manuals.online logo
Brands
  1. Home
  2. •
  3. Brands
  4. •
  5. Inscape Data
  6. •
  7. Security Camera
  8. •
  9. Inscape Data AirGoggle NVC210 User manual

Inscape Data AirGoggle NVC210 User manual

Quick Reference Guide
Rev.
1
.
2
(
August
l, 2009)
N
NV
VC
C2
21
10
0
N
NV
VC
C2
21
10
0R
R2
2
N
NV
VC
C2
21
10
0W
WD
D
Q
QU
UI
IC
CK
K
R
RE
EF
FE
ER
RE
EN
NC
CE
E
G
GU
UI
ID
DE
E
Rev.1.2(August, 2009) 2
1
1.
.
O
Ov
ve
er
rv
vi
ie
ew
w
1
1.
.1
1
B
Bo
ox
x
C
Co
on
nt
te
en
nt
t
Please check to make sure the following items are in the box.
Content
ContentContent
Content
Description
DescriptionDescription
Description
Remark
RemarkRemark
Remark
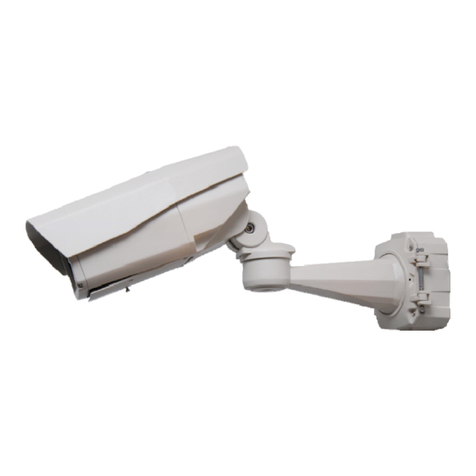
Main Product Body IP Camera NVC2 0 / NVC2 0R2 / NVC2 0WD
with Auto-Iris Varifocal Lens
Power Adapter Input: 00~250V 50-60Hz
Output: + 2V, .5A
AC Power Cable AC 250V, 0A~ 6A
CD Software & User’s Guide Install wizard supported
Quick Reference
Guide Quick installation guide
Warranty
Information Product warranty sheet Included in Quick Reference Guide
Camera Mounting Kit Swivel camera wall or
ceiling mount
Composite Video
Cable
Analog Video “CVBS” Out
Cable
Back focus
Adjustment Allen
Wrench
If needed, use the allen
wrench to adjust the back
focus. In most cases, it is
not needed to perform this
procedure.
Q
QU
UI
IC
CK
K
R
RE
EF
FE
ER
RE
EN
NC
CE
E
G
GU
UI
ID
DE
E
Rev.1.2(August, 2009) 3
1
1.
.2
2.
.
P
Pr
re
ev
vi
ie
ew
w
1
1.
.3
3.
.
P
Ph
hy
ys
si
ic
ca
al
l
d
de
es
sc
cr
ri
ip
pt
ti
io
on
n
1
1.
.3
3.
.1
1.
.
S
Si
id
de
e
V
Vi
ie
ew
w
 Lens : NVC2 0 / NVC2 0R2 / NVC2 0WD includes an auto-iris varifocal lens. If customized
view is required, standard C or CS DC Iris or Non-DC Iris lens can be used.


 CS Lens Mo nt Ring: Used for attaching lens unit to NVC2 0 / NVC2 0WD.


 A to Iris Control: Plug in the cable from standard DC-Iris lens.


 Micrphone (Not-Shown): Built in microphone is available on the NVC2 0R2 and
NVC2 0WD Model.
Prod ct IP-Installer Viewer Program
Network Camera IP installation software
NVR 00 Full featured 6 channel network
surveillance and recorder software
.
NVM 000 enterprise surveillance software
is also available in the CDROM.
Lens
CS Lens Mo nt ring
A to Iris Control
Q
QU
UI
IC
CK
K
R
RE
EF
FE
ER
RE
EN
NC
CE
E
G
GU
UI
ID
DE
E
Rev.1.2(August, 2009) 4
1
1.
.3
3.
.2
2.
.
R
Re
ea
ar
r
p
pa
an
ne
el
l
Interface Description
No.
Interface Description
Auto-Iris
Connector
For use with DC based Auto-Iris Lens
2
CS Lens Mount
Ring
Lens Mount Interface For CS Type Lens. To Use C Type Lens, a CS to C
Type Lens Adapter is Needed.
3 Audio Line Out 3.5 mm 3 conductor mini-jack
external speaker or PA system
interface. Standard 3.5mm stereo jack
and amplified speakers are needed. The
electrical connection notes are noted in
the jack image to the right.
Audio out
Ground
Not used
Audio out
Ground
Not used
Q
QU
UI
IC
CK
K
R
RE
EF
FE
ER
RE
EN
NC
CE
E
G
GU
UI
ID
DE
E
Rev.1.2(August, 2009) 5
4 Audio/MIC In 3.5 mm 3 conductor mini-jack
external Audio Line In or Microphone Input
interface. A standard 3.5mm stereo jack
is needed. The electrical connection notes
are noted in the jack image to the right.
5 RJ45 Jack 0/ 00 Base-Tx Network Interface with IEEE 802.3af Power Over
Ethernet Capability
6 Hardware Reset
Pin
Restore to factory default configuration. There is a switch provided for
returning the network camera to factory default state. Press the switch
through a tiny hole at the left of the 00BaseT connector using tools
with sharp tip for a few seconds while power is applied.
7 Power Connector Local 2VDC power input. Do not use local power connector when PoE
is used.
8 Relay Output
Connector (RLY
OUT)
Controls set of dry contact relay. The relay can be set to normally
open or normally closed contact.
9 Alarm / Sensor
Input Connector
(SNS IN)
Attached set of dry contact sensor into the alarm/sensor input
connector to trigger recording or relay output. Most common sensors
are infrared sensor, heat sensor, magnetic sensor, etc. Please refer to
Section 6. for more detailed description on the Alarm In/Out
connections.
0 RS-485 Connector
Output PTZ control to PTZ modules. Inscape Data cameras support
over 30 PTZ protocol drivers. Drivers maybe found on the product CD-
ROM and upload able to the IP camera via the web management
interface.
Audio In
Ground
Not used
Audio In
Ground
Not used
Q
QU
UI
IC
CK
K
R
RE
EF
FE
ER
RE
EN
NC
CE
E
G
GU
UI
ID
DE
E
Rev.1.2(August, 2009) 6
Composite Video
Out (CVBS +/-)
Analog video output signal with V p-p. Available on the NVC210R2
and NVC210WD Only.
2 Not Used Not Used
3 Factory Use Factory Use Only
4 Network Link/
Activity Indicator
-Link LED: Continuous yellow light means that network cable is plugged
in. It will flicker when there is traffic.
- Status LED: Green color indicates that the camera is in normal
operation mode, while RED color indicates that the camera is in
abnormal condition.
* Integrated
Microphone
Not-Shown Built in Microphone located at the front of the camera
.
Available on the NVC210R and NVC210WD only.
2
2.
.
I
In
ns
st
ta
al
ll
la
at
ti
io
on
n
a
an
nd
d
I
IP
P
a
al
ll
lo
oc
ca
at
ti
io
on
n
The setup in this guide utilizes a crossover cable connection between the NVC units and
installation computer as shown in figure 2- for easy installation and demonstration of basic
feature sets. The NVC supports network configurations including LAN, ADSL modem, and cable
modems including IP sharing devices. Use normal Ethernet cables in most cases unless
connecting directly between the installation PC and the NVC.
2
2.
.1
1.
.
Q
Q
i
ic
ck
k
I
In
ns
st
ta
al
ll
la
at
ti
io
on
n
O
Or
rd
de
er
r
In order to check the functionality of the product, please follow the 3 steps below:
① Connect the installation computer and the NVC product via a crossover Ethernet cable.
② Install the IP-Installer program on the installation computer.
③ Assign an IP address to the NVC product with the IP-Installer.
For further information on LAN, xDSL, and cable modem connections, please refer to
the user manual in the CD provided with the product.
Q
QU
UI
IC
CK
K
R
RE
EF
FE
ER
RE
EN
NC
CE
E
G
GU
UI
ID
DE
E
Rev.1.2(August, 2009) 7
2
2.
.2
2.
.
C
Co
on
nn
ne
ec
ct
ti
in
ng
g
P
PC
C
a
an
nd
d
t
th
he
e
P
Pr
ro
od
d
c
ct
t
Fig re 2-1 Connecting NVC and PC by cross type LAN Cable
① Apply power to the installation PC and start Windows Operating System.
② Apply power to the NVC product and connect it to the installation PC with the crossover LAN
cable as shown in Figure 2- .
③ Video input for each product
- Network Camera: When using the auto iris lens, the DC-Iris lens cable should be connected to
the iris interface at the side panel.
2
2.
.3
3.
.
I
In
ns
st
ta
al
ll
li
in
ng
g
a
an
nd
d
R
R
n
nn
ni
in
ng
g
I
IP
P-
-I
In
ns
st
ta
al
ll
le
er
r
P
Pr
ro
og
gr
ra
am
m
2
2.
.3
3.
.1
1
I
In
ns
st
ta
al
ll
li
in
ng
g
I
IP
P-
-I
In
ns
st
ta
al
ll
le
er
r
P
Pr
ro
og
gr
ra
am
m
Insert the product CD provided into the CD-ROM drive of the installation PC and select “2.IP-
installer; the IP-Installer program will be automatically installed.
2
2.
.3
3.
.2
2
R
R
n
nn
ni
in
ng
g
I
IP
P-
-I
In
ns
st
ta
al
ll
le
er
r
P
Pr
ro
og
gr
ra
am
m
①Double-click the IP-Installer icon ( ) to
start the IP-Installer.
Press “Refresh” button after starting the IP
Installer. The attached camera or server will
appear in the left window of the IP-Installer
program. As shown in figure 2-2.
Refresh B tton
Q
QU
UI
IC
CK
K
R
RE
EF
FE
ER
RE
EN
NC
CE
E
G
GU
UI
ID
DE
E
Rev.1.2(August, 2009) 8
Fig 2-2 Initial mode of IP-Installer
② Network Adapter Selection on Window 2000 or XP
If using Windows 2000 or XP, the PC will ask you to select the proper network adaptor as in
Figure 2-3. It is important to select the right packet driver for the network adaptor. If the PC is
configured to support more than one network (e.g., various MODEM, IEEE 394, etc), the PC
can crash if one selects the wrong packet driver. Click on a network adaptor to highlight, and
then press OK. Figure 2-3 shows an Intel “PRO/ 00 VE” Ethernet adaptor.
Fig 2-3. Network Adapter Screen Mode
③ Click “Refresh” as in Fig 2-4 and check whether the MAC address that appears on the screen
matches the one at the bottom of the physical unit. In cases where they do not match, please
contact your authorized sales agent.
④ Double-click the MAC address on IP-Installer. Default network setup parameters are
displayed and allow you to edit them. See Fig 2-5.
2
2.
.4
4
S
Se
et
tt
ti
in
ng
g
I
IP
P
A
Ad
dd
dr
re
es
ss
s
According to the combinations of network type and IP allocation methods, “Network Mode” can be
Refresh b tton MAC Address
Fig 2-4 IP Installer’s Initial Mode
Fig 2-5 Mode after do ble-click of MAC Address
Q
QU
UI
IC
CK
K
R
RE
EF
FE
ER
RE
EN
NC
CE
E
G
GU
UI
ID
DE
E
Rev.1.2(August, 2009) 9
“LAN Automatic”, “ADSL Static”, “ADSL Automatic”, “Cable Modem Static”, “Cable Modem
Automatic”, which you can choose from. Settings can vary depending on this “Network Mode”.
This “Quick Installation Guide” will explain only about “LAN Static” mode in which the PC and the
product is directly connected by cross type LAN cable.
LAN Static
2
2.
.4
4.
.1
1.
.
C
Co
om
mp
pl
le
et
ti
in
ng
g
I
IP
P
A
Ad
dd
dr
re
es
ss
s
S
Se
et
tt
ti
in
ng
g
After setting up all the parameters, click on the “Set” button. You will see the following message:
“All val es will be saved, and yo r server will be restarted. Contin e?”
Click “Yes” button to save all the values. The unit will be rebooted.
3
3.
.
A
Ac
cc
ce
es
ss
si
in
ng
g
t
to
o
t
th
he
e
P
Pr
ro
od
d
c
ct
t
a
an
nd
d
C
Ch
he
ec
ck
ki
in
ng
g
B
Ba
as
si
ic
c
F
F
n
nc
ct
ti
io
on
n(
(V
Vi
ie
ew
wi
in
ng
g)
)
When IP setting is done with IP-Installer, you must check whether the video stream is
transmitted from the unit. There are two ways to check the video transmission from the unit.
① Using NVR 00, the stand-alone software for multi-channel viewing and recording
② Using the conventional web browser (Internet Explorer)
3
3.
.1
1
A
Ac
cc
ce
es
ss
si
in
ng
g
b
by
y
N
NV
VR
R1
10
00
0
P
Pr
ro
og
gr
ra
am
m
3
3.
.1
1.
.1
1
I
In
ns
st
ta
al
ll
li
in
ng
g
N
NV
VR
R1
10
00
0
a
an
nd
d
R
R
n
nn
ni
in
ng
g
i
it
t
Insert the installation CD provided with the unit into the CD-ROM drive of the PC and select
“NVR 00.exe” from the “NVR 00 Software” directory, the NVR 00 program will run automatically.
Please refer to the user manuals in the CD in the box for detail information
on network modes besides “LAN Static”.
Fixed IP is required in “LAN Static” mode. Select
“LAN Static” and insert “IP address” and “subnet
mask” as shown in Fig 2-6.
Subnet values of both the install PC and the product
must be consistent and only the last portion of IP
addresses of them should be different. (E.g. PC:
2 .52.88.2 0, Product: 2 .52. 88.200)
Fig 2-6 Network Setting for LAN Static
Q
QU
UI
IC
CK
K
R
RE
EF
FE
ER
RE
EN
NC
CE
E
G
GU
UI
ID
DE
E
Rev.1.2(August, 2009) 10
3
3.
.1
1.
.2
2
R
R
n
nn
ni
in
ng
g
N
NV
VR
R1
10
00
0
P
Pr
ro
og
gr
ra
am
m
Fig 3-1 NVR100 Initial Mode
③ Click the “Camera Assignment” button at the bottom, the second from the left. The
IP setting mode screen will appear as shown in Fig 3-2. “Camera Assignment” can be
selected also by clicking the right button of the mouse. As in Fig 3-2, insert the IP
address, channel, user IP (default: root) and password (default: dw200 ) and click ,
then the values set will be saved. (Please make sure that “Store Pwd” is checked before
clicking . Otherwise, the values will not be saved.)
Fig 3-2 NVR100 IP Address Setting Mode
④ Click the start button, , and the live video connected to the unit will be transmitted and
appear on your pc screen as shown in Fig 3-3.
① Start the software by double-clicking the
icon, , on your windows desktop. The
NVR 00 software is shown in Fig 3- .
②The NVR 00 is designed to display 6
channels simultaneously. The user can
customize the display mode accordingly to fit
their needs. (Refer to NVR 00 user’s Guide for
more detail.)
Camera assignment Button
Q
QU
UI
IC
CK
K
R
RE
EF
FE
ER
RE
EN
NC
CE
E
G
GU
UI
ID
DE
E
Rev.1.2(August, 2009) 11
Fig 3-3 Showing Live Images via NVR100
3
3.
.2
2
A
Ac
cc
ce
es
ss
si
in
ng
g
b
by
y
B
Br
ro
ow
ws
se
er
r
The NVC is designed to be accessed via your favorite web browser in addition to the NVR 00
software. In order to access the unit, you must type in the appropriate IP address in the browser.
Fig 3-4 is an example of the web interface.
Fig 3-4 Viewing the Live Video via Web Viewer
P
Pl
le
ea
as
se
e
r
re
ef
fe
er
r
t
to
o
t
th
he
e
N
NV
VR
R1
10
00
0
u
us
se
er
r
m
ma
an
nu
ua
al
l
f
fo
or
r
m
mo
or
re
e
i
in
nf
fo
or
rm
ma
at
ti
io
on
n.
.
Q
QU
UI
IC
CK
K
R
RE
EF
FE
ER
RE
EN
NC
CE
E
G
GU
UI
ID
DE
E
Rev.1.2(August, 2009) 12
For NVM1000 Installation, Please refer to the NVM1000 User Man al located on the
prod ct CDROM.
Become an Inscape Data premiere partner and enjoy the premiere partner’s web portal access
where you may download the latest firmware, software, user manual, and product tutorials.
Please contact an Inscape Data sales professional for more details.

Other manuals for AirGoggle NVC210

1

This manual suits for next models

2

Other Inscape Data Security Camera manuals

Inscape Data AirGoggle NVC360 User manual

Inscape Data

Inscape Data AirGoggle NVC360 User manual

Inscape Data MPEG4 User manual

Inscape Data

Inscape Data MPEG4 User manual

Inscape Data AirGoggle NVC 910 User manual

Inscape Data

Inscape Data AirGoggle NVC 910 User manual

Inscape Data NVC 1000 Series User manual

Inscape Data

Inscape Data NVC 1000 Series User manual

Inscape Data AirGoggle NVC100 User manual

Inscape Data

Inscape Data AirGoggle NVC100 User manual

Inscape Data AirGoggle NVC800 User manual

Inscape Data

Inscape Data AirGoggle NVC800 User manual

Inscape Data PES100 User manual

Inscape Data

Inscape Data PES100 User manual

Inscape Data AirGoggle NVC210 User manual

Inscape Data

Inscape Data AirGoggle NVC210 User manual

Popular Security Camera manuals by other brands

HIK VISION DS-2CD2755FWD-IZS user manual

HIK VISION

HIK VISION DS-2CD2755FWD-IZS user manual

HIK VISION DS-2CE12DFT-PIRXOF user manual

HIK VISION

HIK VISION DS-2CE12DFT-PIRXOF user manual

Abus PPIC32020 quick guide

Abus

Abus PPIC32020 quick guide

Alarmcom Pro Series installation guide

Alarmcom

Alarmcom Pro Series installation guide

Data Video PTC-150TL instruction manual

Data Video

Data Video PTC-150TL instruction manual

Tri-Vision NC-213WF user guide

Tri-Vision

Tri-Vision NC-213WF user guide

RecorderGear LC500W user manual

RecorderGear

RecorderGear LC500W user manual

HIK VISION DS-2AE7232TI-A user manual

HIK VISION

HIK VISION DS-2AE7232TI-A user manual

i-PRO WV-S2536LN BASIC INFORMATION

i-PRO

i-PRO WV-S2536LN BASIC INFORMATION

HIK VISION DS-2CC12A1PN-AVFIR3 Technical manual

HIK VISION

HIK VISION DS-2CC12A1PN-AVFIR3 Technical manual

B-Link XT2 Setup guide

B-Link

B-Link XT2 Setup guide

HIK VISION NETWORK CAMERA user manual

HIK VISION

HIK VISION NETWORK CAMERA user manual

HIK VISION DS-2TD2667T-15/P user manual

HIK VISION

HIK VISION DS-2TD2667T-15/P user manual

Avtech DGC1304XFT user manual

Avtech

Avtech DGC1304XFT user manual

HIK VISION D8T Series user manual

HIK VISION

HIK VISION D8T Series user manual

Abus TVHD71000 user manual

Abus

Abus TVHD71000 user manual

HIK VISION DS-2CD6D54G1-ZS/RC user manual

HIK VISION

HIK VISION DS-2CD6D54G1-ZS/RC user manual

i3 International Ax47R series quick start guide

i3 International

i3 International Ax47R series quick start guide

manuals.online logo
manuals.online logoBrands
  • About & Mission
  • Contact us
  • Privacy Policy
  • Terms and Conditions

Copyright 2025 Manuals.Online. All Rights Reserved.