Insphero GravityTRAP User manual

Product Manual
GravityTRAP™ ULA Plate
www.insphero.com
ISP-09-001
www.insphero.com

GravityTRAP™ ULA Plate Manual
2
Contents
Introduction 3
GravityTRAP™ ULA Components 5
Generating 3D microtissues 8
Additional materials required 8
Preparation 9
Pre-wetting 9
Microtissue seeding 10
Sedimentation/Spheroid maturation 11
Medium exchange in the GravityTRAP™ ULA Plate 12
Analysis and assays in the GravityTRAP™ ULA Plate 13
Annex 1: Microtissue harvest from GravityTRAP™ ULA Plates 14
Annex 2: Troubleshooting guide 16
Annex 3: Step-by-step protocol for HCT116 & HEY microtissues 17
Version 2.0, July, 2015
451-0009-01-B

GravityTRAP™ ULA Plate Manual
www.insphero.com
3
Introduction
The GravityTRAP™ Ultra-Low Attachment
(ULA) plate1represents a simple, exible,
and automation-compatible platform for the
generation, long-term cultivation, observation
and testing of scaold-free 3D microtissue
spheroids in 96-well format. Each plate
consists of a special non-adhesively coated
96-well, sterile-packaged GravityTRAP™ ULA Plate and lid.
InSphero recommends GravityTRAP™ ULA plates for the generation of
spheroids using immortalized or modied cell lines that are known to
readily form microtissues, or as a starting point for investigating whether or
not a cell line can form self-aggregating, scaold-free spheroids. InSphero
recommends our patented GravityPLUS™ Hanging Drop System (ISP-06-
001, ISP-06-010) if generating spheroids in more complex 3D cell culture
scenarios, such as when using primary cells, cell lines that are sensitive to
self-assembly, or when generating co-culture microtissues (e.g., tumor/
stroma). In such cases, the GravityPLUS™ Hanging Drop System provides
the greatest opportunity for success.
1 The GravityTRAP™ ULA Plate and GravityPLUS™ Plate and related technology are protected by several granted and pending patents
world-wide.

GravityTRAP™ ULA Plate Manual
4
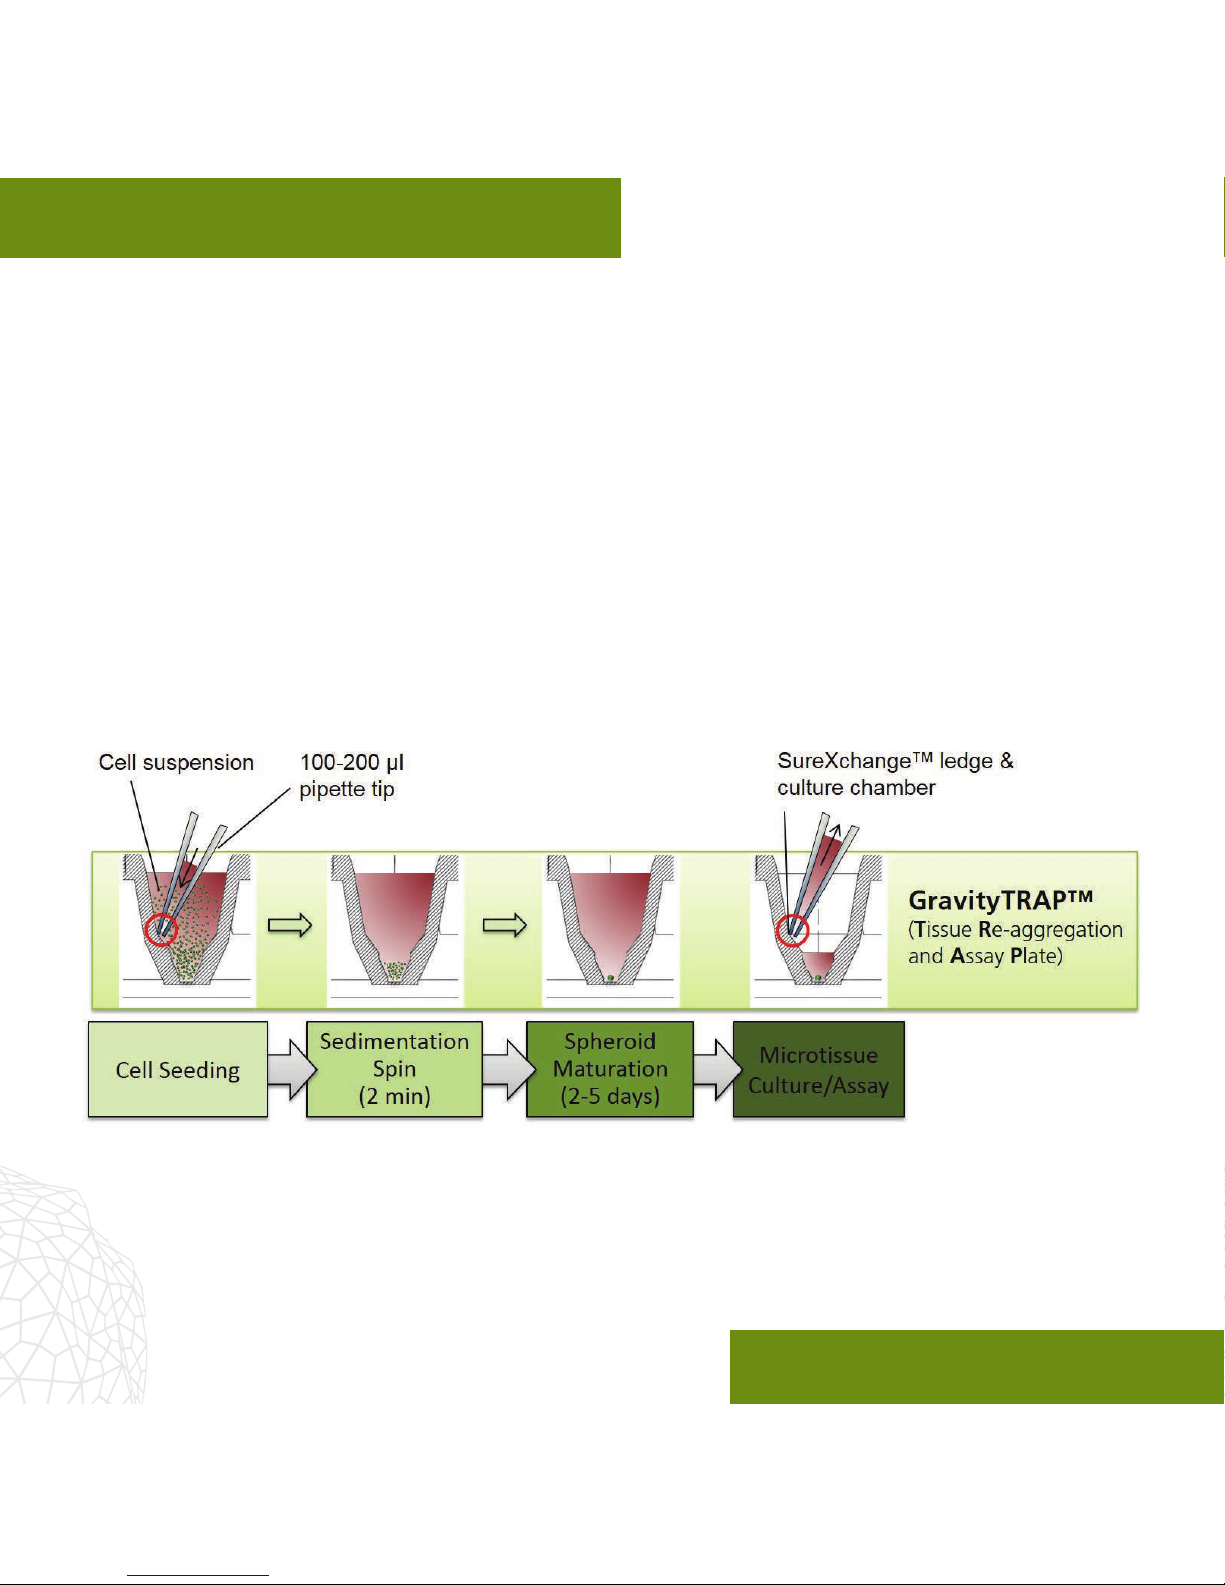
Figure 1: Spheroid formation in the GravityTRAP™ ULA Plate begins with initial seeding
of cells in suspension, followed by a brief spin to concentrate cells. Following microtissue
maturation,the SureXchange™ ledge of the tapered well facilitates medium exchange and
compound dosing without disturbing or losing the microtissue.
Advantages of the GravityTRAP™ ULA Plate:
1. Convenient scaold-free formation of spheroids via cellular self-assembly in
ultra-low attachment (ULA-treated) plates
2. SureXchange™ tapered ledge and culture chamber facilitates easy medium
exchange and prevents microtissue loss during long-term spheroid growth and
analysis
3. 1 mm diameter at bottom observation chamber enables simple spheroid
observation, and greater working eld-to-eld distance reduces well-to-well
imaging cross-talk compared to standard 96-well plates
4. 3D-optimized protocols available for analysis in GravityTRAP™ ULA Plate

GravityTRAP™ ULA Plate Manual
www.insphero.com
5
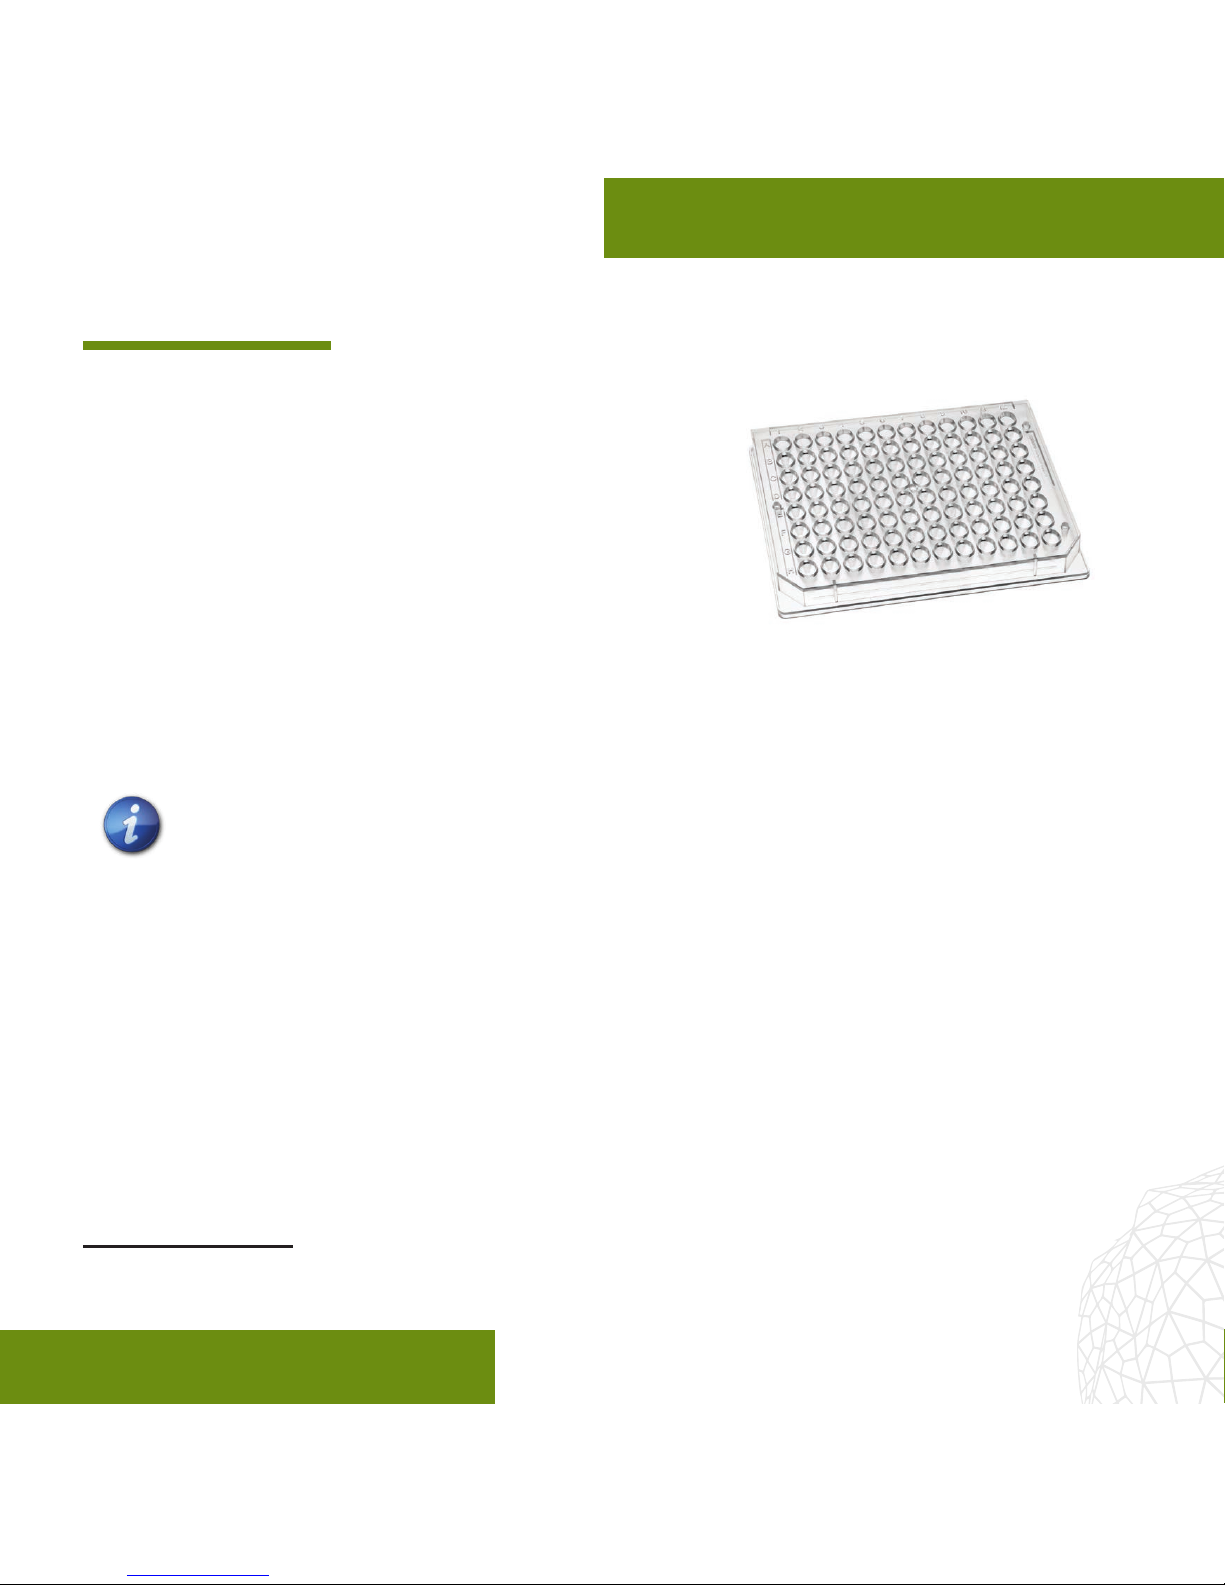
GravityTRAP™ ULA Plate Components
The complete GravityTRAP™ ULA Plate assembly consists of the following
components:
1. Bottom GravityTRAP™ ULA Plate (96-well) (A)
2. Lid (B)
Figure 2:
Components of
the GravityTRAP™
ULA Plate

GravityTRAP™ ULA Plate Manual
6
The GravityTRAP™ ULA Plate
The GravityTRAP™ (Tissue Re-aggregation and Assay Plate) ULA Plate
is a special non-adhesively coated 96-well microtiter plate. It is designed
to accomodate production of 3D microtissues (spheroids) for convenient long-
term cultivation and analysis. GravityTRAP™ tapered wells feature a
SureXchange™ ledge to prevent inadvertent microtissue aspiration and disruption
during medium exchange and compound dosing (Fig. 3). Microtissues are posi-
tioned in a 1.0 mm observation chamber at the bottom of each well, which enables
automated imaging processes (Fig. 4). Biochemical assays as well as optical
analytical methods such as inverse bright eld and uorescence microscopy can
be performed.
Microtissue production with GravityTRAP™ ULA Plates is very simple, and
recommended for cell lines that are known to readily form spheroids in ULA
conditions, or as a rst step in characterizing the spheroid-forming capabilities
of a particular cell type of interest. A cell suspension is delivered to the
bottom plate using a multi-channel pipette or a robotic liquid handler. Following
brief centrifugation to concentrate cells near the bottom of the tapered chamber,
microtissues begin forming by gravity-enforced self-assembly. Spheroid maturation
typically occurs within 2-5 days of seeding depending on the cell type and culture
conditions (Figs. 1 & 4).

GravityTRAP™ ULA Plate Manual
www.insphero.com
7
Figure 3: Bottom plate of the GravityTRAP™ Tissue Re-aggregation and Assay Plate.
Figure 4: HCT-116 colon carcinoma microtissue cultured in
GravityTRAP™ ULA Plate. Picture acquisition with a Zeiss
Axiovert25 microscope, 5× objective.

GravityTRAP™ ULA Plate Manual
8
Generating 3D microtissues
Generating 3D microtissues in the GravityTRAP™ ULA Plate is a straightforward
process, but one that must be optimized for each cell type. Cell type, growth
medium, and intended downstream applications will impact the starting density
and desired culture volume. Optimization is recommended for each cell type and
application. In addition to the process overview in this chapter, Annex 3 illustrates
the formation of spheroids using HCT-116 (human colon carcinoma) and HEY
(human ovarian carcinoma) cell lines as an example for optimizing your own
protocol.
Additional materials required
1. Mammalian cells (primary or cell line) of interest
2. 3D InSight™ Tumor Microtissue Media Kit (InSphero, cat. no. CS-17-001-01) -
includes 3D InSight™ Tumor Re-aggregation Medium (CS-07-111-02) and 3D
InSight™ Tumor Maintenance Medium (CS-07-112-01)
3. Inverted microscope with a 5x/10x objective
4. Cell counter, e.g. Neubauer chamber
5. 8- or 12-channel pipette (e.g. Viao 10.0-300.0 μl, Integra Biosciences,
InSphero, cat. no. IS-001-01)
6. Medium reservoir for multichannel pipettes
7. Microplate centrifuge
8. Humidied CO2incubator 37°C

GravityTRAP™ ULA Plate Manual
www.insphero.com
9
Preparation
1. Prior to seeding, pre-warm the 3D InSight™ Tumor Re-aggregation Medium
(CS-07-111-02).
2. Wipe the GravityTRAP™ ULA Plate bag with 70% EtOH before opening.
3. Carefully open the bag under sterile working conditions and take out the
GravityTRAP™ ULA Plate assembly.
Pre-wetting
IMPORTANT – Pre-wetting the wells of the GravityTRAP™ ULA Plate according
to the procedure below is required prior to seeding microtissues to prevent
inclusion of air bubbles.
IMPORTANT - Perform all of the following steps under sterile conditions.
1. Apply 40 µl of 3D InSight™ Tumor Re-aggregation Medium (CS-07-111-02)
to each well by placing the tip far into the wells. It is recommended to use a
multichannel pipette (8- or 12-channel).
2. Remove pre-wetting solution by placing the tip at the ledge of the upper
cavity of the well (Fig. 5). Aspirate until medium is completely removed from
each well. A negligible amount of medium (<5-7 µl) may remain in the bottom
of the chamber.

GravityTRAP™ ULA Plate Manual
10
Microtissue seeding
1. Trypsinize cells expanded in cell-culture asks according to your standard pro-
tocol.
2. Count the cells to determine cells per ml of medium.
3. Prepare a cell suspension for seeding, using a nal volume per well of 70 µl.
Recommended cell concentration: For long-term growth proling start with
low cell numbers (250–500 cells per well). If non-proliferating cells or rap-
id production of larger microtissues is required then start with 2500–25000
cells/70 µl. See Annex 3 for a detailed example using HCT-116 (colon
carcinoma) and HEY (ovarian carcinoma) cell lines.
IMPORTANT – For homogeneity of forming microtissues, it is essential to
assure a homgeneous distribution of the cell suspension by gently pipetting
up and down prior to seeding into the GravityTRAP™ ULA Plate.
Figure 5: Medium removal from
GravityTRAP™ ULA well.

GravityTRAP™ ULA Plate Manual
www.insphero.com
11
4. Gently (≤10 µl/sec) add 70 µl of the cell suspension to the GravityTRAP™ ULA
Plate by placing the pipette tips far into the wells (avoid touching the well
bottom).
Cell sedimentation and spheroid maturation
Following seeding, it is recommended (but optional) to briey centrifuge the plate
to remove any air bubbles, and to force cells to the bottom of the well in order to
promote aggregation and spheroid formation.
1. Place the lid on the GravityTRAP™ ULA Plate and spin in a microtiter-plate
centrifuge for 2 minutes at 250 RCF.
2. Following centrifugation, remove the plate and incubate the plate in a
humidied CO2incubator at 37°C on a level surface for 2-5 days, checking daily
to observe microtissue maturation and exchanging medium as necessary. See
next section for details on medium exchange.

GravityTRAP™ ULA Plate Manual
12
Medium exchange in the GravityTRAP™ ULA Plate
The special GravityTRAP™ ULA Plate design allows routine medium exchange for
longer-term cultivation without the risk of microtissue loss. The SureXchange™
ledge at the inside wall of the well serves as an anchoring point for the pipette tip.
1. Place the pipette tip at the ledge of the well (Fig. 6, left).
2. Remove the medium at low pipetting speed (<30 µl/sec) by aspirating an ex-
cess of volume. A minimal volume of ~5-7 µl medium will remain in the well.
3. Add 70 µl of fresh medium by placing the pipette tip at the ledge (Fig. 6 right).
Use a dispensing rate <50 µl/sec.
Figure 6: Medium ex-
change in the Gravity-
TRAP™ ULA Plate. Left:
Medium removal with the
pipette tip placed at the
ledge of the well. Right:
Medium addition.
IMPORTANT – When using automated liquid handling devices, an o-center
alignment of the vertical pipette tip will achieve the same aect. Contact
support@insphero.com for more information.

GravityTRAP™ ULA Plate Manual
www.insphero.com
13
Analysis and assays in GravityTRAP™ ULA Plate
The GravityTRAP™ ULA Plate format is compatible with a broad variety of biochem-
ical methods and allows for spectrometrical measurements with a multiwell plate
reader or for visual inspection of microtissues by an inverted microscope (similar
to analysis of standard 2D cultures):
Biochemical Assays
Several validated biochemical assay protocols for microtissues in the GravityTRAP™
ULA Plate are available. Please see Technical Protocols in the support section of
InSphero’s website: www.insphero.com/support.
Histology
Microtissues are amenable to analysis by histology. Please request our Technical
Protocol TP006.
Fluorescent/luminescent multiwell plate reader compatibility
Growth changes and proles in tumor microtissues expressing GFP/RFP can easily
be analysed using uorescent plate readers, as the signal intensity is stronger than
with monolayer cultured cells.
Automated imaging
The GravityTRAP™ ULA Plate is ideal for use in automated imaging equipment, such
as the SCREEN Cell3iMager and PerkinElmer Operetta, as the 1 mm diameter optically
clear base of each well will be positioned exactly in the centre of the eld of view.

GravityTRAP™ ULA Plate Manual
14
Whole mount uorescent staining
Fixed or live cell imaging with uorescent antibodies. Please request our Technical
Protocol TP008.
Annex 1:
Microtissue harvest from GravityTRAP™ ULA Plates
1. Place the pipette tip (1000 µl pipette tip) in a vertical position to cover the cen-
ter of the lower cavity. The tip orice is positioned slightly above the microtis-
sue on the well bottom (the larger 1 ml tip size prevents the disruption of the
microtissue by being squeezed inadvertently as the tip diameter exceeds the
size of the well bottom; Fig. 7A).
2. Collect the microtissues by aspirating 50 µl of the medium. Avoid aspiration of
air bubbles, which may provoke the loss of microtissues in the tip.
3. Alternatively use a 100-200 µl pipette tip and aspirate 50 µl by placing the
head of the tip close to the bottom of the well (Fig. 7B). Do not touch the mi-
crotissues as they will be squeezed and stick to the pipette tip (Fig. 7C).
4. Transfer the microtissue into another vessel or plate format.

GravityTRAP™ ULA Plate Manual
www.insphero.com
15
Figure 7: Microtissue harvest from GravityTRAPTM ULA Plate.

GravityTRAP™ ULA Plate Manual
16
Annex 2: Trouble-shooting guide
Problem Cause Solution
Cells do not form a
compact spheroid.
Certain cell types need
additional measures to im-
prove microtissue forma-
tion. For example, optimized
media formulation, cell seed-
ing density, culture volume,
culture time, or co-culture
with another cell type (e.g.,
broblasts).
If your cells of interest have not pre-
viously been characterized in ULA
plates, we recommend rst optimizing
in GravityTRAP™ ULA plates using a
variety of cell seeding densities using
3D InSight™ Tumor Re-aggregation
Medium (InSphero CS-07-111-02). If
cells fail to reproducibly form micro-
tissues in ULA plates, are known to
require co-culture with another cell
type (e.g. stromal cells), or sequential
layering of multiple cell types is
desired, InSphero recom-
mends the GravityPLUS™ Hang-
ing Drop System (ISP-06-001,
ISP-06-010). InSphero oers custom
microtissue model development and
characterization services. Please
contact us at support@insphero.com
for more information.
Formation of loose cell
aggregate or more than
one single spheroid per
well.
Aggregation is incomplete,
hampered by given culture
conditions, or cell adhesion
proteins have been destroyed
by extensive trypsinization.
Increase serum concentration in
culture medium, or minimize exposure
to trypsin during cell detachment
prior to seeding. Incubation of the
GravityTRAP™ ULA plate on a 45-de-
gree angle during the re-aggregation
process can help facilitate micro-
tissue formation. If the problem
recurs, try the GravityPLUS™ Hanging
Drop System (ISP-06-001, ISP-06-
010)

GravityTRAP™ ULA Plate Manual
www.insphero.com
17
Annex 3: HCT-116 and HEY microtissue formation –
A step-by-step protocol
The following protocol describes the production of HCT-116 (human colon carcino-
ma) and HEY (human ovarian carcinoma cell line) microtissues using GravityTRAP™
ULA Plates.
Materials
• Cryopreserved HCT-116 (ATCC CCL-247™) and HEY cells, ideally 1×10⁶cells
per vial
• 3D InSight™ Tumor Microtissue Media Kit (InSphero, cat. no. CS-17-001-01) -
includes 3D InSight™ Tumor Re-aggregation Medium (CS-07-111-02) and 3D
InSight™ Tumor Maintenance Medium (CS-07-112-01)
• Cell-culture asks T75 (Greiner, cat no. 658175)
• GravityTRAP™ ULA Plate (InSphero, cat no. ISP-09-001)
• Sterile phosphate buered saline (PBS)
• Neubauer chamber
• Water bath (37°C)
• Serological pipettes, 5 and 10 ml

GravityTRAP™ ULA Plate Manual
18
• Plate centrifuge
• Level 1 biosafety cabinet
• Humidied CO2incubator 37°C
• Inverted phase-contrast microscope
• 15 ml Falcon tube
• Sterile multichannel medium reservoir
• Multichannel pipette (e.g. Integra Viao 8-channel pipette, InSphero, cat. no.
IS-001-01; if not available, a single-channel pipette can be used as well)
HCT-116/HEY expansion
Perform all following steps under aseptic conditions for each cell line under
a laminar ow bench. Procedures are the same for both HCT-116 and HEY
cells except where otherwise indicated.
1. Ensure that all cell-culture material is in place and labeled.
2. Prepare T75 ask by adding 5 ml of 3D InSight™ Tumor Maintenance Medium
(CS-07-112-01).
3. Fast thaw one vial of each cell line at 37°C in the water bath.
4. Use the 5 ml pipette and aspirate 5 ml medium.
5. Use the lled 5 ml pipette and aspirate the thawed cell suspension from the
cryo vial and transfer 5 ml into a 15 ml tube. Rinse the cryo vial with the

GravityTRAP™ ULA Plate Manual
www.insphero.com
19
remaining 1 ml medium in the pipette and add to the 15 ml tube.
6. Centrifuge the cells at 200 RCF for 2 min, remove the supernatant and
resuspend the cell pellet with 5 ml of 3D InSight™ Tumor Maintenance
Medium (CS-07-012-01).
7. Transfer resuspended cells into the pre-lled T75 ask.
8. Place the cell-culture ask into the incubator.
9. After 24 hours of incubation replace the medium and check under the micro-
scope if cells have adhered on the plastic surface.
10. After reaching 70-80% conuence (approx. 48 hours) cells are ready for
microtissue production.
HCT-116/HEY microtissue formation
Prepare the GravityTRAP™ ULA Plate as described on page 9.
1. Take the T75 asks with the HCT-116 or HEY cells out of the incubator.
2. Remove medium with the aspiration pipette.
3. Add 10 ml PBS.
4. Remove PBS.
5. Add 1 ml Trypsin EDTA (1×).
6. Incubate at 37°C for 5 minutes.

GravityTRAP™ ULA Plate Manual
20
7. Ensure that the cells are completely detached.
8. Stop trypsinization by adding 9 ml of 3D InSight™ Tumor Maintenance Medium
(CS-07-112-01).
9. Transfer the cell suspension into a 15 ml Falcon tube.
10. Centrifuge for 2 minutes at 200 RCF.
11. Control pellet and aspirate supernatant.
12. Re-suspend cells in 3D InSight™ Tumor Re-aggregation Medium (CS-07-111-
02).
13. Determine cell number with the Neubauer chamber (or alternative method).
14. Adjust cell number with 3D InSight™ Tumor Re-aggregation Medium
(CS-07-111-02) to a density of 1.43×10⁵cells/ml corresponding to a highest-
density stock of 10,000 cells/70 µl) for each cell line; prepare similar stocks
of each cell line to create 2500, 500, and 100 cells/70 µl stocks; prepare a
sucient amount of each cell suspension to account for the number of desired
replicates at each dilution.
15. Pre-wet wells of GravityTRAPTM ULA Plate as instructed on page 9.
16. Transfer cell suspension to a medium reservoir. Obtain a homogeneous
cell distribution by gently pipetting up and down prior to seeding into the
GravityTRAPTM ULA Plate. Seed 70 µl of cell suspension/well using a multi-
channel pipette.
17. Place lid on bottom plate and centrifuge the Gravity-TRAPTM ULA Plate for
Other manuals for GravityTRAP
1
Table of contents
Other Insphero Laboratory Equipment manuals