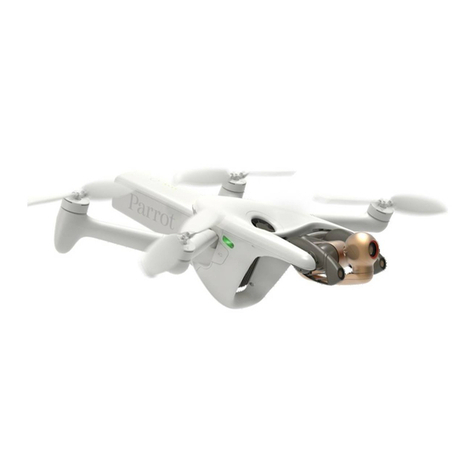
Insta360 DJI Mavic AIR 2 Instruction Manual


1
1. What's Included
2. Names of Parts
Lens Cap * 2
Battery * 1
中文Battery Display
Button
Battery Indicator
USB Type-C
Charging Port
Lock Lever
Shutter Button
Power Button
Battery Door
* Status Indicator
* Flashing red: recording. Solid cyan: standby. Flashing blue: no SD card or SD card error.
* Disclaimer
English
Important: Only suitable for experienced and highly skilled
drone pilots
This product is not a toy and should be used with extreme care and caution under controlled conditions. It should
not be operated by people under 18 years of age, and it is not recommended for use when children are nearby.
Please read this disclaimer carefully. Using the product and its relevant accessories means that you acknowledge
and accept the terms of this disclaimer.
By using this product, you hereby acknowledge and agree that you are solely responsible for your own conduct when
using this product and any consequences thereof. You agree to use this product only for proper and lawful purposes.
You understand and agree that Arashi Vision Inc. (hereinafter referred to as 'Insta360') accepts no liability for any
and all misuse, consequences, damages, injuries, penalties, or any other legal responsibility directly or indirectly
incurred by your using this product and associated accessories. Before every use, make sure that your product and
accessories are functioning properly. If there’s any damage or irregularity, stop using them immediately.
Within the scope of state laws and regulations, Insta360 reserves the right of final explanation and revision for the
commitment.
Open the package and verify you have the following items:
Insta360 Sphere * 1 Sticky Lens Guard * 2
Charge Cable * 1 Lens Cloth & User Manual

2
1)Insta360 Sphere is not water resistant. Do not use the camera in or around water, including in the rain.
2)This product is only suitable for experienced and highly skilled drone pilots. Users are fully responsible for the
risk of using this accessory during drone operation (unless risks are caused by a product defect).
3)Be sure to take off in an open outdoor area, and keep the distance between pilot and drone above 5 meters (16.4
feet) and within 10 meters (32.8 feet). Do not use your hand as a take-off or landing platform.
4)To ensure flight safety, please keep the drone within visual distance, staying away from obstacles, crowds and
bodies of water. For detailed flying guidance, please strictly follow official operation guidelines and instructional
materials from the drone manufacturer.
5)Check that all parts are firmly connected before use.
6)Check the drone's blades before flight. The appearance should not be noticeably worn.
7)Only fly at an altitude of 1000 meters above sea level or below. High altitude environments will reduce the power
redundancy and safety of the aircraft.
8)Do not fly in harsh or unpredictable environments. Do not fly on windy days. Do not fly in extremely cold
environments, or the battery may be damaged irreversibly.
9)As the Insta360 Sphere records video in all directions at once, users do not need to adjust the orientation of the
drone to control the filming angle. To be safe, the user should be facing the drone's tail when controlling it.
9)Please take off or land on the take-off pad to protect the camera's lenses.
1)Before use, open the battery door ( ①) and insert the battery (②). Please charge the Insta360 Sphere via the
included Charge Cable in case of low or depleted battery.
①②3. Notes
4. Before You Fly

3
3)Before use, stick the double-sided adhesive to the inner side of the Sticky Lens Guard, then stick the Sticky Lens
Guards (with the double-sided adhesive) onto the lens.
2)Before use, insert a MicroSD card.
Note:
Please use exFAT formatted microSD cards
with the UHS-I bus interface and Video
Speed Class V30 rating to ensure normal
recording. The maximum supported storage
space is 1TB.

4
5. Assemble
Step 1: Open the Lock Lever to open the mounting bracket.
Step 2: As shown below, lock the mounting bracket's connection buckle onto the bottom of the drone.
①②

5
Step 3: Lock the Lock Lever well and ensure that the yellow mark of the Lock Lever is not showing.
②③①This part should face towards
the front of the drone

6
×1
×1
ON OFF
2s
70-100%40-70%20-40%0-20%6. Button Instructions
Lights Remaining Battery
Important:
When recording long videos, please wait until the flashing red light turns to a solid cyan light
when stopping recording, otherwise a video saving error may occur.
Assembled successfully!

7
After-Sales Service
The warranty period of the attached product is 1 year from the original retail purchase. Warranty service may
vary according to the applicable laws of your state or jurisdiction. For detailed warranty policies, please visit
http://insta360.com/support
Aperture: F2.0 35mm Equivalent Focal Length: 7.2mmBattery Capacity: 1050mAhCharging Method: Type-CUse Environment: -5℃ to 40℃ (23° F to 104° F)* Dimensions: 110×125×63mm (4.33×4.92×2.48in)Weight: 192g (battery included)Specs
7. Downloading the App & SetupThe Insta360 Sphere's default shooting mode is 5.7K 30fps 360° video. If you need to adjust and set shooting
modes and settings, please scan the QR code below (https://www.insta360.com/download) or search "Insta360" in
the App Store/Google Play Store to download and connect to the Insta360 app.
*It's not suggested to use the camera in low temperature environments, or the battery's endurance performance
may be reduced.

重要:仅限熟练操控无人机专业人士使用1、物品清单2、认识部件Insta360 瞳 * 1
打开包装,请确认包含以下物件:镜头保护套 * 2
电池 * 1 镜头保护镜 * 2
充电线 * 1 擦镜布 & 使用说明 本产品并非玩具,不适合未满 18岁的人士使用。请勿让儿童接触本产品及其相关配件。在有儿童出现的场景操作时,请务必特别小心注意。 请仔细阅读本声明,本声明对安全使用本产品以及您的合法权益有着重要影响。一旦使用 Insta360 瞳及其相关产品,即视为对本声明的全部认可和接受。 每次使用前,请仔细检查相机及其相关配件,若出现破损、变形,请勿使用。使用本产品,就意味着您认可并同意,您将对使用本产品的行为和可能产生的后果负全部责任。您承诺仅会出于正当合法的目的使用本产品。您理解并同意,对于直接或间接因使用本产品而造成的滥用、不利影响、损害、伤害、惩罚或者其他法律后果,影石创新科技股份有限公司(以下简称“Insta360”)将不承担任何责任。用户应遵循包括但不限于本文提及的使用注意事项。 在国家法律法规范围内,本承诺解释权、修改权归 Insta360 所有。* 免责声明与警告中文电量显示按键快门键锁栓*状态指示灯电池仓门电源键电量指示灯Type-C充电接口*红灯闪烁:录像中 ;青灯长亮:待机中 ; 蓝灯闪烁:无SD 卡或SD 卡错误 8

4、使用前准备1)使用前,请打开相机电池仓门(①),置入电池(②)。若无法开机或开机后显示低电,请使用充电线连接相机一侧的 USB Type-C 接口,对相机进行充电。①②3、使用前须知1)Insta360 瞳不支持防水,请勿在雨天、近水或水下环境使用相机。2)本产品适用人群为具有丰富飞行经验的无人机用户。对于在飞行过程中可能出现的风险(产品质量问题除外),由用户自行承担。3)务必在室外空旷场地起飞,并保持人机距离在5米以上、10米以内。不可手持起飞或降落。4)为保证飞行安全,请在视距内飞行,远离障碍物、人群、水面等。具体飞行安全指引,请严格参照无人机安全操作指引和相关使用说明。5)使用前请检查各模块连接处的牢固性。6)飞行前请检查桨叶,外观不能有明显磨损。7)请在海拔低于1000米的高度飞行。高海拔环境会降低飞机的动力冗余,降低安全性。8)请勿在恶劣环境飞行。请勿在有风天气飞行。请勿在极寒天气下飞行,以免给电池造成不可逆的损坏。9)由于全景相机是全方位采集图像,用户无需调整飞机朝向。为安全起见,请面朝无人机机尾操控飞行。10)为了保护镜头,请在起飞垫上起飞降落。9

2)使用前,请先插入 Micro SD 卡。3)使用前,将包装内随附的双面胶贴纸贴至镜头保护镜内侧的凹槽,随后将保护镜安装至全景相机镜头。注意:请使用UHS-I、V30 及以上和exFAT 格式的Micro SD/TF 存储卡,速度过低可能导致无法正常录像;Micro SD 卡最大内存可支持1TB。10

5、安装步骤一:打开锁栓,打开相机支架。步骤二:如下图所示,将相机支架连接扣对应锁合至无人机底部。①②11

步骤三:锁合锁栓,请务必确保锁栓的黄色标识显示不可见。②③①此部件朝向无人机机头12

×1
×1
ON OFF
2s
70-100%40-70%20-40%0-20%6、按键使用亮灯个数电量重要:若进行长视频录制,停止录像后,请耐心等待,直至红灯闪烁变为青灯常亮,方可进行其他操作,否则出现视频存储出错。安装完成!13

镜头光圈:F2.0 35mm等效焦距:7.2mm电池容量:1050mAh充电接口:Type-C使用环境:-5℃ ~40℃* 尺寸:110mm*125mm*63mm重量:192 克(含电池) 售后服务规格7、App下载&设置自您最初零售购入之日起,本产品的保修期为 1年。详细的售后服务流程和保修条款,请访问 http://insta360.com/support * 不建议长时间低温环境使用相机,否则可能影响电池的续航能力。Insta360 瞳默认拍摄模式为 5.7K 30帧普通全景录像,如需调整、切换拍摄模式与参数,请手机扫描下方二维码(https://www.insta360.com/cn/download)或前往App Store、应用市场搜索“Insta360”下载安装、连接Insta360 app,进行设置。14


Arashi Vision Inc.
Add: Foresea Life Center, Tower 2, 11F, 1100 Xingye Road, Haiwang Community,
Xin'an Street, Bao'an District, Shenzhen, China
Web: www.insta360.com
Tel: 400-833-4360 +1 800 6920 360
Email: [email protected]
Insta360 GmbH
Ernst-Augustin-Str. 1a, 12489 Berlin, Germany
+49 177 856 7813
EC REP
Other manuals for DJI Mavic AIR 2
1
This manual suits for next models
1
Table of contents

