InstroTek ValiDator User manual

innovators in instrumentation technology
OPERATING MANUAL
Nuclear Gauge Calibration and
Verication System
www.InstroTek.com
®

© 2018 InstroTek, Inc.
ValiDator Nuclear Gauge Moisture/Density Verification and
Calibration System
Manual Revision 6


InstroTek
1
1. Table of Contents
****************************************
1. INTRODUCTION 2
2. ACCESSORIES AND APPLICATION 13
3. SOFTWARE INSTALLATION 15
4. SYSTEM OPERATION 17
5. THEORY OF OPERATION 36
6. INDEX 38
7. WARRANTY 40

InstroTek
2
1. Introduction
We are happy and proud to share this Nuclear Moisture/Density Gauge
verification and calibration technology with you. ValiDator is the first and the
only traceable portable verification and calibration system in the industry.
InstroTek, Inc. would like to thank you for selecting the ValiDator as your field
verification and calibration device. The ValiDator Technology is covered by US
Patent numbers 5,923,726 and 6,050,725 including International patents.
We value your input and would like to hear from you with comments and
suggestions on how we can better serve you with this or other products.
This guide is designed as a reference for the operation of the Verification and
Calibration System. A thorough understanding of the operation and application
of Nuclear Moisture/Density gauges is necessary.
Please follow the nuclear gauge manufacturer recommendations with regard to
operation and safety concerns of these devices. All ValiDator operations should
be done from the end opposite the gauge source, stepping away three feet
while the source rod is in the measure position.
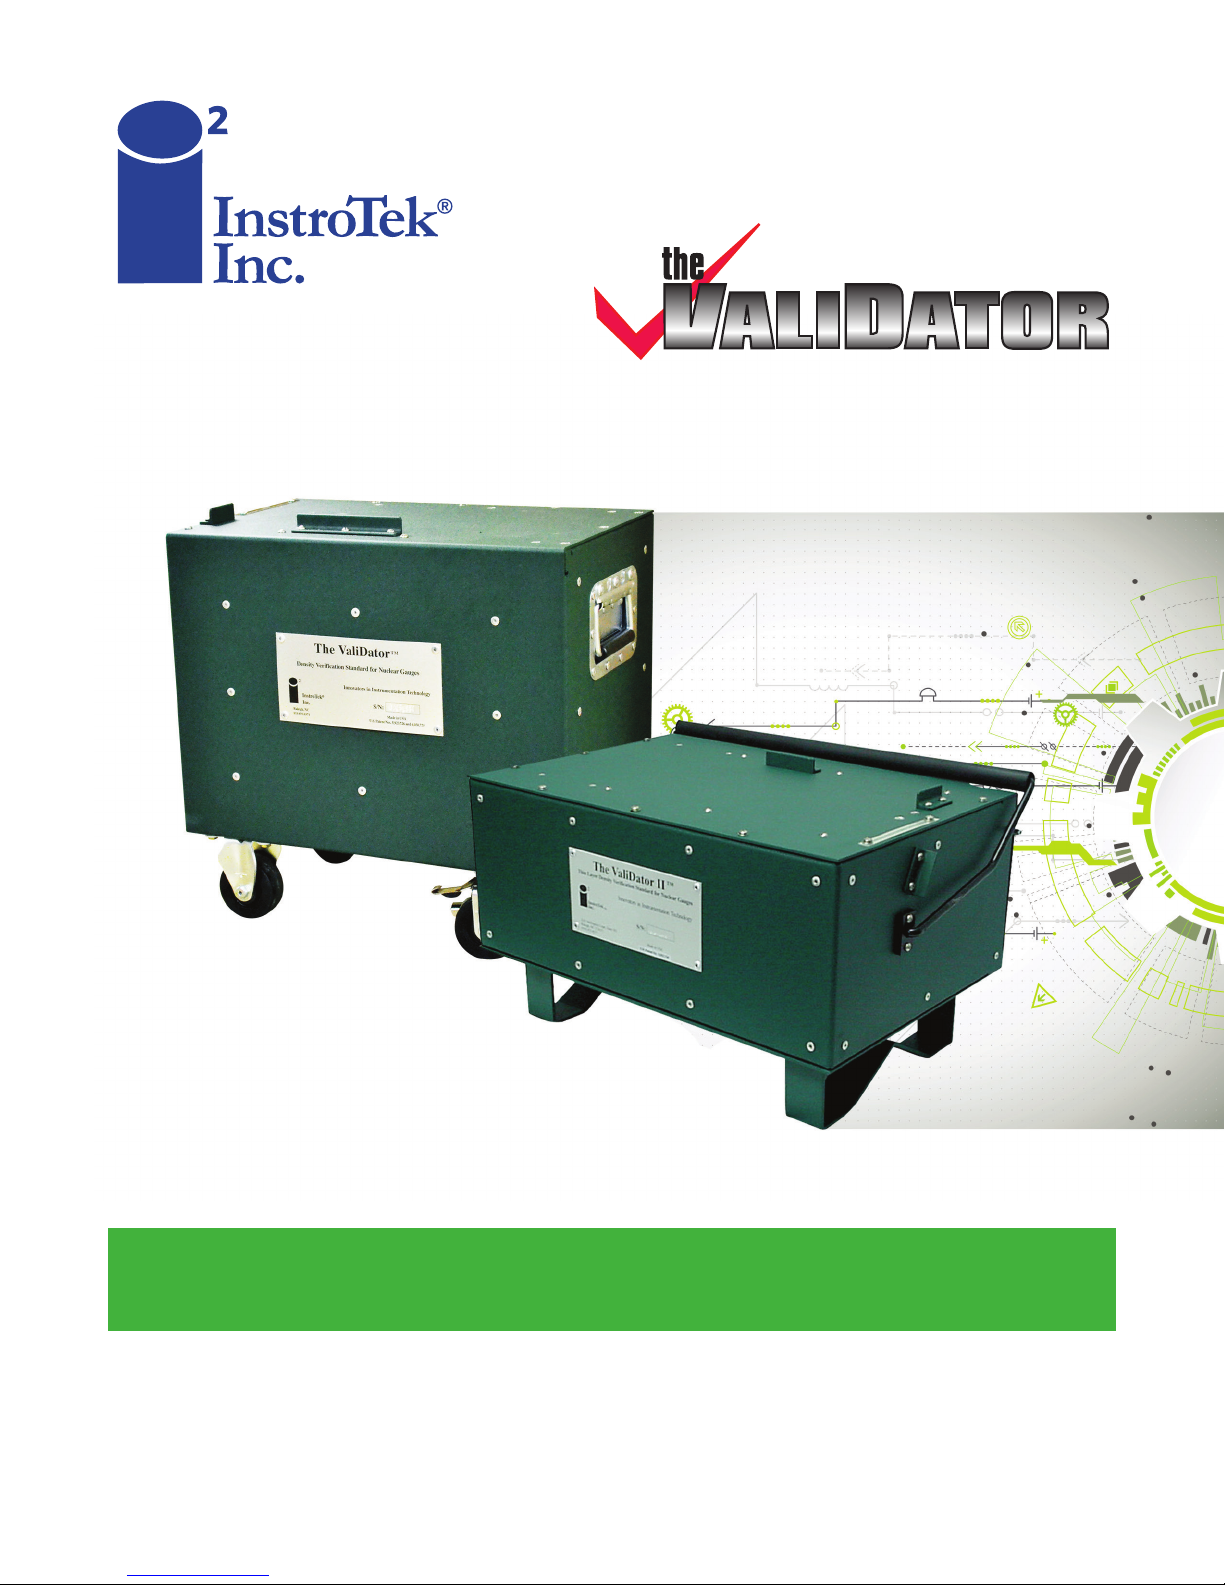
Why the ValiDator?
The American Society for Testing and Materials (ASTM) standards and American
Association of State Highway and Transportation Officials (AASHTO)
specifications require nuclear density gauges to be calibrated or verified every
12 months. In the absence of a field portable validation device, this commonly
would require returning a gauge to the manufacturer or other calibration
facilities. Strict shipping formalities, weeks without a gauge and expensive
calibration fees create a burden on gauge availability for field use.
Gauge owners have never had the option before of performing the verification
and re-calibration in the field. The ValiDator from InstroTek, Inc. is designed to
optimize the management of your gauge resources and help reduce
inconsistencies when multiple gauges are on-site. Multiple gauges calibrated
on the same device will reduce conflicts between results.
How to use the validator?
As easy as taking a field measurement, just place your CPN, Humboldt, InstroTek
or Troxler gauge on the ValiDator device and take a reading. Compare the
gauge wet density and moisture (M pcf) to the pass/fail range on the ValiDator
Calibration Sheet and your verification is complete. Even if the gauge
Verification fails, the optional Calibration Software would allow you to eliminate
the delays in calibration turn-around-time. Calibrate one or all depths in minutes.

InstroTek
3
Supported Nuclear Gauges
It is important when you verify or calibrate your gauge that the correct chart
and values are selected. If there are gauges in your fleet that are not supported
on this list, you may establish guidelines for Verification of these gauges.
(Reference Verification Procedures for Gauges Not Supported page 20)
CPN
MC3 New, MC1 DR New: Gauges manufactured with two GM detectors.
Standard counts are generally between 30000 & 40000 counts.
MC3, MC1 DR: Gauges manufactured before approximately 1996 with one GM
detector. InstroTek currently does not support these gauges. Standard counts
are generally between 10000 & 20000. Please contact InstroTek for more
information on these gauge models or reference Verification Procedures for
Gauges Not Supported page 20.
MC1: InstroTek currently does not support verification of this gauge. Please
contact InstroTek for more information on this gauge model or reference
Verification Procedures for Gauges Not Supported page 20.
MC2: InstroTek currently does not support verification of this gauge. Please
contact InstroTek for more information on this gauge model or refer to manual
section Verification Procedures for Gauges Not Supported page 20.
MC3 and MC1 Elite:
These gauges are supported.
Humboldt
5001 B, 5001C, 5001P, 5001 EZ and 5001 SD are supported.
InstroTek
Model 3500 Xplorer and 3500 Xplorer 2 are supported.
Troxler
3401 & 3411: These gauges are only different in electronic functionality. Both
these gauges are supported by the ValiDator.
3430 & 3440: These gauges are only different in electronic functionality. Both
these gauges are supported by the ValiDator.
3411 New: (Very few gauges were produced, serial numbers greater than 17000)

InstroTek
4
3450: Please contact InstroTek for instructions on how to calibrate these gauges.
These gauges, like 4640, operate with two independent measurement systems.
A special optional software application is required for these gauges.
4640: Not supported by the ValiDator I. The ValiDator II available from InstroTek
is specifically designed for verification and calibration of 4640B gauges and 3450
in the Thinlayer mode. Please contact InstroTek for information on how these
gauges can be verified and calibrated.
3430 and 3440 Plus Gauges: Please contact Instrotek for more information on
these gauge models, or reference Verification Procedures on page 18.
Seaman Nuclear
These gauges are not supported.
User Guide Information
ValiDator: Device used to verify and calibrate nuclear gauges.
Validation: Utilizing the ValiDator device to evaluate gauge calibration
accuracy at multiple depths, at an assigned density.
Verification: The process of using the Validation System to verify the calibration
accuracy of a nuclear density gauging device.
Calibration: The process of re-establishing the calibration parameters for a
nuclear density gauging device.
Calibration Parameters established by the calibration program and used by a
Constants: density gauge to calculate density and moisture.
ValiDator Factory established densities assigned to a specific Validator device
Density: for each measurement depth 0-12.
The ValiDator calibration reports are not exchangeable between different
ValiDator units.

InstroTek
5
Important: Follow the requirements of your nuclear materials license when
operating, maintaining and using nuclear gauges.
Safety
Always operate in accordance with the nuclear
gauge manufacturer recommendations.
Stand opposite the source rod when operating the
ValiDator Device.
Move three feet (one meter) back when the
source rod is extended into the measurement
position.
Use proper lifting techniques when loading and
unloading the ValiDator.
Be aware of heavy machinery operating in the
area of testing.

InstroTek
6
Quick Start Instructions
The quick start instructions will benefit the new and the experienced operators
using the ValiDation System. The System Operation portion of this manual
contains detailed information about all aspects of the ValiDator system. The
Validation system is designed for use with various nuclear gauges manufactured
by CPN, Humboldt, InstroTek, and Troxler.
Important: Observe manufacturers recommendations regarding safety
precautions when operating density gauges. Stand opposite the source rod at
a distance of three feet or 1 meter when measurements are being taken. Follow
the requirements of your nuclear materials license.
Standard Counts for Daily or Rapid Verification: If you are evaluating your
gauges frequently for Quality Assurance, or will not be calibrating on-site, a daily
4 minute standard count may be used for the Standard counts on the
Evaluation Form for Verification. Take one 4-minute count at all other depths.
Standard count should be taken on a solid surface such as soil, asphalt or
concrete base. Do not take standard counts with the standard block on the
ValiDator, second floor, or the tailgate of a truck.
Standard Counts for Combination Verification and Calibration: If you will be
performing a scheduled Verification or Calibration and would like to optimize
the data collection process, perform an Extended Standard Count. (CPN: 20
minute count recording the Wet Count and H2O Count. Humboldt and Troxler:
Perform a Stat Test and record the average Density and Moisture count.) Record
the Standard Counts on the Evaluation form. Two 4-minute counts should be
averaged for Backscatter (BS) and Depth 12 measurements, due to the
relatively lower precision at these positions.
I. Verification Process
A. Align gauge on the ValiDator. For lowering the Source rod, slide the
gauge back until the rod is over the access hole. (See Gauge
Placement page 8)
B. Set count time for four (4) minutes. Note: All moisture verification is
done at the Backscatter position.
C. Backscatter measurements should be taken with the gauge aligned
with the surface stops; two four-min. counts should be averaged for
better precision.
D. Direct Transmission measurements require that the gauge
placement be adjusted to minimize the void between the source
rod and the inside of the ValiDator. After lowering the source rod
move it towards the control panel end of the gauge and to the left

InstroTek
7
side alignment stops. Two 4 min. readings at depth 12 should be
averaged for better precision.
E. Complete a four (4) minute reading and record the gauge results
WD, M, DC and MC on the ValiDator Evaluation Form (page 10).
Make additional blank copies of this form for future use.
F. The Wet Density (WD) and Moisture (M) readings from the gauge
should fall between the range indicated on the gauge specific
ValiDator Calibration Data Table.
G. If the resulting densities indicate the gauge passes, consider the
verification process complete. The gauge is now verified for field
use.
H. If the gauge fails Validation, review precautions and repeat
Validation steps A-G.
I. A second failure would indicate that a calibration is needed.
II. Calibration Process
Note: Gauge Calibration is a sophisticated process and should only be
attempted by advanced and trained users. Please refer to the Calibration
Section of the Manual for calibrating gauges.
Precautions before You Begin
Nuclear gauge: Note: Do not take a Standard Count on the ValiDator.
Clean Base
Record the Current passing standard count in the field location where
Validation is to be performed.
Count time set to four (4) minute counts
Stable Gauge Electronics (Run the manufacturer recommended diagnostics
if field results are questionable.)
No other gauges should be within 30ft (10 meters) of the testing area.
When taking measurements stand opposite the source side of the unit a
distance of three feet (1 meter) away.
Gauge positioned correctly on the ValiDator. (Refer to Gauge Placement
page 8)
Gauges meet the requirements for supported gauges. (Refer to User Guide
page 4)

InstroTek
8
ValiDator Device:
Top surface free of debris
Placed on solid level surface, three feet from any vertical structure.
Tailgates, Carpeted floors, upper floors of buildings, trailers, and uneven
surfaces are not acceptable.
Equipment
Items required for Verification and Calibration include: ValiDator Device,
ValiDator Density Data (In shipping case), ValiDator Evaluation Form (page 10 of
user guide), stable nuclear gauge, and current gauge calibration data (for
calibration option).
Gauge Placement
Nuclear gauges differ between manufacturers. It is important to align each
gauge using the positioning stops on the top and left of the ValiDator.
Backscatter & Moisture Readings
All Backscatter (Depth 0) and Moisture readings should be taken with the gauge
flush with the stop at the top and on the left as shown below.

InstroTek
9
Direct Transmission (Depths 2-12) Readings
Direct Transmission (Depths 2-12) readings require the gauge to be positioned
such that the void between the source rod and the inside of the ValiDator block
is minimized. Slide the gauge back until you can drop the source rod in the hole
on top of the ValiDator. Once the source rod drops in the hole, make sure to
keep the gauge flush with the left stop and slide the gauge back away from the
top stop until it can’t be moved any further.

InstroTek
10
ValiDator Evaluation Form
ValiDator S/N
___________________________
Verification/Calibration
Date:
____________
Gauge S/N
___________________________
Operator:
____________
Gauge Model
___________________________
Daily Standard
Counts
DS________________________
MS________________________
Calibration
Standard Counts
DS________________________ MS________________________
Establish these counts using the average counts from the results of a Stat Test, 20-
minute count or (5) 4 min. Counts. This data is used for the Calibration process.
Count Time
15 sec 1min 4 (Recommended) 16 20 Circle one
Gauge at Backscatter
Stop
Depth
Pass WD Fail
DC
Pass MFail
MC
BS
P ____________ F
____________
P ____________ F
____________
BS
P ____________ F
____________
P ____________ F
____________
BS Avg.
P ____________ F
____________
P ____________ F
____________
2
P ____________ F
____________
3
P ____________ F
____________
4
P ____________ F
____________
5
P ____________ F
____________
6
P ____________ F
____________
7
P ____________ F
____________
8
P ____________ F
____________
9
P ____________ F
____________
10
P ____________ F
____________
11
P ____________ F
____________
12
P ____________ F
____________
12
P ____________ F
____________
12 Avg.
P ____________ F
____________
Notes/Re-counts:

InstroTek
11
Example of Gauge Calibration Report

InstroTek
12
Example Gauge Calibration Report Key
1) Make (CPN, Humboldt, InstroTek or Troxler)
2) Model
3) Serial Number
4) Calibration Standard Counts
5) Calibration Date
6) Factory Density Constants (A, B, C Parameters)
7) Calibration Block Densities lb. /ft3 or kg/m3
8) Calibration Block Counts
9) Factory Moisture Constants
(E & F or A & B for CPN gauges)

InstroTek
13
2. ValiDator Accessories and Application
Before using the ValiDator, it is recommended that the user read this manual
and understand the operation of this system.
List of Equipment & Accessories
User Guide
ValiDator (Calibration Box)
ValiDator Density Data (Laminated Sheets)
Quick Start Instructions
NIST Certificate
List of Optional Accessories
Optional VeriFier Software (USB Flash Drive)
3430 and 3440 Constant Download Cable
InstroTek 3500 Gauge Constant Download Cable
Note: Small scratches should be expected on the ValiDator working surface due
to extensive quality control process utilizing measurements with multiple gauges.
Application Overview
Verification & Calibration Process
There are several steps necessary to accomplish a gauge verification and
calibration. Gauge calibration verification is the most fundamental use of the
ValiDator device. Position a density gauge on top of the ValiDator device, take
a four (4) minute density reading and evaluate the resulting density using the
laminated gauge specific ValiDator Density Data Table provided.
The steps below describe a procedure within the Verification and Calibration
process. Density and Moisture gauge data is required by the VeriFier Software
and should reflect the most recent calibration. If not available, this data may
be obtained from the organization that completed this calibration.

InstroTek
14
Calibration constants are used by the gauges to perform the calculations
necessary to process raw count data into a density. Density and moisture tables
may be used for any gauge, but are more common with units that do not have
internal memory or an internal processor. Gauge manufacturers use NVRAM
(Non-Volatile Random Access Memory) or EPROM’s (Erasable Programmable
Read-only Memory) in their gauges.
Calibration constants may be entered into a gauge (CPN MC3, MC3 Elite, MC1
Elite, Humboldt EZ and SD, InstroTek 3500 and Troxler 3430, 3440, 3430 Plus and
3440 Plus) using the operating keypad. Units that employ EPROM’s (Troxler 3411
and Humboldt 5001 series) may operate using density tables while an EPROM is
programmed and mailed for installation. InstroTek can program EPROM’s for
your gauges. Simply fax or mail the Calibration Constants Report and InstroTek
will program and ship your EPROM by Priority Mail for a nominal charge. You
can also purchase a Prom Programmer Package to burn proms at your facility.
VeriFier allows creation of hexfiles for Troxler 3411B and Humboldt 5001C gauges.
There is an option available on 3401 and 3411 gauges that you can use to allow
direct entry of constants through the keypad. SmartPanel from InstroTek is a
“drop in” replacement for the existing 3401 and 3411 scalars. SmartPanel
upgrades the 3401 and 3411 gauges with many features, including direct entry
of calibration constants through the keypad. For more information on the
InstroTek SmartPanel, please visit our website at www.InstroTek.com.

InstroTek
15
3. Software Installation
Computer Requirements: Windows operating system
Installing VeriFier Software on a PC
Object: Allow the operator to access the software and re-calibrate a nuclear
gauge.
Support: Before loading any software, consult with your organization PC
Manager or operating system manuals.
Locate your flash drive included with your ValiDator system. Please
read license agreement before opening software package. This
software should only be loaded on one computer. Access codes will
be needed to complete installation.
NOTE: ValiDator and its’ associated software is licensed to a single user. Use
of the ValiDator and its’ associated software is not allowed for
calibration of gauges from other organizations.
Windows
1. Download VeriFier software from USB flash drive provided by InstroTek.
2. Follow prompts, click finish when complete.
3. Call InstroTek for registration codes:
Enter Main Registration Code
Click on Calibrate and enter Calibration Registration Code
Enter Password “calibratenow” or “calnow”
Provide Product Key to InstroTek service Representative
Enter Product Code
Upgrading Software Version
You may load the new software version directly over the existing version and not
lose your existing data.
Close all Windows programs.

InstroTek
16
Follow the Install instructions.
Follow prompts.
Moving Software
VeriFier software may only be installed on one computer.
Moving to another computer is possible. Please contact InstroTek for procedures
and access codes.

InstroTek
17
4. System Operation
Calibration Accuracy Verification & Calibration Process
Verification Process
Verification of the gauge is necessary to determine the status of the gauge
calibration. Gauges are calibrated when they are shipped from the manufacturer.
Without performing periodic verification, it is not possible to assess the accuracy of
your gauge calibration. ASTM and AASHTO standards require gauges to be verified
for calibration accuracy at least once every 12 months and also the calibration is
checked on newly acquired or repaired nuclear gauges. With the ValiDator,
gauges may be verified to meet this requirement.
Verification
Definition: Use the reference densities assigned to a ValiDator device for
evaluating the calibration accuracy of a density gauge.
Resources: ValiDator Device, Gauge Field Evaluation Form, ValiDator Calibration
Tables, *Density Gauge, **Stable surface.
Important: Follow the requirements of your nuclear materials license when
operating, maintaining and using your gauge.
Calibration
Calibration is a process of calculating new parameters for the nuclear gauge.
Only advanced users with a high degree of experience and understanding of
gauge measurement and operations should perform this process. It is
recommended that one individual in an organization be responsible for the
calibration process. The Verifier Software with counts taken on the ValiDator can be
used to generate new moisture and density calibration constants for the gauge.
Resources: InstroTek VeriFier Software, PC, Completed Evaluation Form, *Density
Gauge, Gauge Calibration Constants, **Stable surface
Note: The VeriFier Software used for calibrating your gauge assumes that the
current gauge calibration information is obtained and entered
accurately.
Table of contents
Other InstroTek Test Equipment manuals