Intech LPN-H-D User manual

Description.
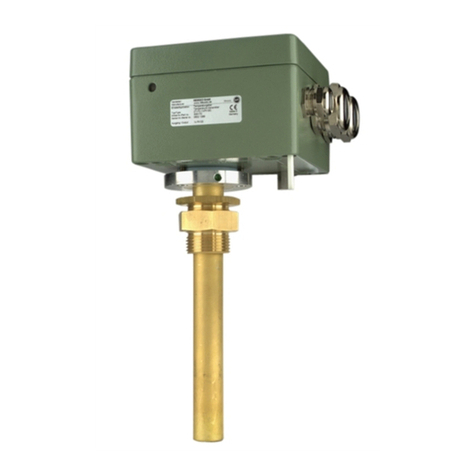
The LPN-H is a complete relative humidity and temperature sensing module, with two independant loop powered
4~20mA output signals, representing 0~100%RH and 0~100C.
Two versions are available:
(i) Wall mount.
(ii) Duct mount.
Both version come complete in an industry standard aluminium connection head. The relative humidity sensor and
temperaturecompensatingsensorprotrudefromtheheadinsideaprotectivecap.Thiscapallowsairtocirculatetothe
sensors.
Reliability.
The wide operating range of the humidity and temperature sensors offer long term reliability over a broad range of
applications. The sensors resist contaminating vapours such as organic solvents, chlorine, and ammonia.
Ordering Information.
MODEL: LPN-H-D 220mm Duct Mount, 0~100%RH Transmitter, 0~100C Transmitter.
LPN-H-W Wall Mount, 0~100%RH Transmitter, 0~100C Transmitter.
LPN-H-F 100mm Flange for LPN-H-D
Note: 0~200F temperature output optional. Please specify when ordering.
Quality Assurance Programme.
The modern technology and strict procedures of the ISO9001 Quality Assurance Programme applied during design,
development, production and final inspection grant the long term reliability of the instrument.
LPN-H Humidity
and Temperature
Transmitter.
The LPN-H has two independant, 2
wire, 4~20mA loop powered outputs:
One for relative Humidity;
One for Temperature.
4.02-1
Features.
Dual 4~20mA Outputs.
Monolithic IC Humidity Sensor.
%RH Temperature Compensated Linear Output.
Pt100 RTD Sensor.
Temperature Output 0~100C. (0~200F Optional)
Temperature Output Linearised.
Very Compact Design.
High Accuracy.
Low Cost.
Easy to Install.
Reverse Polarity Protection.
Internally Accessible Span & Zero Adjustments.
Wide Power Supply Range.
LPN-H-D
LPN-H-W
TECHNOLOGY
& QUALITY
A
W
A
R
D
ISO9001
E
G
I
S
T
E
R
R
E
D
M
A
N
U
A
T
U
R
E
R
C
F
Z495

4.02-2
LPN-H %RH Transmitter Specifications.
Accurate to ±2% FSO Typical. 0~100%RH @ 25C Saturated Salt Calibration.
Important: For continuous measurements of ≥90%RH, refer to note 2 below.
Ambient Temperature Drift <±0.05%/C FSO Typical.
Humidity Sensor-Hysteresis ±0.8% of Span Typical.
-Linearity ±0.5%RH Typical.
-Repeatability ±0.5%RH Typical.
-Long Term Drift ±1%RH Typical at 50%RH in 5 years.
LPN-H Temperature Transmitter Specifications.
Accurate to <±0.1% FSO Typical.
LinearityandRepeatability <±0.1% FSO Typical.
Ambient Temperature Drift <±0.02%/C FSO Typical.
RTD Sensor Pt100 RTD, Class A Din 43760.
Sensor Current 0.5mA.
LPN-H Common Specifications.
Output. 2 wire 4~20mA (Loop Powered).
PowerSupply. 9~33Vdc.
SupplyVoltageSensitivity. <±0.01%/V FSO.
Maximum Output Current. Limited to <36mA.
Output Load Resistance. 750Ω@ 24Vdc. (50Ω/V Above 9Vdc).
EMC Compliances Emissions EN 55022-A. Immunity EN 50082-1, <1% Effect FSO Typ.
Isolation Test Voltage Between %RH and Temperature; 50Vdc for 1 min.
Operating Temperature. -at headA) 0~70C.
-at sensorB) -30~85C (LPN-H-D)
Storage Temperature. -30~85C.
OperatingHumidity. -at headA) 5~85%RH Max. Non-condensing.
-at sensorB) 0~100%RH. Refer note 4 below.
Note: A)
'at head
' refers to ratings for electronics housed in the connection head.
B)
'at sensor
' refers to ratings for electronics housed in the protective cap.
Note1.Goodairflowandgoodairmixingmustbemaintainedoverthesensortominimiselocaltemperaturefluctuations,andtoensureaccuratemeasurements.
Note 2. The RH sensors quickly recover from condensation or wetting. However, after 24 hours or longer exposures to either high >90%RH or
continuous condensation, an upward shift of 2% to 3%RH may occur. This shift is repeatable and can be reversed by placing the sensor in a low
10%RH environment for a 10 hour period.
CONDENSATIONoccurs wheneverthe surfacetemperatureof thesensor's activeareadrops belowthe ambientdewpoint ofthe surroundinggas.
Condensation forms on the sensor (or any surface) even if the surface temperature only momentarily drops below the ambient dew point. Small
temperature fluctuations near the sensor can unknowingly cause condensation to form when operating at humidity levels above 90%.
Whilequicktocondense,wateris slowtoevaporateinhigh humidityconditions.(iewhenthe surfacetemperatureofthesensor isonlyslightlyabove
the ambient dew point.) Because of this, a sensor's recovery from either condensation or wetting is much longer than its normal time response.
During recovery, the sensor outputs a constant 100%RH signal, regardless of the ambient RH.
Product Liability. This information describes our products. It does not constitute guaranteed properties and is not intended to affirm the suitability
of a product for a particular application. Due to ongoing research and development, designs, specifications, and documentation are subject to
changewithoutnotification.Regrettably,omissions andexceptionscannotbe completelyruledout.No liabilitywillbeaccepted forerrors,omissions
or amendments to this specification. Technical data are always specified by their average values and are based on Standard Calibration Units at
25C, unless otherwise specified. Each product is subject to the ‘Conditions of Sale’.
Warning:Theseproductsarenotdesignedforusein,andshouldnotbeusedforpatientconnectedapplications.Inanycriticalinstallation
an independant fail-safe back-up system must always be implemented.
LPN-H-D Dimensions.
LPN-H-W Dimensions. LPN-H-F Dimensions.
312
4024100
M6 x
8
Mitre for
O-ring
countersunk holes
90
Grub Scre
w
PCD = 90mm
4x6mm
69mm
170mm
44mm
=8mm
50mm Nom.
24mm
160mm nom.
24mm Nom.
50mm Nom.
Intech
INSTRUMENTS LTD
www.intech.co.nz

LPN-H Terminals and Layout.
LPN-H Connection Example.
+
-
+
-
-
+
-
+
+-
LPN-H
%RH
Transmitter.
Temperature
Transmitter.
Input 1
Input 2
9~33Vdc
Power Supply
Typical 24Vdc
Allow 40mA per Signal.
E.g. 2100-M-I or PLC
Single Ended Inputs.
(i.e. All '-' inputs
connectedtogether).
4.02-3
Graph Of Maximum Load Versus Power Supply.
TEMPERATURE ZERO ADJUSTMENT
TEMPERATURE SPAN ADJUSTMENT
SENSORS CONNECTOR
(2x5 HEADER)
+- +-
HUMIDITY ZERO ADJUSTMENT
HUMIDITY SPAN ADJUSTMENT
HZ
HS
TS
TZ
TEMP %RH
LPN-H
Maximum Load (Ω)(Ω)
(Ω)(Ω)
(Ω)
0
1000
750
500
250
109152025
30 33
Power Supply (Vdc)
1250
535
1200

The Proper Installation & Maintenance of LPN-H.
All power and signals must be de-energised before connecting any wiring, or altering any Jumpers or Dip Switches.
MOUNTING.
(1) Mount in a clean environment.
(2) Do not subject to vibration.
(3) Avoid mounting near power control equipment.
(4) Mount the LPN-H-W on a solid wall or panel, where air will flow freely around it.
(5) Mount the LPN-H-D through a LPN-H-F 100mm flange, into the duct.
(6) AlwaysmounttheLPN-Hsothatthe protective capiseitherhorizontalorslopingdownwards.Thishelpsprevent
condensate build up in high humidity situations.
(7) Avoid mounting where the protective cap will get wet as this may cause false readings.
(8) Again ensure there is adequate air flow over the sensor.
(9) To maintain compliance with the EMC Directives, the LPN-H metal enclosure must be properly earthed, with
appropriate input / output entry points, cabling and filtering.
WIRING.
(1) Allcablesshould be goodquality overall screenedINSTRUMENTATIONCABLE with thescreen earthed at one
endonly.
(2) Signal cables should be laid a minimum distance of 300mm from any power cables.
(3) For the two, 2 wire current loops Austral Standard Cables B5002CS is recommended.
(4) It is recommended that you do not ground current loops and use power supplies with ungrounded outputs.
(5) Lightning arrestors should be used when there is a danger from this source.
(6) Refer to diagrams for connection information.
COMMISSIONING.
(1) Oncealltheaboveconditions havebeencarriedoutandthewiringcheckedapplypowertotheLPN-Hloopsand
allow five minutes for them to stabilize.
(2) Tocheckhumidityaccuracyuseacalibrationstandard%RHdeviceinthesamelocation.Checkthatthereadings
agreewithin2%+%errorofthecalibrationdevice.AlternativelyexposetheLPN-Htoaknown%RHatmosphere,
and check the readings agree within 2% + % error of atmosphere.
AllreadingsshouldbereferencedagainsttheASTMRelativeHumiditytables,andallowancesmadeforpressure
effects if necessary. Any differences can be corrected using the Humidity Zero and Span Pots on the LPN-H.
(Clockwise to increase the output reading, and anticlockwise to decrease the output readings.)
(3) To check temperature accuracy use a calibration standard RTD in the same location. Check that the readings
agree within 0.1% of the calibration device. Any differences can be corrected using the Temperature Zero and
Span Pots on the LPN-H. (Clockwise to increase the output reading, and anticlockwise to decrease the output
readings.)
MAINTENANCE.
(1) Repeat2and3ofCommissioning-breathingontheprotectivecapwillcausethe%RHandTemperaturereadings
to alter.
(2) Do it regularly - at least once every 6 months.
(3) Check cables entering the LPN-H head.
CLEANING OR REPLACING THE PROTECTIVE CAP.
If the protective cap becomes dirty it can easily be removed for cleaning, or replaced, as follows:
(1) Disconnect power from LPN-H.
(2) Carefully unscrew the cap by hand. No tools to be used - they may damage the protective cap.
(3) The cap may now be cleaned or replaced.
(4) Ensure the cap is thoroughly dry before replacing.
(5) Carefully screw the cap back on by hand, and reapply the power to the LPN-H
NOTE: The LPN-H must not be operated without the protective cap,
as the humidity sensor reading is affected by light.
4.02-4 LPN-H 010212 p65
4~20mA HUMIDITY
4~20mA TEMPERATURE
TEMP %RH
Intech
INSTRUMENTS LTD
www.intech.co.nz
Christchurch Ph: +64 3 343 0646
Auckland Ph: 09 827 1930
Email: [email protected]
This manual suits for next models
2
Table of contents
Popular Transmitter manuals by other brands
Sutron
Sutron Satlink 3 Operation & maintenance manual
Honeywell
Honeywell STT850 SMARTLINE quick start guide
BWI Eagle
BWI Eagle 36-HHE-4 Product information bulletin

Qianjin Electronic
Qianjin Electronic OT86-4F user manual
Minebea Intec
Minebea Intec MP 26 Installation and Calibration Manual
Status
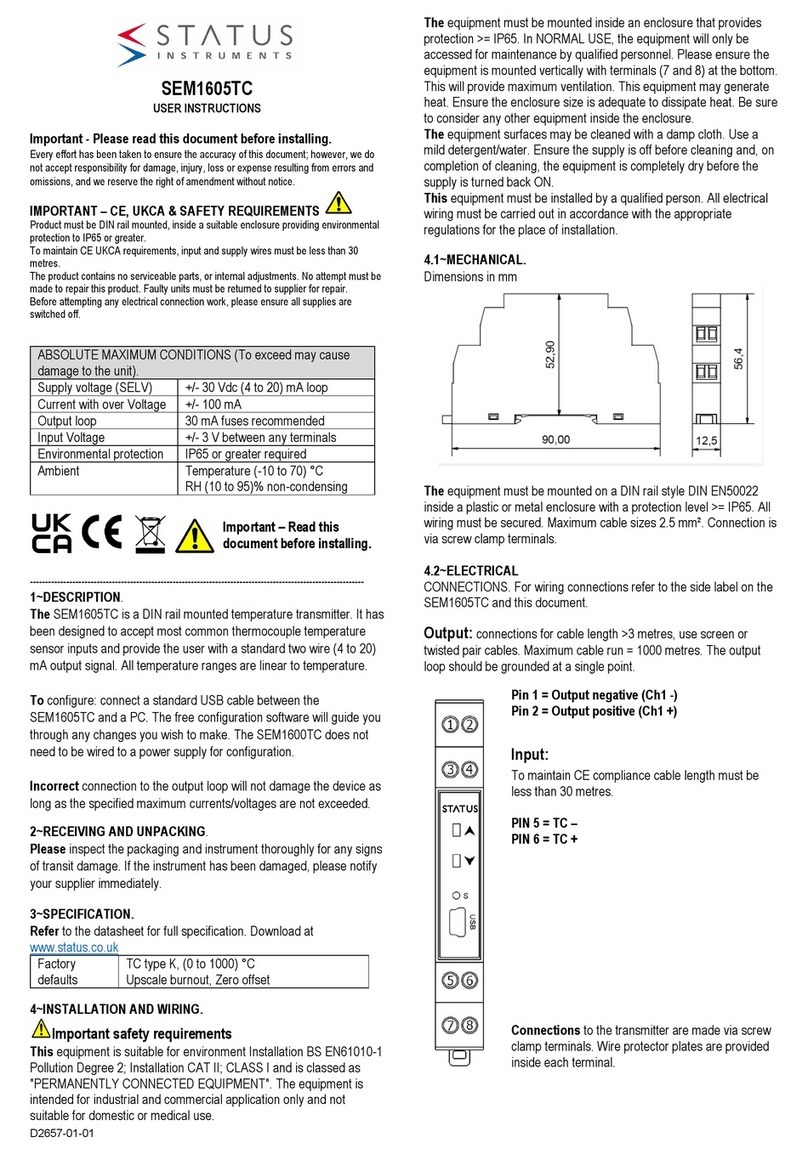
Status SEM1605TC User instructions
