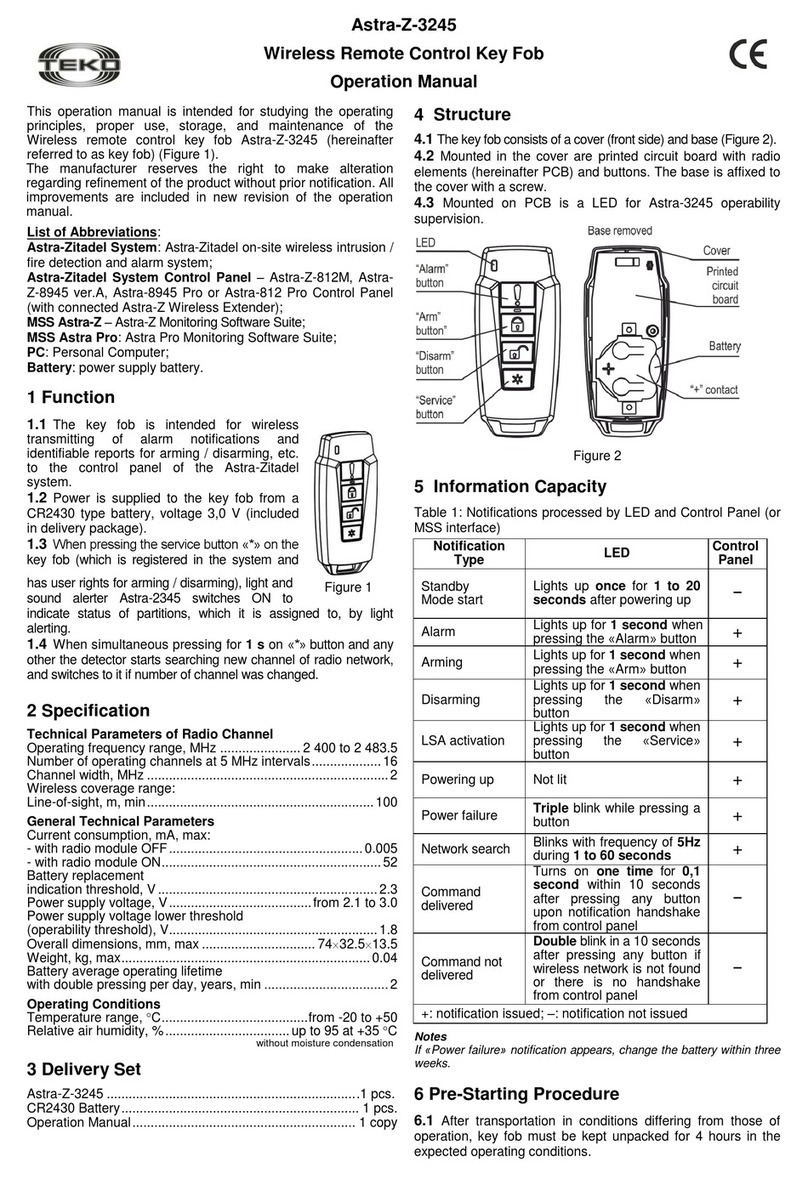
Integratech INT-REMOTE User manual

-1- -2-
BRIGHTNESS
HOLD TIME
DAYLIGHT
SENSOR
STAND-BY DIM
STAND-BY TIME
Selecteer op welk niveau de
verlichting moet werken bij
detectie van beweging.
Seleceer hoe lang de verlichting op
stand-by niveau moet blijven.
Selecteer het lichtniveau waarbij
de sensor geactiveerd moet
worden.
De daglicht sensor wordt uitgeschakeld.
De sensor houdt geen rekening met
omgevingslicht.
LED OMSCHRIJVING OMSCHRIJVING
Selecteer hoe lang de verlichting
ingeschakeld moet blijven na
detectie van beweging.
SENSITIVITY
Selecteer de gewenste
gevoeligheid van de sensor.
Gebruik de testmode om de
gevoeligheid te testen.
LED
Selecteer het gewenste lichtniveau
indien de sensor geen beweging
detecteert. Selecteer 0 indien de
verlichting volledig moet uitgeschakeld
worden.
Selecteer het gewenste lichtniveau
waarbij het toestel niet moet inschakeld
worden.
LED INDICATIE
Voeding
Verpakking
Bereik
Werk temperatuur
Afmetingen
2 x AAA 1.5V batterij,(niet meegeleverd)
Geleverd in beschermend etui
Tot 15 meter
0°C~50°C
123 x 70 x 20.3 mm
INT-REMOTE
Universele IR handzender
HANDLEIDING
SPECIFICATIONS
Verwijder de batterijen indien dit toestel gedurende lange tijd niet gebruikt wordt.
WAARSCHUWING
WERKING
Met de universele infra-rood handzender is het mogelijk om toestellen met een compatibele PIR
of microwave sensor eenvoudig te configureren. De handzender is voorzien van druktoetsen met
led indicatie om de gewenste instellingen snel en eenvoudig te kiezen. De gekozen configuratie
kan met één toets naar elk toestel met een sensor verzonden worden. Het maximum bereik van
de handzender bedraagt 15 meter. Elke sensor kan eenvoudig geconfigureerd worden door de
handzender naar de sensor te richten en op de 'SEND' toets te drukken.
De handzender maakt gebruikt van bi-directionele IR communicatie om de instellingen van de
sensor te verzenden of om eerdere instellingen uit te lezen. De handzender is voorzien van 4
geheugentoetsen om vaak voorkomende instellingen op te slaan voor later gebruik.
Op deze
manier kunnen meerdere toestellen snel en makkelijk ingesteld worden.
WERKING DRUKTOETSEN
ON/
OFF
SEND
OK
AUTO
Navigeer omhoog/omlaag met de
pijltoetsen. De rode led knippert op
de gekozen instelling.
TEST
2s
TOETS BESCHRIJVING TOETS BESCHRIJVING
RESET
DISP
Toon de huidige/laatst gekozen
instellingen. De rode leds tonen
de gekozen instellingen.
4 configuraties kunnen
opgeslagen worden met behulp
van de programma toetsen.
MODE1 MODE2
MODE3 MODE4
Volgorde sensor instellen
1. Druk op de DISP toets, de rode leds tonen de huidige configuratie.
2. Gebruik de navigatietoesten om de configuratie aan te passen indien nodig.
3. Druk op OK om de instellingen te bevestigen.
4. Richt de handzender naar de sensor en druk op de SEND toets. Het armatuur knippert om de
ontvangst te bevestigen.
5. Ga naar het volgende armatuur met sensor en herhaal stap 4 enz.
Bevestig uw selectie met de OK
toets.
Met deze functie kan het luxniveau
gekozen worden waarbij het toestel
uitgeschakeld moet blijven. Indien er
meer daglicht aanwezig is dan de
gekozen waarde, dan zal het armatuur
niet ingeschakeld worden.
(standaard uitgeschakeld)
Druk op de TEST toets om de gevoeligheid
van de sensor te testen. De sensor gaat in
testmode en de daglichtsensor wordt
uitgeschakeld. Bij detectie schakelt het
armatuur slechts 2 seconden in zodat de
gekozen gevoeligheid en detectiebereik
kunnen getest worden.
Keer terug naar de standaard of dip-
switch instellingen van de sensor.
(indien dip-switch aanwezig)
Met de on/off toets kan de
verlichting manueel in- of
uitgeschakeld worden. Druk op
AUTO om de sensor opnieuw in
te schakelen.
Druk op de SEND toets om de
configuratie naar de sensor te
zenden. Het armatuur knippert om
de ontvangst te bevestigen.
Druk op de AUTO toets om de
AUTO modus te activeren. De
sensor instellingen zijn nu actief.
Navigeer naar links/rechts met de
pijltoetsen. De rode led knippert op
de gekozen instelling.
NOTA: Indien de sensor in manuele modus staat (ON/OFF toets) kan de configuratie niet
aangepast worden. Activeer steeds de AUTO modus door op de AUTO toets te drukken.

V2.4
-3- -4-
70%
70%
70%
10s
10s
10s
0%
0%
0%
20%
20%
20%
+
∞
+
∞
+
∞
+
∞
BRIGHTNESS
SENSITIVITY HOLD TIME
DAYLIGHT SENSOR
STAND-BY DIM STAND-BY TIME
MODE1
MODE 2
MODE 3
MODE 4
MODE
MODE1 MODE2 MODE3 MODE4
Programma aanpassen:
/ / / toets, de huidige configuratie wordt getoond door de rode leds.1.Druk
2.Druk om de configuratie aan te passen.
1.Kies een
programma / / /
MODE1 MODE2 MODE3 MODE4
,alle instellingen worden getoond met rode leds.
NOTA: functie is standaard uitgeschakeld.
Druk nogmaals op om het lichtniveau te kiezen
waarbij de sensor uitgeschakeld wordt.
om te bevestigen. Druk op display ter controle. Beide luxniveau's zijn nu actief.
5.Richt de handzender op de sensor en druk op , het armatuur knippert om de instellingen te
bevestigen.
Instellingen wijzigen van de slimme daglichtsensor
1.Druk toets in om de huidige configuratie te bekijken.
2.Druk of om de modus 'configuratie aanpassen' te activeren.De rode led knippert.
3.Druk ,om het lichtniveau te selecteren waarbij de sensor actief wordt.
Daglicht sensor functie
Indien geen beweging:
na 30 min. wordt gedimd
naar 10%.
De verlichting wordt
ingeschakeld op 100% bij
detectie van beweging.
1
21:00
Zolang er geen beweging is
blijft de verlichting op 10%.
3
21:40
2
21:10
Open de daglicht sensor functie in configuratie modus.
Configuratie demostratie:
Vertragingstijd: 30min
Sensor actief luxniveau: 50lux
Sensor uit luxniveau: 300lux
Stand-by dimniveau: 10%
Stand-by periode: +∞
Indien er voldoende omgevings-
licht aanwezig is dan wordt het
armatuur niet ingeschakeld.
Bij onvoldoende omgevings-
licht wordt de sensor actief. Bij
detectie van beweging wordt
het armatuur ingeschakeld.
Indien er geen beweging meer
gedetecteerd wordt dan zal het
armatuur na de ingestelde tijd
naar een lager niveau dimmen.
Indien er tijdens de stand-by
periode geen beweging
gedetecteerd wordt dan zal het
armatuur uitgeschakeld worden.
Trappenhuis (corridor) functie
Indien de sensor uitgerust is met 3-step dimming, dan kan de verlichting naar een lager niveau
gedimd worden alvorens volledig uit te schakelen. (HWDP, PHBP)
DISP
4.Druk
OK
SEND
Reset en programmatoetsen (1,2,3,4)
De handzender is uitgerust met 4 programma toetsen. Hier kan u de meest voorkomende
programma's in opslaan.
RESET: alle instellingen worden gewist, dip-switch instellingen op de sensor worden actief.
SCENE MODES(1 2 3 4)
3.Druk ok om te bevestigen en op te slaan.
Sensor instellen met opgeslagen programma
70% 20% 10s 0%
Nota: controleer alle instellingen, pas eventueel aan met de pijltjestoetsen en druk dan ok.
2.Richt de handzender naar de sensor en druk op SEND
Het armatuur knippert om de ontvangst te bevestigen.
503010
500300100

-1- -2-
BRIGHTNESS
HOLD TIME
DAYLIGHT
SENSOR
STAND-BY DIM
STAND-BY TIME
Sélectionnez le niveau auquel
l'éclairage doit fonctionner
lorsqu'un mouvement est détecté.
Sélectionnez la durée pendant
laquelle l'éclairage doit rester au
niveau de veille.
Sélectionnez le niveau d'éclairage
auquel le capteur doit être activé.
Le capteur de lumière du jour est
désactivé. Le capteur ne prend pas en
compte la lumière ambiante.
LED DESCRIPTION DESCRIPTION
Sélectionnez la durée pendant
laquelle l'éclairage doit rester
allumé après la détection de
mouvement.
SENSITIVITY
Sélectionnez la sensibilité du
capteur souhaitée. Utilisez le
mode test pour tester la sensibilité.
LED
Sélectionnez le niveau d'éclairage
souhaité si le capteur ne détecte
aucun mouvement. Sélectionnez 0 si
l'éclairage doit être complètement
éteint.
Sélectionnez le niveau d'éclairage
souhaité auquel l'appareil ne doit pas
être allumé.
LED INDICATION
Alimentation
Emballage
Transmisson
Temp. ambien
Dimensions
2 x AAA 1.5V batterie,(non inclus)
Livré dans un étui de protection
Jusqu'à 15 mètres
0°C~50°C
123 x 70 x 20.3 mm
INT-REMOTE
Émetteur IR universel
MANUEL
SPECIFICATIONS
Retirez les piles si cet appareil n'est pas utilisé pendant une longue période.
ATTENTION!
FONCTIONNEMENT
Avec l'émetteur IR universel, c'est possible de configurer facilement des appareils avec un capteur
PIR ou RF compatible. L'émetteur portatif est équipé de boutons-poussoirs avec indication LED
pour sélectionner rapidement et facilement les paramètres souhaités. La configuration
sélectionnée peut être envoyée à n'importe quel appareil équipé d'un capteur avec une seule
touche. La transmission maximale de l'émetteur portatif est 15 mètres. Chaque capteur peut être
facilement configuré en pointant l'émetteur portatif vers le capteur et en appuyant sur la touche
«ENVOYER».
L'émetteur portatif utilise une communication infrarouge bidirectionnelle pour envoyer les
paramètres du capteur ou pour lire les paramètres précédents. L'émetteur portatif est équipé de 4
touches de mémoire pour enregistrer les paramètres les plus courants pour une utilisation
ultérieure. De cette façon, plusieurs appareils peuvent être configurés rapidement et facilement.
FONCTIONNEMENT BOUTONS POUSSOIRS
ON/
OFF
SEND
OK
AUTO
Naviguez vers le haut/bas avec les
touches fléchées. La LED rouge
clignote au réglage sélectionné.
TEST
2s
BUTTON DESCRIPTION BUTTON DESCRIPTION
RESET
DISP
Affiche les paramètres actuels/
derniers sélectionnés. Les LED
rouges indiquent les
paramètres sélectionnés.
4 configurations peuvent être
enregistrées à l'aide des
touches de programme.
MODE1 MODE2
MODE3 MODE4
Programmer le capteur
1. Appuyez sur le bouton DISP, les LED rouges indiquent la configuration actuelle.
2. Utilisez les touches de navigation pour ajuster la configuration si nécessaire.
3. Appuyez sur OK pour confirmer les paramètres.
4. Dirigez l'émetteur portatif vers le capteur et appuyez sur le bouton SEND. Le luminaire
clignote pour confirmer la réception.
5. Passez à l'appareil suivant avec un capteur et répétez l'étape 4, etc.
Confirmez votre sélection avec
le bouton OK.
Cette fonction permet de sélectionner
le niveau de lux auquel l'appareil doit
rester éteint. S'il y a plus de lumière
du jour que la valeur choisie, le
luminaire ne sera pas allumé.
(désactivé par défaut)
Appuyez sur le bouton TEST pour tester la
sensibilité du capteur. Le capteur passe en
mode test et le capteur de lumière du jour
est désactivé. Lors de la détection, le
luminaire s'allume pendant seulement 2
secondes afin que la sensibilité et la plage
de détection sélectionnées puissent être
testées.
Revenez aux réglages par défaut ou
dip-switch du capteur.(si interrupteur
DIP présent)
L'éclairage peut être allumé ou
éteint manuellement avec le
bouton marche/arrêt. Appuyez
sur AUTO pour réactiver le
capteur.
Appuyez sur la touche SEND
pour envoyer la configuration au
capteur. Le luminaire clignote
pour confirmer la réception.
Appuyez sur la touche AUTO
pour activer le mode AUTO. Les
paramètres du capteur sont
maintenant actifs.
Naviguez à gauche / droite avec
les touches fléchées. La LED
rouge clignote au réglage
sélectionné.
REMARQUE: Si le capteur est en mode manuel (touche ON/OFF), la configuration ne
peut pas être ajustée. Activez toujours le mode AUTO en appuyant sur la touche AUTO.

V2.4
-3- -4-
70%
70%
70%
10s
10s
10s
0%
0%
0%
20%
20%
20%
+
∞
+
∞
+
∞
+
∞
BRIGHTNESS
SENSITIVITY HOLD TIME
DAYLIGHT SENSOR
STAND-BY DIM STAND-BY TIME
MODE1
MODE 2
MODE 3
MODE 4
MODE
MODE1 MODE2 MODE3 MODE4
Ajuster le programme:
/ / / la configuration actuelle est indiquée par les LED rouges.
pour ajuster la configuration.
NOTE: fonction est désactivé par défaut.
pour sélectionner le niveau d'éclairage auquel le luminaire est éteint.
pour confirmer. Appuyez sur pour vérifier.
, le luminaire clignote pour confirmer.
5. Dirigez l'émetteur portatif vers le capteur et appuyez sur
Modifier les paramètres du capteur de lumière du jour intelligent
pour afficher la configuration actuelle.
1. Appuyez sur
2. Appuyez sur oupour activer le mode 'configuration'. La LED rouge clignote.
pour le niveau d'éclairage auquel le capteur devient actif.
Fonction capteur de lumière du jour
En l'absence de
mouvement: après 30 m le
luminaire passe à 10%.
L'éclairage est allumé à
100% lorsqu'un
mouvement est détecté.
1
21:00
Tant qu'il n'y a pas de
mouvement, l'éclairage
reste à 10%.
3
21:40
2
21:10
Ouvrez la fonction de capteur de lumière du jour en mode configuration.
Demo de configuration:
Temps de retard: 30min
Lux capteur actif: 50lux
Lux capteur non actif: 300lux
Niveau de luminosité en stand-by: 10%
Période stand-by: +∞
S'il y a suffisamment de lumière
ambiante, le luminaire ne sera
pas allumé.
Le capteur devient actif lorsque la
lumière ambiante est insuffisante.
Le luminaire est allumé lorsqu'un
mouvement est détecté.
Si aucun mouvement n'est
plus détecté, le luminaire
diminuera à un niveau inférieur
après le temps réglé.
Si aucun mouvement n'est
détecté pendant la période de
veille, le projecteur sera éteint.
Fonction couloir (corridor)
Si le capteur est équipé d'une gradation en 3 étapes, l'éclairage peut être atténué à un niveau
inférieur avant de s'éteindre complètement.(HWDP, PHBP)
DISP
SEND
Réinitialiser et programmer les touches (1,2,3,4)
L'émetteur portatif est équipé de 4 touches de programme. Ici, vous pouvez enregistrer les
programmes les plus courants.
RÉINITIALISER: tous les paramètres sont supprimés, les paramètres du commutateur DIP
sur le capteur deviennent actifs.
SCENE MODES(1 2 3 4)
1.Appuyez sur
2.Appuyez sur
3.Appuyez sur ok pour confirmer et enregistrer.
70% 20% 10s 0%
Configurer le capteur avec le programme enregistré
1.Sélectionnez un programme
MODE1 MODE2
/ / /
MODE3 MODE4
,tous les paramètres sont affichés avec des
LED rouges. Vérifiez tous les paramètres, ajustez si nécessaire avec les boutons fléchés
puis appuyez sur ok.
2. Dirigez l'émetteur portatif vers le capteur et appuyez sur SEND
Le luminaire clignote pour confirmer la réception.
503010
500300100
3. Appuyez sur
Appuyez à nouveau sur
4. Appuyez sur ok
DI
S
P
Les deux niveaux de lux sont maintenant actifs.

NOTE: If you press button, the remote led indicators will show the latest parameters which
were sent.
DISP
-1- -2-
BRIGHTNESS
HOLD TIME
DAYLIGHT
SENSOR
STAND-BY DIM
STAND-BY TIME
High end trim turning function(To
Set the output level of connected
lighting during occupancy)
To represents the time that the
Sensor will keep the light at low dim
level after the HOLD TIME elapsed.
To represents various thresholds of
natural light level for the Sensor .
The daylight sensor stops working,
and all motion detected could turn on
the lighting fixture, no matter how
bright the natural light is.
LED DESCRIPTION DESCRIPTION
The time that the Sensor will turn
off(if you choose stand-by level is
0) or dim the light to a low level
after the area is vacated
SENSITIVITY
To set the occupancy sensing
sensitivity of the Sensor
LED
To set the output level of connected
lighting during vacancy. The sensor
will regulate the lighting output at
the set level. Setting the STAND-BY
DIM level at 0 means light full off
duringvacancy.
To select the current surrounding lux
value as the daylight threshold. This
feature enables the fixture to function
well in any real application
circumstances.
LED INDICATORS
Power supply
Carrying case
Upload range
Op. temperature
Dimensions
2 x AAA 1.5V battery, Alkaline preferred
RC-100 in carrying case
Up to 15 m (50 ft.)
0°C~50°C (32°F~122°F)
123 x 70 x 20.3 mm (4.84" x 2.76" x 0.8")
INT-REMOTE
Sensor Remote Programmer
OPERATION INSTRUCTIONS
SPECIFICATIONS
Remove the batteries from compartment if the remote will not be used in 30 days.
WARNING
OVERVIEW
The Wireless IR Configuration Tool is a handheld tool for remote configuration of remote control
IR-enabled fixture integrated sensors. The tool enables device to modify via pushbutton without
ladders or tools, and stores up to four sensor parameter modes to speed configuration of multiple
sensors.
The uses bidirectional IR communication to send and receive sensor settings at remote control
mounting height up to 50 feet. The device can display previously established sensor parameters,
copy parameters and send new parameters or store parameter profiles. For projects where identical
settings may be desired across a large number of areas or spaces, this capability provides a
streamlined method of configuration. Settings can be copied throughout a site, or in different sites.
with carrying case
REMOTE
50030010 0
503010
MODE4MODE3MODE2MODE1
DAYL IGHT
SENSO R
BUTTON OPERATION
Press button, all settings go
back to settings of dip Switch in
sensor.
ON/
OFF
Press button, upload the
current parameters to sensor(s),
the led light which the sensor
connects will on/off as confirm.
SEND
OK
Press button, the sensor starts to
function and all settings remain the same
as the latest status before the light is
switched on/off.
AUTO
Enter in the setting condition, the
parameter leds of remote control will
flash to be selected. and Navigate to
UP and Down for choose selected
parameters in LED indicators.
The button is for testing purpose
sensitivity only. after you choose sensitivity
thresholds, then you press button,
The sensor goes to test mode(hold time is
only 2s) automatically ,meanwhile the
stand-by period and daylight sensor are
disabled. Press button to quit from
this mode.
TEST
2s
BUTTON DESCRIPTION BUTTON DESCRIPTION
RESET
DISP
Display the current/lastest setting
parameters in LED indicators(the
LED indicators will on for showing
the setting parameters).
4 Scene modes with preset
parameters which are available to
be changed and saved in modes.
MODE1 MODE2
MODE3 MODE4
Navigate to LEFT and RIGHT for
choose selected parameters in
LED indicators.
SETTING
The SETTING Content contains all available settings and parameters for remote sensors. It
allows you to change the available control, parameters, and operation of the sensor from
factory default or current parameters.
Change multiple settings of sensor(s)
1.Press button, the remote control leds will show the latest parameters you set.
Confirm the selected parameters
selected parameters in remote
control.
Open and close smart daylight Sensor.
Press or Enter in the setting
condition, the parameter leds of remote
control will flash to be selected, Press
for open or close smart daylight
Sensor.
DISP
SEND
TEST
2s
TEST
2s
AUTO
NOTE: the setting works key step is by Push or , enter in the setting condition.
NOTE: the led light which the sensor connects will on/off after getting the new parameter as confirm.
RESET
Press the button, the light goes
to permanent on or permanent off
mode, and the sensor is disabled.
(MUST press button to quit this
mode for Setting.
AUTO
ON/
OFF
AUTO
ON/
OFF
AUTO
NOTE: if you push button before, you must push button to unlock the sensor.
2.Press or enter in the setting condition, the parameter leds of remote control will flash to be
selected, navigate to the desired setting by pressing to select the new parameters.
3.Press ok to confirm all setting and saving.
4.Aim at the target sensor and press to upload the new parameter, the led light which the sensor
connects will on/off as confirm.

V2.4
-3- -4-
UPLOAD
The upload function allows you to configure the sensor with all parameters in one operation. You
may select CURRENT SETTING parameters or the MODE for uploading. Current setting parameters
or the MODE are displayed in Remote control .
SCENE MODES(1 2 3 4)
70%
70%
70%
10s
10s
10s
0%
0%
0%
20%
20%
20%
+
∞
+
∞
+
∞
+
∞
BRIGHTNESS
SENSITIVITY HOLD TIME
DAYLIGHT SENSOR
STAND-BY DIM STAND-BY TIME
MODE1
MODE 2
MODE 3
MODE 4
MODE
About RESET and MODE(1,2,3,4)
The remote control comes with 4 Scene MODES which are not default. You may make desired
parameters and save as the new MODE(1,2,3,4) to configure the installed sensors.
MODE1 MODE2 MODE3 MODE4
Change the MODES:
1.press / / / button,the remote control Led indicators show existing parameters.
2.press to select the new parameters.
3.Press to confirm all parameters and saving in the mode.
Upload the current parameters to sensor(s),and duplicate the sensor
parameters form one to anther
1.Press button or press / / / ,all parameters are displayed in Remote control.
MODE1 MODE2 MODE3 MODE4
1.Open or close the smart daylight sensor by push when remote control is in setting condition.
2.When the smart daylight sensor open, 2 Led indicators are flash in daylight sensor setting.
select daylight as setpoint to light on Automatically , select daylight
as setpoint to light off automatically.When smart daylight sensor close, 1 Led indicator is flash in
the daylight sensor setting for choose daylight sensor threshold.
3.When the smart daylight sensor open, the stand-by time is only .
4.Smart daylight sensor takes place of normal photocell senor and works independently.
5.See Daylight Sensor Function.
NOTE: is disabled by default.
+
∞
3.Press ,2 led indicators will flash in daylight sensor settings ,select daylight as
setpoint to light on Automatically , select daylight as setpoint to light off
Automatically.
4.Press to confirm all setting and saving.
5.Aim at the target sensor and press to upload the new parameter. The led light which the sensor
connects will on/off.
Change multiple setting of sensors with smart photocell sensor Open
1.Press , the remote led indicators will show the latest parameters.
2.Press or enter in the setting condition, the parameter Led indicators of remote control will
flash to be selected.
Daylight Sensor Function
The light dims to stand-by
level after the hold-time.
The light switches on at
100% when there is
movement detected.
1
21:00
The light remains in dimming
level at night.
3
21:40
2
21:10
Settings on this demonstration:
Hold-time: 30min
setpoint to light on:50lux
Stand-by Dim: 10%
Stand-by period: +∞
Open the daylight sensor by push when remote control is in setting condition.
setpoint to light off:300lux
(when the smart photocell sensor open, the stand-by
time is only +∞)
This function inside the motion sensor to achieve tri-level control, for some areas which require
a light change notice before switch-off. The sensor offers 3 levels of light: 100%-->dimmed light
(natural light is insufficient) -->off; and 2 periods of selectable waiting time: motion hold-time and
stand-by period; Selectable daylight threshold and freedom of detection area.
With suffcient natural light, the
light does not switch on when
presence is detected.
With insufficient natural light,
the sensor switches on the light
automatically when presence
is detected.
After hold-time, the light dims to
stand-by level if the surrounding
natural light is below the
daylight threshold.
Light switches off automatically
after the stand-by period
elapses.
Corridor Function
When the natural light
level exceeds setpoint
off to light,the light will
turn off even if when the
space is occupied.
100% on when movement
detected, and dims to 10%
in long absence.
1 3 goes in cycle
at night ...
4
08:10
The light automatically turns
on at 10% when natural light
is insuffcient (no motion).
5
17:40
Every 30min
Check
Hold-time ends
Power On
Dim
100% On
Off
motion
No motion
Corridor Function VS Daylight Sensor Function.
1.In corridor function, turn on the light MUST by natural light level lower daylight sensor setting
and Occupancy. In smart daylight sensor function, turn on the light by natural light level lower
daylight setpoint to light on even if vacancy.
2.In corridor function, turn off light by stand-by time finish if vacancy. In smart daylight sensor
function, turn off the light by natural light level higher than daylight setpoint to light off even
if occupancy.
3.In smart daylight sensor function, natural light level lighter/lower than daylight setpoint to
light off/on MUST keep at least 1mintue,that will turn off/on the light automatically.
DISP
OK
SEND
RESET: all settings go back to settings of DIP Switch in sensor.
DISP
OK
70% 20% 10s 0%
SEND
Note: if other sensor need same parameters, just aim at the sensor and press button.
Note: check if all parameters are correct , if not, change them.
SEND
2.Aim at the sensor and press button , the light that sensor connects will be on/off as confirm.
503010
500300100
503010 500300100
Table of contents
Languages:
Other Integratech Remote Control manuals
