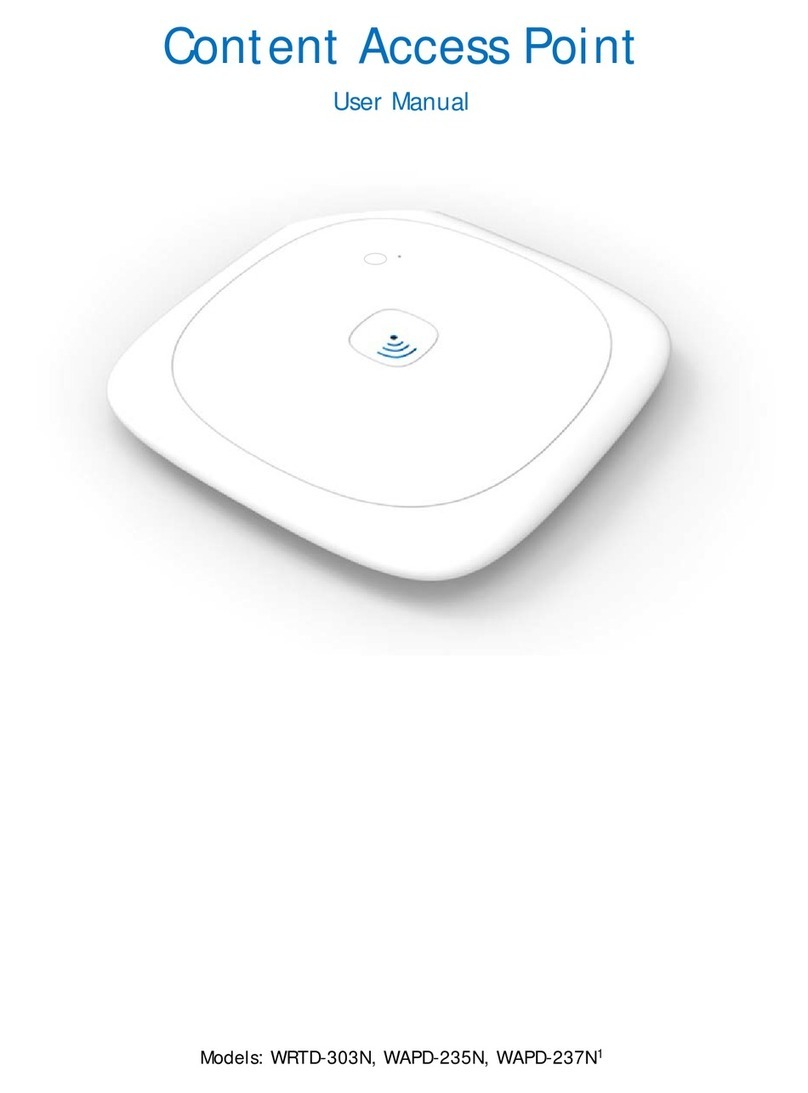
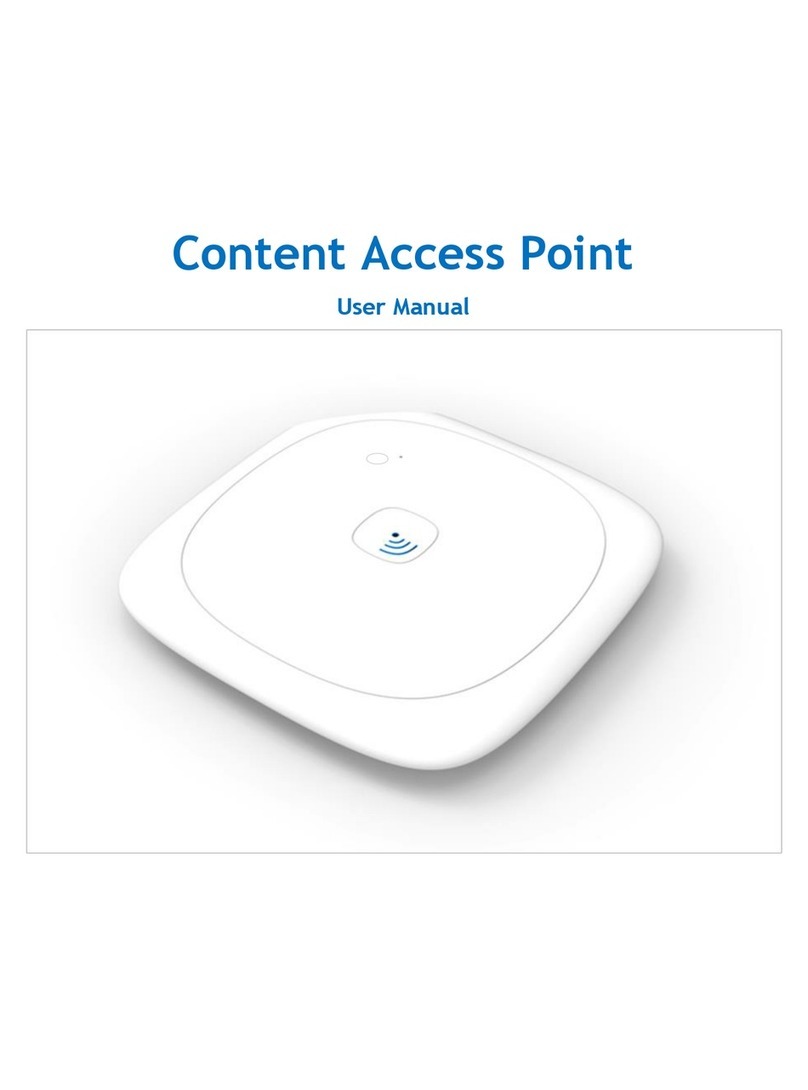
Intel PRO/Wireless 5000 User manual

1
Overview
Welcome to the Intel® PRO/Wireless 5000 LAN Access Point User's Guide. This guide covers
software installation, configuration, and troubleshooting.
To select a topic, click a link in the contents column to the left.
After installing the access point register your access point online. Go to the Intel Product
Registration Web site.
Copyright © 2002 Intel Corporation. Legal Information
Introduction
The 802.11a and 802.11b Intel® PRO/Wireless 5000 LAN Dual Access Point operates in the both
5 GHz and 2.4 GHz environment at speeds up to 54 Mbps (802.11a) and 11 Mbps (802.11b). It
features a software configurable antenna and will supports IEEE 802.3af Power over Ethernet.
Each access point uses eight non-overlapping transmission channels for support of up to 64
active users per access point. Placement can be on a desk or table, mounting on a wall or ceiling.
The PRO/Wireless 5000 LAN Access Point is compatible with other products supporting the IEEE
802.11a standard and 802.11b standard.
Security features include support for 128, 64, and 0-bit Wired Equivalent Privacy (WEP)
encryption and Virtual Private Network (VPN) compatibility.
A browser-based user interface is provided for configuration of the access point. See the
installation instructions for information on how to set up and configure one or more access points.
For information on how to set up a wireless LAN, see the Administrator's Guide. The
Administrator's Guide is intended for use by network administrators.
802.1x Authentication
The 802.11a Intel® PRO/Wireless 5000 LAN Dual Access Point supports 802.1x authentication
for Windows operating systems.
802.1x authentication for wireless LANs has three main components: The supplicant (usually the
client software); the authenticator (the access point); and the authentication server (usually a
Remote Authentication Dial-In User Service or RADIUS server).
802.1x is a standards-based solution for port-level authentication for a wired or wireless Ethernet
client systems.
Copyright © 2002 Intel Corporation. Legal Information

2
Installation
•Introduction
•Installation Options and Requirements
•Connect and Power Up the Access Point
•LED Indicators
•Configuring the Access Point for the First Time
•Using DHCP
•Access Point Default Values
•Restore Factory Defaults
•Select a Location for Installation of the Access Point
•Access Point Configuration
Introduction
Your Intel® PRO/Wireless 5000 LAN Access Point, when used with Intel PRO/Wireless 5000
LAN Adapters or other 802.11a and 802.11b-compliant wireless LAN adapters, offers an easy
and economical way to add secure wireless connectivity to a wired local area network (LAN)
within a building or office.
For detailed hardware installation requirements and diagrams, see the printed Quick Installation
Guide supplied with the access point.
Installation Options and Requirements
Review the following options and requirements for installation and configuration of the access
point for connection over the wired LAN:
•(Recommended) For configuration of the access point, you will need a wired client
workstation connected to the access point directly (recommended) or over the wired LAN
to which the access point is connected. Note: Initial setup and configuration must be
done over a wired connection, but subsequent changes to the configuration can be done
over a wireless connection.
•(Optional) DHCP server support for automatic assignment of an IP address to the
access point over the wired network. You can configure the access point to use DHCP to
get its IP address. See Using DHCP.
Connect and Power Up the Access Point
Connect the Access Point to the Wired Network
•Plug an RJ-45 Category 5 Ethernet cable into the RJ-45 connector on the bottom of the
access point and into a 10/100 Ethernet wall connector or hub.

3
Connect the Access Point to a Source of AC Power
•Plug the power adapter into a wall outlet.
•Plug the power adapter cable into the power socket on the bottom of the access point.
LED Indicators
Once the access point is connected to a wired network and is powered on, check the LED
indicators to verify that the unit is functioning correctly. If the access point fails to initialize, restart
it by disconnecting and reconnecting the power.
The Intel® PRO/Wireless 5000 LAN Access Point can be mounted "right side up" on a desk
or table or "upside down" on a wall or ceiling. The LED discussion that follows is based on a wall-
or ceiling-mounted configuration in which the access point is "upside down." In this configuration
the "Ready" LED will be the top LED and "Wired link" will be the bottom LED.
•The "Ready" LED should be lit.
•If the access point is connected to a LAN through an Ethernet cable, the "Wired link" LED
should be lit (green for 10 Mbps, orange for 100 Mbps) and the "Wired network activity"
LED should be blinking.
•If the access point is communicating with a wireless adapter, the "Wireless radio activity"
LED should be flashing steadily. The Wireless radio activity LED blinks faster when the
access point is sending or receiving information from a wireless adapter.
•Note that there are two sets of LEDs for "Wireless radio activity" and "Wireless radio
association." The description indicates which models use which set or sets.
Viewed on a wall- or ceiling-mounted access point, the LED indicators have the following
locations and functions.
Ready
Green. This indicator will stay illuminated after
the access point has completed the initialization
sequence. The Ready light flashes quickly 3
times during a reset to factory default settings.
Wireless radio activity (802.11a)
Yellow flashes steadily if no adapter
associated, and more rapidly when transferring
data. Applies to models WSAP5000 and
WDAP5000.
Wireless radio association (802.11a)
Green will be ON if a client is associated to the
access point and OFF if not. Applies to models
WSAP5000 and WDAP5000.
Wireless radio activity (802.11b)
Yellow flashes steadily if no adapter
associated, and more rapidly when transferring
data. Applies to models WSAP2000 and
WDAP5000.
Wireless radio association (802.11b)
Green will be ON if a client is associated to the
access point and OFF if not. Applies to models
WSAP2000 and WDAP5000.
Wired network activity Yellow blinking shows activity.
Wired link Green for 10 Mbps wired network speed and
orange for 100 Mbps.

4
Configuring the Access Point for the First Time
1. Set up a portable or desktop computer as a configuration workstation from which to view
the access point browser-based Configuration Management System and configure the
access point:
2. Connect the configuration workstation to the access point over a wired LAN, either
directly (using a crossover RJ-45 cable) or through a hub or switch (using a standard RJ-
45 cable). (Modifications to the configuration can be done from a wireless workstation
once the access point has been set up and configured on the network.)
3. The configuration workstation must be running Microsoft Windows XP, 2000, Me, or 98,
and must have one of the following web browsers installed for access to the access point
Configuration Management System: Microsoft Internet Explorer versions 5.5 or later or
Netscape Navigator version 4.78 or later
4. In order to view the browser-based Configuration Management System and modify
access point default settings, the configuration workstation must be configured initially
with an IP address compatible with the default IP address and subnet of the access
point. For example, based on the access point default IP address 192.0.2.1 and default
subnet 255.255.0.0, the client workstation could be set to 192.0.2.2, 192.0.2.3, or a
similar address not in use by another device.
5. Once the workstation has been configured as just described, type the default access
point IP address as a URL in the browser address field: http://192.0.2.1.
6. To access the Express Setup pages, type a user name and a password. The default for
both user name and password is Intel (upper case I, lower case ntel)
7. Use Express Setup to configure the access point with a new IP address, subnet, and
other settings suitable for the network to which it will be permanently connected.
8. Click Apply first, then click Restart AP. After the access has restarted, connect it to the
required network.
To ensure that your settings are saved, always click the Apply button after making changes
to settings, then click OK to exit the page. If you click OK without clicking Apply, the new settings
will not be saved.
9. Once the access point has been configured and connected on the network, the
configuration interface can be viewed from any workstation on the same network
segment or subnet. Open a browser and type the actual IP address of the access point
as a URL in the address field.
View the Access Point Browser Interface
1. Make sure that the IP address of the computer you are using to configure the access
point is on the same subnet or has access via a gateway to the subnet the access point
is attached to (see instructions above for setting up a configuration workstation). Also
make sure your proxy settings are correct. If you are not sure, contact your network
administrator.
2. Launch one of the following Internet browsers: Netscape Navigator* 4.78 or later, or
Microsoft Internet Explorer* 5.5 or later.
3. In the browser’s address field, enter http://x.x.x.x, where x.x.x.x is the access point’s IP
address. The access point Configuration Management System main page will display.
4. Access the various screens using the tree located on the left.
To view configuration, function or option changes on the browser pages, turn off the
browser's caching function.

5
•For Netscape, from the menu bar select Edit, Properties, Advanced, Cache, the select
Document in cache is compared to document on network: Every time.
•For Internet Explorer, from the menu bar select View, Internet Options, Temporary
Internet files, Settings, then select Check for newer versions of stored pages: Every visit
to the page.
If this property or option is not turned off, the browser returns the previous view of the page
without the changes.
Settings for First Time Configuration (Express Setup)
For complete coverage of access point settings see the Access Point Help File.
Setting Description
Default IP
Address
The default IP address is 192.0.2.1. An IP address is not dynamically assigned to
the access point under its default configuration. Use the default address initially,
then change it to a valid address for the network to which the access point will be
connected. For dynamic address assignment, see Using DHCP.
System
Name
User-defined name for the access point. Any combination of letters and numbers
from 1 to 32 characters. Default is the model number of the access point.
Default
Subnet
Mask
The default Subnet Mask is 255.255.0.0 if DHCP usage is Disabled or DHCP
service is not available. Change this address to a valid address for the network to
which the access point will be connected.
Default
Gateway
There is no default gateway initially configured. Use a valid gateway address for the
network to which the access point will be connected. If no valid gateway is defined
on your network, use the default gateway 0.0.0.0. For gateway assignment via
DHCP, see Using DHCP.
DHCP
The Dynamic Host Configuration Protocol (DHCP) dynamically assigns IP
addresses on a network with a DHCP server. Default setting for the PRO/Wireless
5000 LAN Access Point is Disabled. If you wish to change this setting to Enabled
and install the access point on a network using DHCP support, see Using DHCP.
Help URL
Location of the Help files accessible by clicking the Help button on a screen in the
access point Configuration Management System. See Access Point Help File
Installation.
SSID 11A
Service Set Identifier (also called Network Name, Network ID, ESSID) identifies the
network to which the access point is connected. All access points and client
workstations on the same wireless LAN must have the same SSID, which can be
any combination of letters and numbers up to 32 characters. Default for Intel
PRO/Wireless 5000 LAN devices is "101." The default SSID is intended only for
preliminary setups and connections; it should usually be changed to a descriptive
name for the wireless LAN network in question.
Using DHCP
The Intel PRO/Wireless 5000 LAN Access Point can be configured to use DHCP to get its IP
address, subnet mask, and default gateway:
1. Access the Express Setup page in the browser-based Configuration Management
System as described in Steps 1-6 under Configuring the Access Point for the First Time.

6
2. Change the DHCP setting from Disabled to Enabled on the Express Setup page (or the
Configuration page). Save the new settings by clicking Apply, then click Restart AP. After
the restart, connect the access point to the network to which it will be permanently
connected.
3. The next time the access point is restarted after DHCP has been enabled, it will attempt
to get its IP address, subnet mask, and default gateway from the DHCP server. If no
server is available, the access point will use its Default IP Address and Default Subnet
Mask settings.
4. When the access point used DHCP to obtain its IP address, you will have to determine
the IP address before you can access the configuration pages. There are several
strategies you can use for this, based on the MAC address assigned to the access point:
•Before connecting the "DHCP Enabled" access point to a DHCP
network, ask your network administrator to reserve an IP address based
on the MAC address for the access point in the DHCP "lease table." This
will allow the DHCP server to recognize the access point when it is
connected to the network and assign it a known IP address based on the
MAC address.
•You can also connect a "DHCP Enabled" access point to a DHCP
network immediately, without reserving the MAC address before
connection. In this case an address will be assigned automatically, but
you will have to request the address from your network administrator
who will obtain it from the DHCP "lease table."
•You can also use the Intel Access Point Administration Tool AP
Discovery to find the access point and display its IP address. See the
Administrator's Guide for information.
The MAC Address
The Ethernet Media Access Control (MAC) address of an Ethernet or wireless LAN device is a
hardware address unique to that device and permanently set when the device was manufactured.
A MAC address is a 48-bit number written as six hexadecimal bytes separated by colons. For
example:
00:A0:F8:24:9A:C8
The MAC address of the access point can be seen on the Configuration page, on the Ethernet
Network Interface page, and on the label on the bottom of the access point.
Access Point Default Settings
System name WDAP5000
IP address 192.0.2.1
Subnet mask 255.255.0.0
Default gateway None
User Intel (case sensitive)
Password Intel (case sensitive)
SSID 11A 101
WEP 11A Disabled

7
Restore Factory Defaults
The access point has a Reset button that can be used to perform a hardware reset or to restore
the access point's factory default settings.
The Reset button is located in a pinhole on the bottom of the access point. Insert the end of an
unbent paper clip into the hole and apply pressure as follows:
•Press and release the Reset button quickly to perform a hardware reset of the access
point.
•Press and hold the Reset button until the "Ready" LED flashes quickly 3 times. This will
restore all access point parameters to factory default settings, including the default user
name, password, and IP address.
For detailed information on access point configuration parameters, see the Access Point Help
File.
Select a Location for Installation of the Access Point
PRO/Wireless 5000 LAN Access Points should be positioned for maximum throughput and range
between access points and wireless client stations. Range and performance are dictated by the
distance between the access point and client radios, and by obstacles that may be present in a
specific building or office environment. The following positioning guidelines are suggested:
•If you're installing two or more access points to make up a single wireless Ethernet
network, all access points must be connected to the same wired Ethernet subnet and
must use the same network ID (SSID). If WEP security is used, all access points and
clients must use the same WEP key.
•Make a chart documenting all the access points and client adapters you wish to include in
your wireless network. Record the MAC address of each, and fill out the chart with the IP
addresses of each (when set), as well as the network ID (SSID), subnet mask, gateway,
and WEP key, if used.
•Use the Site Survey utility supplied on the Intel CD-ROM to analyze positioning and test
signal strength at various locations. Modify the positioning of the access points and client
stations as required for optimum performance. See the Administrator's Guide for
information on this utility.
•Wired LAN (RJ-45) and power connections must be available for the access point at the
desired location
•If building blueprints or floor plans are available, use them to define potential client
workstation locations and likely roaming areas
•Identify possible obstacles or sources of interference that could affect signal strength (for
example, walls, metal objects)
•Define preliminary access point positioning based on the range of access points and
client adapters, which is approximately 150-300 feet (45-90 meters) between access
points, depending on the environment (see Specifications for details).
•Mount the access point in the desired location using the bracket and mounting screws
supplied. See the Quick Installation Guide for detailed instructions.
•The location of each access point must be dry and dust free (install in wet or dusty areas
only with additional protection) and maintain a temperature range between 0° C and 55°
C.
•Place the access point in a location clear of debris and away from office traffic.

8
Copyright © 2002 Intel Corporation. Legal Information
Configuration
You configure an access point through the Access Point Configuration Management System. It
contains several configuration screens, each of which is displayed in a browser.
The Access Point Online Help File
An online help file describes the features in each of the screens in the Access Point Configuration
Management System. There are two ways to view the online help file.
•To view the Access Point online help file now, without using the Access Point
Configuration Management System, click here.
•To view the Access Point online help file as you are viewing or changing settings in the
configuration screens, you have to install the online help file on a management client
workstation or server and configure the Access Point Configuration Management System
to display it. After the installation and configuration, click the Help button on a
configuration screen to display help information pertinent to that screen. For instructions
on how to install the help file, click here.
To access the browser-based Configuration Management System built into the access point, see
the access point installation and setup information .
Help File Installation
Install the Help file on a web server (recommended):
1. Create a directory for the Help file. For example: D:/Intel/Wireless/Ap/Help.
2. Create an alias for the Help path. For example: HelpPath.
3. Copy the file WAP50HLP.HTM from the directory GUIDES/APHelp/5000 on the Intel CD-
ROM to the directory created in Step 1.
4. On the Express Setup or Configuration screen in the access point Configuration
Management System, enter the following URL in the field “Help URL”:
HTTP://nnn.nnn.nnn.nnn/HelpPath, where nnn.nnn.nnn.nnn is the IP address of the
web server. Click Apply.
If no web server is available, install the Help file on a client workstation:
This option is only available if your browser is Internet Explorer.
1. Create a directory for the Help file. For example: C:/Intel/Wireless/Ap/Help.
2. Copy the file WAP50HLP.HTM from the directory GUIDES/APHelp/5000 on the Intel CD-
ROM to the directory created in Step 1.
3. On the Express Setup or Configuration screen in the access point Configuration
Management System, enter the path to the directory created in Step 1
(C:/Intel/Wireless/Ap/Help in the example above) in the field “Help URL” and click
Apply.

9
Be sure that the Help file installed on the local machine or web server is identical to the file
found on the Intel CD-ROM.
Copyright © 2002 Intel Corporation. Legal Information
Troubleshooting
Installing the Access Point Administration Tools
The AP Administration Tools AP Discovery and Site Survey have to be installed using the
Custom installation option during installation of the Intel® PRO/Wireless 5000 LAN CardBus
Adapter. See Installing Access Point Administration Tools for information.
Installing the Access Point Help File
The Intel® PRO/Wireless 5000 LAN Access Point browser interface that features a Help button
for access to configuration information. However, before you can use the Help button, the Help
file has to be installed and the browser interface has to be configured with the path to its location.
See Access Point Help File Installation for instructions on how to install the Help file and
configure the browser for access to it.
Troubleshooting Tips
Use the Latest Release of Your Intel Installation CD-ROM
If you have more than one Intel Installation CD-ROM for your Intel PRO/Wireless 5000 LAN
products, always use the CD-ROM with the highest version number.
Access Point LED Functions
The front panel of the Access Point uses seven LEDs to indicate the current state of activity. The
LEDs are grouped into three pairs, with an additional "Ready" LED at the bottom (when the
access point is mounted on a desktop) or top (when mounted on a wall or ceiling). Usage of the
second and third pair of LEDs varies with different access point models. One pair is used for
802.11a functions (models WSAP5000 and WDAP5000) and the other for 802.11b (models
WSAP2000 and WDAP5000). On dual 802.11a and 802.11b access points (such as model
WDAP5000), both the second and third pairs may be active. See LED indicators for a table of the
access point LEDs and their functions.
Confirming Changes to AP Settings When Using Internet Explorer

10
In some versions of Microsoft* Internet Explorer, changes to Access Point parameters via the
browser interface may not be retained unless they are explicitly applied. Therefore, after making
changes on a page, make sure that you first click the Apply button, then the OK button to save
the new settings before exiting the page.
Additional Sources of Information
Use the Help features (click Help or press F1) of installation and utility software to obtain
additional information on the task you wish to perform.
Consult your computer and network documentation as needed. For the latest technical notes on
PRO/Wireless 5000 LAN products, see the Release Notes on the Intel CD.
See Intel Support Services for additional information.
Copyright © 2002 Intel Corporation. Legal Information
Intel® PRO/Wireless 5000 LAN Products
Specifications
Specifications by Model
Models Intel® PRO/Wireless 5000 LAN Dual Access Point model WDAP5000
Intel® PRO/Wireless 5000 LAN Access Point model WSAP5000
Intel® PRO/Wireless 5000 LAN CardBus Adapter model WCB5000
Intel® PRO/Wireless 5000 Mini-PCI Adapter model WM3A5000
Intel® PRO/Wireless 5000 LAN PCI Adapter model WPCI5000
Form Factor Access Point
Dimensions 8.6" x 5.6" x 3.3" (22 cm x 14 cm x 8 cm)
Weight 27 oz (765 g)
Connector Interface RJ-45
LEDs See LED Indicators
Access Point
Physical
Specifications
Power 100-240 Volt AC Adapter
Form Factor CardBus Type II Extended
Dimensions 2.2" x 4.4" x 0.19" (54 mm x 112 mm x 5
mm)
1" (25 mm) on extended portion
Weight 1.5 oz (43 g)
Connector Interface 68-pin CardBus
LEDs See LED Indicators
CardBus Adapter
Physical
Specifications
Power 3.3 V
PCI Adapter Form Factor PCI Adapter

11
Dimensions 8.4" x 4.8" x 0.8" (21 cm x 12 cm x 2 cm)
Weight 3.4 oz (96 g)
Connector Interface PCI
LEDs Link, Activity
Physical
Specifications
Power 3.3 V
General Specifications
Frequency band 5.15 GHz to 5.35 GHz
Modulation BPSK, QPSK, 16 QAM, 64 QAM
Wireless Medium Orthogonal Frequency Division Multiplexing
(OFDM)
5 GHz UNII
Frequency and
modulation
Channels 8 Non-overlapping (4 non-overlapping in
Japan)
WLAN Standard IEEE 802.11a
Wired Standard 10/100BTx
Architecture Infrastructure, ad-hoc (peer-to-peer)
Roaming
802.11a compliant for seamless roaming
between access points
Network
Wired-to-wireless switching Intel® PROSet II software
Security Encryption 64-bit and 128-bit WEP
802.11i (802.1x, Radius, EAP):
enhanced wireless
authentication security
Pending IEEE ratification in 2002
QOS DCF CSMA/CA
Data Rates 54, 48, 36, 24, 18, 12, 9, 6 Mbps
Indoor Range •40 feet @ 54 Mbps
•300 feet @ 6 Mbps
Range and
Throughput
Outdoor Range •100 feet @ 54 Mbps
•1000 feet @ 6 Mbps
Output Power 30 mW to 200 mW, depending on
frequency channel
Transmit 450-480 mA
Receive 420-440 mA
Power
Idle 420 mA

12
Standby 30 mA
CardBus and PCI Adapters 0 to 65 degrees Celsius
Operating
Temperature Access Point 0 to 45 degrees Celsius
Humidity 10 to 90% non-condensing
OS Microsoft Windows* 98SE*, Me*, 2000*,
XP*
WECA Pending ratification of interoperability test
and logo program by WECA (when 5 GHz
standard is available)
Compatibility
WHQL Yes
Safety UL, C-UL
United States FCC Part 15.247 and 15.249
Canada Industry Canada RSS-210
Japan VCCI, JATE, Telec
Singapore IDA
Regulatory and
Safety
Japan A-tick
Intel® PRO/Wireless 2011B LAN Products
Specifications
Specifications by Model
Models Intel® PRO/Wireless 2011B LAN Access Point model xxx
Intel® PRO/Wireless 2011B LAN Adapter model xxx
Form Factor Access Point
Dimensions 1.75” x 6” x 8.5” (4.4 cm x 15.2 cm x 21.6 cm)
Weight (w/power supply) 1 lb (454 g)
Connector Interface RJ-45
LEDs See LED indicators.
Access Point
Physical
Specifications
Power 110 Volt AC Adapter
Adapte
r
Form Factor CardBus Type II, 3.3V

13
Dimensions 3.3" x 2.1" x 0.2" (85 mm x 54 mm x 5 mm)
Weight 1.6 oz (45.4 g)
Connector Interface
LEDs See LED indicators.
Physical
Specifications
Power
General Specifications
Frequency band country dependent, typically 2412 MHz to 2462 MHz
Modulation Binary GFSK
Wireless Medium
Frequency and
modulation
Channels 3 Non-overlapping
WLAN Standard IEEE 802.11b
Wired Standard 10/100B Tx
Architecture Infrastructure, ad-hoc (peer-to-peer)
Roaming
•802.11b compliant for seamless roaming
between access points
•International roaming (802.11d)
Network
Wired-to-wireless
switching
Intel® PROSet II software
Security Encryption 64-bit and 128-bit WEP
QOS DCF
Data Rates 11 Mbps - Optional
5.5 Mbps - Optional
2 Mbps - Required
1 Mbps - Required
Indoor Range •30 to 50 feet @ 11 Mbps
Outdoor Range •100 feet @ 11 Mbps
Range and
Throughput
Throughput Up to 11 Mbps
Output Power
Transmit
Receive
Idle
Standby
Power
Voltage 3.3 V

14
Operating
Temperature
0 to 55° Celsius
Humidity 10 to 95% non-condensing
OS Windows 95C, 98SE, Me, 2000
WECA Yes
Compatibility
WHQL Yes
Safety UL, C-UL
United States FCC part 15.247
Canada Industry Canada RSS-210
Europe ETS 300 320
Regulatory and
Safety
Japan RCR STD-33
Copyright © 2002 Intel Corporation. Legal Information
Intel® PRO/Wireless LAN Products
Safety and Regulatory Notices
This document contains regulatory notices for the following products:
•Intel® PRO/Wireless 5000 LAN Products
•Intel® PRO/Wireless 2011B LAN Products
Intel® PRO/Wireless 5000 LAN Products
This section provides the following safety and regulatory notices covering the following products:
Intel® PRO/Wireless 5000 LAN Dual Access Point model WDAP5000, Intel® PRO/Wireless 5000
LAN Access Point model WSAP5000, Intel® PRO/Wireless 5000 LAN CardBus Adapter model
WCB5000, Intel® PRO/Wireless 5000 Mini-PCI Adapter model WM3A5000, Intel® PRO/Wireless
5000 LAN PCI Adapter model WPCI5000.
Safety Notices
The FCC with its action in ET Docket 96-8 has adopted a safety standard for human exposure to
radio frequency (RF) electromagnetic energy emitted by FCC certified equipment. The Intel
PRO/Wireless 5000 LAN products meet the Human Exposure limits found in OET Bulletin 65,
2001, and ANSI/IEEE C95.1, 1992. Proper operation of this radio according to the instructions
found in this manual will result in exposure substantially below the FCC’s recommended limits.
•Do not touch or move antenna while the unit is transmitting or receiving.
•Do not hold any component containing the radio such that the antenna is very close or
touching any exposed parts of the body, especially the face or eyes, while transmitting.

15
•Do not operate the radio or attempt to transmit data unless the antenna is connected; if
not, the radio may be damaged.
•Use in specific environments:
oThe use of wireless devices in hazardous locations is limited by the constraints
posed by the safety directors of such environments.
oThe use of wireless devices on airplanes is governed by the Federal Aviation
Administration (FAA).
oThe use of wireless devices in hospitals is restricted to the limits set forth by each
hospital.
•Antenna use:
oIn order to comply with FCC RF exposure limits, low gain integrated antennas
should be located at a minimum distance of 7.9 inches (20 cm) or more from the
body of all persons.
oHigh-gain, wall-mount, or mast-mount antennas are designed to be
professionally installed and should be located at a minimum distance of 12
inches (30 cm) or more from the body of all persons. Please contact your
professional installer, VAR, or antenna manufacturer for proper installation
requirements.
•Explosive Device Proximity Warning (see below)
•Antenna Warning (see below)
•Use on Aircraft Caution (see below)
•Other Wireless Devices (see below)
•Power Supply (Access Point) (see below)
Explosive Device Proximity Warning
Warning: Do not operate a portable transmitter (such as a wireless network device) near
unshielded blasting caps or in an explosive environment unless the device has been modified to
be qualified for such use.
Use On Aircraft Caution
Caution: Regulations of the FCC and FAA prohibit airborne operation of radio-frequency wireless
devices because their signals could interfere with critical aircraft instruments.
Other Wireless Devices
Safety Notices for Other Devices in the Wireless Network: Refer to the documentation
supplied with wireless Ethernet adapters or other devices in the wireless network.
Power Supply (Access Point)
Use manufacturer-provided power supply with output rating 5.0 VDC and 2.5 A.
FCC Regulations
FCC Regulations Part 15 Declaration of Conformity (DoC)
Intel Corporation declares that the equipment described in this document is within the
requirements of the Code of Federal Regulations listed below:
Title 47 Part 15, Subpart B, Class B for a digital device.

16
This declaration is based upon the compliance of the Intel® PRO/Wireless 5000 LAN Access
Point model WSAP5000, the Intel® PRO/Wireless 5000 LAN Dual Access Point model
WDAP5000, the Intel PRO/Wireless CardBus Adapter model WCB5000, the Intel PRO/Wireless
PCI Adapter model WPCI5000 and the Intel® PRO/Wireless 5000 Mini-PCI Adapter model
WM3A5000 to the above standards. Intel has determined that the models listed have been shown
to comply with the applicable technical standards if no unauthorized change is made in the
equipment and if the equipment is properly maintained and operated.
These units are identical to the units tested and found acceptable with the applicable standards.
Records maintained by Intel continue to reflect that units being produced under this Declaration of
Conformity, within the variation that can be expected due to quantity production and tested on a
statistical basis, continue to comply with the applicable technical standards.
Warning
To comply with the FCC and ANSI C95.1 RF exposure limits, it is recommended for the following
products: IntelWCB5000 PRO/Wireless 5000 LAN CardBus Adapter, IntelPRO/Wireless
5000 LAN Access Point, IntelPRO/Wireless 5000 LAN Dual Access Point, Intel
PRO/Wireless 5000 LAN PCI Adapter and Intel® PRO/Wireless 5000 Mini-PCI Adapter model
WM3A5000. These mobile device uses radio transmissions to operate. Please keep it at least 20
cm from any persons during operation. This Adapter has passed all necessary tests, and FCC
applications are pending to classify the product as a portable device that can be operated in close
proximity to the human body. The adapter is a wireless device with an integrated antenna. To
comply with the FCC and ANSI C95.1 RF exposure limits, when using such a wireless device
inserted into a laptop computer, it is recommended that the antenna should not be positioned
closer than 20 cm (8 inches) from your body or nearby persons. It is recommended that the user
limit exposure time if the antenna is positioned closer than 20 cm (8 inches). Installers and end-
users must follow the installation instructions provided in this user guide.
Radio Frequency Interference Requirements
This device is restricted to indoor use when used over its full frequency bandwidth capabilities
(5.15 to 5.35 GHz) due to its operation in the 5.15 to 5.25 GHz frequency range. FCC requires
this product to be used indoors for the frequency range 5.15 to 5.25 GHz to reduce the potential
for harmful interference to co-channel Mobile Satellite systems. The product can be used
outdoors only if the frequency range is limited to 5.26 to 5.35 GHz. In addition, it should be noted
that high power radars are allocated as primary users of the 5.25 to 5.35 GHz and 5.65 to 5.85
GHz bands. These radar stations can cause interference with and /or damage this device. See
the Online User's Guide for information on specifying the radio frequency to be used.
FCC Rules and Regulations - Part 15
This device complies with Part 15 of the FCC rules. Operation is subject to the following two
conditions:
1. This device may not cause harmful interference and,
2. This device must accept any interference received, including interference that may cause
undesired operation.
This equipment has been tested and found to comply with the limits for a Class B digital device
pursuant to Part 15 of the FCC rules. These limits are designed to provide reasonable protection
against harmful interference in a residential installation. This equipment generates, uses, and can
radiate radio frequency energy and, if not installed and used in accordance with the instructions,
may cause harmful interference to radio communications. However, there is no guarantee that

17
interference will not occur in a particular installation. If this equipment does cause harmful
interference to radio or television reception, which can be determined by turning the equipment
off and on, the user is encouraged to try to correct the interference by one or more of the
following measures:
•Reorient or relocate the receiving antenna.
•Increase the separation between the equipment and the receiver.
•Connect the equipment into an outlet on a circuit different from that to which the receiver
is connected.
•Consult the dealer or an experienced radio/TV technician for help.
CAUTION: The Part 15 radio device operates on a non-interference basis with other devices
operating at this frequency. Any changes or modification to said product not expressly approved
by Intel could void the user's authority to operate this device.
Canadian Department of Communications Industry Canada (IC) Notice
These digital apparatuses do not exceed the Class B limits for radio noise emissions from digital
apparatuses set out in the Radio Interference Regulations of the Canadian Department of
Communications.
Les présents appareils numériques n'ément pas de bruits radioélectriques dépassant les limites
applicables aux appareils numériques de Classe B prescrites dans le règlement sur le brouillage
radioélectrique édicté par le Ministère des Communications du Canada.
These devices comply with Class B Limits of Industry Canada. Operation is subject to the
following two conditions:
1. The device may not cause harmful interference, and
2. The device must accept any interference received, including interference that may cause
undesired operation.
These devices are certified to the requirements of ANSI/IEEE C95.1-1992 and RSS-210 Issue 5
for LELAN devices. The use of these devices in a system operating either partially or completely
outdoors may require the user to obtain a license for the system according to the Canadian
regulations. For further information, contact your local Canada Industry office.
Japan Regulatory Notices
TELEC
This equipment has been certified to conform with the technical regulations of the specified radio
equipment under the radio law of Japan. If you open the case to modify the circuit, you may be
punished by law.
This equipment is for indoor use only under the Radio Wave law.
JATE
Refer to the JATE approval number on the equipment.

18
Intel® PRO/Wireless 2011B LAN Products
Radio Frequency Interference Requirements – USA
This device uses, generates and radiates radio frequency energy. The radio frequency energy
produced by this device is well below the maximum exposure allowed by the Federal
Communications Commission (FCC).
This device complies with the limits for a Class B digital device pursuant to Part 15 subpart C of
the FCC Rules and Regulations. Operation is subject to the following two conditions:
1. This device may not cause harmful interference.
2. This device must accept any interference received, including interference that may
cause undesired operation.
The FCC limits are designed to provide reasonable protection against harmful interference when
the equipment is installed and used in accordance with the instruction manual and operated in a
commercial environment. However, there is no guarantee that interference will not occur in a
particular commercial installation, or if operated in a residential area.
If harmful interference with radio or television reception occurs when the device is turned on, the
user must correct the situation at the user’s own expense. The user is encouraged to try one or
more of the following corrective measures:
•Re-orient or relocate the receiving antenna.
•Increase the separation between the equipment and receiver.
•Connect the equipment into an outlet on a circuit different from that on which the
receiver is connected.
•Consult the dealer or an experienced radio/TV technician for help.
Radio Frequency Interference Requirements – Canada
This Class B digital apparatus complies with Canadian ICES-003, Issue 2, and RSS-210, Issue 5
(Nov. 2001).
“To prevent radio interference to the licensed service, this device is intended to be operated
indoors and away from windows to provide maximum shielding. Equipment (or its transmit
antenna) that is installed outdoors is subject to licensing.”
Cet appareil numérique de la classe B est conforme à la norme NMB-003,
No. 2, et CNR-210, No. 5 (Nov. 2001).
« Pour empêcher que cet appareil cause du brouillage au service faisant l'objet d'une licence, il
doit être utilisé à l'intérieur et devrait être placé loin des fenêtres afin de fournir un écran de
blindage maximal. Si le matériel (ou son antenne d'émission) est installé à l'extérieur, il doit faire
l'objet d'une licence. »
Radio Frequency Interference Requirements – European Union

19
CE Marking & European Union Compliance
Products intended for sale within the European Union are marked with the
Conformite Europeene (CE) Marking, which indicates compliance with the
applicable Directives and European Normes, and amendments, identified below.
This equipment also carries the Class 2 identifier.
English
This product follows the provisions of the European Directive 1999/5/EC.
Danish
Dette produkt er i overensstemmelse med det europæiske direktiv 1999/5/EC
Dutch
Dit product is in navolging van de bepalingen van Europees Directief 1999/5/EC.
Finnish
Tämä tuote noudattaa EU-direktiivin 1999/5/EC määräyksiä.
French
Ce produit est conforme aux exigences de la Directive Européenne 1999/5/EC.
German
Dieses Produkt entspricht den Bestimmungen der Europäischen Richtlinie 1999/5/EC.
Greek
Το προϊόν αυτό πληροί τις προβλέψεις της Ευρωπαϊκής Οδηγιας 1999/5/EC.
Icelandic
Þessi vara stenst reglugerð Evrópska Efnahags Bandalagsins númer 1999/5/EC.
Italian
Questo prodotto è conforme alla Direttiva Europea 1999/5/EC.
Norwegian
Dette produktet er i henhold til bestemmelsene i det europeiske direktivet 1999/5/EC.
Portuguese
Este produto cumpre com as normas da Diretiva Européia 1999/5/EC.
Spanish
Este producto cumple con las normas del Directivo Europeo 1999/5/EC.
Swedish
Denna produkt har tillverkats i enlighet med EG-direktiv 1999/5/EC.
Applicable Directives
Electromagnetic Compatibility Directive 89/336/EEC
Low Voltage Directive 73/23/EEC
Radio and Telecommunication Terminal Equipment 1999/5/EC
Applicable Standards
EN 50 082-1 – 1997 Electromagnetic Compatibility – Generic Immunity Standard, Part 1:
Residential, Commercial, Light Industry
EN61000-4-2 – Electromagnetic Compatibility for Industrial Process Measurement and Control
Equipment, Part 2: Electrostatic Discharge Requirements
EN61000-4-3 – Electromagnetic Compatibility for Industrial Process Measurement and Control
Equipment, Part 3: Radiated Electromagnetic Field Requirements
EN61000-4-4 – Electromagnetic Compatibility for Industrial Process Measurement and Control
Equipment, Part 4: Electrical Fast Transients Requirements
EN61000-4-5 – Surge Immunity Tests Basic EMC Standard
EN61000-4-6 – Immunity to Conducted Disturbances, Induced by Radio Frequency Fields

20
EN61000-4-11 – Voltage Dips, Short Interruptions and Voltage Variations
EN 300 328-2 V1.1.1 (2000-07) – Radio Equipment and Systems (RES); Wideband
transmission systems; Technical characteristics and test conditions for data transmission
equipment operating in the 2.4 GHz ISM band and using spread spectrum modulation
techniques
ETS 300 826:1997 – Electromagnetic compatibility and Radio spectrum Matters (ERM);
Electromagnetic Compatibility (EMC) standard for
2.4 GHz wideband transmission systems and High Performance Radio Local Area Network
(HIPERLAN) equipment. This is a basic standard called out by EN 301 489-17.
EN 301 489-17 v1.1.1 (2000-09) – Electromagnetic Compatibility (EMC) standard for radio
equipment and services; Part 17: Specific conditions for Wideband data and HIPERLAN
equipment.
EN 55022:1998 – Information technology equipment – Radio disturbance characteristics –
Limits and methods of measurement
EN 55024:1998 – Information technology equipment – Immunity characteristics – Limits and
methods of measurement
EN 61000-3-2:1995 +A14 – Electromagnetic compatibility (EMC)
Part 3-2: Limits – Limits for harmonic current emissions (equipment input current up to and
including 16 A per phase)
EN 61000-3-3:1995 – Electromagnetic compatibility (EMC),
Part 3-3: Limits – Limitation of voltage fluctuations and flicker in low-voltage supply systems
for equipment with rated current up to 16 A
EN 60950:1992 + A1 – A4, A11 – Safety of Information Technology Equipment, including
Electrical Business Equipment
European Economic Area Restrictions
The European variant is intended for use throughout the European Economic
Area; however, authorization for use is restricted as follows:
European standards dictate maximum radiated transmit power of 100mW EIRP and frequency
range 2.400 to 2.4835 GHz.
In France, the equipment must be restricted to the 2.4465 to 2.4835 GHz frequency range and
must be restricted to indoor use.
In Belgium when used outside, the equipment must be restricted to the 2.460 to 2.4835 GHz
frequency range.
Operation in Italy requires a user license.
In Hungary, Processing gain minimum 10 dB, integral or external antenna with maximum 6 dBi
gain.
In the Netherlands, 10 mW indoor and outdoor with no license. 100 mW indoor with no
license. 100 mW with license outdoor within 2451 - 2471 MHz.
Japanese Notices
Other manuals for PRO/Wireless 5000
2
Table of contents
Other Intel Wireless Access Point manuals
Popular Wireless Access Point manuals by other brands

Accton Technology
Accton Technology WB3001A Quick installation guide

TP-Link
TP-Link AURANET CAP300-Outdoor user guide

Samsung
Samsung SLS-BU10J quick start guide

3e Technologies International
3e Technologies International AirGuard 3e-525C-2 user guide

Huawei
Huawei U-SYS IAD208E user manual

SMC Networks
SMC Networks SMC2552W-G EliteConnect Specifications