IntelliHeat PLANO User manual

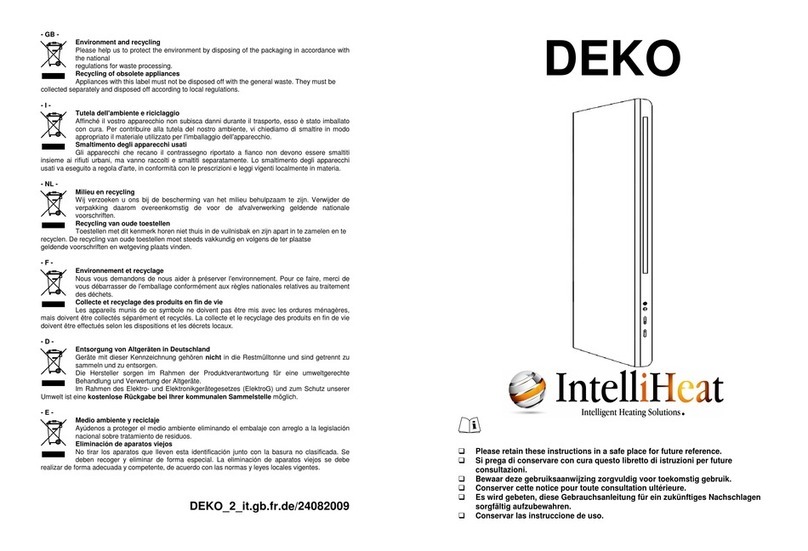
- GB - Environment and recycling
Please help us to protect the environment by disposing of the packaging in accordance with
the national
regulations for waste processing.
Recycling of obsolete appliances
Appliances with this label must not be disposed off with the general waste. Theymust be
collected separately and disposed off according to local regulations.
- I - Tutela dell'ambiente e riciclaggio
Affinché il vostro apparecchio non subisca danni durante il trasporto, esso è stato imballato
con cura. Per contribuire alla tutela del nostro ambiente, vi chiediamo di smaltire in modo
appropriato il materiale utilizzato per l'imballaggio dell'apparecchio.
Smaltimento degli apparecchi usati
Gli apparecchi che recano il contrassegno riportato a fianco non devono essere smaltiti
insieme ai rifiuti urbani, ma vanno raccolti e smaltiti separatamente. Lo smaltimento degli apparecchi
usati va eseguito a regola d'arte, in conformità con le prescrizioni e leggi vigenti localmente in materia.
- NL - Milieu en recycling
Wij verzoeken u ons bij de bescherming van het milieu behulpzaam te zijn. Verwijder de
verpakking daarom overeenkomstig de voor de afvalverwerking geldende nationale
voorschriften.
Recycling van oude toestellen
Toestellen met dit kenmerk horen niet thuis in de vuilnisbak en zijn apart in te zamelen en te
recyclen. De recycling van oude toestellen moet steeds vakkundig en volgens de ter plaatse
geldende voorschriften en wetgeving plaats vinden.
- F - Environnement et recyclage
Nous vous demandons de nous aider à préserver l'environnement. Pour ce faire, merci de
vous débarrasser de l'emballage conformément aux règles nationales relatives au traitement
des déchets.
Collecte et recyclage des produits en fin de vie
Les appareils munis de ce symbole ne doivent pas être mis avec les ordures ménagères,
mais doivent être collectés séparément et recyclés. La collecte et le recyclage des produits en fin de vie
doivent être effectués selon les dispositions et les décrets locaux.
- D - Entsorgung von Altgeräten in Deutschland
Geräte mit dieser Kennzeichnung gehören nicht in die Restmülltonne und sind getrennt zu
sammeln und zu entsorgen.
Die Hersteller sorgen im Rahmen der Produktverantwortung für eine umweltgerechte
Behandlung und Verwertung der Altgeräte.
Im Rahmen des Elektro- und Elektronikgerätegesetzes (ElektroG) und zum Schutz unserer
Umwelt ist eine kostenlose Rückgabe bei Ihrer kommunalen Sammelstelle möglich.
- E - Medio ambiente y reciclaje
Ayúdenos a proteger el medio ambiente eliminando el embalaje con arreglo a la legislación
nacional sobre tratamiento de residuos.
Eliminación de aparatos viejos
No tirar los aparatos que lleven esta identificación junto con la basura no clasificada. Se
deben recoger y eliminar de forma especial. La eliminación de aparatos viejos se debe
realizar de forma adecuada y competente, de acuerdo con las normas y leyes locales vigentes.
PLANO_5/270608
PLANO
Please retain these instructions in a safe place for future reference.
Si prega di conservare con cura questo libretto di istruzioni per future
consultazioni.
Bewaar deze gebruiksaanwijzing zorgvuldig voor toekomstig gebruik.
Conserver cette notice pour toute consultation ultérieure.
Es wird gebeten, diese Gebrauchsanleitung für ein zukünftiges Nachschlagen
sorgfältig aufzubewahren.
Conservar las instruccione de uso.

n°1 n°2
n°3-5X60mm
n°1
n°3-8X50mm
1
4 mm
2
3
5
4
10
9
8
7
min. 20cm
min.
20cm
min.
20cm
X
Y
Z
Click !!!
B
!
A
B
min. 50cm
A
6
NO!

ENGLISH
OPERATING INSTRUCTIONS
Before operating the heater, please read these instructions thoroughly to avoid damage and
hazardous situations. Any use of this heater other than that stipulated in this instruction manual
may cause fire, electric shock or injury, and voids all warranties.
Warranty does not apply to any defect, deterioration, loss, injury or damage caused by, or as a result of,
the misuse or abuse of this heater. The rights dictated by State law are not prejudiced. None of the terms
of this warranty are to be taken as excluding any conditions or warranties implied by State law, which
cannot be excluded or modified.
Before any operation remove the packaging and check product integrity. In case of defects or damages
do not try to repair it yourself but contact your dealer.
Do not let children play with the packaging and protect the environment by disposing of the packaging in
accordance with the national regulations for waste processing.
1. Your product
Other than the heater you have chosen the package includes (picture 1):
-N°2 metal brackets for wall mounting;
-N°1 plastic brackets for wall mounting;
-N°3 nylon plug expansion 8x50mm;
-N°3 5x60mm cross head screws to fix wall brackets;
Refer to your dealer is something is broken or missing.
2. For your safety
Make sure that the mains power supplymatches the rated input: 230V AC, 50Hz.
Never allow animals or children to play with or touch the product. Attention! The panel may
become very hot while it is working (approximately 80°C = 176°F);
WARNING: In order to avoid overheating, do not cover the heater. Do not hang anything on
the heater and do not cover it while it’s working. This is clearly written on the cover of the product
or shown bythe symbol
This product may not be used by people (children included) with reduced physical, sensorial or
mental capacities, or with inadequate experience and knowledge, unless they are under the
supervision of a person responsible for their safety or have been suitably instructed by the latter.
Children must be supervised to ensure they do not play with the product.
To prevent overheating, never cover the product inappropriately (pictures 9 and 10).
Do not use the product in rooms saturated with explosive gas, vapours generated by solvents or
paints or flammable vapours/gas.
If the cable and/or plug are damaged, do not repair them yourself but take the product to the
technical service or a qualified repair centre and have them repaired by specialised personnel in
order to avoid any risk of damage.
Always position the product so that the plug is immediately accessible.
Never position this appliance immediately underneath a power socket.
3. Safe positioning
Only use the product in its horizontal position;
This product is fitted with a double electrical insulation circuit (class II) and therefore does not
require an earth connection;
Always make observe the minimum distances from walls, furniture and/or objects, as indicated in
picture 2.
Never install the product on a surface made from wood or synthetic material.
This product is water resistant to IP24. It may therefore be used in bathrooms or other areas
subject to humidity provided it is never installed within the perimeter of bathtubs or showers
(Volume 1 of figure 2).
It must never be possible for people in the bath tub or shower to reach the adjustment knobs.
4. Installation
After carefully reading section 3, proceed with installation following the sequence shown in figures
4 to 8.
Distances indicated in picture 4 are:
Model X (mm) Y (mm) Z (mm)
PLANO45 Min 270 - Max 340 535 165
PLANO65 Min 400 - Max 500 535 265
PLANO95 Min 600 - Max 800 535 463
- Placing metal wall brackets keep in mind that the right bracket must be located in the
lodging realised in the control box of the product. Warning: if you do not respect this
instruction the product may be instable!
- If installation becomes complicated due to the imperfect alignment of the holes, adjust the
position of the wall brackets by loosening the screw a little and moving the connector vertically.
- Fixing the lower bracket(s) in a different position compared to above reported distances is not
recommended! Placing bracket(s) in a different position may endanger product resistance to
knocks. Always mind to insert the lower bracket(s) between two following openings and newer
totally inside only one to prevent side movements (picture 6).
5. Electrical connections
The product must be powered at a voltage of 230V AC 50Hz.
The product must be supplied with a cable and plug or with a cable for installation. If a product with
plug is installed in France, connect it to the mains power supply by cutting off the plug and using a
suitable connection box.
If the product is supplied with a cable for installation, connect it to the mains power supply using a
3-wire cable (Brown=Live, Blue=Neutral, Black=Pilot wire) and a connection box. If you do not
wish to use the pilot wire functions, just connect the phase and the neutral wires: the
product will work correctly even without the external programmer.
In bathrooms, kitchens or other humid areas, install the connection terminal at least 25cm off the
floor.
The electrical connection to the mains power supply must also include a 2-pole switch with a
minimum contact aperture of 3mm. As a priority, always abide you national wiring rules.
It is forbidden to connect the appliance to the earth circuit. DO NOT CONNECT THE PILOT WIRE
(BLACK) TO THE EARTH CIRCUIT.
If the product is powered through a 30mA differential switch, make sure the pilot wire is also
controlled by the differential switch.
L
N
Phase (brown)
Pilot wire (black) – DO NOT CONNECT TO EARTH
Neutral (blue)

6. Using the product
D C B A
The product is fitted with a main on/off pushbutton (A), a slider to select desired working function
(B), a slider to set wished temperature (C) and a led showing the operating status (D).
The main pushbutton (A) controls the supply of the entire product. When switched on the internal
electronics is readyto be used. In case you have the optional remote control we suggest to use this
button only in case you will not use the product for al long period, in all other cases is preferable to
use the selector (B). Switching off the product by the pushbutton (A) causes, after about 3 hours of
internal autonomy, the loss of time/day information blocking the programmed functioning until
further data input.
The main pushbutton (A) deactivates the product apart of any possible input coming from the pilot
wire.
Slider selector (B) allows to select between one of the following working set:
STAND-BY
The product is supplied but heating elements are disconnected.
COMFORT
The product is supplied and works depending on the temperature set with the slider
(C).
ECO
The product is supplied and works depending on the temperature set with the slider
(C) decreased of 3,5°C.
FROST-FREE
The product is supplied and thermostat set is electronically forced to 7±3°C
(independently of temperature set with the slider (C)).
PROG
Functioning depends on inputs coming from the pilot wire (black) or from the optional
remote control.
The thermostat (C) maintains the required ambient temperature by automatically turning the
appliance on and off. The more the knob is moved to the right, the higher the temperature will be.
The highest position of the thermostat corresponds to approximately 30°C, the bottom one to about
10°C.
To set optimum combination between room temperature and power consumption a specific range
of the thermostat has been highlighted as "comfort".
In case you need a frost free selection we suggest to use the function selector (B) and set it to the
"
"
position, without moving the thermostat (C) to the minimum.
The indicator led (D) gives different information by changing the way it lights on and exactly:
-The light is on and red when the product is heating to reach desired temperature;
-The light is on and yellow if the desired temperature has been reached and the product is
ready to operate to comfortablymaintain it to the desired value;
-The light continuously flashes in red colour if temperature electronic sensor is broken. The
product must be repaired by an authorised service only;
Using the thermostat
In a room with a temperature in excess of 30°C, the thermostat does not turn on the appliance
even if it is at maximum.
Vice-versa, in a room with a very low temperature (below 10°C), the thermostat keeps the heater
constantly on, even if it is at minimum.
To optimise use of the thermostat, proceed as follows:
-set the thermostat (C) to maximum and wait until a comfortable temperature is reached;
-move the thermostat (C) to the left until functioning led (D) turns yellow;
-move the thermostat (C) to the right for a couple of millimetres;
-in this position, the thermostat will maintain the selected ambient temperature.
Using the pilot wire
If the product is fitted with a power cable without plug, it can also be controlled with specific
programmers. The behaviour of the product depends on the voltage applied between the pilot wire
and the neutral wire, as shown in the following table:
ORDER RECEIVED
WAVE SHAPE
MODE
HEATING
TEMPERATURE
NO SIGNAL
COMFORT
TEMPERATURE SET
BY THERMOSTAT
COMPLETE
ALTERNATING SIGNAL
ECO
3°C LOWER THAN THE
TEMPERATURE SET
BY THE THERMOSTAT
NEGATIVE
ALTERNATING SIGNAL
SEMIWAVE
ANTIFREEZE
TEMPERATURE
MAINTAINED AT
APPROX. 7°C
POSITIVE ALTERNATING
SIGNAL SEMIWAVE
STOP
THE APPLIANCE IS
SWITCHED OFF
CYCLICAL EMISSION OF
A COMPLETE
ALTERNATING SIGNAL
Tc=300S To=3S
1°C REDUCTION
1°C LOWER THAN THE
TEMPERATURE SET
BY THE THERMOSTAT
CYCLICAL EMISSION OF
A COMPLETE
ALTERNATING SIGNAL
Tc=300S To=7S
2°C REDUCTION
2°C LOWER THAN THE
TEMPERATURE SET
BY THE THERMOSTAT
Note: the STOP input signal on the pilot wire will switch off the product even if the mode
selector is NOT in the "PROG" mode.
Using the remote (optional)
The optional remote control allows to set a "comfort" or "eco" temperature for each hour of the
day, all days independently.
Operating mode could be easily switched from the remote to the pilot wire and vice-versa.
With just one remote it is possible to transmit the same program to all the products of this series
you have installed. All details about programming are included in the instruction manual of the
remote control.
To
Tc

7. What to do in case of malfunctions
In the event of overheating, the safety device on the appliance automatically disables the heating
elements.
The product will resume automatic operation as soon as the temperature returns below the safety
limit.
Attention: the functioning led will not be switched off by the operation of the safety device.
If you notice irregular operation, damage to the heating panel or to the structure of the appliance,
disconnect the product from the mains power supply and contact your technical assistance centre or
dealer.
8. Maintenance
This product does not require any special maintenance.
Clean the product, especially the heating panel, with a dry cloth once every 6 months.
If the product requires repairing, contact an authorised technical service centre.
When replacing the power cable, use a 2x1.00mm2or 3x1.00mm2H05VV-F HAR type, depending
on the version. This operation, for cables both with and without plugs, must be performed by
qualified personnel and never by the end user in order to avoid damaging the appliance and
jeopardising personal safety.
Table of contents
Other IntelliHeat Heater manuals
Popular Heater manuals by other brands

DeWalt
DeWalt DXH50K instruction manual
Dovre
Dovre DV400 owner's manual
Estate Design
Estate Design AUBURN EFSXB-15ABLK owner's manual
HTW
HTW HTW-CAL2000BLACK owner's manual

Pinnacle International
Pinnacle International Remington REM-40-GFA User's manual & operating instructions

Costway
Costway ES10201DE user manual
cecotec
cecotec Ready Warm 6550 Turbo Convection Design instruction manual
EOS
EOS Mythos S35 Installation and operating instructions
Lasko
Lasko 755320 operating manual
Sealey
Sealey CH30S instructions
Adax
Adax VG5T Instructions for use

Toyotomi
Toyotomi Toyoset NS-2800 Installation and operation instructions


