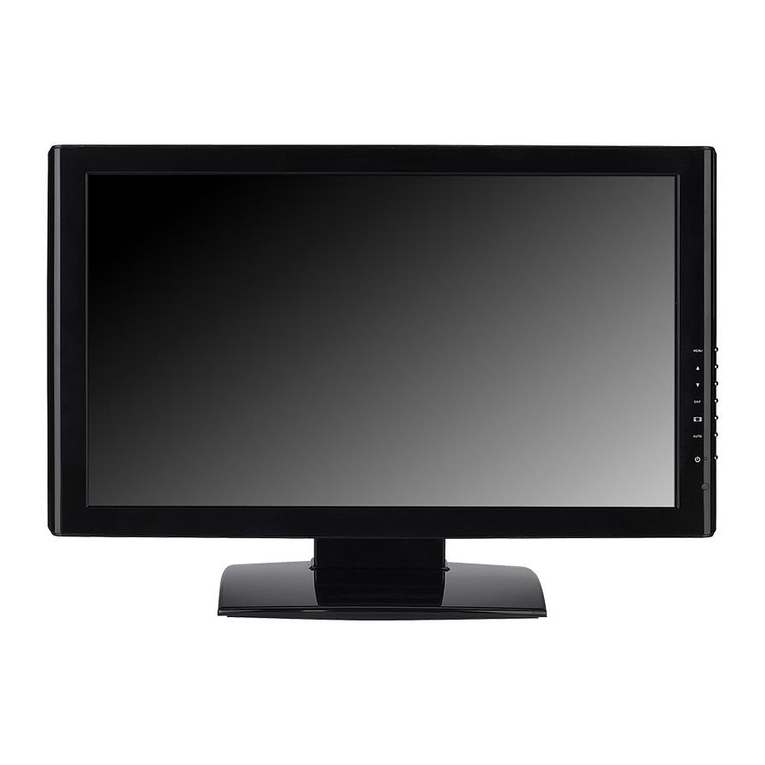
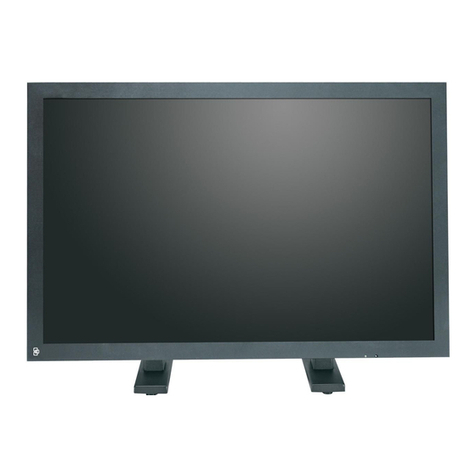
Interlogix UVM-2600 User manual

UVM-2600 / UVM-3200 / UVM-
4200 Monitors User Manual
EN User Manual
DE Benutzerhandbuch
ES Manual de usuario
FR Manuel d’utilisation
IT Manuale dell'utente
NL Gebruikershandleiding
PL Instrukcja obsługi
PT Manual do Utilizador
RU Руководство пользователя
TR KullanıcıKılavuzu
P/N 1079201A-Multilingual • REV 1.2 • ISS 05JAN12

Copyright
© 2012 UTC Fire & Security. All rights reserved
Trademarks and patents
Interlogix, UltraView brands and logos are trademarks of
UTC Fire & Security.
Other trade names used in this document may be trademarks
or registered trademarks of the manufacturers or vendors of
the respective products.
Manufacturer
UTC Fire & Security Americas Corporation, Inc.
2955 Red Hill Avenue, Costa Mesa, CA 92626-5923, USA
A
uthorized EU manufacturing representative:
UTC Fire & Security B.V.
Kelvinstraat 7, 6003 DH Weert, The Netherlands
Certification
N4131
FCC compliance
Class A: This equipment has been tested and found to comply
with the limits for a Class A digital device, pursuant to part 15
of the FCC Rules. These limits are designed to provide
reasonable protection against harmful interference when the
equipment is operated in a commercial environment. This
equipment generates, uses, and can radiate radio frequency
energy and, if not installed and used in accordance with the
instruction manual, may cause harmful interference to radio
communications. Operation of this equipment in a residential
area is likely to cause harmful interference in which case the
user will be required to correct the interference at his own
expense.
ACMA compliance
Notice! This is a Class A product. In a domestic environment
this product may cause radio interference in which case the
user may be required to take adequate measures.
Canada
This Class A digital apparatus complies with Canadian ICES-
003.
Cet appareil numérique de la classe A est conforme à la norme
NMB-0330 du Canada.
European Union directive
2004/108/EC (EMC directive): Hereby, UTC Fire & Security
declares that this device is in compliance with the essential
requirements and other relevant provisions of Directive
2004/108/EC.
2002/96/EC (WEEE directive): Products marked with this
symbol cannot be disposed of as unsorted municipal waste in
the European Union. For proper recycling, return this product to
your local supplier upon the purchase of equivalent new
equipment, or dispose of it at designated collection points. For
more information see: www.recyclethis.info.
2006/66/EC (battery directive): This product contains a
battery that cannot be disposed of as unsorted municipal waste
in the European Union. See the product documentation for
specific battery information. The battery is marked with this
symbol, which may include lettering to indicate cadmium (Cd),
lead (Pb), or mercury (Hg). For proper recycling, return the
battery to your supplier or to a designated collection point. For
more information see: www.recyclethis.info.
Contact information
For contact information see: www.interlogix.com or
www.utcfssecurityproducts.eu.

User Manual 1 EN
EN
Content
Important safeguards 1
Introduction 2
Features 2
Connections 2
Front panel controls 2
Control panel 2
Remote control 3
Changing a monitor parameter 4
Hot keys 4
Adjustment procedure 5
OSD function 5
VGA menu (VGA / HDMI / DVI) 5
CAM menu (CAM1 / CAM2 / S-Video) 7
PIP table 8
Self-diagnosis 9
Removing the monitor stand (all models) 9
Attaching the monitor stand 9
Troubleshooting 10
Specifications 10
UVM-2600 / UVM-3200 models 10
UVM-4200 model 11
Factory preset timings 12
UVM-2600 model 12
UVM-3200 / UVM-4200 models 13
Important safeguards
1. Installation cautions:
• Do not block any ventilation openings.
• Always ensure that the monitor is located in
a well-ventilated area to prevent the unit
from overheating.
• Only use accessories specified by the
manufacturer or those sold with the product.
• Avoid operating or placing the monitor in the
following environments: extremes of
temperatures, both hot and cold; high
humidity; direct sunlight; excessively dusty
surroundings; avoid close proximity to other
equipment that generates a strong magnetic
field
2. Water and moisture: Do not use this appliance
near water. To reduce the risk of fire or electric
shock, do not expose this unit to rain or
moisture.
3. Power cord and power cord protection:
Power cords should be routed so that they not
likely to be walked on or pinched. Pay particular
attention to the location of cords and plugs,
convenience receptacles, and the point of exit
from the appliance.
4. Product care: Do not touch the screen directly
with fingers. The oils from your skin may leave
marks on the surface of the screen, which are
difficult to be removed and may damage the
screen permanently. Do not apply pressure to
the screen.
5. Cleaning: Clean only with a dry cloth.
6. Servicing: Do not attempt to service this unit
yourself. Opening or removing covers may
expose you to dangerous voltage or other
hazards. Refer all servicing to qualified service
personnel.
7. Lightning: For added protection during a
lighting storm or when this unit is left
unattended and unused for long periods of time,
unplug the unit from the wall outlet and
disconnect the cable system. This will prevent
damage to the unit due to lightning and power
line surges.
8. Mains plug (2 pin/3 pin):
• Do not remove the grounding or earth
connection from the power supply / mains
plug.
• Always remember to unplug the monitor
from the power supply under the following
EN 2 User Manual
circumstances if the monitor will not be used
for a long period of time, if the power supply
cable or plug/connector is damaged or if the
monitor housing is damaged or broken.
CAUTION: Do not attempt to dismantle this
product. Any attempt to dismantle or remove the
covers from this product will invalidate the warranty
and may also result in serious injury.
Introduction
This manual explains how to correctly install,
operate and get the best performance from your
monitor. Please read this user manual carefully
before installing your monitor then keep it near your
monitor for quick reference.
First, please check that the contents of the box
correspond with the following checklist:
• LCD monitor
• Power cord
• AC adaptor
• User manual
If any item is missing or damaged, please contact
your dealer. Please keep the box and packing
materials so that you may properly store or
transport your monitor.
Features
The convenient and user-friendly on-screen
display allows for easy and accurate
adjustments of screen size, position and screen
color.
The monitor complies with the VESA Display
Data Channel (DDC) specification for Plug and
Play compatibility. Advanced microcircuitry
makes setup and configuration fast and
effortless.
The monitor features Advanced Color Controls
for fine-tuning to meet your own personal tastes
or application requirements. Use the on-screen
controls to adjust the color temperature,
Press the Menu button and activate the Self-
Diagnosis menu to determine whether your
monitor is functioning normally, not receiving a
signal or is receiving a signal that is out of
scanning range.
Connections
1. AC Input
2. Head Phone Out
3. PC Stereo Input
4. HDMI
HDMI signal input
5. VGA
RGB signal input
6. DVI
DVI-D signal input
7. CAM2 R/L
Audio signal input left and right for CAM2
8. CAM2 IN/OUT
Composite signal input and output for CAM2
9. CAM1 R/L
Audio signal input left and right for CAM1
10. CAM1 IN/OUT
Composite signal input and output for CAM1
11. S-VIDEO IN/OUT
Separated signal input and output.
Front panel controls
Control panel
1 POWER Indicator
2 SOURCE (*)
Used to select from different input sources.
Press the UP or DOWN arrow to scroll through
the available sources, and press LEFT or
RIGHT arrow to confirm selection.
3 Down Arrow
Allows for vertical scrolling in the OSD (On-
Screen Display) menu.

User Manual 3 EN
4 Up Arrow (*)
Primary Function: Automatically adjusts the
display to the most optimal setting
possible.(VGA mode only)
Secondary Function: Allows for vertical scrolling
in the OSD menu.
5. IR Sensor Window
6 POWER
Switches the monitor on and off.
7 MENU
Turns the OSD window on. Turns the OSD
window off and moves from sub menu to top
menu in the OSD window.
8 Left Arrow (*)
Primary Function: Used to decrease the
volume.
Secondary Function: Moves cursor to the left in
the OSD window and decreases the value of
any selected menu.
9 Right Arrow (*)
Primary Function: Used to increase the volume.
Secondary Function: Moves cursor to the right
in the OSD window and increases the value of
any selected menu.
(*) = Hot key
Remote control
R1 POWER
Turn the monitor on from stand-by or off to
stand-by mode.
R2 INPUT SOURCE
Select the signal source from the multiple input
sources.
R3 MUTE
Turn the sound on and off.
R4 NUMBER Button
Not used. R5 LAST CH
Not used. R6 INFO
Information display. R7 PICT MODE
Recall your preferred picture settings.
R8 SLEEP
Set the sleep timer.
R9 MENU
Display a main menu.

EN 4 User Manual
R10 EXIT
Turns the OSD window off and moves from
sub Menu to top menu in the OSD window.
R11 / R17 UP/DOWN /Button
Press UP/DOWN button to enter the Function
menu.
R12 / R14 LEFT/RIGHT /Button
Press LEFT/RIGHT Button to adjust the
volume.
R13 OK
Select menu items. R15 VOL +/-
Adjust the sound level.
R16 PR +/-
Not used.
R18 PC
Directly select PC mode.
R19 S.MODE
Choose a different preset sound mode or your
own customized sound.
R20 AUTO
Choose automatically the correct horizontal
Position and vertical position as well as the
size of the screen image. (PC mode only)
R21
Not used.
R22 POSITION
Select the position of PIP display.
R23 ZOOM
Select the screen format (CAM/HDMI mode
only).
R24 SIZE
Select the size of PIP display.
R25 SKIP
Not used.
R26 PIP
Activate or cancel the PIP function.
R27 S. SWAP
Change the sound source of the main or sub
display.
R28 SOURCE
Select the signal source of the sub display.
R29 P. SWAP
Change the picture of the main or sub display.
R30, R31, R32, R33
Not used.
Inserting batteries into the remote control unit
Open the battery compartment of the remote
control. Insert the batteries (two 1.5 V type R03 or
AAA). Make sure that the polarity matches with the
(+) and (-) marks inside of the battery compartment.
Note: To avoid damage from possible battery
leakage, remove the batteries if you do not plan to
use the remote control handset for an extended
period of time.
Changing a monitor
parameter
1. Press the MENU button on the front panel to
obtain the OSD menu screen.
2. Use Left-Right buttons to select the menu.
3. Use Down button to select the submenus.
4. Use Up-Down buttons to select a submenu
function.
5. Press SOURCE button, then using left-right
buttons you can make adjustments as
necessary
6. To exit press, MENU.
Hot keys
Selects signal in order. VGA
- HDMI - CAM
When there is no OSD, if
you press this ▲(UP/AUTO)
button, you can use the best
display performance fit for a
current mode
When there is no OSD, you
can adjust the volume
directly

User Manual 5 EN
Adjustment procedure
OSD function
Configure the monitor using the onscreen display
(OSD) menus and submenus. Changes are
immediately saved and implemented.
VGA menu (VGA / HDMI / DVI)
Picture
1. Contrast
Adjust the contrast of image, the difference
between light and dark areas on the screen.
2. Brightness
Adjust the brightness of the image.
3. Color Mode
Choose a different preset color temperatures or
set your own customized color parameters.
(Normal/Warm/Cool/User)
4. Scale
Select the screen size (HDMI mode only)
5. Auto
Choose automatically the proper horizontal
position and vertical position and size of the
screen image. (VGA mode only)
Sound
1. Bass
When you select the user mode, adjust the
bass sound.
2. Treble
When you select the user mode, adjust the
treble sound.
3. Balance
Adjust the sound balance of the left and right
speakers.
4. MTS
Not used.
5. Sound Mode
Choose a different preset sound mode or your
own customized sound. (Standard/ Movie/
Music/ User).

EN 6 User Manual
Geometry
1. H-Position
Adjust the position of the display horizontally
(left or right).
2. V-Position
Adjust the position of the display vertically (up
or down).
3. Clock
Adjust the width (horizontal size) of the screen
image.
4. Phase
Remove any horizontal noise and clear or
sharpen the image of the characters.
System
1. Sleep Timer
Select time to turn off the monitor.
(Off/15/30/45/60 Minutes)
2. Language
Select language for OSD (English/German).
3. OSD H-Position
Adjust the OSD position of the display
horizontally (left or right).
4. OSD V-Position
Adjust the OSD position of the Display vertically
(up or down).
5. OSD Timeout
Adjust the display of the OSD Menu. (5 to 60
seconds).
6. OSD Transparency
Adjust the OSD transparency.
7. Information
Show the status of the current Display settings.
8. Memory Recall
Reset the screen to the factory preset display
settings.
PIP
1. Multi Window
Activate or cancel the PIP function.
2. Sub Source
Select the input source the PIP screen (CAM1/
CAM2/ SVIDEO).
3. Size
Select the PIP display size
(Small/Middle/Large/Double 1/Double 2).
4. Position
Adjust the PIP display position (R-Up/R-Down/
L-Down/ L-Up).
5. Border Color
Select the border color of the PIP display
(Black/ Blue).
6. Sound Swap
Select the sound Swap (Main/ Sub).
7. Picture Swap
Change the main picture and the sub-pictures
of the PIP.

User Manual 7 EN
CAM menu (CAM1 / CAM2 / S-Video)
Picture
1. Contrast
Adjust the contrast of image, the difference
between light and dark areas on the screen.
2. Brightness
Adjust the brightness of the image.
3. Tint
Adjust the Tint of image.
4. Color
Adjust Color of the image.
5. Sharpness
Adjust the display image quality (if the monitor
can scale up images).
6. Color Tone
Choose a different preset color temperatures or
set your own customized color parameters
(Normal/ Warm/ Cool).
7. Picture Mode
Select the picture mode (Standard/ Movie/
Dynamic/ User).
8. Screen Format
Select the aspect ratio (Full/Zoom1/ Zoom2/
Subtitle/ 4:3/ panorama).
Sound
1. Bass
When you select the user mode, adjust the
bass sound.
2. Treble
When you select the user mode, adjust the
treble sound.
3. Balance
Adjust the sound balance of the left and right
speakers.
4. MTS
Not used.
5. Sound Mode
Choose different preset sound mode or your
own customized sound.
(Standard/Movie/Music/User)
Function
1. 3D NR
Reduce the noise in the picture due to poor
reception or poor picture quality (Off/ Low/
Middle/ High).

EN 8 User Manual
2. MADi
Select advanced color engine for automatic
picture enhancement (2D/3D).
3. H-Size
Adjust the width (horizontal size) of the screen
image.
4. V-Size
Adjust the height (vertical size) of the screen
image.
5. H-position
Adjust the position of the display horizontally
(left or right).
6. V-position
Adjust the position of the display vertically (up
or down).
System
1. Sleep Timer
Select time to turn off the monitor.
(Off/15/30/45/60 minute)
2. Language
Select language for OSD (English/Deutsch).
3. OSD H-Position
Adjust the OSD position of the Display
horizontally (left or right).
4. OSD V-Position
Adjust the OSD position of the Display vertically
(up or down).
5. OSD Time out
Adjust the display OSD Menu (5 to 60
seconds).
6. OSD Transparency
Adjust the OSD transparency.
7. Information
Shows the status of the current Display
settings.
8. Memory Recall
Reset the screen to the Factory Preset Display
Settings.
PIP
1. Multi Window
Activate or cancel the PIP function.
2. Sub Source
Select the input source the PIP screen.
(VGA/HDMI/DVI)
3. Size
Select the PIP display size
(SMALL/MIDDLE/LARGE/DOUBLE 1/DOUBLE
2)
4. Position
Adjust the PIP display position. (R-UP/R-
DOWN/L-DOWN/L-UP)
5. Border Color
Select the border color of the PIP display.
(Black/Blue)
6. Sound Swap
PIP table
SUB
Main
VGA HDMI DVI CAM1 CAM1 S-
Video
V
G
A
XX
HDMI XX
DVI
CAM1 X X
CAM2 XX
S-
V
ideo
X X
X = Not supported
= Supported

User Manual 9 EN
Self-diagnosis
If there is no image, the Self-Diagnosis screen will
be displayed. The self-diagnosis function checks if
the status of the monitor screen is No Signal, Out
of range or None support.
No Signal screen is displayed
when the D- Sub signal
connector is connected but
the status of the monitor is on
DPMS mode.
Out of Range screen is
displayed when the applied
frequency is under or over
normal range.
Normal range (Non-interlaced
mode only):
H: 30 to 80 kHz
V: 56 to 77 Hz
Check that the cable screen
is displayed when the analog
signal cable is disconnected.
Removing the monitor stand
(all models)
1. Turn off the monitor and unplug the power
cable.
2. Place a cushion or a soft cloth on the floor and
put the monitor on it with the front of the monitor
facing the floor.
3. Detach the rear cover of the monitor stand with
a screwdriver.
4. Remove the six screws connecting the stand
and monitor body.
Screws (x4)
Attaching the monitor stand
Tighten the screws at the locations indicated by
arrows shown in the figures above. See pictures
below.
Monitor stand attached
here Face of monitor
stand arm
The monitor’s installation surface is compatible with
other types of VESA standard stands.
VESA mount specifications:
Model Specifications
UVM-2600 VESA standard: 100 x
100 mm and 200 x 100 mm
(3.94 x 3.94 in. and 7.87 x
3.94 in.)
Screw thread: M4 screw
Length: 8.0 mm
UVM-3200 VESA standard: 200 x
200 mm and 400 x 200 mm
(7.87 x 7.87 in. and 15.75 x
7.87 in.)
Screw thread: M5 screw
Length: 10.0 mm
UVM-4200 VESA standard: 200 x
200 mm and 400 x 200 mm
(7.87 x 7.87 in. and 15.75 x
7.87 in.)
Screw thread: M5 screw
Length: 10.0 mm

EN 10 User Manual
Troubleshooting
Symptom Check
Picture is jittery Adjust Clock to set the
screen position and adjust
Clock value carefully until a
noise is no longer
displayed.
No picture Check if the power switch
and computer power switch
are in the On position
Check if the signal cable is
correctly connected to the
video card.
Check if the pins of D sub-
connector are not bent.
Check if the computer is in
the power- saving mode.
POWER LED is
not lit
Check if power switch is in
the On position.
Check if the power cord is
correctly connected.
Image is unstable Check if the signal cable is
suitable for the video card.
Image is not
centered, too
small or too large
Adjust Clock or H&V
Center to get the proper
image.
Picture bounces
or a wave pattern
is present in the
picture
Keep devices that may
cause electrical interference
away from the monitor.
See the FCC information at
the front cover of the
manual.
Symptom Check
Picture is blurred Adjust Contrast and
Brightness.
Low sound Adjust the volume on the
OSD menu.
Adjust the volume of the
sound card in the computer.
VIDEO screen
cannot be seen
Check if PICTURE mode
has been set.
Check if the video terminal
is properly connected.
No video Check if the video cable is
correctly connected to the
computer and set to
Functions on the OSD
picture menu.
Poor color in the
video
Adjust the Color or Tint
values on the OSD Picture
menu.
Grainy picture in
the video
Adjust the Sharpness on
the OSD Picture menu.
Specifications
UVM-2600 / UVM-3200 models
Items UVM-2600 model UVM-3200 model
Panel Screen size 26 in. (66 cm) 32 in. (81.3 cm)
Pixel pitch 0.4215 x 0.4215 mm 0.36375 x 0.36375 mm
View angle (H/V) 178°/178° 178°/178°
Contrast ratio 3000:1 (typ) 5000:1 (typ)
Response time 6.5 ms (G-to-G) 6.5 ms (G-to-G)
Brightness 450 cd/m² (typ) 450 cd/m² (typ)
Recommended
resolution 1366 x 768 @ 60 Hz 1920 x 1080 @ 60 Hz

User Manual 11 EN
Items UVM-2600 model UVM-3200 model
Audio Speaker power 5 W x 2 5 W x 2
Speakers Built-in Built-in
Sound features Stereo R/L Stereo R/L
Interface VGA in (15 Pin D-Sub) 1 1
DVI in 1 1
HDMI in 1 1
CAM in/out 2/2 2/2
Audio in (RCA type) 2 2
S-Video in/out 1/1 1/1
PC stereo in Yes Yes
Head phone out Yes Yes
Transmitter Remote control Yes Yes
Power Consumption < 100 W < 100 W
Source 100 to 240 VAC 100 to 240 VAC
Special feature Multi display function PIP/POP/PBP PIP/POP/PBP
Filter type 3D comb filter,
deinterlacing 3D comb filter,
deinterlacing
Dimensions W x H x D (without
stand) 633 x 399 x 104 mm
24.92 x 15.79 x 4.09 in. 766 x 476 x 106 mm
30.16 x 18.74 x 4.17 in.
W x H x D (with stand) 633 x 447 x 230 mm
24.92 x 17.60 x 9.06 in. 766 x 522 x 230 mm
30.16 x 20.55 x 9.06 in.
W x H x D (box) 710 x 554 x 293 mm
27.80 x 21.81 x 11.54
in.
877 x 657 x 293 mm
34.53 x 25.87 x 11.54
in.
Weight Net (without stand) 11.4 kg (25.2 lb.) 17.0 kg (37.5 lb.)
Net (with stand) 14.0 kg (30.9 lb.) 19.5 kg (43.0 lb.)
Gross (box) 17.7 kg (39.0 kg) 23.0 kg (50.7 lb.)
VESA mount
Specifications
Hole patterns
VESA standard 100 x 100 mm and
200 x 100 mm
(3.94 x 3.94 in. and
7.87 x 3.94 in.)
200 x 200 mm and
400 x 200 mm
(7.87 x 15.75 in. and
15.75 x 7.87 in.)
Spacing screw size M4 screw M5 screw
Length 8.00 mm 8.00 mm
Operating
temperature 0 to 40 °C / 32 to 104 °F
The specifications can change without notice.
The panel may have some defective pixels (ex. slightly light or dark) due to a characteristic of the panel. However,
there is no defect in your panel product itself.
UVM-4200 model
Items UVM-4200 model
Panel Screen size 42 in. (106.7 cm)
Pixel pitch 0.4845 x 0.4845 mm
View angle (H/V) 178°/178°
Contrast ratio 1500:1 (typ)
Response time 5 ms
Brightness 500 cd/m² (typ)

EN 12 User Manual
Items UVM-4200 model
Recommended resolution 1920 x 1080 @ 60 Hz
Audio Speaker power 5 W x 2
Speakers Built-in
Sound features Stereo R/L
Interface VGA in (15 Pin D-Sub) 1
DVI in 1
HDMI in 1
CAM in/out 2/2
Audio in (RCA type) 2
S-Video in/out 1/1
PC stereo in Yes
Head phone out Yes
Transmitter Remote control Yes
Power Consumption < 180 W
Source 100 to 240 VAC
Special feature Multi display function PIP/POP/PBP
Filter type 3D comb filter, deinterlacing
Dimensions W x H x D (without stand) 992 x 602 x 114 mm
39.06 x 23.70 x 4.49 in.
W x H x D (with stand) 992 x 649 x 270 mm
39.06 x 25.55 x 10.63 in.
W x H x D (box) 1095 x 765 x 343 mm
43.11 x 30.12 x 13.50 in.
Weight
Net (without stand) 29.5 kg (65.0 lb.)
Net (with stand) 31.7 kg (69.9 lb.)
Gross (box) 35.7 kg (79.7 kg)
VESA mount
Specifications
Hole patterns
VESA standard 200 x 200 mm and 400 x 200 mm
(7.87 x 7.87 in. and 15.75 x 7.87 in.)
Spacing screw size M4 screw
Length 8.00 mm
Operating
temperature 0 to 40 °C / 32 to 104 °F
The specifications can change without notice.
The panel may have some defective pixels (ex. slightly light or dark) due to a characteristic of the panel. However,
there is no defect in your panel product itself.
Factory preset timings
UVM-2600 model
VESA modes
Mode Resolution H freq. (kHz) V freq. (Hz) Remark
VGA 640 x 480 @ 60 Hz 31.5 60 Non-interlaced
VGA 640 x 480 @ 72 Hz 37.9 72 Non-interlaced
VGA 640 x 480 @ 75 Hz 37.5 75 Non-interlaced

User Manual 13 EN
VESA modes
Mode Resolution H freq. (kHz) V freq. (Hz) Remark
SVGA 800 x 600 @ 56 Hz 35.2 56 Non-interlaced
SVGA 800 x 600 @ 60 Hz 37.9 60 Non-interlaced
SVGA 800 x 600 @ 72 Hz 48.1 72 Non-interlaced
SVGA 800 x 600 @ 75 Hz 46.9 75 Non-interlaced
XGA 1024 x 768 @ 60 Hz 48.4 60 Non-interlaced
XGA 1024 x 768 @ 70 Hz 56.5 70 Non-interlaced
XGA 1024 x 768 @ 75 Hz 60.0 75 Non-interlaced
SXGA 1152 x 864 @ 75 Hz 67.5 75 Non-interlaced
SXGA 1280 x 960 @ 60 Hz 60.0 60 Non-interlaced
SXGA 1280 x 1024 @ 60 Hz 64.0 60 Non-interlaced
SXGA 1280 x 1024 @ 75 Hz 80.0 75 Non-interlaced
HD 1366 x 768 @ 60 Hz 47.7 60 Non-interlaced
IBM modes
Mode Resolution H freq. (kHz) V freq. (Hz) Remark
EGA 640 x 350 @ 70 Hz 31.5 70 Non-interlaced
DOS 720 x 400 @ 70 Hz 31.3 70 Non-interlaced
MAC modes
Mode Resolution H freq. (kHz) V freq. (Hz) Remark
VGA 640 x 480 @ 67 Hz 35.0 67 Non-interlaced
SVGA 832 x 624 @ 75 Hz 49.7 75 Non-interlaced
SVGA 152 x 870 @ 75 Hz 68.7 75 Non-interlaced
MAC modes
Mode Resolution H freq. (kHz) V freq. (Hz) Remark
SVGA 1280 x 1024 @ 70 Hz 74.4 70 Non-interlaced
The LCD monitor has only non-interlaced modes without flicker.
UVM-3200 / UVM-4200 models
VESA modes
Mode Resolution H freq. (kHz) V freq. (Hz) Remark
VGA 640 x 480 @ 60 Hz 31.5 60 Non-interlaced
VGA 640 x 480 @ 72 Hz 37.9 72 Non-interlaced
VGA 640 x 480 @ 75 Hz 37.5 75 Non-interlaced
SVGA 800 x 600 @ 56 Hz 35.2 56 Non-interlaced
SVGA 800 x 600 @ 60 Hz 37.9 60 Non-interlaced
SVGA 800 x 600 @ 72 Hz 48.1 72 Non-interlaced
SVGA 800 x 600 @ 75 Hz 46.9 75 Non-interlaced
XGA 1024 x 768 @ 60 Hz 48.4 60 Non-interlaced
XGA 1024 x 768 @ 70 Hz 56.5 70 Non-interlaced
XGA 1024 x 768 @ 75 Hz 60.0 75 Non-interlaced
SXGA 1152 x 864 @ 75 Hz 67.5 75 Non-interlaced
SXGA 1280 x 960 @ 60 Hz 60.0 60 Non-interlaced
SXGA 1280 x 1024 @ 60 Hz 64.0 60 Non-interlaced

EN 14 User Manual
VESA modes
Mode Resolution H freq. (kHz) V freq. (Hz) Remark
SXGA 1280 x 1024 @ 75 Hz 80.0 75 Non-interlaced
HD 1366 x 768 @ 60 Hz 47.7 60 Non-interlaced
WXGA+ 1440 x 900 @ 60 Hz 55.9 60 Non-interlaced
WSXGA+ 1680 x 1050 @ 60 Hz 65.3 60 Non-interlaced
FHD 1920 x 1080 @ 60 Hz 67.5 60 Non-interlaced
IBM modes
Mode Resolution H freq. (kHz) V freq. (Hz) Remark
EGA 640 x 350 @ 70 Hz 31.5 70 Non-interlaced
DOS 720 x 400 @ 70 Hz 31.3 70 Non-interlaced
MAC modes
Mode Resolution H freq. (kHz) V freq. (Hz) Remark
VGA 640 x 480 @ 67 Hz 35.0 67 Non-interlaced
SVGA 832 x 624 @ 75 Hz 49.7 75 Non-interlaced
SVGA 152 x 870 @ 75 Hz 68.7 75 Non-interlaced
MAC modes
Mode Resolution H freq. (kHz) V freq. (Hz) Remark
SVGA 1280 x 1024 @ 70 Hz 74.4 70 Non-interlaced
The LCD monitor has only non-interlaced modes without flicker.

Benutzerhandbuch 1 DE
DE
Inhalt
Wichtige Sicherheitsvorkehrungen 1
Einführung 2
Merkmale 2
Anschlüsse 2
Bedienelemente an der Vorderseite 3
Steuerelemente (Modell TVM-1700/TVM-1900) 3
Fernbedienung 3
Ändern eines Monitorparameters 4
Hotkeys 4
Anpassungen vornehmen 5
OSD-Funktion 5
VGA-Menü (VGA / HDMI / DVI) 5
CAM-Menü (CAM1 / CAM2 / S-Video) 7
PIP-Tabelle 8
Selbsttest 9
Monitorfuß entfernen (alle Modelle) 9
Monitorfuß befestigen 9
Problemlösung 10
Technische Daten 10
Modelle UVM-2600 / UVM-3200 10
Modell UVM-4200 11
Werkseinstellungen 12
Modell UVM-2600 12
Modelle UVM-3200 / UVM-4200 13
Wichtige
Sicherheitsvorkehrungen
1. Sicherheitshinweise für die Installation:
• Verdecken Sie nie die Lüftungsöffnungen.
• Achten Sie darauf, dass der Monitor immer
in einer gut belüfteten Umgebung steht,
damit er nicht überhitzt.
• Benutzen Sie ausschließlich Zubehör, dass
vom Hersteller empfohlen oder dass
zusammen mit dem Gerät verkauft wird.
• Achten Sie darauf, dass der Monitor
am Aufstell- oder Lagerort vor
folgenden Bedingungen geschützt ist:
extremen Temperaturen, heiß oder
kalt; hoher Luftfeuchtigkeit; direkter
Sonneneinstrahlung; übermäßig staubigen
Umgebungen; unmittelbarer Nähe zu
Geräten, die ein starkes Magnetfeld
erzeugen
2. Wasser und Feuchtigkeit: Benutzen Sie
dieses Gerät nicht in der Nähe von Wasser.
Um das Risiko eines Brands oder elektrischen
Schocks zu vermeiden, sollten Sie das Gerät
nicht Regen oder Feuchtigkeit aussetzen.
3. Sicherheitsmaßnahmen für das Stromkabel:
Stromkabel sollten so verlegt werden, dass
möglichst niemand auf sie tritt und sie nicht
eingeklemmt werden. Achten Sie auf Kabel,
Stecker, Steckdosen und auf die Austrittsstellen
der Kabel am Gerät.
4. Umgang mit dem Produkt: Berühren Sie den
Bildschirm nicht direkt mit den Fingern. Der
Talg auf der Haut kann Abdrücke auf dem
Schirm hinterlassen, die schwer zu entfernen
sind und die den Schirm dauerhaft beschädigen
können. Üben Sie keinen Druck auf den
Bildschirm aus.
5. Reinigung: Reinigen Sie das Gerät nur mit
einem trockenen Tuch.
6. Wartung: Versuchen Sie nicht, das Gerät
zu warten, sondern überlassen Sie dies
Fachleuten. Wenn Sie das Gehäuse
öffnen oder Abdeckungen entfernen,
droht unter anderem Gefahr durch hohe
Stromspannungen. Alle Servicearbeiten sind
qualifizierten Fachkräften zu überlassen.
7. Blitzeinschlag: Während eines Gewitters oder
wenn das Gerät über einen längeren Zeitraum
unbeaufsichtigt gelassen oder nicht benutzt
wird, sollten Sie es von der Wandsteckdose
und vom Kabelsystem trennen. Dadurch

DE 2 Benutzerhandbuch
vermeiden Sie Schäden, die durch
Blitzeinschlag oder Spannungsanstiege
verursacht werden können.
8. Hauptstecker (2-polig/3-polig):
• Die Erdung darf nie von der
Stromversorgung bzw. vom Hauptstecker
entfernt werden.
• In den folgenden Fällen sollten Sie den
Monitor immer von der Stromversorgung
trennen: wenn der Monitor über einen
längeren Zeitraum nicht benutzt wird;
wenn das Stromkabel oder der Stecker
beschädigt ist; wenn das Monitorgehäuse
beschädigt ist.
ACHTUNG: Versuchen Sie nicht, dieses Gerät
in seine Bestandteile zu zerlegen. Wenn Sie
versuchen, das Gerät in seine Bestandteile zu
zerlegen oder Abdeckungen zu entfernen, erlischt
die Garantie und es drohen schwere Verletzungen.
Einführung
In diesem Handbuch wird erläutert, wie der Monitor
ordnungsgemäß installiert und verwendet wird und
wie die optimale Leistung erzielt wird. Lesen Sie
dieses Handbuch sorgfältig durch, bevor Sie Ihren
Monitor installieren, und halten Sie es zu
Referenzzwecken im Zugriff.
Prüfen Sie, ob der Verpackungsinhalt mit der
folgenden Checkliste übereinstimmt:
• LCD-Monitor
• Netzkabel
• AC-Adapter
• Bedienerhandbuch
Wenden Sie sich an Ihren Händler, falls
eines dieser Elemente fehlt oder beschädigt
ist. Bewahren Sie den Karton und das
Verpackungsmaterial auf, um den Monitor
ggf. sicher zu lagern oder zu transportieren.
Merkmale
Das komfortable und benutzerfreundliche
On-Screen-Display ermöglicht eine exakte
Einstellung der Bildschirmgröße, -position
und -farbe.
Der Monitor erfüllt die VESA DDC-Spezifikation
(Display Data Channel) für Plug-and-Play-
Kompatibilität. Fortschrittliche Mikroschaltungen
ermöglichen ein schnelles und problemloses
Einrichten und Konfigurieren.
Über eine erweiterte Farbsteuerung ermöglicht
der Monitor eine Feineinstellung der Farben im
Hinblick auf persönliche Präferenzen oder die
Anforderungen von Anwendungen. Über die
Bildschirmregler können Sie die Farbtemperatur
anpassen.
Drücken Sie die Menütaste und aktivieren Sie
das Menü für den Selbsttest, um festzustellen,
ob Ihr Monitor normal funktioniert, eventuell
kein Signal oder ein Signal außerhalb des
Abtastbereichs empfängt.
Anschlüsse
1. Wechselstromeingang
2. Kopfhörerausgang
3. PC-Stereoeingang
4. HDMI
HDMI-Signaleingang
5. VGA
RGB-Signaleingang
6. DVI
DVI-D-Signaleingang
7. CAM2 R/L
Audiosignaleingang links und rechts für CAM2
8. CAM2 IN/OUT
Composite-Signalein- und -ausgang für CAM2
9. CAM1 R/L
Audiosignaleingang links und rechts für CAM1
10. CAM1 IN/OUT
Composite-Signalein- und -ausgang für CAM1
11. S-VIDEO IN/OUT
S-Video-Signalein- und -ausgang

Benutzerhandbuch 3 DE
Bedienelemente an der
Vorderseite
Steuerelemente (Modell
TVM-1700/TVM-1900)
1 POWER (Netzanzeige):
2 QUELLE (*)
Auswahl der verschiedenen Eingangsquellen.
Drücken Sie den PFEIL NACH OBEN oder
unten, um durch die verfügbaren Quellen zu
blättern, und den PFEIL NACH LINKS oder
RECHTS, um eine Auswahl zu bestätigen.
3 Pfeil nach unten
Ermöglicht das vertikale Blättern im OSD-Menü
(On-Screen-Display).
4 Pfeil nach oben (*)
Hauptfunktion: Automatische Anpassung der
Anzeige mit den optimalen Einstellungen (nur
im VGA-Modus).
Zweite Funktion: Vertikales Blättern im OSD-
Menü.
5. IR-Sensor-Fenster
6 POWER
Schaltet den Monitor ein bzw. aus.
7 MENU
Blendet das OSD-Fenster ein. Schaltet das
OSD-Menü aus und wechselt vom Untermenü
zum Hauptmenü im OSD-Fenster.
8 Pfeil nach links (*)
Hauptfunktion: Dient zur Verringerung der
Lautstärke.
Zweite Funktion: Bewegt den Kursor in den
linken Bereich des OSD-Fensters und reduziert
den Wert eines ausgewählten Menüs.
9 Pfeil nach rechts (*)
Hauptfunktion: Dient zur Erhöhung der
Lautstärke.
Zweite Funktion: Bewegt den Kursor in den
rechten Bereich des OSD-Fensters und erhöht
den Wert eines ausgewählten Menüs.
(*) = Hotkey
Fernbedienung
R1 POWER
Schaltet den Monitor aus dem Standby-Modus
ein bzw. versetzt ihn in den Standby-Modus.
R2 INPUT SOURCE
Auswahl der Signalquelle aus mehreren
Eingangsquellen.
R3 MUTE
Schaltet den Ton ein bzw. aus.
R4 NUMMERN-Taste
Ohne Funktion. R5 LAST CH
Ohne Funktion. R6 INFO
Informationsanzeige. R7 PICT MODE
Bevorzugte Bildeinstellungen erneut aufrufen.
R8 SLEEP
Timer für den Ruhemodus einstellen.
R9 MENU
Ein Hauptmenü anzeigen.
R10 EXIT
Schaltet das OSD-Menü aus und wechselt

DE 4 Benutzerhandbuch
vom Untermenü zum Hauptmenü im OSD-
Fenster.
R11 / R17 AUF/AB/-Taste
Drücken Sie die AUF/AB-Taste, um das
Funktionsmenü aufzurufen.
R12 / R14 LINKS/RECHTS/-Taste
Drücken Sie die LINKS/RECHTS-Taste, um
die Lautstärke anzupassen.
R13 OK
Auswahl der Menüelemente. R15 VOL +/–
Lautstärke anpassen.
R16 PR +/–
Ohne Funktion.
R18 PC
Direkte Auswahl des PC-Modus.
R19 S.MODE
Auswahl eines anderen voreingestellten
Soundmodus oder des selbst eingestellten
Sounds.
R20 AUTO
Automatische Auswahl der richtigen
horizontalen und vertikalen Position sowie der
Größe des Bildschirmbildes. (Nur PC-Modus)
R21
Ohne Funktion.
R22 POSITION
Auswahl der Position der PIP-Anzeige.
R23 ZOOM
Auswahl des Bildschirmformats (nur
CAM/HDMI-Modus).
R24 SIZE
Auswahl der Größe der PIP-Anzeige.
R25 SKIP
Ohne Funktion.
R26 PIP
Aktivieren bzw. Beenden der PIP-Funktion.
R27 S. SWAP
Ändern der Soundquelle der Haupt- oder
Unteranzeige.
R28 SOURCE
Auswahl der Signalquelle der Unteranzeige.
R29 P. SWAP
Ändern des Bildes der Haupt- oder
Unteranzeige.
R30, R31, R32, R33
Ohne Funktion.
Einlegen der Batterien in die Fernsteuerung
Öffnen Sie das Batteriefach der Fernsteuerung.
Legen Sie die Batterien ein (zweimal 1,5 V vom
Typ R03 oder AAA). Achten Sie darauf, dass die
Pole mit den Zeichen (+) und (–) im Batteriefach
übereinstimmen.
Hinweis: Entfernen Sie die Batterien, wenn Sie die
Fernsteuerung längere Zeit nicht benutzen, um
Schäden durch Auslaufen der Batterien zu
vermeiden.
Ändern eines
Monitorparameters
1. Drücken Sie auf der Vorderseite auf die Taste
MENU, um das OSD-Menü aufzurufen.
2. Wählen Sie mit den Links-/Rechts-Pfeiltasten
ein Menü aus.
3. Wählen Sie die Untermenüs mit der Pfeil-nach-
unten-Taste aus.
4. Wählen Sie eine Untermenüfunktion mit der
Pfeil-nach-oben-Taste aus.
5. Drücken Sie die Taste QUELLE und nehmen
Sie mit den Links/Rechts-Tasten die
erforderlichen Anpassungen vor.
6. Drücken Sie zum Beenden auf MENU.
Hotkeys
Auswahl des Signals in der
gegebenen Reihenfolge.
VGA – HDMI – CAM
Wenn OSD nicht gestartet
ist, wird durch Drücken der
Taste ▲(UP/AUTO) die für
den aktuellen Modus
optimale Anzeigeeinstellung
ausgewählt.
Wenn OSD nicht gestartet
ist, können Sie die
Lautstärke direkt anpassen.
Other manuals for UVM-2600
1
This manual suits for next models
2
Table of contents
Languages:
Other Interlogix Monitor manuals

Interlogix
Interlogix TVM-1700 User manual

Interlogix
Interlogix ATS1100 Assembly instructions

Interlogix
Interlogix TVM-1701 User manual

Interlogix
Interlogix TruVision GEL 1070521A User manual

Interlogix
Interlogix UVM-2600 User manual

Interlogix
Interlogix TVM-2700 User manual

Interlogix
Interlogix ULTRAVIEW SERIES User manual

Interlogix
Interlogix TruVision TVM-2202 User manual