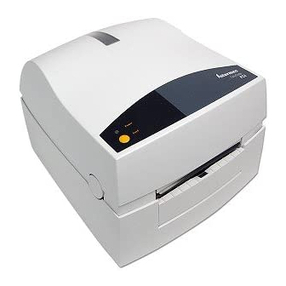
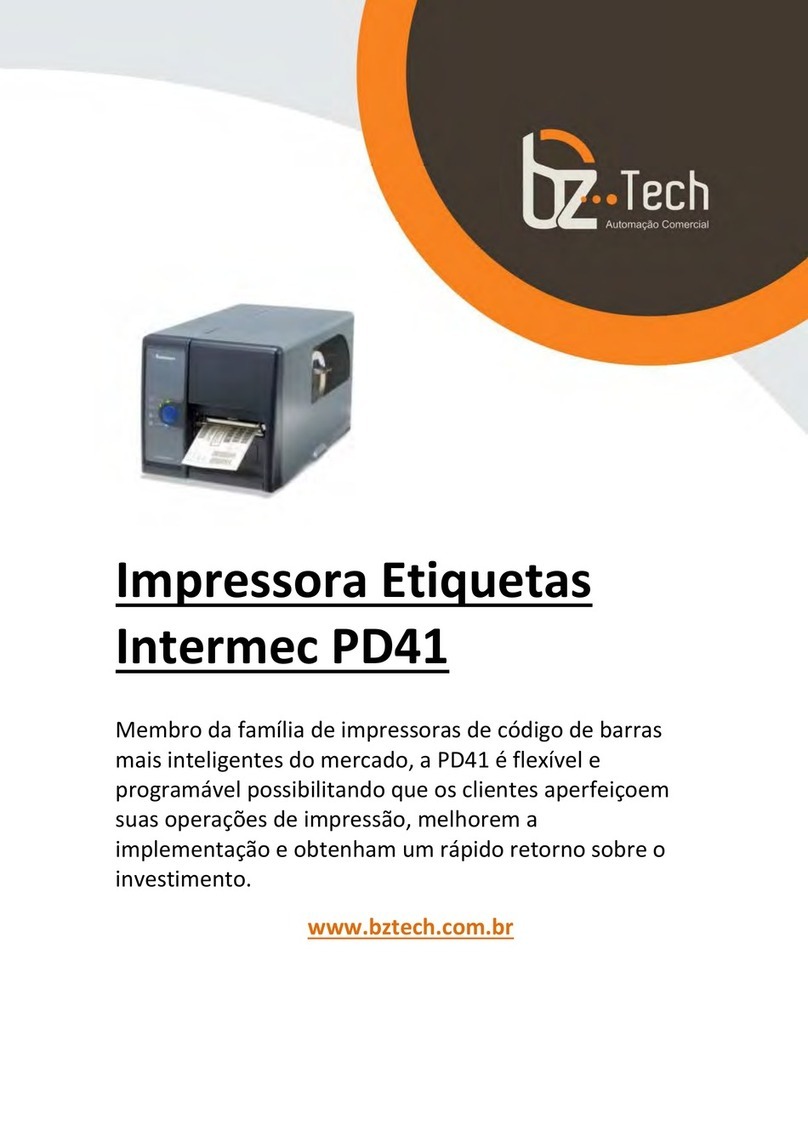
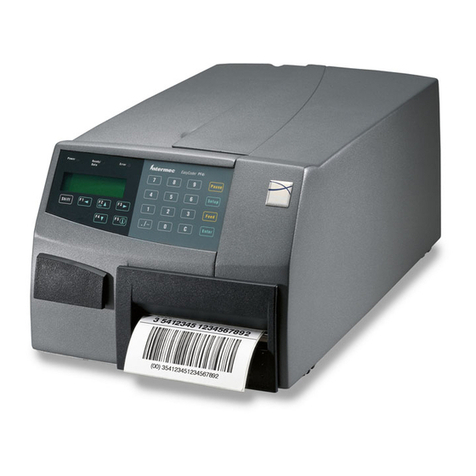
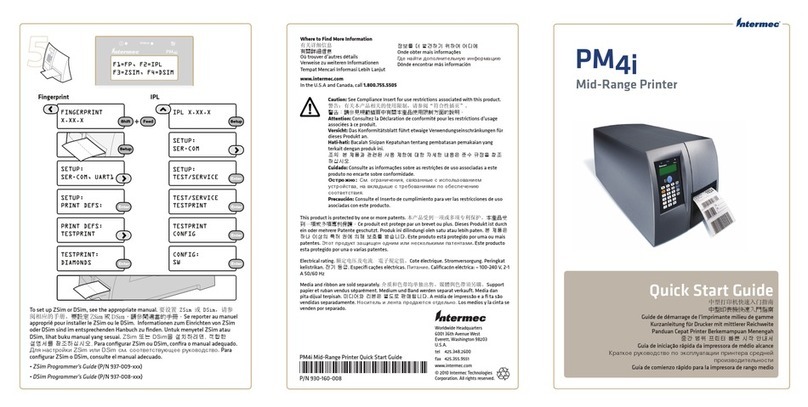
EasyCoder C4
QuickGuide
Bienvenido a Intermec!
Enhorabuena por la compra de la impresora EasyCoder C4!. Sinceramente, creemos que es la mejor elección,
por sus características, relación calidad-precio, potencia y facilidad de uso. Su impresora viene equipada con
todo lo necesario para empezar a trabajar: software, cables y una muestra de papel térmico.
Pruebe el concepto Connect and Print™!
Por favor, inserte el CD que adjuntamos, titulado PrinterCompanion y siga las instrucciones que allíle apare-
cen. Este CD contiene información referente a la impresora, una guía de instalación animada, documentación
técnica, información sobre repuestos y accesorios originales Intermec y el siguiente software:
•LabelShop®START
•InterDriver™con Controles ActiveX
Si Vd. quiere sacar provecho de una herramienta profesional diseñada específicamente para el diseño de
etiquetas, le recomendamos la compra de LabelShop®de Intermec.
Nuestro InterDriver™con Controles ActiveX le permite diseñar etiquetas para aplicaciones de Microsoft tales
como Word and Excel, utilizando fáciles comandos en un entorno sobradamente conocido.
Tanto LabelShop como la utilidad InterDriver son herramientas que permiten la configuración y ajuste óptimos
según el tipo de papel ó de cinta de impresión a utilizar.
Instalando LabelShop®START 5.04
LabelShop® START es una herramienta muy versátil y muy sencilla de utilizar, para el diseño e impresión de
sus propias etiquetas. Como complemento a LabelShop® START, el CD PrinterCompanion también contiene
versiones de evaluación de LabelShop® ULTRA and LabelShop®PRO para aplicaciones más sofisticadas.
Para instalar la actual versión 5.04 de LabelShop®START, por favor siga estas instrucciones:
1. Conecte su impresora y cargue un rollo de etiquetas ( Si Vd. quiere imprimir con transferencia térmica,
deberámontar una cinta, que no estáincluida en esta caja ). Si tiene duda sobre cómo abrir la impresora,
o cargar el rollo, por favor vea el diagrama de la Guía Rápida ( QuickGuide ), óconsulte la Guía de
Instalación del CD PrinterCompanion.
2. Inserte el CD y seleccione “Software”y “LabelShop”. Haga click en <install>. (LabelShop®START está
seleccionado por defecto) y siga las instrucciones. Compruebe que selecciona “EasyCoder C4”cuando
le pregunte el tipo de impresora.
Ahora ya tendráinstalado LabelShop®START en su disco duro. Para ejecutar el programa, haga click
en el icono “LabelShop START”, de la carpeta “Intermec LabelShop START”. Por favor, tenga en cuenta
que el programa utiliza la unidad de medida “mm”( milímetros ) por defecto; si Vd. prefiere pulgadas,
seleccione la opción <Tools>, <Options>, <Units> y haga el cambio oportuno.
3. Antes de imprimir físicamente las etiquetas que Vd. diseñe, es conveniente realizar los ajustes en la pro-
gramación de acuerdo con el tipo que papel que vaya a utilizar. En esta misma caja, Vd. encontraráun
rollo de papel Térmico Directo, del tipo DT Premium (Europa), o Duratherm II (América).
Ajuste del tamaño de la etiqueta: Haga click en <File>, <Page Setup>, <Stock> y seleccione:
“DT Premium”(Europa) o “Duratherm II”(America) en la opción “Type”, y “101.6 x 152.4mm”(4" x 6")
como “Name”y haga de nuevo clik en <OK>.
4. Ahora ya estátodo listo para imprimir etiquetas!
El CD contiene un manual de usuario con una introducción a LabelShop®START y una guía con instruc-
ciones a seguir paso a paso para crear una etiqueta.
Välkommen till Intermec!
Gratulerar till ditt köp av EasyCoder C4! Du har valt en utmärkt skrivare som har bra prestanda, ger god
driftsekonomi och är enkel att sköta. Din skrivare är komplett utrustad med allt som behövs för att komma igång:
mjukvara, kablar och en provrulle med termoetiketter!
Nu kan du koppla in skrivaren och börja trycka!
Connect and Print™!
Ladda den bifogade CD-skivan i din dator och följ in struktionerna. CD-skivan innehåller produktinformation,
en animerad installationshandledning, teknisk dokumentation, information om Intermec originaltillbehör och
följande mjukvaru-program:
•LabelShop®START
•InterDriver™med ActiveX Controls
Om du föredrar ett verkligt professionellt mjukvaruprogram särskilt framtaget för att skapa etiketter, sårekom-
menderas LabelShop®från Intermec.
Med programmet InterDriver™med ActiveX Controls från Intermec kan du skapa etiketter i Microsoft applika-
tionsprogram, såsom Word och Excel, genom att använda välkända kommandon i välkänd programmiljö.
Både LabelShop och InterDriver innehåller verktyg som hjälper dig att ställa in och justera din skrivare till de
tillbehör som krävs.
Installera LabelShop®START 5.04
LabelShop®START är ett flexibelt verktyg, enkelt att använda för design och tryckning av dina etiketter. Den
bifogade CD-skivan PrinterCompanion innehåller —förutom programmet LabelShop®START —även testversio-
ner av programmen LabelShop®ULTRA och LabelShop®PRO för mer avancerade etikettapplikationer.
För att installera LabelShop®START 5.04, var vänlig följ dessa instruktioner:
1. Anslut skrivaren och ladda den med etiketter (och termoband om du önskar termotransferetiketter [ej
inkluderade]. Observera att i detta fall inställningarna nedan kan bli annorlunda.) För instruktioner, se
framsidan av denna QuickGuide, eller Installation Guide påCD-skivan PrinterCompanion.
2. Ladda CD-skivan och välj “Software”och “LabelShop”. Klicka på<install> (grundinställning är Label-
Shop®START) och följ instruktionerna. När du ombeds välja skrivare, markera “EasyCoder C4”.
LabelShop®START är nu installerat pådin hårddisk. För att köra programmet, klicka påikonen “Label-
Shop START”i foldern “Intermec LabelShop START”.
Observera att programmet i grundinställningen använder millimeter (mm) som måttenhet. Om du hellre
vill ha enheten tum (inch), välj <Tools>, <Options> och <Units> för att ändra.
3. Innan du börjar skapa etiketter bör du justera programinställningarna efter de tillbehör du valt. Bifogat fin-
ner du en provrulle av Intermec direkttermoetiketter av följande typ: DT Premium (Europa), eller Duratherm
II (Amerika).
Inställning av etikettstorlek: Klicka på<File>, <Page Setup>, <Stock> och välj “DT Premium”(Europa)
eller “Duratherm II”(Amerika) som Typ, och välj “101.6 x 152.4 mm”(4" x 6") som Namn. Klicka sedan
på<OK>.
4. Nu kan du börja trycka etiketter!
CD-skivan innehåller en användarhandbok med introduktion till programmet LabelShop®START och en
steg-för-steg handledning som visar hur du enkelt skapar en etikett.
Willkommen bei Intermec!
Vielen Dank und herzlichen Glückwunsch, daßsie sich für den EasyCoder C4 entschieden haben. Mit diesem
Produkt haben Sie eine ausgezeichnete Wahl getroffen, die sich durch Leistungsfähigkeit, Wirtschaftlichkeit
und eine leichte Bedienbarkeit auszeichnet. Im Lieferumfang des Druckers sind alle notwendigen Komponenten
zum sofortigen Betrieb enthalten: Software, Kabel und eine Musterrolle Thermodirekt-Etiketten.
Nun können Sie Connect and Print™(verknüpfen und drucken).
Bitte legen Sie die beigefügte PrinterCompanion CD ein und befolgen Sie die Anweisungen. Die CD enthält
Produkt-Informationen, einen animierten Installationsführer, die technische Dokumentation, Informationen über
Intermec Original-Lieferanten und die folgende Software:
•LabelShop®START
•InterDriver™with ActiveX Controls
Für die flexible und professionelle Label-Gestaltung empfehlen wir LabelShop®von Intermec.
Mit dem InterDriver with ActiveX Controls erstellen Sie Ihre Labels mit Standard-anwendungen wie Microsoft
Excel oder Microsoft Word in gewohnter Weise.
Sowohl LabelShop als auch InterDriver enthalten die notwendigen Werkzeuge zur Konfiguration des Druckers
und zur Einstellung der erforderlichen Media-Parameter.
Installation des LabelShop®START 5.04
LabelShop®START ist ein vielseitiges und bedienerfreundliches Werkzeug für die Gestaltung und das Drucken
Ihrer eigenen Etiketten. Zusätzlich zu LabelShop®START enthält die beigefügte PrinterCompanion CD auch
Testversionen von LabelShop®ULTRA und LabelShop®PRO für die fortgeschrittene Anwendung.
Um LabelShop®START 5.04 zu installieren, beachten Sie bitte folgende Instruktionen:
1. Schließen Sie Ihren Drucker an und legen Sie Etiketten ein (und Farbbänder, wenn Sie Thermo-Transfer-
Etiketten bevorzugen; diese sind aber nicht enthalten. Berücksichtigen Sie bitte, dass in diesem Fall die
untenstehenden Einstellungen verschieden sein können). Für Instruktionen beachten Sie bitte die Vorder-
seite des Quick-Guide oder den Installation-Guide auf der PrinterCompanion CD.
2. Legen Sie die CD ein und wählen Sie „Software“und „LabelShop“. Klicken Sie <install> (LabelShop®
START ist voreingestellt) und folgen Sie den Setup-Anweisungen. Bitte prüfen Sie, ob „C4“als Drucker-
vorgabe eingestellt ist.
LabelShop®START wird jetzt auf Ihrem Drucker installiert. Nach der Installation können Sie das Pro-
gramm aus der Programmgruppe Intermec LabelShop®START aufrufen. Bitte beachten Sie, dass als
Maßeinheit mm verwendet wird. Wenn Sie diese Einstellung ändern wollen, können Sie unter dem Menü:
Tools > Options > Units, eine andere Maßeinheit auswählen.
3. Bevor Sie mit der Gestaltung Ihres Labels beginnen, empfehlen wir, im Programm Ihre Druckerparameter
einzustellen.. Beigefügt finden Sie eine Musterrolle der Intermec Thermodirect-Etiketten des folgenden
Typs: DT Premium (Europa) oder Duratherm II (America).
Einstellung der Etikettengröße: Klicken Sie <File>, <Page Setup>, <Stock> und wählen Sie „DT Premium“oder
„Duratherm II“als Typbezeichnung und „101,6 x 154,4mm“als Name. Bestätigen Sie anschließend mit
<OK>.
4. Nun können Sie mit der Erstellung von Etiketten beginnen!
Die CD enthält ein Benutzerhandbuch mit einer Einführung zum LabelShop®START und einen Führer,
der Sie Schritt-für-Schritt bei der Gestaltung Ihrer Etiketten begleitet.
INSTALLATION
Installation
Installazione
Instalación
Installation
Installation
Supports all Windows versions incl. Windows
3.1x/95/98, as well as NT 3.51. and 4.0.
Supporte toutes les versions sous Windows y com-
pris Windows 3.1x/95/98, ainsi que sous NT 3.51
et 4.0.
Supporta tutte le versioni di Windows tra cui Win-
dows 3.1x/95/98, NT 3.51. e 4.0.
Suporta todas las versiones de Windows,
3.1x/95/98, asícomo NT 3.51. y 4.0.
Stödjer alla Windows versioner inkl. Windows
3.1x/95/98, samt NT 3.51. och 4.0.
Unterstützt alle Windows-Versionen einschl. Win-
dows 3.1x/95/98 sowie NT 3.51. und 4.0.
Welcome to Intermec!
Congratulations on your purchase of the EasyCoder C4! This is an excellent choice of printer, combining per-
formance, economic value, and ease of use. Your printer is fully equipped with everything you need to get
started: software, cables, and a sample roll of direct thermal media!
Now you can Connect and Print™!
Please insert the enclosed PrinterCompanion CD and follow the instructions. The CD contains product informa-
tion, an animated installation guide, technical documentation, information about Intermec original supplies,
and the following software:
•LabelShop®START
•InterDriver™with ActiveX Controls
If you prefer a truly professional tool designed specifically for creating labels, we recommend LabelShop®by
Intermec.
Our InterDriver™with ActiveX Controls allows you to design labels in Microsoft application programs, such as
Word and Excel, using familiar commands in a familiar environment.
Both LabelShop and InterDriver feature tools for setting up and adjusting your printer and the required media
parameters.
Installing LabelShop®START 5.04
LabelShop®START is a versatile and easy-to-use tool for designing and printing your own labels. In addition to
LabelShop®START, the enclosed LabelShop CD also contains evaluation versions of LabelShop®ULTRA and
LabelShop®PRO for advanced label applications.
To install LabelShop®START 5.04, please follow these instructions:
1. Connect your printer and load it with labels [and ribbon, if you prefer thermal transfer labels (not includ-
ed). Please note that in this case the settings below may be different]. For instructions, see the front of this
QuickGuide, or the Installation Guide on the PrinterCompanion CD.
2. Insert the CD and choose “Software”and “LabelShop”. Click <install> (LabelShop®START is set as
default.) and follow the set-up instructions. Check “EasyCoder C4”when asked to choose printer.
LabelShop®START is now installed on your hard drive. To run the program, please click the “LabelShop
START”icon in the “Intermec LabelShop START”folder. Please note that the program uses mm as default
measurement unit. If you prefer inches, select <Tools>, <Options> and <Units> to adjust.
3. Before you start creating labels, it’s recommended that you adjust the program settings to the media of
your choice. Enclosed you find a sample roll of Intermec direct thermal labels of the following type: DT
Premium (Europe), or Duratherm II (America).
Label Size Setup: Click <File>, <Page Setup>, <Stock> and select:
“DT Premium”(Europe) or “Duratherm II”(America) as Type, and 101.6 x 152.4 mm (4" x 6") as Name
and click <OK>.
4. Now you can start producing labels!
The CD contains a user's manual with an introduction to LabelShop®START and a step-by-step guide
for how to create a label.
Bienvenue chez Intermec!
Félicitation pour l’acquisition de cette EasyCoder C4! C’est un excellent choix d’imprimante, associant perfor-
mance, prix et facilitéd’utilisation. Votre imprimante est livrée avec tout ce dont vous avez besoin pour débuter:
logiciel, câbles et un rouleau échantillon de papier thermique.
Maintenant, vous pouvez Connect and Print™(connecter et imprimer)!
Nous vous recommandons d’utiliser le cédérom joint et de suivre les instructions fournies. Ce cédérom contient
des informations sur le produit, un guide d’installation animé, la documentation technique, des informations sur
les fournitures Intermec et enfin sur les logiciels suivant:
•LabelShop Start ‚
•Driver Windows InterDriver et les objets ActiveX.
Si vous souhaitez un outil de création d’étiquettes plus performant, nous vous recommandons les logiciels
LabelShop‚Ultra ou Pro d’Intermec.
Nos pilotes d’impression Windows InterDriver etles objets ActiveX vous permettent de réaliser vos étiquettes
dans des applications sous Windows, comme Word ou Excel, en utilisant les commandes usuelles de cet envi-
ronnement.
Le logiciel LabelShop Start‚et les InterDriver autorisent la configuration et les réglages de l’imprimante.
Installation du logiciel LabelShop®START 5.04
Le logiciel LabelShop‚START est un outil souple et facile àutiliser pour créer et imprimer ces propres étiquettes.
Le cédérom fournie contient également une version d’évaluation du logiciel LabelShop ULTRA et du LabelShop
PRO pour des applications plus complexes.
Pour installer le logiciel LabelShop START, suivez les instructions suivantes:
1. Connecter votre imprimante et installer le papier (et le ruban encreur si vous souhaitez des étiquettes
transfert thermique, ruban non fourni) Veuillez noter, dans ce cas, que les paramètres de l’imprimante
sont différents. Pour les instructions de chargement, se référer au guide utilisateur ou au guide d’installa-
tion présent sur le cédérom.
2. Insérer le cédérom et sélectionner «Software»et «LabelShop», cliquer sur «Install»(le labelShop START
est sélectionnépar défaut) et suivre les instructions. Sélectionner «EasyCoder C4»dans les choix d’impri-
mante. Le LabelShop START s’installe sur le disque dur. Pour lancer le programme «LabelShop START»,
cliquer sur l’icône correspondant. Attention, l’unitéde mesure par défaut est le mm. Si vous souhaitez
utiliser les pouces, sélectionner le menu «Outil», «Options»et «Unités»pour le changement.
3. Avant de commencer àcréer une première étiquette, il est recommandéd’ajuster les paramètres liés àla
nature du consommable utilisé. Vous trouverez joint avec l’imprimante un rouleau échantillon de papier
thermique du type : DT Premium (pour l’Europe) et Duratherm II (pour les Etats Unis).
Pour la configuration de la taille de la page : sélectionner «Fichier», «Format», «Modèle»et choisir dans
type «DT premium», 101,6mm x 152,4mm (pour l’Europe) et «Duratherm II», 4" x 6" (pour les Etats Unis)
puis valider la sélection.
4. Maintenant, vous pouvez commencer àcréer vos étiquettes.
Le cédérom contient un manuel utilisateur pour le LabelShop®START et un guide d’aide point par point
pour la réalisation de vos propres étiquettes
Benvenuti in Intermec!
Congratulazioni per l’acquisto della Vostra nuova EasyCoder™C4. E’una scelta eccellente per una stampante
che unisce prestazioni, prezzo e semplicitàd’utilizzo. La Vostra stampante ècompleta di tutto quanto serve
per stampare: cavi, materiali di consumo e software.
Ora potete collegare e stampare (Connect and Print™)
Seguite attentamente le istruzioni incluse nel CD denominato Printer Companion. Vi potrete trovare informa-
zioni riguardanti il prodotto, una guida all’installazione, documentazione tecnica, informazione riguardanti le
forniture di materiali originali Intermec ed i seguenti pacchetti software:
•LabelShop®Start
•InterDriver™con ActiveX Controls
Preferendo utilizzare un programma studiato per la creazione d’etichette, vi suggeriamo una delle diverse
versioni di LabelShop™, in relazione alle Vostre esigenze.
Con InterDriver™ed ActiveX controls èpossibile stampare etichette da un qualsiasi applicativo Microsoft™
come Word o Excel, utilizzando quindi programmi giàconosciuti.
LabelShop®ed InterDriver™permettono di impostare tutti i parametri per un corretto funzionamento della
stampante ed ottenere quindi ottimi risultati di stampa.
Installazione di LabelShop®Start 5.04
LabelShop®Start èun programma per la creazione d’etichette molto versatile e di facile utilizzo. Oltre a
LabelShop®Start in questo CD sono contenute le copie dimostrative dei programmi LabelShop®ULTRA e
LabelShop®Professional per applicazioni molto avanzate.
Per installare LabelShop®Start 5.04, eseguire le seguenti istruzioni:
1. Collegate la stampante al computer con le etichette e di nastro, qualora l’usiate in modo trasferimento
termico, tenendo presente che questo tipo d’etichetta non ècompreso nella confezione. Inoltre, in questo
caso, ènecessario modificare la configurazione della stampante seguendo le istruzioni riportate nella
Quick Guide o nell’Installation Guide contenuta nel CD allegato.
2. Inserire il CD nel vostro lettore, scegliendo “Software”e quindi “Label Shop”.
Selezionate il pulsante <Install> (l’installazione del programma LabelShop™èproposta di default) e
seguite le istruzioni presenti nei vari menu.
Scegliere la stampante EasyCoder C4 quando richiesto.
LabelShop®Start saràquindi installato nel computer. Per utilizzare il programma fare “click”sull’icona
“Labelshop START”presente nella cartella o indice “Intermec LabelShop START”.
Il programma utilizza come unitàdi misura i millimetri.
3. Prima d’iniziare la creazione di un’etichetta suggeriamo di impostare nel programma le caratteristiche
del materiale di consumo che si sta utilizzando. Inclusi nella confezione puòtrovare delle etichette termi-
che dirette del seguente tipo: DT Premiun (per l’Europa) o Duratherm II (per l’America).
Configurazione del materiale usato: Fare “click”in successione su <File>, <Page Setup>, <Stock> e sele-
zionare come Type “DT Premium”(per l’Europa) o “Duratherm II”(per l’America) e come Name “101.6
x 152.4 mm“(4 inches x 6 inches), quindi fare “click”su <OK>.
4. Ora potete cominciare a stampare le vostre etichette!
Il CD contiene il manuale del programma che include una serie d’indicazioni per la creazione delle etichet-
te.
