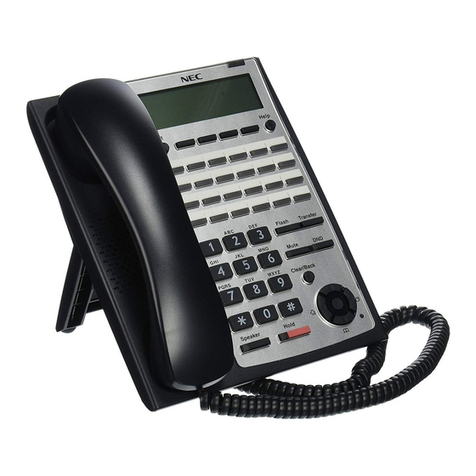
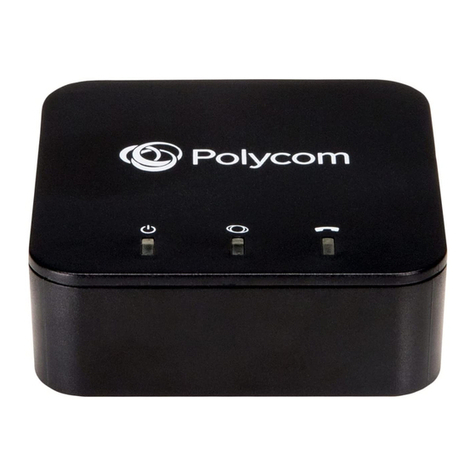
Intermedia Polycom VVX 201 User manual

Intermedia Hosted PBX | Polycom VVX 201
Quick Start Guide

2
Welcome to your Hosted PBX service.

3
What’s in the box?
Polycom VVX 201
A. Phone
B. Ethernet Cable
C. Handset Cable
D. Handset
E. Stand
F. Quick Start Guide
G. AC Adapter
D.
E.
F. G.
Quick
Start
Guide
A.
B
C

4
Pass-Through Ethernet connection to computer
not available on VVX 101 (optional; extra
Ethernet cable not included)
Optional Ethernet cable should
be rated CAT-5E at minimum.
AC power connection (optional accessory)
Use if Power over Ethernet (POE) is unavailable.
Guided Setup
Connect Cables
Please follow the diagram to install your phone. Once plugged in, the
phone will automatically download its conguration and start to work.
The voicemail box will be functional with a default greeting.

5
Optional Ethernet cable should
be rated CAT-5E at minimum.
RJ-9 port
Note: Your phone supports wired
headsets, including electronic
hookswitch (EHS) headsets.
For connection directions, refer
to your headset documentation.
Standard headsets typically use the
RJ-9 port while EHS headsets use the
RJ-9 and serial ports.
Serial port
Deskmount
Installation
Wallmount
Installation
Connect Optional
Headset

6
Voicemail Box Setup
RECORDING YOUR PERSONAL VOICEMAIL GREETING
1. Press the “Messages” button, and press the “Connect” soft key.
2. Enter the default PIN of 0000.
3. Select option 8 for User Options.
4. Select option 1 to record the Unavailable greeting.
5. Follow the voice prompts to record and check your greeting.
CHANGING THE PIN FROM THE PHONE
1. Press the “Messages” button.
2. Enter the default PIN of 0000.
3. Select option 8 for User Options.
4. Select option 3 to change the PIN.
5. Enter the new PIN when prompted.
Your new PIN:
• Must be between 6 and 10 digits and must not start with “0”.
• Must not contain sequential or repeating digits, such as “123”
or “111”.
LOGGING IN TO YOUR VOICEMAIL BOX VIA THE WEB
1. Go to www.intermedia.net/login/voice.
2. Enter your Phone Number and PIN/Password.
3. Click LOGIN.

7

8
Commonly Used Features
PLACING OUTGOING CALLS
When the phone is not in use:
1. Pick up the handset or press the “Speakerphone“ button.
2. Dial an extension or telephone number.
When you are already on a call:
1. Press the “Hold” button.
2. Press the “Call” soft key.
3. Dial an extension or telephone number.
4. Resume the original call by pressing the “Line” button to the left of
the screen that corresponds with that call.
ANSWERING AN INCOMING CALL
…On the Handset:
Pick up the handset to answer the call.
…On a Headset:
When a headset is connected, press the “Headset” button to
answer the call.
…On Speakerphone:
Press the “Speaker” button to answer the call.
REJECTING AN INCOMING CALL
Press the “Rjct” soft key to immediately send the caller to voicemail.

9
IGNORING AN INCOMING CALL
Press the “More” soft key and then press the “Ignr” soft key to send the
caller to voicemail.
Note: The caller will continue to hear ringing for the specied amount of
time, dened in the phone’s “No Answer Forwarding” settings.
ENDING A CALL
…On the Handset:
Press the “End” soft key.
…On a Headset:
Press the “Headset” button or the “End” soft key.
…On Speakerphone:
Press the “Speaker” button or the “End” soft key.
HOLD
Placing a Call On Hold:
•While on a call, press the “Hold” soft key.
Retrieving Calls On Hold:
•Press the “Res” soft key to resume the holding call on that line.
TRANSFERRING CALLS
Transfer Button:
The Transfer soft key possesses dual functionality:
1. Quickly press the “Tsfr” soft key to initiate the default transfer method.
2. Press and hold the “Tsfr” soft key to access a menu of transfer types.

10
Default Transfer Type:
Quickly pressing the “Tsfr” soft key will invoke a Consultative or Warm
transfer by default. The phone’s default transfer type may be changed
within the Preferences menu.
Note: Changing the phone’s default transfer type to “Blind” may cause the
Call Park feature to stop functioning correctly. Revert the default transfer
type to “Consultative” to resolve this.
Blind Transfers:
1. While on a call, press and hold the “Tsfr” soft key.
2. Select the option for “Blind” and press the “Sel” soft key.
3. Dial the desired phone number or extension number.
4. The call is automatically transferred.
Attended (Consultative or Warm) Transfers:
1. While on a call, press and hold the “Tsfr” soft key.
2. Select the option for “Consultative” and press the “Sel” soft key.
3. Dial the desired phone number or extension number.
4. Wait for the party to answer and announce that you are transferring
a call to them.
5. Hang up the phone to complete the transfer.
MUTE
1. To mute the microphone on an active call, press the red “Mute” button.
2. To un-mute the microphone, press the red “Mute” button again.

11
VOICEMAIL
1. Press the “Messages” button.
2. Enter your PIN when prompted.
VOLUME ADJUSTMENT
In-Call Volume:
•While on a call, press the “+” or “-“ buttons to raise or lower the
volume.
Ringer Volume:
•While the phone is not in use, press the “+” or “-“ buttons to adjust
the ringer volume on the phone.
CALL WAITING
While already on a call, and a new call rings in, you will hear a beep tone
emitted by your phone.
To Answer the Second Call:
1. Press the “Ans” soft key to answer the call. If the “Ans” soft key no
longer displays, press the ashing line button to access the call. The
original call is put on hold.
2. Once the second call has ended, resume the original call by pressing
the “Res” soft key or by pressing the ashing “Line” button.
To Reject the Second Call:
•Press the “Rjct” soft key to immediately send the caller to voicemail.

12
CALL WAITING (CONTINUED)
To Ignore the Second Call:
•Press the “Ignr” soft key to send the caller to voicemail.
Note: The caller will continue to hear ringing for the specied amount of
time, dened in the phone’s “No Answer Forwarding” settings.
SPEAKERPHONE
While the phone is not in use:
•Press the “Speakerphone” button to activate the speakerphone and
get dial tone for an outbound call.
While on a call on the handset / headset:
•Press “Speakerphone” button to continue the current call on the
speakerphone.
While a call on speakerphone is active:
•To hang up the current call, press the “Speakerphone” button or the
“End” soft key.

13
FORWARDING CALLS
1. Press the “More” soft key.
2. Press the “Fwd” soft key.
3. If “Always Forward” is currently disabled, “Always (Disabled)” will be
displayed.
4. Press 1 for “Always”.
5. Enter / verify the contact number where calls will be forwarded.
6. Press the “Enbl” soft key.
7. All calls will now be forwarded.
Disabling “Always Forward”:
1. Press the “More” soft key.
2. Press the “Fwd” soft key.
3. If “Always Forward” is currently enabled, “Always (Enabled)” will be
displayed.
4. Press 1 for “Always”.
5. Press the “Dsbl” soft key.
6. All calls will now ring the phone.
“Forward On Busy” and “Forward On No Answer” can be set in a similar
manner.
FREE
Download CallScape for increased desktop productivity:
www.intermedia.net/callscape


PolycomVVX201-QS-002
*POLYCOMVVX201-QS-002*
www.intermedia.net
Table of contents
