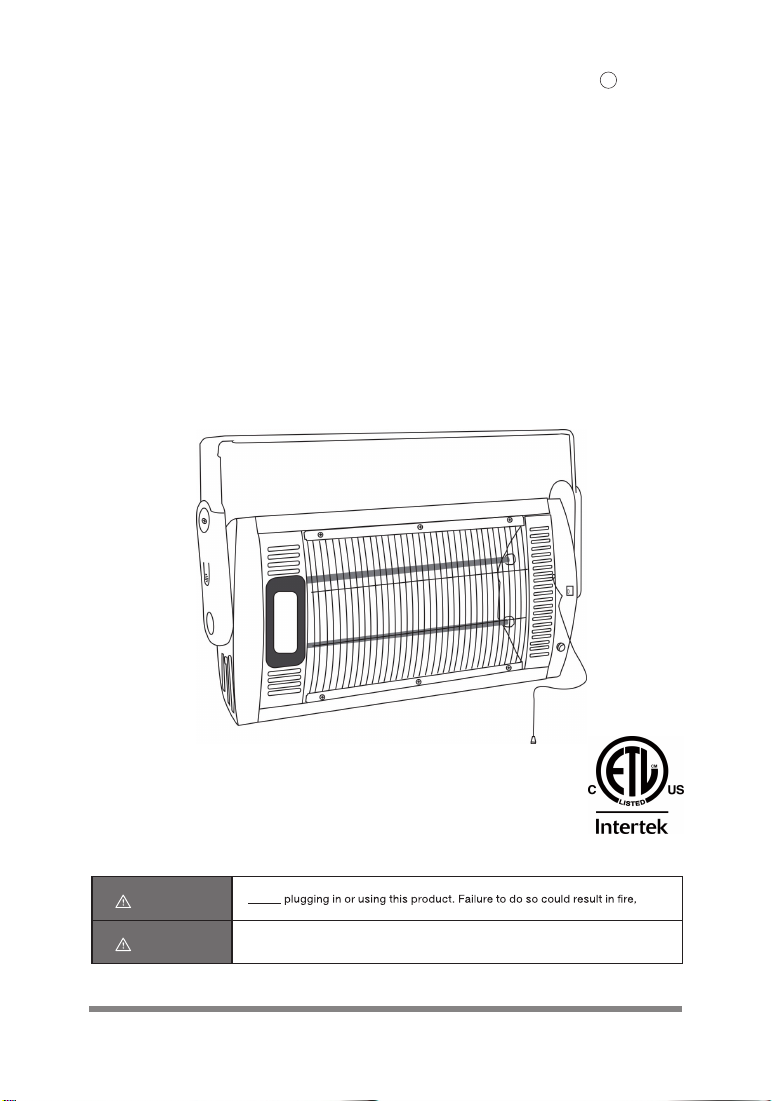
Intertek DONYER POWER CH-1500 User manual
i
WARNING
Read and understand this entire owner’s manual, including all safety information,
before
electric shock, or serious personal injury.
CAUTION
Keep this owner’s manual for future reference.
OWNER’S MANUAL
WALL MOUNTED
GARAGE HEATER
MODEL: CH-1500
DONYER POWERR
2
2
This owner’s manual will provide you with valuable information
necessary for the proper care and maintenance of your new
product. Thoroughly read the instructions and familiarize yourself
with all the operational aspects of your new product.
IMPORTANT INSTRUCTIONS
1. Read ALL instructions before using this unit.
2. CAUTION: Risk of Electric Shock. DO NOT open or try
to repair the heater yourself.
3. This heater may get hot when in use. To avoid burns,
DO NOT let bare skin touch hot surfaces. If provided, use
h
against
andle(s) when moving this heater. DO NOT place it
furniture, curtains, etc.
4. Keep combustible materials, such as furniture, pillows,
bedding, paper, clothes, and curtains at least 3 ft from the
front of the heater and keep them away from the sides,
top, and rear. DO NOT place towels or other objects on
the heater.
5. Extreme caution is necessary when any heater is used.
6. DO NOT operate any heater with a damaged cord or
after the heater malfunctions, has been dropped or dam-
aged in any manner. Return heater to authorized service
facility for examination, electrical or mechanical adjust-
ment, or repair.
7. This heater is not intended for use in bathrooms, laundry
areas, showers or swimming pools and similar locations.
NEVER locate heater where it may fall into a bathtub or
other water container. To protect against electrical haz-
ards, DO NOT immerse in water or other liquids.
8. DO NOT touch the control panel or plug with a wet hand.
9. DO NOT run cord under carpeting. DO NOT cover cord
with throw rugs, runners, or similar coverings. Arrange
cord away from traf c area and where it will not be tripped
over.
When using this electric unit, basic safety precautions should
always be followed to reduce the risk of re, electric shock, and
injury to persons, including the following:
3
Save These Instructions
shock or re, or damage the heater.
11. To prevent a possible re, DO NOT block the air intakes or
exhaust in any manner. DO NOT use on soft surfaces, like
a bed, where openings may become blocked.
12. A heater has hot and arcing or sparking parts inside. DO
NOT use in areas where gasoline, paint, explosive and/or
ammable liquids are used or stored. Keep unit away from
heated surfaces and open ames.
13. Always plug heaters directly into a wall outlet/receptacle.
Never use with an extension cord or relocatable power tap
(outlet/power strip).
14. To avoid re or shock hazard, plug the unit directly into a
120 V AC electrical outlet.
15. To disconnect heater, turn controls to OFF, then remove
plug from outlet. Pull rmly on the plug, DO NOT unplug
by pulling on the cord.
16. Always unplug the unit before moving or cleaning, or
whenever the heater is not in use.
17. Use only for intended household use as described in this
manual. Any other use not recommended by the manufac-
turer may cause re, electric shock, or injury to persons.
The use of attachments not recommended or sold by
unauthorized dealers may cause hazards.
18. Always use on a dry surface.
19. Wall mounted only. DO NOT use on ceilings.
20. WARNING: To reduce the risk of re or electric shock,
DO NOT use this unit with any solid-state speed control
device.
21. DO NOT attempt to repair or adjust any electrical or
mechanical functions on this unit. Doing so will void your
warranty. The inside of the unit contains no user service-
able parts.
10. DO NOT insert or allow foreign objects to enter any ven-
tilation or exhaust opening as this may cause an electric

4
4
SPECIFICATIONS
SAFETY FEATURES
VOLTAGE RATING 120 V (60Hz) 12.5 Amps
POWER CONSUMPTION 1
7.3 lbs
500W
UNIT SIZE
UNIT WEIGHT
It is normal for the power cord to feel warm to the touch; however, a
loose t between the outlet and the plug may cause overheating of the
plug. If this occurs, try inserting the plug into a different outlet. Contact
a quali ed electrician to inspect the original outlet for damage.
WARNING
Overheat Safety Feature
This heater is equipped with an overheat safety feature. When
the heater’s internal components reach a certain temperature
that could cause overheating and possible re, the heater will
automatically shut off.
A
C
B
D
WARNING: This heater has a voltage rating
of 120 volts. The cord has a plug as shown
in A. An adapter as shown in Cis available
for connecting three-blade grounding-type
plugs to two-slot receptacles. The ground-
ing plug extending from the adapter must
be connected to a permanent ground such
as a properly grounded outlet box. The
adapter should not be used if a three-slot
grounded receptacle is available.
DO NOT DEFEAT THE SAFETY PURPOSE
OF THE GROUNDED PLUG.
23.6 in W x 3.1 in D x 15.5 in H
5
IN THE BOX
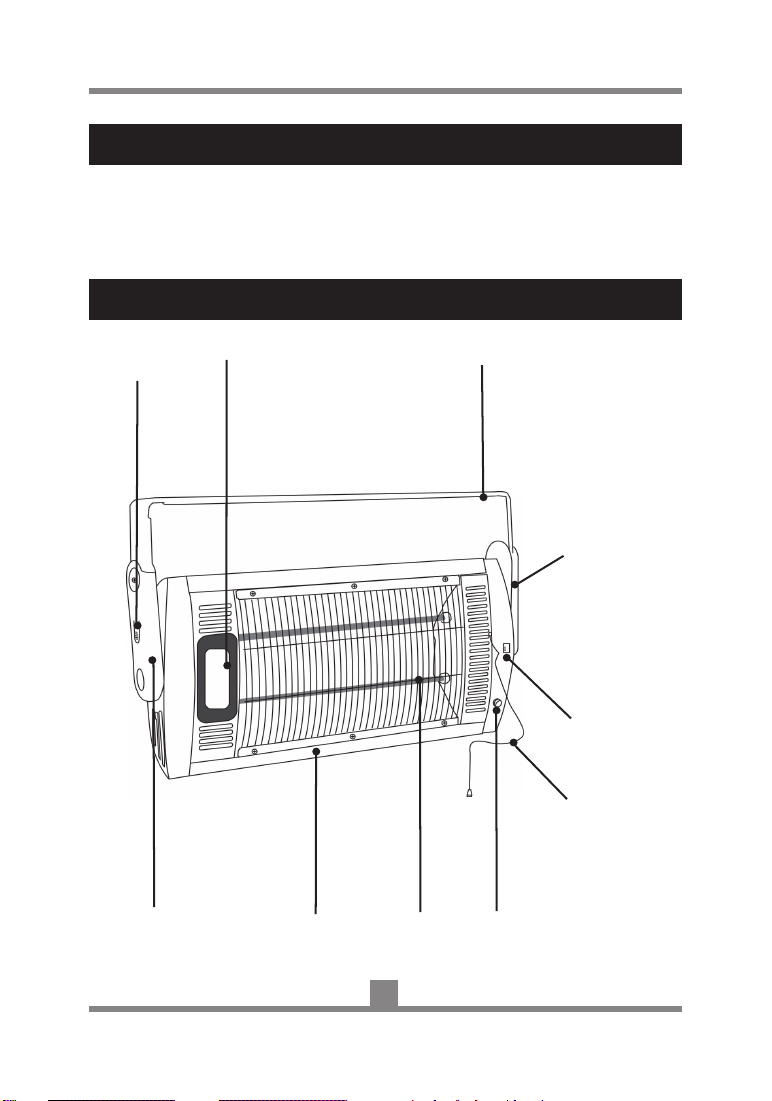
PRODUCT DIAGRAM
• Wall Mounted Garage Heater
1 x Mounting Bracket
2 x M4* 25 Screws
1 x Metal Washer
3 x ST*35 Screws
3 x Wall Anchors
•
•
•
• 2 x Nuts
•
•
•
Owner’s Manual
LED LightArm
Release Button Mounting Bracket
Rotating Arm
Hot Air
Radiation Zone
Metal Housing
Rotating Arm Power Light
Pull String
Power Setting
Indicator
1.
Locate a desired position on your wall in the area to be warmed.
MUST be near an outlet. Unit CANNOT be near electrical cables,
communication lines, pipes, combustible materials, etc. That
could be damaged or ignited by excessive heat.
Using the Mounting Bracket as a template, line up one of the key
slots at each end of the bracket. Mark the 3 slotted openings.
Pre-drill your wall based on the above markings and insert 3 Wall
Anchors.
Heater should be at least 3 feet away from combustible material. The
heater is wall mounted only, not suitable for ceiling mounting.
KEY SLOT MOUNTING INSTALLATION
2.
4. Install 3 x ST4*35 Screws and 1 x Washer provided, leaving about
1/4 inch between the head of the screws and the mounting
surface.
Slip the Mounting Bracket over the screw heads and slide the
bracket to engage the screws in the slots. Tighten the Screws
securely. See Fig.1
iWARNING
3.
Wall Anchors
Key Slots
Metal Washer
Wall Mounting Bracket
Fig.1
7
Always remove the Screw from each Rotating Arm before attaching
heater to Mounting Bracket. Do not forget to put the Screws back in
each Rotating Arm after attaching the heater. Otherwise, the heater
could slide out of Mounting Bracket and cause injury or damage.
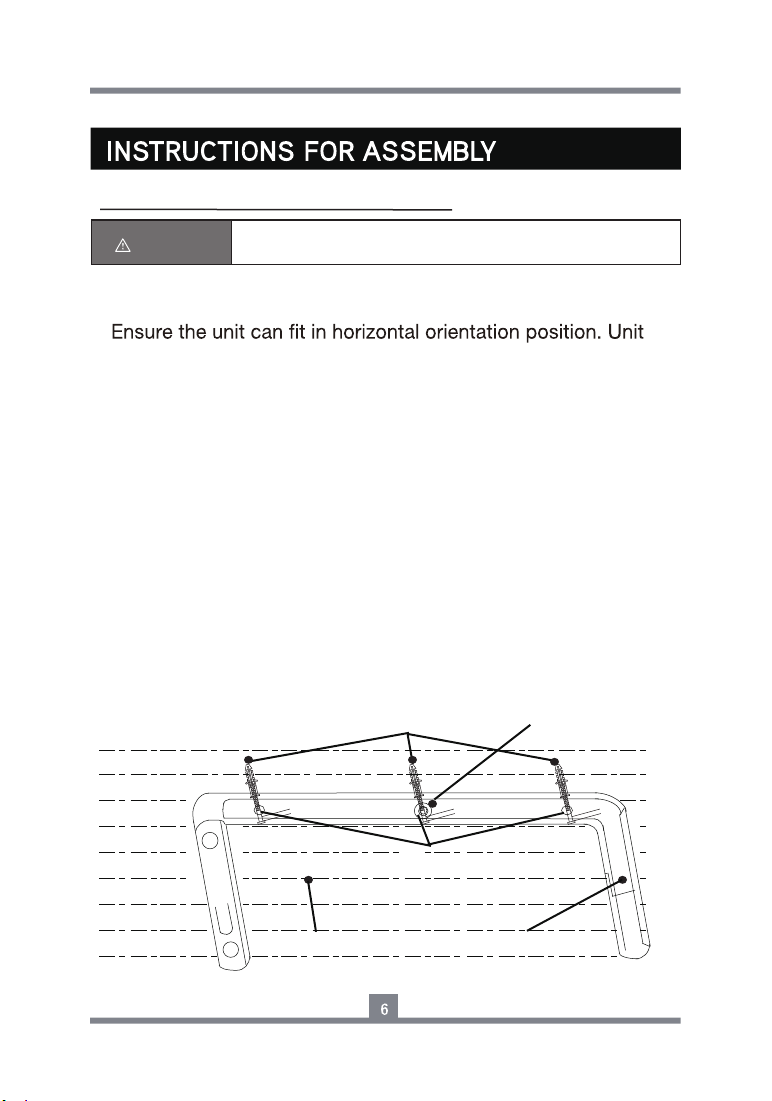
The heater is equipped with Rotating Arms at each end of the unit.
To conserve space in shipment, these arms are in line with the
heater body and must be repositioned before installation. With
your heater laying face down, rotate each arm slowly upward
i
until they are perpendicular to the body. For safety reasons,
once rotated, the arms cannot be returened to their original
position.
1.
2. Holding the heater by the Rotating Arms (one in each hand),slide
the Rotating Arms onto the Mounting Bracket until it locks into
place.
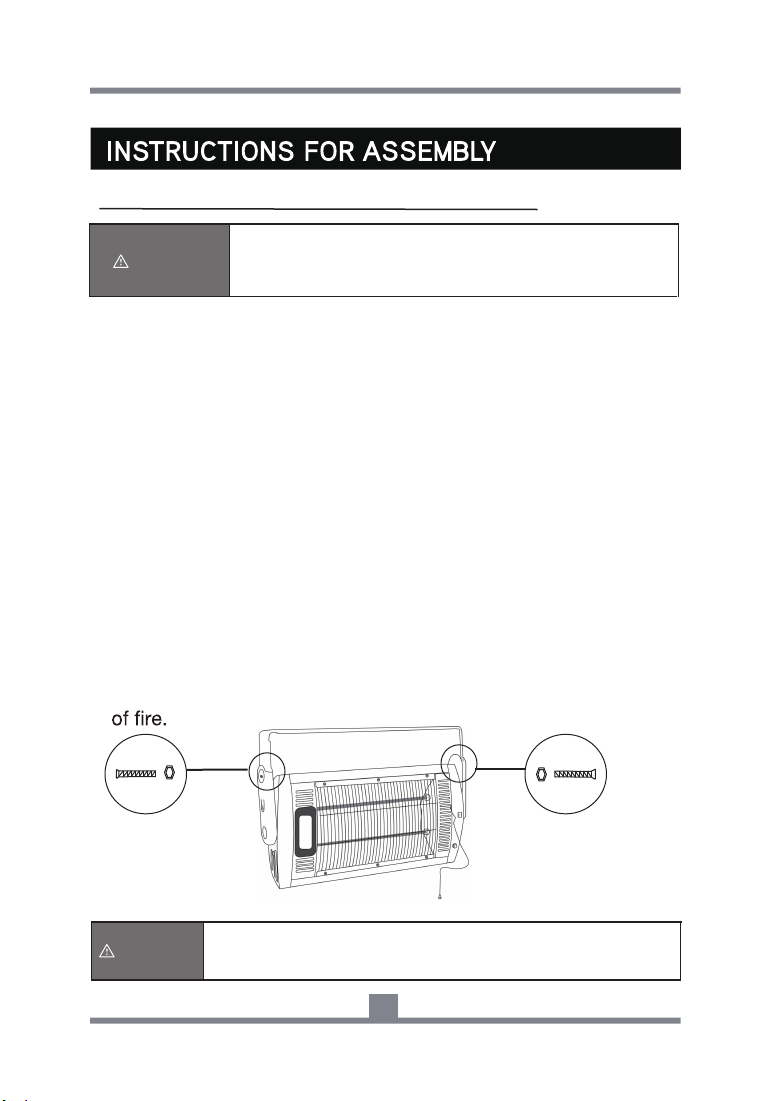
3. Place the 2 x M4*25 Screws into each Rotating Arm with the nut
after the heater is attached to the Mounting Bracket. See Fig. 2
4. Plug the unit directly into a 120V AC grounded outlet. Keep the
cord away from the front of the heater. Do not use an extension
cord, because the extension cord may overheat and cause a risk
ATTACHING HEATER TO MOUNTING BRACKET
CAUTION Do not adjust the heater while it is operating. The metal parts of the
housing and the lampshade get very hot and can cause injury. Always
turn your heater off and allow time for it to cool before adjusting.
iWARNING
Fig. 2

8
Unplug the unit and let it cool completely.
1.
Remove Screws from each Rotating Arm.
2.
Push-in the two arm release button on the side of each arm.
3.
Grasp both arms and simultaneously pull the unit down while
holding the buttons in.
4.
REMOVING HEATER FROM MOUNTING BRACKET
CAUTION Do not attempt to remove the heater one arm at a time.
Do not attempt to fold this heater. These could cause damage
to the heater housing.
INSTRUCTIONS FOR USE
1. With the power set at Off Position, plug the heater directly into a
120V AC grounded outlet.
2. Rotate the heater to the desired direction.
3. Set the heat function by pulling the pull string. See power indicator
Set the power to OFF Position and unplug the heater when
nished using.
4.
as below:
Position 0: OFF Position
Position I: 25 Watts, lighting only
Position II: 750 Watts, light and one heating element
Position III: 1500 Watts, light and both elements
may be present. This is normal and should not occur again unless
the heater is not used for an extended period of time.
NOTICE
0
I
II
III

9
MAINTENANCE
STORAGE
2. Unplug the unit and let it cool completely.
1. Set the power to OFF Position.
3. To keep the heater clean, the outer shell may be cleaned
with a soft, damp cloth. A mild detergent can be used if
necessary.
4. After cleaning, dry the unit with a soft cloth.
5. Wait until the unit is completely dry before use.
Store the heater in a cool, dry location when not in use. To prevent
dust and dirt build-up, use the original packaging to repack the
unit.
WARNING
•DO NOT let liquid enter the heater.
•DO NOT use alcohol, gasoline, abrasive powders,
furniture polish, or rough brushes to clean the heater.
This may cause damage or deterioration to the surface
of the heater.
•DO NOT immerse the heater in water.

8
10
TROUBLESHOOTING
If the heater will not operate, please check the following:
1. Check if the power cord is plugged into an electrical
outlet. If not, plug in unit to appropriate outlet.
2. Check if electricity to the outlet is working
3. Ensure power is turned to ON position.
4. See SAFETY FEATURES section for additional information.
The product is equipped with an overheat safety feature
protector which will switch off the heater in case of accidental
over heating (ex. Obstruction of air intake and outlet grills).
NOTICE


Table of contents
Other Intertek Heater manuals


