Intrise AIR ZERO AZ Series User manual

2
TABLE OF CONTENTS
1. INTRODUCTION ·······························································P 4 -5
1-1 The type of electricity and electricity plug
1-2 Caution label
1-3 Location of caution label
2. OPENING THE PACKED BOX OF THE MACHINE ························P 6
2-1 The machine
2-2 Spare Parts
2-3 Tool set
2-4 Others
3. SPECIFICATION OF THE MACHINE ······································· P 7
4. CAUTION FOR USE
4-1 Caution for safety ······································································· P 8
4-2 Method to make a good sealing ······················································ P 9
5. DEFINITION & BASIC FUNCTION OF THE MACHINE ······················P 10
5-1 ~ 5-2
6. USABLE RANGE OF PACKING ENVELOPE ··································P 10
6-1 ~ 6-2
7. NAME OF EACH PART ·························································P 11~14
7-1 AZ-type
7-2 AZV-type
8. INSTALLATION ··································································P 15
8-1 ~ 8-7
9. PREPARATION OF OPERATION ···············································P 15
9-1 ~ 9-3
10. FUNCTION & USE OF EACH BUTTON ON CONTROL BOX ············· P 16-17
10-1 VAC/TIME ~ 10-6 STOP
11. OPERATION PROCEDURE ····················································P 17-18
11-1 ~ 11-10
12. SPECIAL FUNCTION ···························································P 18
12-1 ~ 12-3
13. SETTING OF PROPER TIME/VACUUM DEGREE ·····························P 19
14. PROCESS OF EACH MODE ·
14-1 VACUUM MODE············································································ P 20
14-2 PROGRAMMABLE MODE ································································P 21
14-3 SEAL MODE ··············································································P 22

3
14-4 END OF OPERATION ··································································· P 22
15. MAINTENANCE
15-1 Cleaning of nozzle ······································································P 23
15-2 Cleaning of vacuum and gas line ····················································· P 23
15-3 Cleaning of vacuum filter ································································P 24
16. CONSUMABLES CHANGE ································································P 25-26
16-1 HEAT WIRE
16-2 TEFLON SHEET
16-3 TEFLON TAPE
16-4 UPPER TEFLON TAPE
16-5 SEALING RUBBER
16-6 COMPRESSION SPONGE
17. LAY-OUT DRAWING ······················································· P 27~28
17-1 AZ-type
17-2 AZV-type
18. INSIDE DRAWING ······························································ P 29-32
18-1 AZ-type
18-2 AZV-type
19. ELECTRICITY CIRCUIT DIAGRAM ··········································· P 33-38
19-1 AZ-type
19-2 AZV-type
20. TROUBLE SHOOTING ··························································P 39-41
20-1 ~ 20-10
21. SENSOR SETTING ·······························································P 42
21-1 ~ 21-4
※WARRANTY PAPER ··································································· P 43

4
1. INTRODUCTION
Thank you for your purchase. This machine is a nozzle type vacuum and gas flushing packaging
machine. The machine does vacuuming and gas flushing directly to the inside of the vacuum bag by
using a nozzle to protect packed goods from oxidation, moisture, external shock, static electricity, etc.
Before you start to use the machine, it is essential to read this user’s manual with full attention so
that no accident or injury from the malfunction of the machine should occur. For any accident or injury
caused by that the user does not conform to this user’s manual, INTRISE CO. LTD has no legal liability.
Therefore, please keep this user’s manual near you whenever you use the machine.
If you need more information beyond or have any question about the content of this user’s manual,
please feel free to contact to the following address ;
INTRISE CO., LTD.
27, Haean-ro 213beon-gil, Danwon-gu, Ansan-si, Gyeonggi-do, Korea
TEL. 82-31-407-9000,FAX. 82-31-407-9090
http : // www.intrise.co.kr , http : // www.airzero.co.kr
1-1 The type of electricity and electricity plug
1 ph, 220V 1 ph, 110V
The above types are just one example and there could be other types according to the model, nation,
etc
1-2 Caution label
The caution not to insert the hand between the sealing bars.

5
The caution against a danger of burn by heat around heat wire
1-3 Location of caution label

6
2. OPENING THE PACKED BOX OF THE MACHINE
After opening the packed box of the machine, please check up as follows ;
A. Is the model same as your order ?
B. Are there all things listed from 2-1 to 2-4 ?
C. Is there any damage to all things listed from 2-1 to 2-4 ?
2-1 The machine
2-2 Spare Parts
1) Heat Wire
2) Teflon Tape
3) Fuse
2-3 Tool set
1) Driver
2) Wrench set
3) Spanner (13mm)
2-4 Others
1) Work tray ( Except for AZV-type )
2) User’s manual

7

8
4. CAUTION FOR USE
4-1 Caution for safety
1) In case of emergency, please pull off the power plug. Basically, circuit protection fuses
are installed to cut off any irregular electricity shock. Nevertheless, if there is any
emergency including a breaking out of a fire on the Teflon tape, pull off the power plug.
2) The user must use just the electricity power stipulated at this manual.
3) In case of exchanging any part of the machine, the power plug must be pulled off. And, to
prevent any malfunction or accident, it is prohibited to use of part against the specification
stipulated by the manufacturer.
4) It is prohibited that the buyer by himself rebuilds the machine.
5) Electricity flows on the heat wire. Please do not insert any metal product between sealing
bars not to receive electricity shock.
6) If N.F.B automatically turns off, the user must find out the reason and take necessary
measures before the user turns on N.F.B. ( Please refer to 20-10. If N.F.B (NO FUSE
BREAKER ) turns off )
7) Please avoid installing the machine in the place where it is full of dust, or high temperature
and high humidity. Especially, the temperature of work place suitable for this machine is
0~50 ℃.
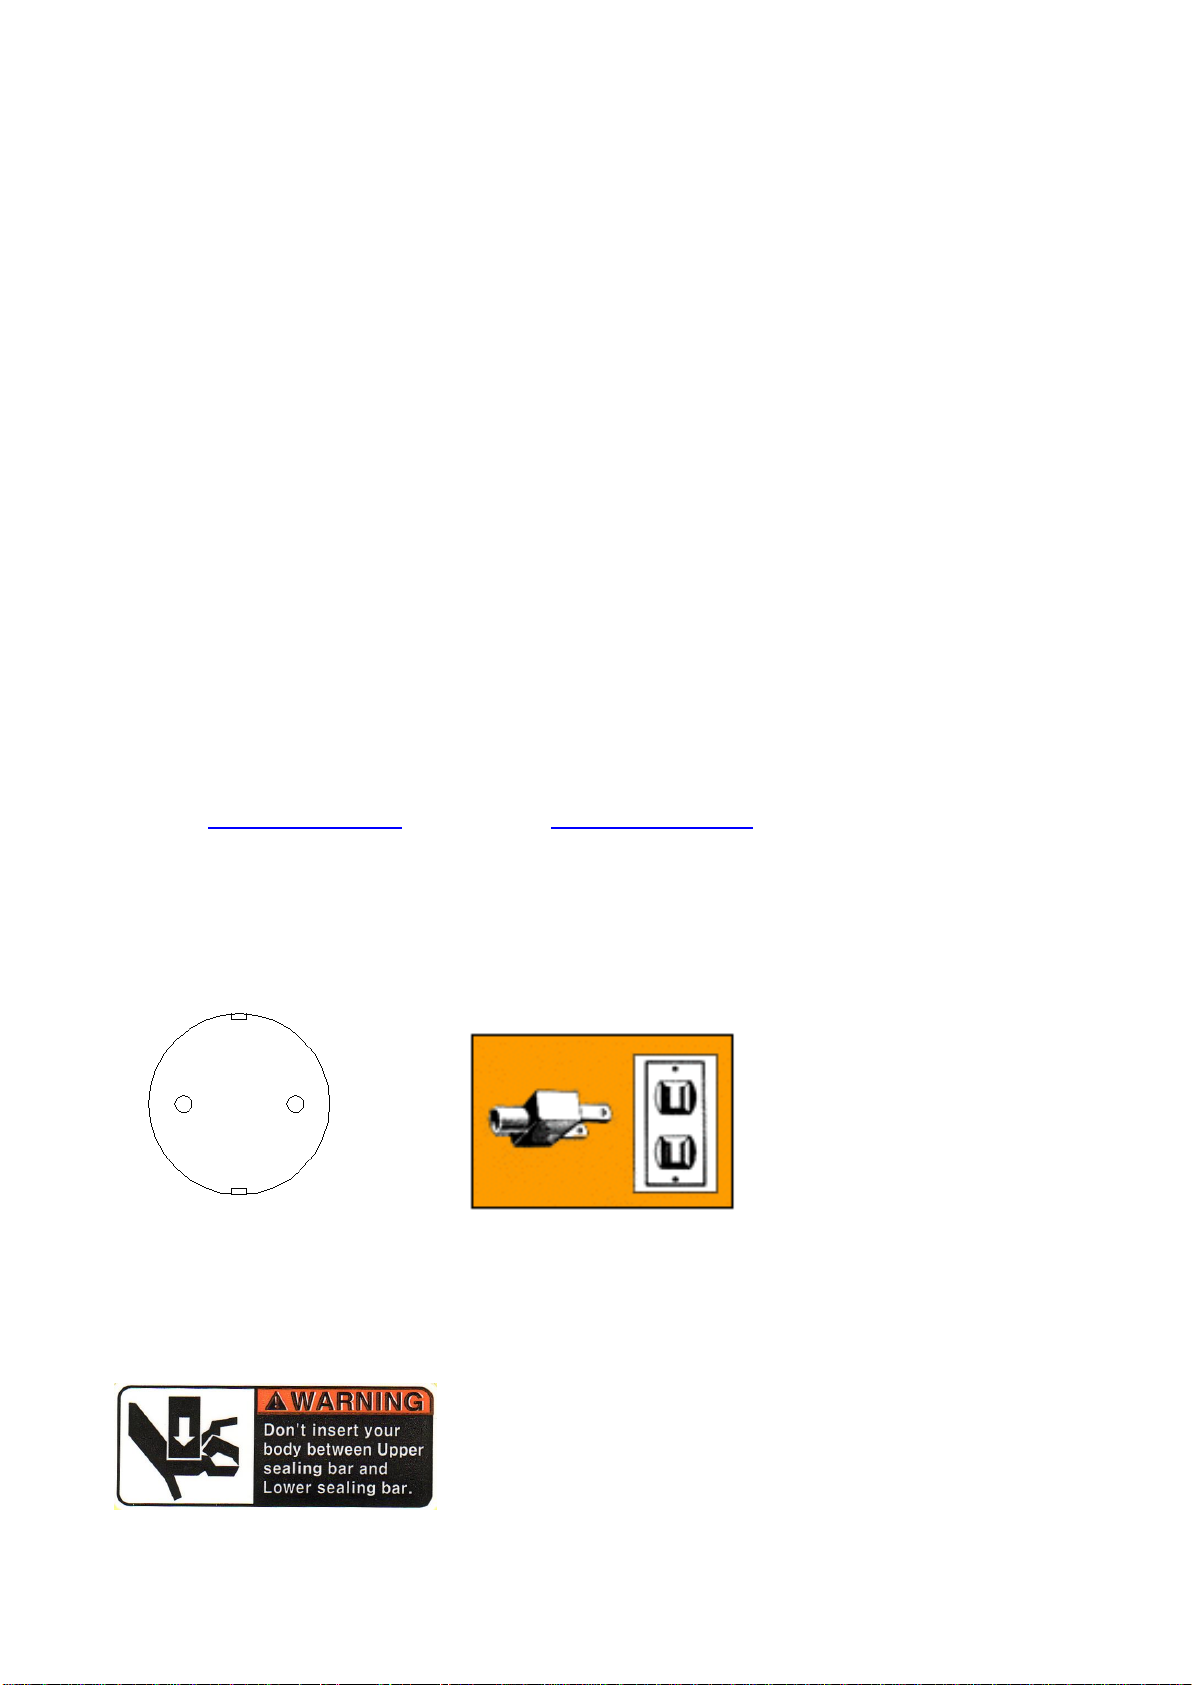
8) Please do not insert the hand between the sealing bars.
(1) A long time use of the machine accumulates heat around heat wire, and there is a
danger of burn.
(2) There is a chance that the power of the upper sealing bar’s going down hurts fingers.
( Regarding this, this machine has safety sensors so that sealing bar returns
immediately to the original state when finger, alien substance or packed object get
caught in. )
9) Before mass operation, please find out proper sealing time and cooling time through a full
sealing test.
10) Please check up whether there is any damage on Teflon sheet, Teflon tape, sealing rubber.
11) If the packing is wrongly operated, please push the STOP button. Then, the packing is
instantly suspended and the nozzle moves back and the upper sealing bar go up.
12) To reduce the risk of electric shock, disconnect power cord set before cleaning
13) You must lock up the gas cock of external gas line to cut off gas inflow to the machine in
the follow cases ;
(1) When the user does not use machine
(2) When the user does not use gas function of machine
(3) When there is any gas leakage on the gas line
14) You must NOT use any explosive gas for gas flushing packing.

9
4-2 Method to make a good sealing
1) Please set sealing time as short as possible in the range that sealing is possible. An
unnecessary long sealing time can do damage to Teflon sheet, Teflon tape, heat wire, etc,
make sealed surface of packing film bad, and cause low productivity and high electricity
consumption.
2) Please set cooling time fully ( generally, 3.5~ 4 times as long as sealing time. Please refer
to 13. SETTING PPOPER TIME/VACUUM DEGREE ). A full cooling time make sealed surface
of packing film good. ( Cooling is a state that heat of heat wire radiates while 2nd going
down of upper sealing bar continues. )
3) Please check up whether there is any damage on Teflon sheet, Teflon tape, sealing rubber.
If there is any damage, exchange it with new one. ( Refer to 16. CONSUMABLES CHANGE )
4) A long time use of this machine raises the temperature of sealing bar and can change
proper sealing condition. Please set sealing time more short and cooling time more long.
5) Please check up whether sealing bars are clean. Any alien substance on there can not only
make sealed surface of packing film bad but do damage to heat wire.
6) Before 1st going down of upper sealing bar, the nozzle must be into the bag and the bag
should be pulled at both sides with full tension by the user's hands. It makes much more
perfect vacuuming and clean sealing to prevent any vacuum leakage and wrinkle.
7) Please check up whether the sealing is done rightly. Put the packing film into the water,
and check up whether bubbles come from it. Especially, this is necessary in the case of
Gusseted packing film, because each part of the packing film has different thickness,

10
5. DEFINITION & BASIC FUNCTION OF THE MACHINE
5-1 DEFINITION OF THE MACHINE
Airzero vacuum sealer is a nozzle type vacuum and gas flushing packaging machine. The machine
does vacuuming and gas flushing directly to the inside of the vacuum bag by using a nozzle to protect
packed goods from oxidation, moisture, external shock, static electricity, etc.
5-2 BASIC FUNCTION OF THE MACHINE
If the user pushes the MODE button on control box, the work is changed as follows ;
1) S MODE : Sealing
2) V MODE : Vacuum →Sealing
3) PROGRAM MODE ( 1 ~ 8 )
(1) Gas flushing →Sealing
(2) Vacuum →Gas flushing →Sealing
(3) Gas flushing →Vacuum →Sealing
(4) Vacuum →Gas flushing →Vacuum →Sealing
(5) Gas flushing →Vacuum →Gas flushing →Sealing
(6) Vacuum →Gas flushing →Vacuum →Gas flushing →Sealing
6. USABLE RANGE OF PACKING ENVELOPE
6-1 This machine’s sealing process is as follows ; 1. Press packing film with sealing bars, 2. Flow
electricity on heat wire, 3. Hot-press and melt packing film by thermal conduction, 4. After
sealing time, radiate the heat on sealing bar.
This machine can seal most of common packing film. But, Sealing may be impossible if
packing film is too thick or the smelting point is too high.
6-2 The thickness of packing film that this machine can seal is as follows ;
* There is some variance of the limit of thickness of film to be sealed according the film’s material
Heat wire
Width of Heat wire
The thickness of packing film
( In terms of all layers of film are folded )
Single
5 mm
less than 0.25 mm
10 mm
less than 0.3 mm
Up and low double
5/10 mm
less than 0.4 mm

11
7. NAME OF EACH PART
7-1 AZ-type

12
7-2 AZV-type
1) NOZZLE : This is to suck air from and insert gas to the packing envelope.
2) UPPER SEALING BAR : This is to press the front of the packing envelope during the 1st
going-down of upper sealing bar and to seal the front during the 2nd going-down of upper
sealing bar.
3) CONTROL BOX : Refer to 9. FUNCTION & USE OF EACH BUTTON ON CONTROL BOX
4) N.F.B (No Fuse Breaker) : This is to cut off the supply of electricity against the an
electric leakage and overload

13
5) AIR REGULATOR : This is to control the pressure degree of compressed air supplied to
the machine.
6) UP/DOWN BUTTON : This is to control the height of the machine’s upper body.
7) PIN TO FIX HEAD : The user adjust and fix the angle of the head between 0 ~ 90 °by
using this.
8) CASTER : This is used to move the machine.
9) NOZZLE FORWARDING DEGREE CONTROL RING : With this, the degree nozzle
moves forward can be controlled. So, the case user can set the nozzle to move deeply
into packing film so that it can get close to the packed object. ( If the nozzle is too far
from the packed object, both sides of packing film stick to each other which prevents air
from being sucked fully out.)

14
8. INSTALLATION
8-1 Place the machine on a plane around where it is well ventilated to be not humid and protected
from any external shock.
8-2 By using the caster, set the horizontal of the machine and locate it to the proper place.
( Except for DESKTOP TYPE )
8-3 Connect electricity strictly according to the name board on the machine ( If you use any other
type of electricity different from the type at the name board , the machine will get
broken out.) and connect the ground wire. (This machine adopts the power plug which has
ground connection. But, if the power outlet of work place has no ground connection, the user
must by himself connect to the ground wire to the body of machine.)
8-4 Connect FOOT S/W to 2P connector of the machine. ( Regarding 2P connector, refer to 18.
INSIDE DRAWING )
8-5 The machine needs compressed air for operating. Therefore, it needs a compressor, of which
the capacity is above 250 NI/m for AZ-type and above 350 NI/m for AZV-type respectively.
The pressure of compressed air supplied to the machine should be set at 5~6.5 kgf/㎠. If the
compressed air of more than 7 kgf/㎠is supplied continuously, it can do damage to any part
of the machine. In the other hand, if the compressed air is less than 4.5 kgf/㎠, there is a
chance that the machine does not operate well.
(Pull up the air regulator and turns right (clockwise ). Then, air pressure goes up. If the air
regulator is turned left ( counterclockwise ), air pressure goes down. Set the air pressure
about at 6 kgf/㎠and push the air regulator down to be locked.
In the other hand, if the compressed air contains a lot of liquid, there is a chance that the
machine does not operate well. Get rid of the liquid from the compressed air. In addition to
that, if the air regulator contains liquid, get rid of the liquid by pushing the pin attached at the
bottom of the air regulator.
8-6 Connect a gas line. Keep up gas pressure at proper degree by using the pressure controller.
* The proper pressure is 1~5 kgf/㎠and should be set to match well with the gas time
according to the quantity of inserted gas relying to the size of bag. (But, you must set the
gas pressure not more than 5 kgf/㎠)
8-7 Connect Foot S/W to the machine.
9. PREPARATION OF OPERATION
9-1 After the fulfillment of above installation condition, turn on the power switch.
9-2 Check up whether the air pressure is at 5~6.5 kgf/㎠.
9-3 Start the work after setting exactly TIME and MODE. ( Refer to 10. FUNCTION & USE OF EACH
BUTTON ON CONTROL BOX )
10. FUNCTION & USE OF EACH BUTTON ON CONTROL BOX

15
10-1 VAC/TIME
This button is to select whether you control vacuum procedure by time or by vacuum degree.
( T and V appear at the lower-left side of LCD )
T : Time of vacuuming
The machine is operated by the preset time for vacuuming. When you select 25, the vacuum
works for 2.5 second and the nozzle moves backward after that.
V: Vacuum Degree (Kpa) of vacuuming
The machine is operated by the preset vacuum degree. If you select 45, the vacuum works
until the vacuum degree for the inside of vacuum bag approaches to 45 Kpa and the nozzle
moves backward after that.Therefore, it is not related to vacuuming time.
10-2 MODE
This button decides the type of work. PROGRAMMABLE 1 ~ 8, VACUUM, and SEALING are
changed one by one for each press of MODE button. ( 1~8, V, and S mean respectively
PROGRAMMABLE, VACUUM,and SEALING which appear at the lower-right side of LCD)

16
10-3 TIME
This button decides target time or target degree of each process the user wants to get. With
each pressing of TIME button, the turns are changed one by one from VACUUM1, VACUUM2,
GAS1, GAS2, and SEALING to COOLING. Then, for each of them, you can adjust time or
vacuum degree by UP and DOWN button. ( If V is set by using VAC / TIME button, the value
below VACUUM1and VACUUM2 means vacuum degree )
10-4 UP
Increase time / vacuum degree for each selected process.
10-5 DOWN
Decrease time / vacuum degree same as 6-4
10-6 STOP
This is the Stop button. If you press the button, the machine comes back to the original state.
So, the nozzle moves backward and the sealing bar moves up.
11. OPERATION PROCEDURE
11-1 Turn on N.F.B and check whether AIRZERO AZ-( ) appears on LCD screen. If other words
appear, check whether the compressed air is supplied properly. ( Refer to 8-5 )
11-2 Press VAC/TIME button and Select whether to do vacuum procedure by time or vacuum degree.
(T-time, V-vacuum degree)
11-3 Press MODE button to select the work which you want to do among 1 ~ 8, V or S.
11-4 Set time or vacuum degree, for each of VACUUM1, VACUUM2, GAS1, GAS2, SEALING and
COOLING, using by TIME and UP and DOWN button.
11-5 If you press STOP button, all processes are suspended and the machine comes back to
original state. So, the nozzle moves backward and the sealing bar moves up.
11-6 Each MODE under setting appears at the upper-middle row of LCD. The value of
TIME/VACUUM DEGREE appears at the lower-middle side of LCD. The V or T of
VAC/TIME appears at the lower-left side of LCD. The work by set MODE button appears at the
lower-right side of LCD. (M1~M8 = PROGRAMMABLE MODE, V = VACUUM MODE, , S =

17
SEALING MODE ). The value of counting is at the up-right side of LCD, which increases by
one for each cycle of work.
11-7 When the above setting is under way, the operation of machine is impossible to start. That is,
the operation of machine can start only when ‘AIRZERO AZ-( ) ‘appears on LCD. (After
above setting, press TIME button once more. Then, you can find ‘AIRZERO AZ-( )’appears
on LCD screen.)
11-8 After completion of setting, start packing operation by stepping on FOOT S/W. ( Refer to 14.
PROCESS OF EACH MODE )
11-9 In the case of VACUUM and 1 ~ 8 MODE, if the worker steps on FOOT S/W, upper sealing
bar's 1st going down is carried out.
Before 1st going down of upper sealing bar, the nozzle must be into the bag and the bag should
be pulled at both sides with full tension by the user's hands. It makes much more perfect
vacuuming and clean sealing to prevent any vacuum leakage and wrinkle.
Then, arrange the packed object as you like and step on the FOOT S/W once more. Then, the
operation proceeds automatically according to the selected MODE. ( Refer to 14. PROCESS OF
EACH MODE )
At this time, to do vacuum smoothly without a hitch, please close (however, do not touch) the
nozzle to the packed object. If the nozzle is too far from the packed object, both sides of
packing film stick to each other and vacuum cannot be done.
After first cycle of work, the nozzle is moved forward automatically. Then, proceed work as
same as the above described method. ( If you want the nozzle not to move forward
automatically, press STOP button and UP button at the same time. If you want the nozzle to
move forward automatically, press once more STOP button and UP button at the same time. )
11-10 In the case of SEALING MODE, if you insert a packing envelope between sealing bars and
step on FOOT S/W, sealing is proceeded.
12. SPECIAL FUNCTION
12-1 At VACUUM MODE, if you want to stop vacuum procedure suddenly, please step on FOOT S/W.
Then, vacuuming is suspended and the nozzle moves back and sealing starts.

18
12-2 If you want the nozzle not to move forward automatically, press STOP button and UP button at
the same time. If you want the nozzle to move forward automatically, press once more STOP
button and UP button at the same time.
12-3 To make counter value as 0 (zero), turn off and on the electricity power.
13. SETTING OF PROPER TIME/VACUUM DEGREE
* Time Unit : 1 = 0.1 Sec.
* Before mass operation, please find out proper sealing time and cooling time
through a full sealing test.
* A continuous use of the machine raises the temperature of sealing bar and can
change proper sealing condition. Please set sealing time more short and cooling
time more long.
MODE
TIME / VACUUM DEGREE SETTING
VACUUM1
VACUUM2
Set the proper time or vacuum degree according to the size of vacuum bag,
the type of packed object, and packing purpose.
GAS1
GAS2
Set the proper time according to the size of vacuum bag, the type of packed
object, packing purpose and pressure degree of GAS.
SEALING
Set the proper time according to the type and thickness of vacuum bag
( Generally, set 6 ~ 11 (=0.6 ~ 1.1sec) ). Especially, in the case of dual heat
wire option or 5 mm heat wire option, sealing time should be set more
shortly.
* Warning : If the sealing time is set at 0, it means in effect infinite time so that
sealing continue infinitely. But, in program, if someone even just once set
sealing time at more than 0, it can’t be set at 0 since then. So, if the sealing
time is set at 0 when you first get the machine, you must change the value at
more than O. Of course, before delivery to buyer, my production line always
does two times of final inspection test. And, during that time, sealing time is set
at more than 0.
COOLING
Set 3.5~4.0 times as long as sealing time. The longer cooling time is, the
better the sealed surface is. ( There is a chance that a change is needed
according to the type of film )

19
14. PROCESS OF EACH MODE
14-1 VACUUM MODE
Step on FOOT S/W
Nozzle moves forward. Then, insert an envelope
Step on FOOT S/W
1st going down ( Sensor 2 turns on )
Step on FOOT S/W
Vacuum 1 works as long as preset vacuum time or vacuum
degree
Nozzle moves back ( Sensor 4 turns on )
2nd going down. ( Sensor 3 turns on ) Then, Sealing works as
long as preset sealing time
Cooling works as long as preset cooling time
Sealing bar goes up ( Sensor 1 turns on ) and 1st work
completes
* If you want the nozzle not to move forward automatically, press STOP button and UP button at the
same time. If you want the nozzle to move forward automatically, press once more STOP button and
UP button at the same time.

20
14-2 PROGRMMABLE MODE ( 1 ~ 8 )
Step on FOOT S/W
Nozzle moves forward. Then, insert an envelope
Step on FOOT S/W
1st going down ( Sensor 2 turns on )
Step on FOOT S/W
Vacuum 1 works as long as preset vacuum time or vacuum
degree
Gas 1 works as long as preset gas 1 time
Nozzle moves back ( Sensor 4 turns on )
2nd going down. ( Sensor 3 turns on ) Then, Sealing
works as long as preset sealing time
Cooling works as long as preset cooling time
Sealing bar goes up ( Sensor 1 turns on ) and 1st work
completes.
1) If all of Vacuum 1, Vacuum 2, Gas 1, and Gas2 are set at “0”, the machine does not operate.
2) If you want to do just no other work but gas flushing, please set all of Vacuum 1, Vacuum 2,
and Gas 2 at “0”and set Gas1 at some value you want. ( If you set all of Vacuum 1, Vacuum 2,
and Gas 1 at “0”and set Gas1 at some value you want. The machine does not operate as above
diagram )
* If you want the nozzle not to move forward automatically, press STOP button and UP button at the
same time. If you want the nozzle to move forward automatically, press once more STOP button and
UP button at the same time.
This manual suits for next models
8
Table of contents