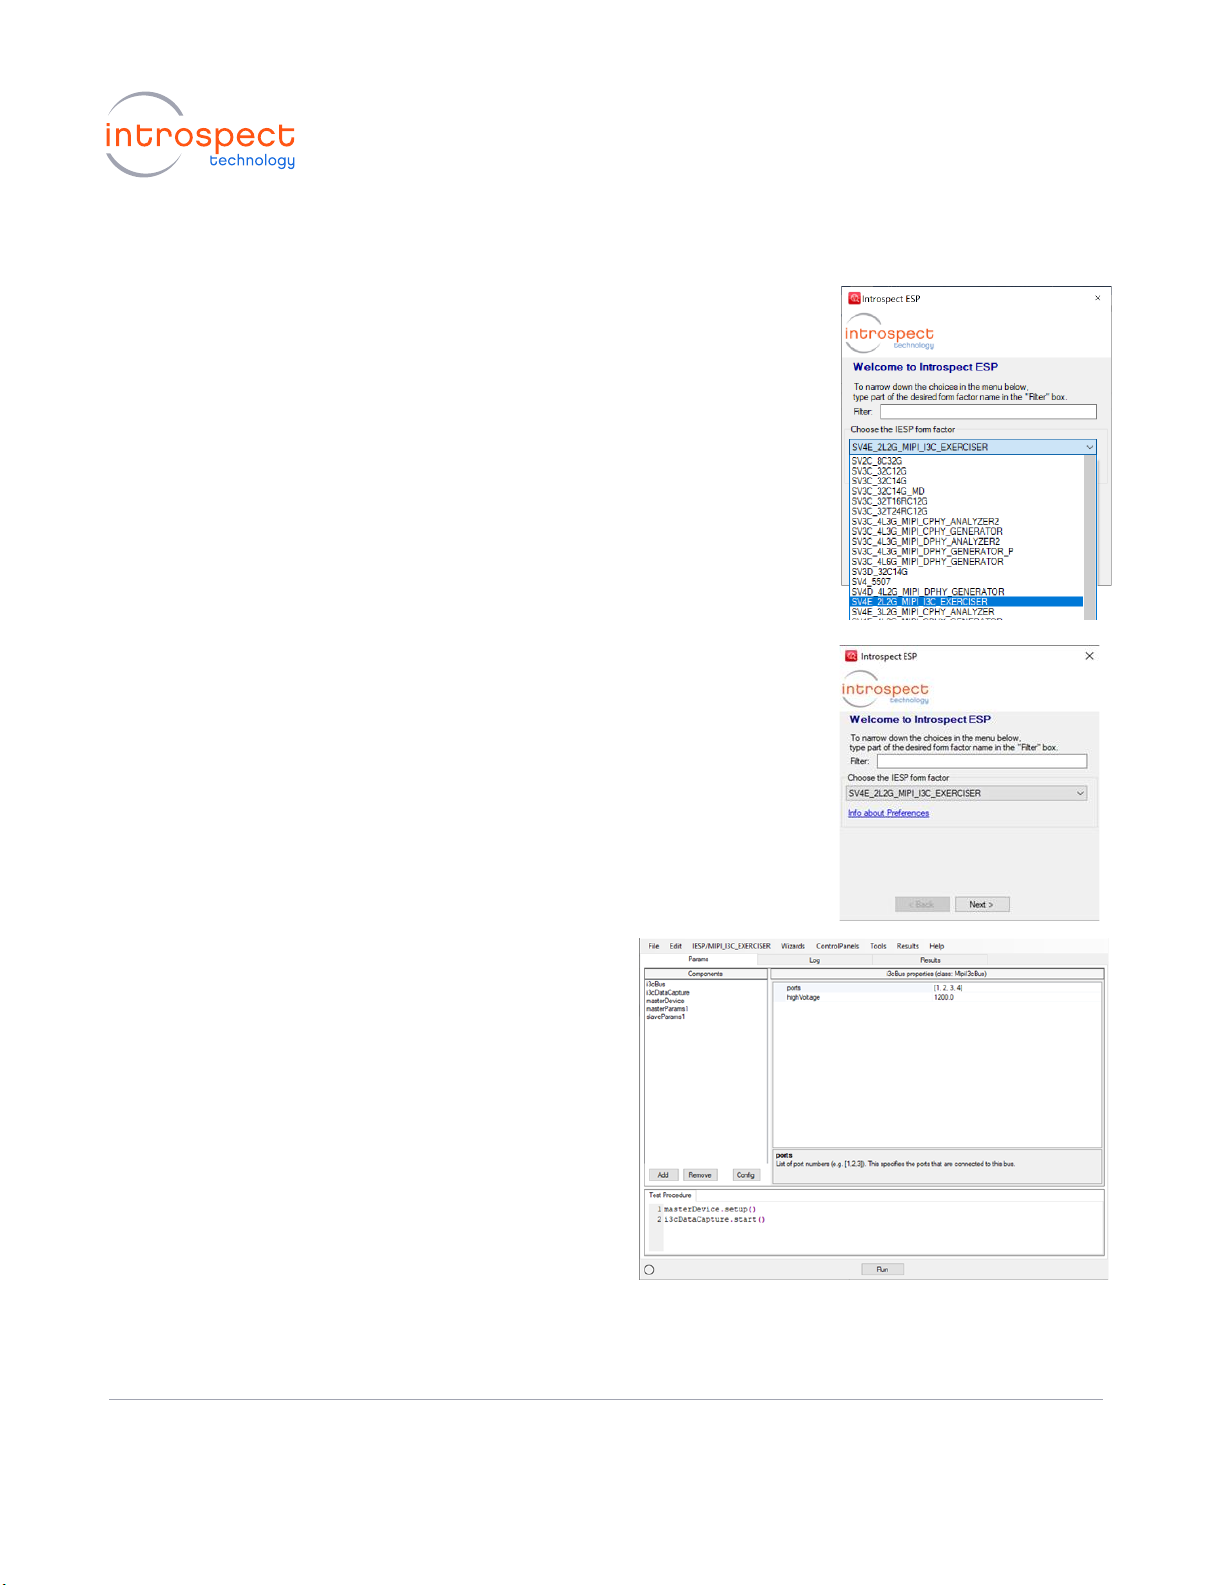
Introspect ESP Software Installation
SYSTEM REQUI REME NTS
The Introspect ESP Software provides an easy-to-use environment for device characterization and test
plan development. To run the software, the following components are required:
•A PC installed with Windows XP, Vista, or Windows 7, 8 or 10
•The Introspect ESP Software install executable
•USB device drivers (refer to the driver installation instructions)
INTROSPE CT E S P SOFTWA RE I NSTA LLATION
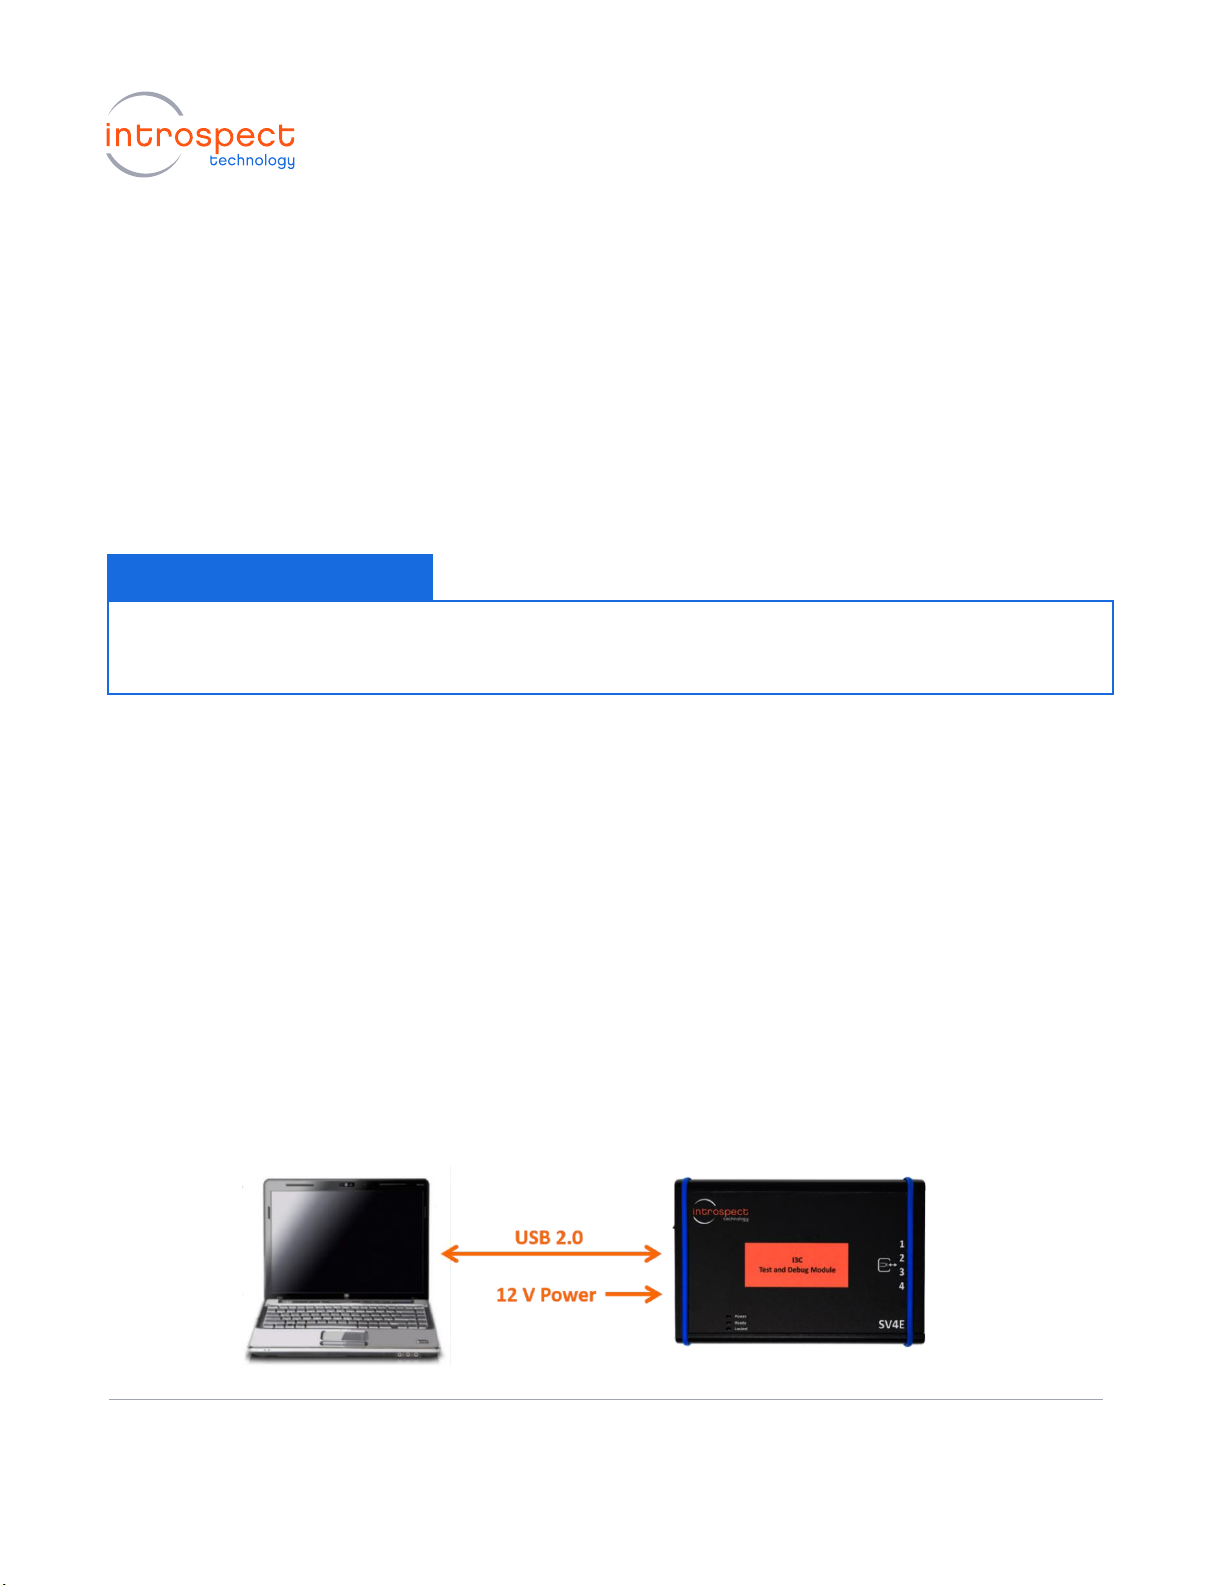
1. PREPARE FOR INSTALLATION
Quit any Introspect ESP Software sessions before starting the installation.
2. INSTALL SOFTWARE
a) From the directory containing the installation files, double-click on the icon for
"IntrospectESP_Installer.exe" and follow the instructions on the screen.
b) The installer will install a local Python environment, and it has no dependence on any
Python installation that already exists on your PC.
c) When prompted, specify the location where you want to install the Introspect ESP
Software application. (Note that this must be a new location, not a location of a
previous installation). The default location is the "Introspect" folder under the
Windows "Program Files" folder. The application will be installed into a sub-folder
with a name that includes the version number. The application will also create a folder
called “Introspect” under the “My Documents” folder of your account. This folder is
where Test Procedures are typically stored.
3. INSTALL LICENSE FILE
a) Towards the end of the installation, you will be asked to provide either an activation key or a
license file for the software.