manuals.online logo
Brands
  1. Home
  2. •
  3. Brands
  4. •
  5. Inval
  6. •
  7. Indoor Furnishing
  8. •
  9. Inval GCM 070 User manual

Inval GCM 070 User manual

OP:
DATE/FECHA:
FINISH/ACABADO:
Al llamar o escribirnos, por favor darnos el número de
OP, aqui resaltado, con el fin de ofrecerle la respuesta
mas eficiente.
When calling or wring us, please provide the OP number,
here highlighted, so we can offer the most efficient
response.
ATENCIÓN
ATTENTION
Pag. 1-18
REF.:
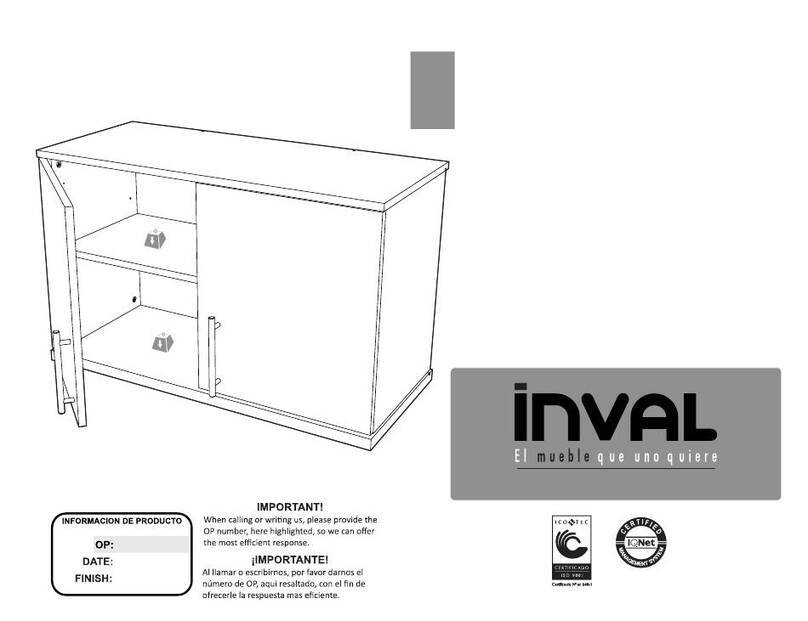
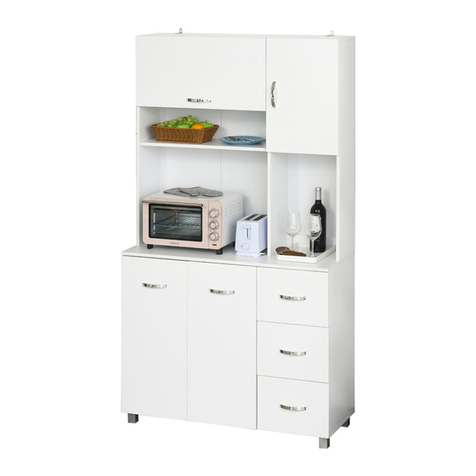
Kitchen Cabinet
Gabinete de Cocina
Consejos de Armado
Assembly Tips
GCM 070
42 Lb
19 Kg
B
H
V
F
Z
K
I
Y
J
G
A
U
D
M
R
R
R
N
L
P
Q
O
T
S
Q
E
11 Lb
5 Kg
11 Lb
5 Kg
U
V
V
H
G
W
D
A
Q
AG
M
D
T
L
P
S
O
AC
AD AD
18 Lb
8 Kg
42 Lb
19 Kg
B
H
V
F
Z
K
I
Y
J
G
A
U
D
M
R
R
R
N
L
P
Q
O
T
S
Q
E
11 Lb
5 Kg
33 Lb
15 Kg
11 Lb
5 Kg
11 Lb
5 Kg
11 Lb
5 Kg
U
V
V
H
G
S
T
O
W
Q
P
AG
L
M
D
A
V
Z
C
B
F
V
U
A
W
M
D
T
Q
AG
P
S
O
L
AG
N
R
G
H
AB
I
J
11 Lb
5 Kg
11 Lb
5 Kg
18 Lb
8 Kg
33 Lb
15 Kg
11 Lb
5 Kg
42 Lb
19 Kg
11 Lb
5 Kg
42 Lb
19 Kg
4 Lb
3 Kg
50934
25/11/2022
WHITE/MAPLE
BLANCO/TRIBECA
Pag. 2-18
MANUAL DEL BUEN USO DEL PRODUCTO
Damos gracias por haber seleccionado nuestros productos y
esperamos vernos favorecidos con sus futuras compras. Antes de
empezar a armar este mueble, lea este instructivo, revise
cuidadosamente las piezas y herrajes y realice el inventario para
identificar que todo esté completo y en buen estado.
In the event that you are missing any parts or hardware, do not
return the product to the store, please call INVAL's customer or
consumer service line or write to us via the website or by email. Go
to the INVAL Customer Service line when you think it is necessary to
clarify doubts about the furniture.
Nous sommes reconnaissants d'avoir sélectionné nos produits et
espérons être favorisés lors de vos futurs achats. Avant de
commencer à assembler ce meuble, lisez ce manuel d'instructions,
examinez attentivement les pièces et la quincaillerie et faites
l'inventaire pour vous assurer que tout est complet et en bon état.
Lea y siga detenidamente el orden consecutivo de las instrucciones de armado.
Read and carefully follow the sequential order of the assembly instructions.
Lisez et suivez attentivement l'ordre séquentiel des instructions d'assemblage.
Arme el mueble en una superficie limpia, si desea puede usar el empaque
como protector para evitar que el mueble se raye con el piso.
Assemble the furniture on a clean surface, if you wish you can use the packaging as a
protector to prevent the furniture from being scratched by the floor.
Assemblez le meuble sur une surface propre, si vous le souhaitez, vous
pouvez utiliser l'emballage comme protecteur pour éviter que le meuble ne soit
rayé par le sol.
Limpie el mueble periódicamente con su producto limpiador favorito, evite
usar sustancias químicas, abrasivas o agua en exceso.En caso de que el
mueble se moje, séquelo inmediatamente con un trapo seco absorbente.
Clean the furniture periodically with your favorite cleaning product, avoid using
chemicals, abrasives or excess water.In case the furniture gets wet, wipe it dry
immediately with a dry absorbent cloth.
Nettoyez régulièrement les meubles avec votre produit de nettoyage préféré,
évitez d'utiliser des produits chimiques, des abrasifs ou un excès d'eau. Si le
meuble est mouillé, essuyez-le immédiatement avec un chiffon absorbant sec.
Proteja el mueble del agua y de la humedad.
Protect the furniture from water and humidity.
Protégez les meubles de l'eau et de l'humidité.
Se requiere de dos personas para armar y mover este mueble.
It takes two people to assemble and move this furniture.
Il faut deux personnes pour assembler et déplacer ce meuble.
En caso de que le haga falta alguna pieza o
herraje, no devuelva el producto a la tienda, por
favor llame a la línea de servicio al cliente o al
consumidor de INVAL o escribanos vía página
web o por correo electrónico. Acuda a la línea de
Servicio al Cliente INVAL cuando lo crea
necesario para aclarar dudas sobre el mueble.
No pinte el mueble.
Do not paint the furniture.
Ne peignez pas les meubles.
Evite que los menores se suban al mueble.
Prevent minors from climbing onto the furniture.
Empêchez les mineurs de grimper sur les meubles.
N'utilisez pas les meubles à l'extérieur. Évitez de placer des objets chauds sur
les surfaces des meubles.
No use el mueble al aire libre. Evite colocar objetos calientes sobre las
superficies del mueble.
Do not use the furniture outdoors. Avoid placing hot objects on furniture surfaces.
In the event that you are missing any parts or
hardware, do not return the product to the store,
please call INVAL's customer or consumer
service line or write to us via the website or by
email. Go to the INVAL Customer Service line
when you think it is necessary to clarify doubts
about the furniture.
Dans le cas où il vous manque des pièces ou du
matériel, ne renvoyez pas le produit au magasin,
veuillez appeler la ligne de service client ou
consommateur d'INVAL ou nous écrire via le site Web
ou par courrier électronique.
Rendez-vous sur la ligne Service Client INVAL lorsque
vous pensez qu'il est nécessaire de clarifier les doutes
sur le mobilier.
PRODUCT GOOD USE MANUAL MANUEL D'UTILISATION DU PRODUIT
Durante el armado no golpee ni martille el producto, hágalo solo donde se indica.
During assembly do not strike or hammer the product, do so only where indicated.
Lors de l'assemblage, ne pas frapper ni marteler le produit, ne le faites que là
où cela est indiqué.
Evite la exposición del mueble a ambientes húmedos o de baja ventilación,
alta temperatura, suciedad o ha insectos como la termita, hormiga blanca o
cualquier otro tipo de insecto que afecte el producto.
Avoid exposing the furniture to humid or low ventilation environments, high
temperatures, dirt or insects such as termites, white ant or any other type of
insect that affects the product.
Évitez d'exposer les meubles à des environnements humides ou à faible
ventilation, à des températures élevées, à de la saleté ou à des insectes tels
que termites, fourmis blanches ou tout autre type d'insecte qui affecte le
produit.
Ensamble y ubique el mueble sobre una superficie plana y nivelada; para
asegurar su correcto funcionamiento y evitar su deterioro.
Assemble and place the furniture on a flat and level surface; to ensure its
proper functioning and prevent deterioration.
Assemblez et placez les meubles sur une surface plane et de niveau; pour
garantir son bon fonctionnement et éviter sa détérioration.
Pag. 3-18
(EN) IMPORTANT Illustrations depicted in this manual are representative of the assembly process. For this reason, physical fittings can change and not be identical of the ones shown in
the illustrations. INVAL S.A. keps the rights of making changes with no previous advice. (ES) IMPORTANTE Las Imágenes e ilustraciones de los herrajes en este manual son representativos para
guiar al usuario durante el proceso de armado, por lo anterior el herraje fisico no debe ser necesariamente igual a la ilustración. INVAL S.A. se reserva el derecho de hacer cambios sin previo aviso. (FR)
IMPORTANT Les images et illustrations du matériel dans ce manuel sont représentatives pour guider l'utilisateur pendant le processus d'assemblage, par conséquent le matériel physique ne doit pas
nécessairement être le même que l'illustration. INVAL S.A. se réserve le droit d'apporter des modifications sans préavis.
Le signe indique la perforation du
bord brut
Arrow must face the hole in the
unfinished edge
La señal apunta hacia la perforación
del canto sin acabado
Perforación amplia
Plus grand trou
Largest hole
NE PAS INSÉRER de boulons
dans les bords
NO INSERTE pernos en las
perforaciones de los cantos
Do NOT insert the cam
studs in the edge holes
Insert only in face
hole
Insérer uniquement
dans les trous indiqués
Inserte unicamente en
las perforaciones
indicadas
Required Tools
Herramientas Requeridas
Outils Nécessaires
Hammer
Martillo
Marteau
Philips Screwdriver
Atornillador Estrella
Tournevis Cruciforme
Rubber Hammer
Martillo De goma
Marteau en Caoutchouc
Assembly Suggestions / Recomendaciones de ensamble
Pag. 4-18
Cam Lock
Tuerca
Wooden Dowels
Tarugo de madera
(ES) El ensamble adecuado de este herraje garantiza su durabilidad (EN) Adequate assembly of this fitting
guarantee item sturdiness (FR) Un bon assemblage de ce matériel garantit sa durabilité
Cam Stud
Perno
Locking Twist
Giro de bloqueo
Parts Identification / Identificación de Partes Pag. 5-18
Pieza
Part Quantity
Cantidad
W
X
Y
Z
A
D
O
Q
F
B
C
E
G
H
I
J
K
M
L
N
P
R
S
T
U
V
1
2
1
2
1
2
1
1
1
1
1
1
1
2
1
1
1
1
1
1
1
1
3
1
1
1
Quantity
Cantidad
From
Desde
To
Hasta
40 AAG
Cantidad Descripción Letra Largo (mm) Ancho (mm) Material
1 costado izq. A 730,0 370,0 Supercor 15 mm
1 Trasero gav angosta AA 222,0 103,0 Supercor 15 mm
1 fondo gav angosta AB 231,0 342,0 Superfondo 4 mm
1 CAVA HORIZONTAL AC 303,0 246,0 Supercor 15 mm
2 CAVA VERTICAL AD 201,0 246,0 Supercor 15 mm
1 falda amarre AE 859,0 82,0 Supercor 15 mm
1 espaldar sup. AF 435,0 886,0 Superfondo 4 mm
1 divisor sup der AG 420,0 250,0 Supercor 15 mm
1 costado der. B 730,0 370,0 Supercor 15 mm
1 divisor C 730,0 370,0 Supercor 15 mm
1 cubierta D 893,0 390,0 Supercor 15 mm
1 fondo E 893,0 370,0 Supercor 15 mm
1 entrepaño inf IZQ. F 567,0 298,0 Supercor 15 mm
1 frente gav. G 581,0 130,0 Supercor 15 mm
1 frente gav angosta. H 289,0 130,0 Supercor 15 mm
2 Lateral gaveta izq. I 350,0 103,0 Supercor 15 mm
2 Lateral gaveta der. J 350,0 103,0 Supercor 15 mm
1 Trasero gav. K 512,0 103,0 Supercor 15 mm
1 costado sup. izq. L 855,0 250,0 Supercor 15 mm
1 costado sup. der. M 855,0 250,0 Supercor 15 mm
1 divisor sup izq N 420,0 250,0 Supercor 15 mm
1 tapa O 893,0 250,0 Supercor 15 mm
1 entrepaño fijo SUP P 305,0 250,0 Supercor 15 mm
1 entrepaño fijo Q 859,0 250,0 Supercor 15 mm
2 entrepaño sup movil. R 262,0 200,0 Supercor 15 mm
Cantidad Descripción Letra Largo (mm) Ancho (mm) Material
1 Puerta izquierda sup S 450,0 289,0 Supercor 15 mm
1 Puerta der sup T 450,0 289,0 Supercor 15 mm
1 puerta izquierda inf U 600,0 289,0 Supercor 15 mm
2 puerta central inf V 600,0 289,0 Supercor 15 mm
1 espaldar ruteo W 435,0 886,0 Superfondo 4 mm
3 Espaldar inf X 750,0 294,0 Superfondo 4 mm
1 fondo gav. Y 521,0 342,0 Superfondo 4 mm
1 entrepaño INF DER Z 277,0 298,0 Supercor 15 mm
A
B
C
D
E
F
G
H
I
I
JJ
KLM
NAG
O
P
Q
RR
ST
UVV
W
AF
XXX
Y
Z
AA AB
AC
AD
AE
Part
Pieza
Quantity
Cantidad
AA
AB
AC
AD
AE
AG
AF
2
1
1
1
1
1
1
Hardware Identification / Identificación de Herrajes
Pag. 6 -18
X
28
1-3/16”
30 mm
X
20
CAM STUDS
2
PERNOS
X
20
CAM LOCKS
3
TUERCAS
X
24
BLACK SCREW
4
TORNILLO NEGRO
2”
50.8 mm
2”
50.8 mm
X
10
DOOR HINGE
5
BISAGRA PUERTA
X
4
6
GLIDERS
DESLIZADORES
1/2"
12.5 mm
1/4"
6 mm X
40
7
HINGES-SCREWS
TORNILLO-BISAGRAS
1/2"
12.5 mm
1/4"
6 mm X
20
8
SLIDES SCREWS
TORNILLO RIELES
X
4
9
SLIDES
RIELES
X
4
10
DRAWER SLIDES
RIELES GAVETA
X
8
12
CAM CAPS
TAPA TUERCAS
X
1
14
PLASTIC PROFILE
BISEL PLASTICO
X
20
15
STAR WASHERS
ARANDELA ESTRELLA
X
16
16
PANEL SUPPORT
SOPORTE ENTREPAÑO
X
50
18
NAILS
PUNTILLAS
X
1
19
STRAP
CINTA
X
1
20
WALL SCREW
TORNILLO PARED
7/16"
10 mm
2"
50 mm
X
1
21
WALL ANCHOR
CHAZO PARED
2"
50 mm
5/16"
8 mm
X
1
17
SCREW
TORNILLO
5/8"
16 mm
5/16"
8 mm
*
If you do not receive the hardware #14
your model does not require it.
Si no recibe el herrajes #14 su modelo no
lo requiere.
* ATENCIÓN
* ATTENTION
X
2
13
WASHER
ARANDELA
X
7
X
18
1-3/16”
30 mm
X
13
CAM STUDS
2
PERNOS
X
13
CAM LOCKS
3
TUERCAS
X
16
BLACK SCREW
4
TORNILLO NEGRO
2”
50.8 mm
2”
50.8 mm
X
10
DOOR HINGE
5
BISAGRA PUERTA
X
4
6
GLIDERS
DESLIZADORES
1/2"
12.5 mm
1/4"
6 mm X
40
7
HINGES-SCREWS
TORNILLO-BISAGRAS
1/2"
12.5 mm
1/4"
6 mm X
10
8
SLIDES SCREWS
TORNILLO RIELES
X
2
9
SLIDES
RIELES
X
2
10
DRAWER SLIDES
RIELES GAVETA
X
5
12
CAM CAPS
TAPA TUERCAS
X
1
13
PLASTIC PROFILE
BISEL PLASTICO
X
1
14
PLASTIC PROFILE
BISEL PLASTICO
X
18
15
STAR WASHERS
ARANDELA ESTRELLA
X
24
16
PANEL SUPPORT
SOPORTE ENTREPAÑO
X
50
18
NAILS
PUNTILLAS
X
1
19
STRAP
CINTA
X
1
20
WALL SCREW
TORNILLO PARED
7/16"
10 mm
2"
50 mm
X
1
21
WALL ANCHOR
CHAZO PARED
2"
50 mm
5/16"
8 mm
X
1
17
WALL SCREW
TORNILLO PARED
5/8"
16 mm
5/16"
8 mm
* **
If you do not receive the hardware #13
and #14 your model does not require it.
Si no recibe los herrajes #13 y
# 14 su modelo no los requiere.
* **ATENCIÓN
* **ATTENTION
X
2
22
WASHER
ARANDELA
X
6
11
KNOB & SCREW
BOTÓN Y TORNILLO
WOODEN DOWELS
1
TARUGOS DE MADERA
11
KNOB & SCREW
BOTON Y TORNILLO
4
1
Furniture Assembly / Armado del Mueble Pag. 7-18
X
4
BLACK SCREW
4
TORNILLO NEGRO
2”
50.8 mm
2”
50.8 mm
X
2
10
DRAWER SLIDES
RIELES GAVETA
X
1
1/2"
12.5 mm
1/4"
6 mm X
4
8
SLIDES SCREWS
TORNILLO RIELES
X
2
1-3/16”
30 mm
X
2
CAM STUDS
2
PERNOS
X
2
CAM LOCKS
3
TUERCAS
3
1
3
8
G
Y
I
1
G
I/J
2
G
I/J
J
I
KK
J
I
Y
Y
Y
K
K
I
J
I
G
10
I
J
G
11
WOODEN DOWELS
1
TARUGOS DE MADERA
2
11
KNOB & SCREW
BOTON Y TORNILLO
2
Furniture Assembly / Armado del Mueble
Pag. 8-18
X
4
BLACK SCREW
4
TORNILLO NEGRO
2”
50.8 mm
2”
50.8 mm
X
2
10
DRAWER SLIDES
RIELES GAVETA
X
1
1/2"
12.5 mm
1/4"
6 mm X
4
8
SLIDES SCREWS
TORNILLO RIELES
X
2
1-3/16”
30 mm
X
2
CAM STUDS
2
PERNOS
X
2
CAM LOCKS
3
TUERCAS
3
1
3
1
H
I/J
2
H
I/J
I
J
H
I
J
AA
I
J
AA
I
JAA
AB
AB
AA
I
H
AB
I
H
4
11
8
10
AB
WOODEN DOWELS
1
TARUGOS DE MADERA
2
11
KNOB & SCREW
BOTON Y TORNILLO
3
Furniture Assembly / Armado del Mueble Pag. 9-18
X
10
1-3/16”
30 mm
X
4
CAM STUDS
2
PERNOS
X
6
CAM LOCKS
3
TUERCAS
4
Q
AE
Q
AE
LM
L/M
2
L/M
Q/AE
Q/AE
1
Q
AE
L
M
X
2
BLACK SCREW
4
TORNILLO NEGRO
2”
50.8 mm
2”
50.8 mm
WOODEN DOWELS
1
TARUGOS DE MADERA
P
N
AG
56
Furniture Assembly / Armado del Mueble
Pag. 10-18
X
2
CAM STUDS
2
PERNOS
X
4
BLACK SCREW
4
TORNILLO NEGRO
2”
50.8 mm
2”
50.8 mm
X
8
1-3/16”
30 mm
X
4
CAM LOCKS
3
TUERCAS
N
LEFT SIDE
LADO IZQ N
RIGHT SIDE
LADO DER
3
AG
LEFT SIDE
LADO IZQ
AG
RIGHT SIDE
LADO DER
3
P
P
N
AG
Q
AE
L
M
2
1
N/AG
2
N/AG
P
P
1
2
WOODEN DOWELS
1
TARUGOS DE MADERA
Furniture Assembly / Armado del Mueble Pag. 11-18
X
4
BLACK SCREW
4
TORNILLO NEGRO
2”
50.8 mm
2”
50.8 mm
7
P
N
AG
Q
AE
L
M
Q
O
O
2
O
L/M
/N/AG
1
O
L/M/
N/AG
2
D
P
N
AG
Q
AE
L
M
Q
O
D
8
X
10
CAM STUDS
2
PERNOS
2
Furniture Assembly / Armado del Mueble
Pag.
12-18
X
4
BLACK SCREW
4
TORNILLO NEGRO
2”
50.8 mm
2”
50.8 mm
X
4
1-3/16”
30 mm
X
4
CAM LOCKS
3
TUERCAS
1/2"
12.5 mm
1/4"
6 mm X
6
8
SLIDES SCREWS
TORNILLO RIELES
X
2
9
SLIDES
RIELES
9
P
N
AG
Q
AE
L
M
Q
O
E
B
9
8
Letter A slides
Rieles letra A
1
32
A
A
6
B
1
3
B
8
Atornillar sin
agujero
pre-perforado
Screw Without
pre-drilled hole/
A
B
E
4
C
LEFT SIDE
LADO IZQ
C
RIGHT SIDE
LADO DER
Furniture Assembly / Armado del Mueble
9
8
3
C
LEFT SIDE
LADO IZQ
B
9
8
B
Letter B slides
Rieles letra B
13
2
10
X4
E
E
6
X
4
6
GLIDERS
DESLIZADORES
WOODEN DOWELS
1
TARUGOS DE MADERA
11
2
D
A/B
/C
1
D
A/B
/C
Furniture Assembly / Armado del Mueble Pag. 13-18
E
B
A
C
11
Letter C slides
Rieles letra C
1
32
9
8
C
LEFT SIDE
LADO IZQ
C
RIGHT SIDE
LADO DER
P
N
AG
Q
AE
L
M
Q
O
D
E
B
A
C
12
X
2
BLACK SCREW
4
TORNILLO NEGRO
2”
50.8 mm
2”
50.8 mm
X
2
1-3/16”
30 mm
X
2
CAM LOCKS
3
TUERCAS
1/2"
12.5 mm
1/4"
6 mm X
6
8
SLIDES SCREWS
TORNILLO RIELES
X
2
9
SLIDES
RIELES
WOODEN DOWELS
1
TARUGOS DE MADERA
13 4.Nail perimeter
4.Apuntille Perimetro
Furniture Assembly / Armado del Mueble
Pag. 14-18
X
50
18
NAILS
PUNTILLAS
X36
E
B
M
X
X
X
W
W
W
CAUTION
PRECAUCIÓN
Please use a support object
when nailing the back panels
Por favor utilice un elemento
de apoyo al clavar las piezas
D
M
N
Q
O
L
E
B
A
C
14
G
IY
B/C
I/J
9
X18
E
B
M
X
X
X
W
W
W
1/16"
2 mm
1/16"
2 mm
CAUTION
PRECAUCIÓN
Please use a support object
when nailing the back panels
Por favor utilice un elemento
de apoyo al clavar las piezas
90°
X
X
W
W
X/W
1.Adjust Back Panels - 2.Nail Corners - 3. Nail Washer
1.Ajuste espladares - 2.Apuntille las esquinas - 3. Apuntille Arandela Estrella
X18
WX
X
W
W
E
B
M
X
X
X
1/16"
2 mm
1/16"
2 mm
CAUTION
PRECAUCIÓN
Please use a support object
when nailing the back panels
Por favor utilice un elemento
de apoyo al clavar las piezas
90°
X/AF
X18
X
W
W
AF
E
B
M
X
X
X
CAUTION
PRECAUCIÓN
Please use a support object
when nailing the back panels
Por favor utilice un elemento
de apoyo al clavar las piezas
W
AF
X
1
14
PLASTIC PROFILE
BISEL PLASTICO
X
20
15
STAR WASHERS
ARANDELA ESTRELLA
*
Si no recibe el herrajes #14 su modelo no
lo requiere.
If you do not receive the hardware #14
your model does not require it.
* **ATENCIÓN
* **ATTENTION
X
10
DOOR HINGE
5
BISAGRA PUERTA
Furniture Assembly / Armado del Mueble
15
Furniture Assembly / Armado del Mueble Pag. 15-18
1/2"
12.5 mm
1/4"
6 mm X
40
7
HINGES-SCREWS
TORNILLO-BISAGRAS
Hinges Assembly
Armado de Bisagras
5
7
S/T
5
7
U/V
X
5
11
KNOB & SCREW
BOTON Y TORNILLO
11
11
A
LC
D
E
M
Q
AE
N
AG
P
O
S
T
U
V
V
A
LC
D
E
M
Q
AE
N
AG
P
O
G
H
Y
AB
I
A/B/C
I/J
7
7
CAUTION
PRECAUCIÓN
D
M
N
Q
O
L
E
B
C
H
V
S
T
11 11
11
A
U
7
5
11
11
A
LC
D
E
M
Q
AE
N
AG
P
O
S
T
U
V
V
7
7
Pag. 16-18
Loosen or tighten the indicated
screw to ADJUST HEIGHT.
Loosen or tighten the indicated
screw to ADJUST DEPTH.
Loosen or tighten the indicated
screw to adjust
SIDE AND GAPS ADJUSTMENT.
16
Furniture Assembly / Armado del Mueble
Hinges Assembly
Armado de Bisagras
A
B
C
D
E
F
G
H
I
I
JJ
KLM
NAG
O
P
Q
R
R
ST
UVV
W
AF
XXX
Y
Z
AA AB
AC
AD
AE
S
T
U
V
V
S
T
U
V
V
S
T
U
V
V
U
V
V
H
G
S
T
O
W
Q
P
AG
L
M
D
A
CAUTION
PRECAUCIÓN
L
O
N
S
T
S
O
W
Q
P
AG
L
Furniture Assembly / Armado del Mueble
Furniture Assembly / Armado del Mueble Pag. 17-18
L
O
N
S
T
S
O
W
Q
P
AG
L
13
19
17
O
CAUTION
PRECAUCIÓN
17
Las paredes deben ser de
hormigón o ladrillo para este tipo
de anclaje. Si no es así, póngase
en contacto con su ferretería más
cercana.
ATENCIÓN
ATTENTION
The walls must be made of solid
concrete or brick for this type of
anchor. If not, contact your
nearest hardware store.
X
1
19
STRAP
CINTA
X
1
20
WALL SCREW
TORNILLO PARED
7/16"
10 mm
2"
50 mm
X
1
21
WALL ANCHOR
CHAZO PARED
2"
50 mm
5/16"
8 mm
X
1
17
SCREW
TORNILLO
5/8"
16 mm
5/16"
8 mm
X
2
13
WASHER
ARANDELA
19
13
21
20
2"
U
V
V
H
G
S
T
O
W
Q
P
AG
L
M
D
A
Pag. 18-18
18 19
X
8
12
CAM CAPS
TAPA TUERCAS
X
16
16
PANEL SUPPORT
SOPORTE ENTREPAÑO
Congratulations! In this way you finish
assembling your furniture.
¡Felicitaciones! De esta manera usted termina
de armar su mueble
Furniture Assembly / Armado del Mueble
12
I/J
U
V
V
H
G
W
D
A
Q
AG
M
D
T
L
P
S
O
AC
AD AD
AD
AD
AC
H
V
V
U
G
W
M
D
T
Q
AG
P
S
O
A
L
AG
N
R
R
F
Z
C
B
U
V
V
H
G
W
D
A
Q
AG
M
D
T
L
P
S
O
AC
AD AD

This manual suits for next models

1

Other Inval Indoor Furnishing manuals

Inval GCM 042 User manual

Inval

Inval GCM 042 User manual

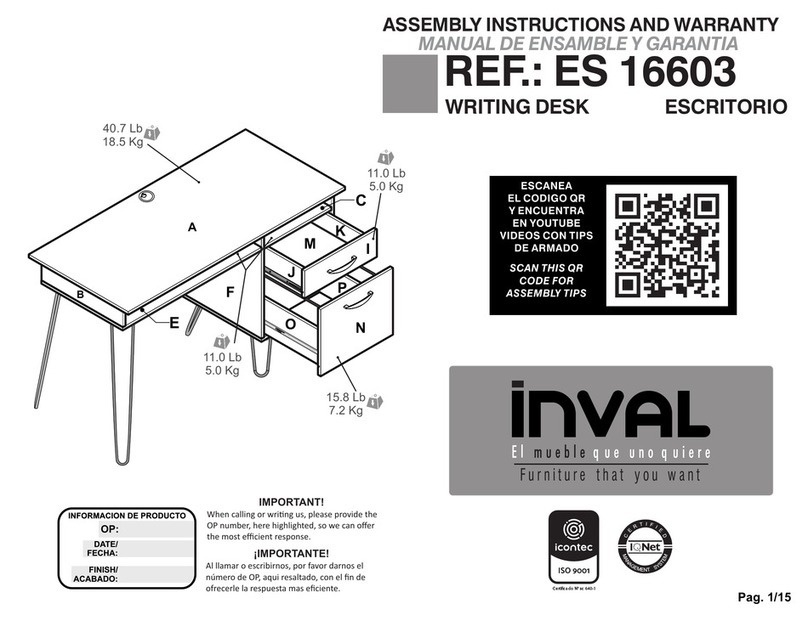
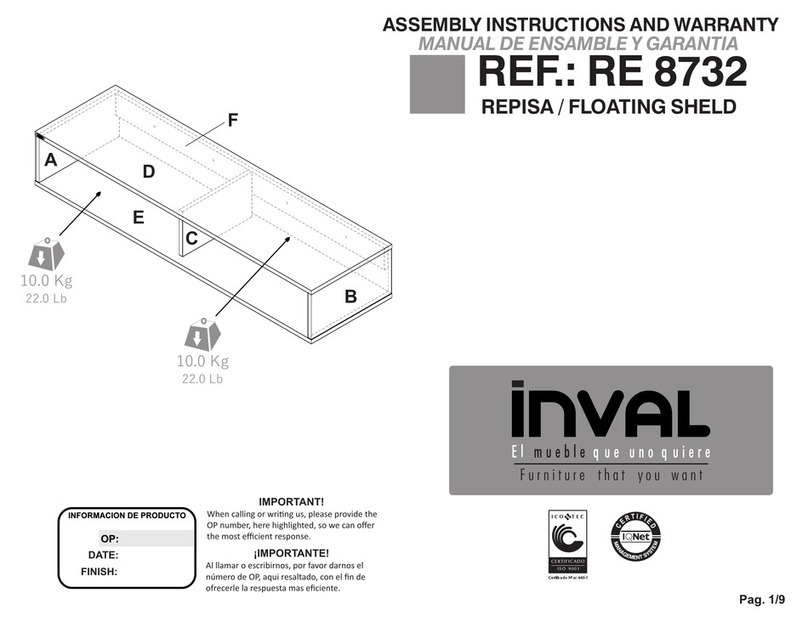
Inval RE 8732 Installation guide

Inval

Inval RE 8732 Installation guide

Inval CC 5701 User manual

Inval

Inval CC 5701 User manual

Inval AM 29223 Installation guide

Inval

Inval AM 29223 Installation guide

Inval AM 13923 Installation guide

Inval

Inval AM 13923 Installation guide

Inval CC5901 Installation guide

Inval

Inval CC5901 Installation guide

Inval GCM 069 User manual

Inval

Inval GCM 069 User manual

Inval MTV 22519 Installation guide

Inval

Inval MTV 22519 Installation guide

Inval ES 9303 Installation guide

Inval

Inval ES 9303 Installation guide

Inval ES 14703 Installation guide

Inval

Inval ES 14703 Installation guide

Inval GM 0740 User manual

Inval

Inval GM 0740 User manual

Inval ES 14403 Installation guide

Inval

Inval ES 14403 Installation guide

Inval MTV 22619 User manual

Inval

Inval MTV 22619 User manual

Inval ES 13603 Installation guide

Inval

Inval ES 13603 Installation guide

Inval AM 13923 Installation guide

Inval

Inval AM 13923 Installation guide

Inval GM 2840 Installation guide

Inval

Inval GM 2840 Installation guide

Inval ES 16603 Installation guide

Inval

Inval ES 16603 Installation guide

Inval ES 2403 User manual

Inval

Inval ES 2403 User manual

Inval ES 14903 User manual

Inval

Inval ES 14903 User manual

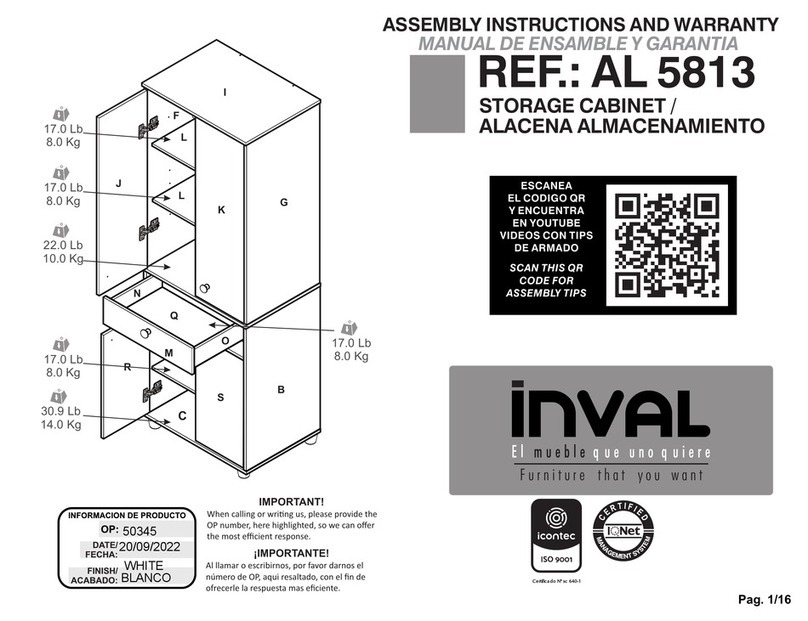
Inval AL 5813 Installation guide

Inval

Inval AL 5813 Installation guide

Inval AR 3X3 R Installation guide

Inval

Inval AR 3X3 R Installation guide

Inval ES 11103 Installation guide

Inval

Inval ES 11103 Installation guide

Inval GM 1140 Installation guide

Inval

Inval GM 1140 Installation guide

Inval ES 14803 Installation guide

Inval

Inval ES 14803 Installation guide

Popular Indoor Furnishing manuals by other brands

Pedrali Gliss 950 instructions

Pedrali

Pedrali Gliss 950 instructions

Kleton fn468 Assembly instructions

Kleton

Kleton fn468 Assembly instructions

BRW LARGO PREG2D1K3S Assembly manual

BRW

BRW LARGO PREG2D1K3S Assembly manual

ofichairs Vanity How to Adjust

ofichairs

ofichairs Vanity How to Adjust

Julian Bowen Jupiter JUP302 Assembly instructions

Julian Bowen

Julian Bowen Jupiter JUP302 Assembly instructions

Evan furniture BELLUNO V1 Assembly instruction

Evan furniture

Evan furniture BELLUNO V1 Assembly instruction

VIVO HOME VH961 Assembly instructions

VIVO HOME

VIVO HOME VH961 Assembly instructions

Techni Mobili RTA-733DL Assembly instructions

Techni Mobili

Techni Mobili RTA-733DL Assembly instructions

PowellKids 335-238 Assembly instructions

PowellKids

PowellKids 335-238 Assembly instructions

U-Line H-2805 Assembly instructions

U-Line

U-Line H-2805 Assembly instructions

Landscape Forms Carousel installation guide

Landscape Forms

Landscape Forms Carousel installation guide

Julian Bowen Limited RAD204 Assembly instructions

Julian Bowen Limited

Julian Bowen Limited RAD204 Assembly instructions

Argos Washington 425/8425 Assembly instructions

Argos

Argos Washington 425/8425 Assembly instructions

Office Star Products ST428V operating instructions

Office Star Products

Office Star Products ST428V operating instructions

Jahnke XTRA BY SIDE manual

Jahnke

Jahnke XTRA BY SIDE manual

pakoworld 097-000004 Assembly instructions

pakoworld

pakoworld 097-000004 Assembly instructions

BROSA Field Double Open Shelf Assembly guide

BROSA

BROSA Field Double Open Shelf Assembly guide

Furniture Solutions CAESAR 17CAEC02CX2 instruction manual

Furniture Solutions

Furniture Solutions CAESAR 17CAEC02CX2 instruction manual

manuals.online logo
manuals.online logoBrands
  • About & Mission
  • Contact us
  • Privacy Policy
  • Terms and Conditions

Copyright 2025 Manuals.Online. All Rights Reserved.