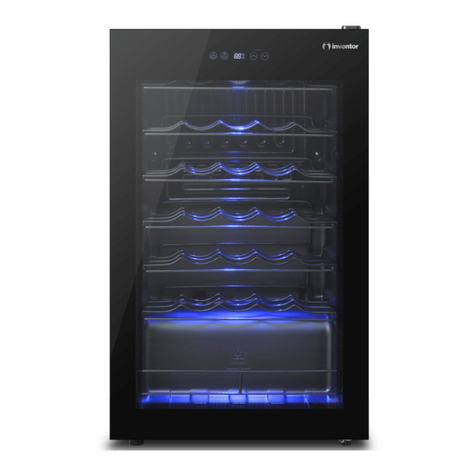
INVENTOR WC24BT User manual

MODELS:
WC24BT
WC24BTEC
• USER’S MANUAL
• ΕΓΧΕΙΡΙΔΙΟ ΧΡΗΣΗΣ
• MANUAL UTILIZATORULUI
• BEDIENUNGSANLEITUNG
• MANUEL D'UTILISATEUR
• MANUALE DELL’ UTENTE
• MANUAL DE USUARIO
WINE COOLER
ENGLISH | ΕΛΛΗΝΙΚΑ | ROMANA | DEUTSCH |
FRANÇAIS | ITALIANO | ESPAÑOL


LANGUAGES
ENGLISH.............................................................................................................................4
ΕΛΛΗΝΙΚΑ........................................................................................................................22
ROMANA..........................................................................................................................40
DEUTSCH..........................................................................................................................58
FRANÇAIS.........................................................................................................................76
ITALIANO .........................................................................................................................94
ESPAÑOL........................................................................................................................112

4EN
TABLE OF CONTENTS
1. SAFETY & WARNING INSTRUCTIONS............................................................................. 5
2. ELECTRICAL INFORMATION ........................................................................................... 7
3. SOCIABLE REMARKS - ENVIRONMENTAL PROTECTION............................................... 7
4. STEPS BEFORE USE ......................................................................................................... 8
5. GETTING TO KNOW YOUR WINE COOLER..................................................................... 9
6. WINE COOLER FEATURES ............................................................................................. 10
7. INSTALLATION GUIDELINES......................................................................................... 11
8. CONTROL PANEL & FUNCTIONS.................................................................................. 12
9. MAINTENANCE & CLEANING ....................................................................................... 14
10. STORAGE...................................................................................................................... 15
11. TIPS............................................................................................................................... 16
12. TROUBLESHOOTING................................................................................................... 17
Dear Consumer,
Congratulations on your choice!
Inventor’s Wine Coolers create ideal conditions for perfect
wine maturity within the bottle, enhancing 100% the quality
of your favorite drinks. Low energy consumption and a modern
design, is an ideal combination, making Inventor Wine Coolers
the best choice!
Please refer to this manual of the Wine Cooler, through the

5
EN
!
1. SAFETY & WARNING INSTRUCTIONS
lNo children under the age of 8 should be permitted to operate this electric device. Be certain,
that children, handicapped people, or people with the lack of knowledge and experience, must
be supervised, depending the situation, by persons responsible for their well-being and do not
undertake procedures such as the cleaning or the maintenance of this device.
lIt is important that adequate supervision is provided and no minors are left unattended with
this device.
lThis device is intended to be used in household and similar residential applications such as:
2) By clients in hotels, motels bed and breakfast and other residential type environments.
lThis household product is intended for the storage of wine only. Do not use this device to
store blood, drugs, biological products or other items.
lDo not install the appliance in areas that are too humid or too cold, such as construction
appendices, garages or wine cellars.
lThis device should always be kept in an upright position to avoid any damage.
lIf the supply cord is damaged, it must be replaced by the manufacturer, its service agent
the device.
lVentilation openings, in both the appliance’s enclosure and in the built-in structure should
be clear of obstructions. Mechanical devices or other means of accelerated defrosting should
not be used, only methods recommended from the manufacturer should be applied.
lAs this device is heavy, always be cautious when relocating, safety gloves are recommended.
l
l
technician for repair or maintenance of this device.
l
lDuring operation, do not touch the compressor or the condenser, be cautious as they are
hot.
lThe manufacturers of this product prohibit the placement of regulators, power adaptors, or
any other appliances on top of the wine cooler. This appliance is not intended for use in the
food pantry.
lDo not place heavy objects on the power cord. Make sure that the cord is not compressed.
lDo not place cord under any obstacles (carpets rugs or runners etc). Cord should be arranged
away from areas where accidental tripping may occur.
lDo not operate other electric appliances inside the food storage compartments of this device,
unless recommended by the manufacturer.
l
appliance.
lThe refrigerant circuit should remain intact. If damage occurs, be extremely cautious of any
lDo not sit or climb on the device.
l
door closing, helps prevent accidental misplacement of the items inside.
lRemoving items from the Wine Cooler with wet hands should be avoided, as it is highly
possible for a frostbite to occur.
lDo not place the unit in direct sunlight or near other heating sources like radiators, cookers,
ovens or hobs.
l

6EN
lFor EN standard: This appliance can be used by children aged from 8 years and
above and persons with reduce physical sensory or mental capabilities or lack of
experience and knowledge if they have been given supervision or instruction
concerning use of the appliance in a safe way and
and user maintenance shall not be made by children without supervision. Children aged from 3
to 8 years are allowed to load and unload refrigerating appliances.
lTo avoid contamination of food, please respect the following instructions:
in the compartments of the appliance.
– Clean regularly surfaces that can come in contact with food and accessible drainage
systems.
connected to a water supply if water has not been drawn for 5 days.note 1)
contact with or drip onto other food.
or making ice-cream and making ice cubes.(note 2)
food.(note 3)
– For appliances without a 4-star compartment: this refrigerating appliance is not
dry, and leave the door open to prevent mould developing within the appliance.
l
compartment type.
lFor a freestanding appliance: this refrigerating appliance is not intended to be used
as a built-in appliance.
• Upon first use, and for proper calibration, please allow unit to operate
continuously for 24 hours.

7
EN
2. ELECTRICAL INFORMATION
lThe nameplate, with all the electrical and technical data of this appliance, is located on the
rear panel.
lThe appliance should be installed in accordance with national wiring regulations.
l
l
to use is not adequately grounded or protected by a time delay fuse or circuit breaker, have a
- A 10A plug outlet or higher, should only be used.
220-240V±10% may cause the malfunction and damage of the unit.
lEnsure the wall socket is still accessible after the installation of the Wine Cooler.
lDo not use extension cords or adapter plugs with this device.
lBe certain that no damage has occurred to any of the electrical components (e.g. main plug,
lTo avoid personal injury, always disconnect the power supply of the device, before
maintenance.
lThe replacement and maintenance of the LED lamp should be made always by the
Power o the refrigerator before removing the plug. Do not
disconnect the plug from the wall socket by pulling on the cord.
3. SOCIABLE REMARKS
- ENVIRONMENTAL PROTECTION
Disposal of equipment no longer used:
Please follow the instructions below, when using this refrigerator in European countries.
lThis appliance requires special treatment for disposal. In the European Union, electronic
equipment must not be treated as domestic waste, but must be disposed of professionally in
accordance with Directive 2002/96/EC of the European Parliament and Council of 27th January
2003 concerning old electrical and electronic equipment. The disposal of this unit should follow
all legal requirements and should not be disposed as unsorted municipal waste.
endangering your health and the environment.
lThere are several alternative solutions for disposal. Please remove all doors before disposal
to prevent children’s accidental trapping.
A) Your local municipality has established free collection systems for electronic
waste.
B) Your local retailer upon purchase of a new product.
C) The manufacturer may accept the old appliance for disposal.
D) Old appliances sometimes contain valuable resources for scrap metal dealers.

8EN
For warranty purposes, please note
the SN (serial number). The SN is
labeled behind the device.
Please refer to the electronic
warranty instructions, in the
last page (English section) of
this manual.
4. STEPS BEFORE USE
User's manual
SN: D2002255780115715200209
Wine Cooler

9
EN
5. GETTING TO KNOW YOUR WINE COOLER
7
9
1
2
5
36
1. Wine Racks 2. Led Light 3. 4. Water tray 5. UV glass door 6. Handle
7. Temperature Control Display 8. Adjustable Feet 9. Power Cord
8
4

10 EN
6. WINE COOLER FEATURES
Position the appliance in a location where the ambient temperature corresponds to the
temperature:
Class Symbol Ambient temperature range °C
Extended temperate SN + 10 to + 32
Temperate N + 16 to + 32
Subtropical ST + 16 to + 38
Tropical T + 16 to + 43
internal temperature of the Wine Cooler is too low, possible damage to its contents
may occur. Accumulation of frost on the Wine Cooler’s door, may take place if the
level of 72%RT.
MODEL NAME WC24BT / WC24BTEC
Category WINE COOLER
Color BLACK
Total Storage Volume (L) 66
Energy Class
Energy Consumption (kWh/annum) 140
220-240/50/1
Climate Class SN,N,ST
Refrigerant/Mass (g) R600a/18
Noise Level [dB(A)] 40
Product Dimensions (WxDxH) (mm) 480x440x642
Net Weight (Kg) 23
Number of shelves 4
Interior Light YES
Power Cord Length (mm) 1700
Reversible Door NO
Built-in NO
Extended temperate: 'this refrigerating appliance is intended to be used at ambient
temperatures ranging from 10°C to 32°C
Temperate: 'this refrigerating appliance is intended to be used at ambient temperatures
ranging from 16°C to 32°C
Subtropical: ‘ this refrigerating appliance is intended to be used at ambient temperatures
ranging from 16 °C to 38 °C
Tropical: ‘ this refrigerating appliance is intended to be used at ambient temperatures ranging
from 16°C to 43°C
Table 1 Climate classes

11
EN
7. INSTALLATION GUIDELINES
1.
surrounding the unit. The rear
end (backside) of this appliance
should stand against a wall
as follows:
➟20cm from the top
➟ 15cm from the back
➟40cm from the rest sides
2.Wait at least 4 hours before
connecting the appliance to the
power supply, thus, allowing all
Position
should be well ventilated, without additional heating sources nearby.
*The above prices
may be subject to deviation. Kindly
refer to the purchased product.
Interior Dimensions (mm)
170
140
360
190
25
405
535

12 EN
Leveling the Unit
Adjust the two levelling feet at the front of the unit. If the
unit is not aligned, the door and magnetic seal alignments
will not be covered properly.
✔✔
xx
Lock Key
Press the button for 3 seconds as to activate or deactivate the lock function.
When operating under “Lock Mode” all other functions apart from the Lighting Mode,
are not applicable.
Lighting Mode
Press the button to activate or deactivate the lighting mode.
Digital Display
Upon initial use, the digital display panel will be lit for approximately 3 seconds,
followed by a start-up sound. After the 3 second time period, the unit enters into
normal operation.
While the unit is under Lock Mode, the digital display will show inactive, if there is no
key activity within 30 seconds.
The digital display buttons, should be slightly pressed, while it is strongly advised to
position the Wine Cooler away from magnetic areas and areas of high humidity levels,
to ensure its optimal operation.
Switching between Fahrenheit and Celsius
Press the Arrow UP key and the Arrow DOWN key simultaneously in order to
select between Fahrenheit or Celsius.
8. CONTROL PANEL & FUNCTIONS

13
EN
Temperature setting
Press the Arrow UP key and the temperature will increase by 1°C.
Once the temperature is adjusted, the Wine Cooler will operate according to the set
value.
Press the Arrow DOWN key and the temperature will decrease by 1°C.
Once the temperature is adjusted, the Wine Cooler will operate according to the desired
value.
•
For correct temperature control settings, kindly consider
the following:
✓ Room temperature
✓ The frequent door opening of the Wine Cooler.
✓ The quantity of stored bottles
✓ The positioning of the appliance.
Smart Memory
This unit has smart memory, meaning that in the event of a power failure, once power
has regained, the unit will operate with the last applied settings.
Bottle Storage Tips
Air circulation creates a differential in temperature
within the Wine Cooler, as a result, higher temperatures
are formulated in the upper levels of the unit, while
lower temperatures are formulated in the lower levels.
Wine bottle storage from top to bottom is advised as
follows:
- Strong red wine
- Pink and mild red wine
- White wine
Pour wines shall be placed a bit lower than the serving
temperature. This will allow the wine to breathe and
still come to the proper serving temperature.
Dry lter
Humidication
If extra humidity within your Wine Cooler is preferred, add water to the
water tray every 3-4 days.

14 EN
• The Wine Cooler can be used only for storage of
unopened bottles.
• We suggest to not store bottles of wine or champaign
post the expiry date.
• For the most eective storage of bottles the cork of
the bottles should always face the door. Maintain a
small distance between the bottle and the back side
of the Wine Cooler as this will ensure the correct air
circulation inside the cooler.
Prior to cleaning the appliance, un-
plug from the wall power socket, and
remove all shelves.
• Clean the appliance with a moist soft
cloth. Use only neutral detergents.
• Clean the unit’s interior with a weak
bicarbonate soda solution and rinse
with warm water applying a damp
sponge or cloth.
• Use a damp cloth to clean the
exterior, keep in mind the door must
be shut to avoid getting any polish on
the magnetic door seal or the interior
of the unit.
• Make sure not to let any water spill on the control elements of the door.
• Be certain that there is no water spilling on the control elements of the door
• While cleaning, you may lightly rinse the interior with water and dry
• Allow the appliance to dry for
approximately 1 to 2 hours.
• Plug into a power source. The
appliance will chill continuously until
set temperature has been reached.
• Be sure to regularly clean the drain
hole to ensure proper drainage.
9. MAINTENANCE & CLEANING
Clean the
interior of
the appliance
ONCE A
MONTH

15
EN
• Do not use abrasive products, abrasive cleaning pads,
solvents or metal objects. Do not use water spray and
steam to clean the appliance.
• Do not use extreme moist cleaning pads. Any moisture
around the electric components, should be avoided.
• The use of a steam cleaner is prohibited, as this may
be very dangerous.
Defrosting Process
Water drops, or possible frost may be accumulated in the rear of the unit when the
water drops or frost, as the defrosted water will be collected into the drain tank and then
• Never use sharp or metal objects to remove frost
while defrosting
• Do not use any mechanical devices or instruments to
accelerate the defrosting process prior to consulting
the manufacturer
10. STORAGE
When appliance is inactive for an extended period of time, please make sure you follow the
instructions below, for the appropriate storage of your appliance:
• Remove all the items from the interior compartment.
• Clean the removable parts of the device.
• Leave the door open to prevent unpleasant odors.
• Cover the device.
• Store the wine cooler in upright position, in a dry, well ventilated area and avoid direct
sunlight.

16 EN
11. TIPS
✓
in the wine cooler.
✓Avoid extensive use of the door on wet and hot weather. Be cautious, once the Wine
Cooler’s door is open to shut the soonest possible.
✓Do not place goods in direct contact with the wall of the refrigerator, always allow some
space.
✓Be certain the wall behind the appliance is dirt and dust free, especially with outer
condenser equipped units.
✓Do not store boxed wine in this device.
✓Avoid placing hot beverages in the wine cooler.
✓Moisten the cork before replacing it into the bottle to prevent air space between the cork
and the bottle.
Serving Temperature TIPS
✓Wines should be allowed adequate time to breath prior to serving. (red wine: 4-5 hours
and pink wine: 2-5 hours). White wines and champagne can be served immediately.
Wine Kinds Serving Temp
Bordeaux red
Cotes du Rhone red/Barolo Louis Family dry red wine/Barolo
Burgundy red/Bordeaux red
Port
Young Burgundy red
Young red wine
Young Boaujolais/all wines with little residual sugar
Old white wines/Chardonnay
Sherry
Young white wines from late vintage
White wines Loire/Entre-deux-Mers

17
EN
12. TROUBLESHOOTING
ISSUE CAUSE / REMMEDY
Appliance is not
working
The plug is not in the power socket. Put the plug in the power
socket.
Temperature in
refrigerator is too
high or too low
1) Thermostat has been set incorrectly. Set the thermostat
correctly.
reset.
Cooler isn’t chilling
on the lower part of
the interior
Frequent door openings or maximum allowable bottle storage.
Keep door shut for approximately 4-5 hours, then recheck.
Condensation
appears on the inside
surface of the unit
This may be caused by a change in the room’s temperature
or due to high humidity levels. Use a soft cloth to wipe away
technician for assistance.
Appliance is making a
noise
1) The refrigerant liquid causes noises in the cooling system.
2) Noise is produced while the compressor is operating, as
3) Make sure the refrigerator is levelled and balanced.
the goods correctly in the refrigerator.
5) Check if the refrigerator’s components are in the proper
position.
The wine cooler’s
door can’t be
properly closed
Make sure items are not obstructing the door.
Make sure the refrigerator is not tilted.
Long term operation
of the compressor
It is normal if the compressor runs for a long time during high
ambient temperatures.
Allow warm and hot goods to chill prior to placing them in the
unit.
Avoid the frequent opening of the door.
Inactive LED
indicators
In the event that the Led indicators of the Temperature Control
Display or of the interior lighting of the Wine Cooler are inactive,
while the unit is powered and operating, please contact your
local after-sales service agent for proper service.
Understanding Error codes
E1 - Temperature sensor Error Code
E4 - Defrosting sensor Error Code
In the event that the above error codes appear on the digital display panel, contact after

18 EN
Ordered Part Provided by Minimum Time Required
for Provision
Thermostats Professional maintenance
personnel
At least 7 years after the
last model is launched on
the market
Temperature sensors Professional maintenance
personnel
At least 7 years after the
last model is launched on
the market
Printed circuit boards Professional maintenance
personnel
At least 7 years after the
last model is launched on
the market
Light sources Professional maintenance
personnel
At least 7 years after the
last model is launched on
the market
Door handles Professional repairers and
At least 7 years after the
last model is launched on
the market
Door hinges Professional repairers and
At least 7 years after the
last model is launched on
the market
Trays Professional repairers and
At least 7 years after the
last model is launched on
the market
Baskets Professional repairers and
At least 7 years after the
last model is launched on
the market
Door gaskets Professional repairers and
At least 7 years after the
last model is launched on
the market
The ordered parts in the following table can be aquired from the channel of Inventor:

19
EN
All the pictures in the manual are for explanatory purposes only. The actual shape of the
The company may not be held responsible for any misprinted information. The design and
change without any prior notice.
Please consult with the manufacturer at +30 211 300 3300 or with the Sales agency for
further details. Any future updates to the manual will be uploaded to the service website,
and it is advised to always check for the latest version.
Scan here to download the latest version of this manual.
www.inventorappliances.com/manuals

20 EN
Activate your Warranty
l Visit our web site and activate your warranty via the below link or by
scanning the QR code
https://www.inventorairconditioner.com/warranty-inventor
l Fill all the elds as shown below
þ
once the warranty submission has been completed a conrmation message will be
sent to your email
Full Name*
Address*
Postal Code*
Phone Number*
E-mail*
Unit Type*
Serial Number of the unit*
Date of Purchase*
Invoice Number*
Additional Details
Subscribe to Inventor's Newsletter
Owner details Unit details
To activate the warranty card, please ll in the following elds
* Required eld
With the current warranty card you accept the terms and conditions.
SEND
Follow the next quick steps to activate your warranty:
STEP 1
Visit our website via the link:
https://www.inventorairconditioner.com/warranty-inventor
or by scanning the QR code, as follows:
STEP 2
Fill in the obligatory fields as requested in the “Owner’s details” and “Unit’s details”:
STEP 4
Wait for the confirmation email you will receive at the email address you have filled
in - please also check your spam folder.
STEP 5
Inventor warranty is now valid!
STEP 3
Click SEND button at the end of the submission form:
þ
message will be sent to your email
Activate your Warranty
l Visit our web site and activate your warranty via the below link or by
scanning the QR code
https://www.inventorairconditioner.com/warranty-inventor
l Fill all the elds as shown below
þ
once the warranty submission has been completed a conrmation message will be
sent to your email
Full Name*
Address*
Postal Code*
Phone Number*
E-mail*
Unit Type*
Serial Number of the unit*
Date of Purchase*
Invoice Number*
Additional Details
Subscribe to Inventor's Newsletter
Owner details Unit details
To activate the warranty card, please ll in the following elds
* Required eld
With the current warranty card you accept
the terms and conditions.
SEND
Activate your Warranty
l Visit our web site and activate your warranty via the below link or by
scanning the QR code
https://www.inventorairconditioner.com/warranty-inventor
l Fill all the elds as shown below
þ
once the warranty submission has been completed a conrmation message will be
sent to your email
Full Name*
Address*
Postal Code*
Phone Number*
E-mail*
Unit Type*
Serial Number of the unit*
Date of Purchase*
Invoice Number*
Additional Details
Subscribe to Inventor's Newsletter
Owner details Unit details
To activate the warranty card, please ll in the following elds
* Required eld
With the current warranty card you accept the terms and conditions.
SEND
Activate your Warranty
This manual suits for next models
1
Table of contents
Languages:
Other INVENTOR Kitchen Appliance manuals
Popular Kitchen Appliance manuals by other brands

Hyundai
Hyundai SM 652 instruction manual

Coopers of Stortford
Coopers of Stortford 10956 Instructions for use

Avallon
Avallon AWBV54152 user guide

Hatco
Hatco Krampouz KCMG Series Installation and operating manual

Küppersbusch
Küppersbusch EEH 610.0 Instructions for use and installation instructions

W.Besteckhaus SCHAFER
W.Besteckhaus SCHAFER GOURMEMAXX user manuel