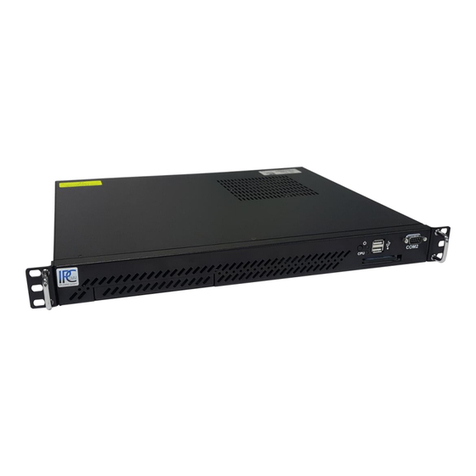
IPCOMM IPC191V5 User manual

Subject to alterations Version 1.1
IPCOMM GmbH - 1 - IPC191V5 Manual
Walter-Bouhon-Straße 4 Copyright © IPCOMM GmbH, 2022
90427 Nuremberg All rights reserved
Germany
Table of Contents
1Introduction...................................................................................................................................... 2
2Hardware Description...................................................................................................................... 3
2.1 General.................................................................................................................................... 3
2.2 Front View................................................................................................................................ 3
2.3 Rear View................................................................................................................................ 4
2.4 Hardware Components............................................................................................................ 5
2.4.1 Mainboard........................................................................................................................ 5
2.4.2 RS-232 Interfaces............................................................................................................ 5
2.4.3 8/16-Port RS-232 Serial Interface ................................................................................... 6
2.4.4 Protecting RS-232 Interfaces according to IEC 61850-3 / EN 61850 ............................. 6
2.4.5 Ethernet Interfaces .......................................................................................................... 7
2.4.6 CFast Memory Card ........................................................................................................ 7
2.4.7 Lithium Battery................................................................................................................. 8
2.4.8 CPU LED ......................................................................................................................... 9
2.4.9 Power Supply................................................................................................................. 10
2.4.9.1 AC Power Supply....................................................................................................... 10
2.4.9.2 DC Power Supply ...................................................................................................... 10
3Overview of Variants / Interface Configuration.............................................................................. 11
3.1 Variant L ................................................................................................................................ 11
3.2 Variant A................................................................................................................................ 11
3.3 Variant B................................................................................................................................ 12
3.4 Variant E4.............................................................................................................................. 13
4Technical Data Sheet .................................................................................................................... 13
5EU Declaration of Conformity........................................................................................................ 13
6Nomenclature of the IPC191V5 Article Number............................................................................ 14
7Dimensions IPC191V5 (CAD) ....................................................................................................... 15

Subject to alterations Version 1.1
IPCOMM GmbH - 2 - IPC191V5 Manual
Walter-Bouhon-Straße 4 Copyright © IPCOMM GmbH, 2022
90427 Nuremberg All rights reserved
Germany
1 Introduction
All technical information, descriptions and illustrations contained in this ‘Operating, Maintenance and
Installation Manual’ remain our property and shall not be used otherwise than for operating this system,
nor shall they be copied, reproduced or passed on to third parties or brought to their notice without our
prior written consent.
The information represented in this manual is in keeping with current standards and is subject to later
alterations.
This manual contains important instructions referring to safe installation, commissioning, operation and
maintenance.
Read this manual carefully before starting up the gateway and observe the instructions.
In order to comply with the guidelines for electro-magnetic compatibility in industrial PCs (or other
variants) only CE-certified components are used in compliance with project-specific requirements.
Finally we want to draw your attention to the fact that any warranties with respect to the gateway
hardware will be invalid in the event that:
Operation, servicing and maintenance are not carried out accurately according to the
instructions; repairs are not carried out by our personnel or without our prior written consent.
Commissioning is not carried out by our personnel or we have not given our approval for the
commissioning or the commissioning is carried out by untrained personnel.
The unit is used inadequately, incorrectly, negligently or inappropriately or for a purpose other
than that originally intended.
The serial number is removed from the product.
For your protection, observe the following safety precautions when setting up your equipment:
Follow all cautions and instructions marked on the equipment.
Ensure that the voltage and frequency of your power source match the voltage and frequency
inscribed on the equipment's electrical rating label.
Never push objects of any kind through openings in the equipment. Dangerous voltages may
be present. Conductive foreign objects could produce a short circuit that could cause fire,
electric shock, or damage to your equipment.
The industrial PC must be mounted on an equipment carrier (1U) in a 19" rack.
A free floating or unilateral mounting may cause defects.
It is imperative to ensure a consequent strain relief to avoid damage to the connector of the
‘8-port DB9-male connector cable’.
All trademarks or brand marks mentioned in this document are used for identification purposes only and
are property of their respective owners.

Subject to alterations Version 1.1
IPCOMM GmbH - 3 - IPC191V5 Manual
Walter-Bouhon-Straße 4 Copyright © IPCOMM GmbH, 2022
90427 Nuremberg All rights reserved
Germany
2 Hardware Description
2.1 General
As hardware platform for the protocol converter a 19" industrial PC is used. This solution offers a high
degree of flexibility, performance and reliability.
Important for the selection of our components are particular items like quality, availability and a high
durability.
Mounting and intensive tests of the gateway hardware are done in our company. Each device runs
through an intensive function test. This function test includes a burn-in test with full communication of
all interfaces (min. 48 hours). Drops of communication, transmission errors and every important
component with regard to function, temperature, voltages etc. are monitored. Hundreds of restarts are
executed whereby a connection to all interfaces is established at each reboot.
Quality assurance is done according to the four-eye principle. Each device passes a number of quality
inspections.
2.2 Front View
Figure 1: IPC191V5 front view
S/N, model, voltage
CFast card
power LED
power button
CPU LED
COM2
CFast
activity LED

Subject to alterations Version 1.1
IPCOMM GmbH - 4 - IPC191V5 Manual
Walter-Bouhon-Straße 4 Copyright © IPCOMM GmbH, 2022
90427 Nuremberg All rights reserved
Germany
2.3 Rear View
Figure 2 shows the reverse side of the device. The PCIe card varies depending on the model. An
overview of the different models can be found in chapter 3 “Overview of Variants / Interface
Configuration”.
Figure 2: interfaces overview
Figure 3: 8-port DB9 male connector cable for 8-port serial interface card
COM4
main power supply
input
PCIe slot
COM3
HDMI
COM1
From left:
ETH0 –ETH5
2x USB 3.0
8-port DB9-male connector cable
for 8-port serial interface card
Attention! It is imperative to ensure a consequent strain relief to avoid damage to the
connector, see figure above!

Subject to alterations Version 1.1
IPCOMM GmbH - 5 - IPC191V5 Manual
Walter-Bouhon-Straße 4 Copyright © IPCOMM GmbH, 2022
90427 Nuremberg All rights reserved
Germany
2.4 Hardware Components
The IPC191V5 consists of a 19" housing (1U) with industrial motherboard, and integrated network
interfaces, and all other required interfaces. The basic system can be expanded with appropriate PCIe
plug-in cards.
All components are cooled passively. Only if critical system temperatures are reached, two independent
housing fans are switch on automatically.
2.4.1 Mainboard
The Mini-ITX Mainboard is an ultra-compact x86 platform. Its heart consists of a passively cooled Intel®
quad-core processor. The mainboard provides one DIMM slots for DDR3L memory module and supports
up to 8 GB system memory. Six Ethernet and four serial interfaces are also available. The gateway can
be expanded with a PCI Express card.
Additional interfaces:
6x Ethernet interface 10/100/1000 Mbps BaseT (RJ45)
4x RS-232 (3x DB9 male; 1x RJ45)
1x SATA
USB 2.0 and USB 3.0 ports
1x PCIe x1
HDMI
Keyboard and mouse via USB
2.4.2 RS-232 Interfaces
The installed mainboard provides four integrated serial interfaces.
COM 2 front side and COM3, COM4 rear side
SERIAL PORT
RS232 DTE
DB9 male connector
Pin
Direction
Description
1
INPUT
DCD Data Carrier Detect
2
INPUT
RXD Receive Data
3
OUTPUT
TXD Transmit Data
4
OUTPUT
DTR Data Terminal Ready
5
GND Ground
6
INPUT
DSR Data Set Ready
7
OUTPUT
RTS Request To Send
8
INPUT
CTS Clear To Send
9
INPUT
RI Ring Indicator
Figure 4: pin assignment of DB9 DTE RS-232 interfaces

Subject to alterations Version 1.1
IPCOMM GmbH - 6 - IPC191V5 Manual
Walter-Bouhon-Straße 4 Copyright © IPCOMM GmbH, 2022
90427 Nuremberg All rights reserved
Germany
COM 1 rear side
SERIAL PORT
RS232 DTE
RJ-45 Port
Pin
Richtung
Beschreibung
1
AUSGANG
RTS Request To Send
2
AUSGANG
DTR Data Terminal Ready
3
AUSGANG
TXD Transmit Data
4
GND Ground
5
n/c
6
EINGANG
RXD Receive Data
7
EINGANG
DSR Data Set Ready
8
EINGANG
CTS Clear To Send
Figure 5: pin assignment of RJ-45 RS-232 interface
2.4.3 8/16-Port RS-232 Serial Interface
Depending on the model each IPC191V5 can be equipped with one 8 or 16-port serial interface cards.
The following pin assignment is realized with an 8-port DB9 male connector cable (see Figure 3).
SERIAL PORT
RS232 DTE
DB9 male connector
Pin
Direction
Description
1
INPUT
DCD Data Carrier Detect
2
INPUT
RXD Receive Data
3
OUTPUT
TXD Transmit Data
4
OUTPUT
DTR Data Terminal Ready
5
GND Ground
6
INPUT
DSR Data Set Ready
7
OUTPUT
RTS Request To Send
8
INPUT
CTS Clear To Send
9
Figure 6: pin assignment of DB9 serial interface
2.4.4 Protecting RS-232 Interfaces according to IEC 61850-3 / EN 61850
For the adequate protection against the impact of switching interferences (Burst) and surge voltage, we
recommend the use of our 4 kV isolated RS-232 isolator. The used RS-232 transceivers have ESD
protection up to 15 kV. The isolator was tested according to EMC guidelines, climatic and mechanical
requirements in compliance with the standard IEC 61850-3.

Subject to alterations Version 1.1
IPCOMM GmbH - 7 - IPC191V5 Manual
Walter-Bouhon-Straße 4 Copyright © IPCOMM GmbH, 2022
90427 Nuremberg All rights reserved
Germany
2.4.5 Ethernet Interfaces
The industrial PC features six 10/100/1000 Mbps BaseT (RJ45) interfaces with link and activity LED.
Figure 7: RJ45 network interface
Additional interfaces with 10/100/1000 Mbps BaseT can be realized on request. The IPC191V5 can be
equipped with up to 10 Ethernet interfaces.
2.4.6 CFast Memory Card
The CFast card serves as a mass storage device, i.e. for storing the operating system, the applications
and configuration data. As a result the disadvantages involved with the use of a rotating hard disk are
avoided, thus improving the reliability of the system substantially since a CFast has an MTBF of at least
4,000,000 hours.
The CFast adapter is simply connected to the SATA bus of the mainboard and treated just like a hard
disk.
Figure 8: CFast adapter
When the power supply is switched off the CFast card with the entire software can simply be taken out
or inserted enabling a quick change to different hardware.
Push to take
out CFast

Subject to alterations Version 1.1
IPCOMM GmbH - 8 - IPC191V5 Manual
Walter-Bouhon-Straße 4 Copyright © IPCOMM GmbH, 2022
90427 Nuremberg All rights reserved
Germany
2.4.7 Lithium Battery
The BIOS settings of the system are stored on a battery-backed CMOS. The long-life lithium battery has
normally a lifetime of at least 5 years.
If the CMOS battery is empty and the CMOS information has been deleted, the CMOS-RAM is
programmed by the BIOS with default settings.
The converter can be operated faultlessly even if the CMOS RAM is not provided by the battery. After
the battery has been changed only time and date must be input.
To open the housing, loosen 6 screws from the top cover using a T10 size Torx screwdriver.
When replacing the battery, charge transfers to the circuit board and components must be avoided and
ESD protection measures, such as the use of a grounding wrist strap, are therefore required. The
operation may only be performed on a grounded and conductive surface.
The battery holder is soldered in the mainboard and well visible.
Figure 9: battery
Attention! Open-frame power supplies are used. Because of this, the process should be carried
out only by experienced electronic engineers.
The device must be completely disconnected from any power supply.
Before opening please push the power button (without electricity supply) several times to
eliminate residual voltages of the power supply.
Attention!
Battery replacement must be carried out by qualified specialists.
Replace the battery exclusively by the same type
(Manganese Dioxide Lithium Button Cell 3 V DC, CR2032).
The battery is not rechargeable.
When replacing, pay attention to the polarity of the battery.
Batteries must not be disposed of with household waste or incinerated. At the end of its service
life, the battery must be taken to a collection point for the recycling of electrical and electronic
equipment in accordance with the ElektroG or the EU RoHS directive.
There is a risk of explosion if the battery is handled improperly!
Battery

Subject to alterations Version 1.1
IPCOMM GmbH - 9 - IPC191V5 Manual
Walter-Bouhon-Straße 4 Copyright © IPCOMM GmbH, 2022
90427 Nuremberg All rights reserved
Germany
2.4.8 CPU LED
The CPU LED shows the states of conversion software and operating system.
Following figure shows all possible indications:
Figure 10: CPU LED indications
ON
OFF
0,5 s
ON
OFF
0,5 s
5 s
ON
OFF
passive
mode
(standby)
active
mode
software has
sopped

Subject to alterations Version 1.1
IPCOMM GmbH - 10 - IPC191V5 Manual
Walter-Bouhon-Straße 4 Copyright © IPCOMM GmbH, 2022
90427 Nuremberg All rights reserved
Germany
2.4.9 Power Supply
Power supplies with different input voltages can be used in the IPC191V5. Please pay attention to the
correct polarity and input voltage. The input voltage of the respective device is labeled on top of the
housing (see Figure 1).
The standard power supply is 115 / 230 V AC (90 - 264 V AC)
Power supply 12 / 24 V DC (9 - 32 V DC)
Power supply 48 / 60 / 110 V DC (30 - 120 V DC)
Other voltages on request
2.4.9.1 AC Power Supply
By using AC voltages a specific power supply cable (see figure below) is supplied. Please use this cable
exclusively:
Figure 11: power cable
2.4.9.2 DC Power Supply
By using DC voltages only a male connector is supplied. This connector has to be used. By connecting
the cable with the male connector the correct polarity must be kept. The wire cross-section must be at
least 1.5 mm².
Figure 12: DC voltage connection at the power supply
Figure 13: DC power cable (example - not included in the scope of delivery)
Attention! Please check the silver product label to verify the correct input voltage before
operating the unit.
Attention! Please observe the yellow instruction label for the correct connection of the DC
voltage supply.
PE ⏚
Uin –
Uin +

Subject to alterations Version 1.1
IPCOMM GmbH - 11 - IPC191V5 Manual
Walter-Bouhon-Straße 4 Copyright © IPCOMM GmbH, 2022
90427 Nuremberg All rights reserved
Germany
3 Overview of Variants / Interface Configuration
The following tables represent the configuration of the individual interfaces of miscellaneous variants.
3.1 Variant L
The device variant L corresponds to the part number HP.V5L.xyz0-0.x (see nomenclature).
Assembly
Linux
Device
I/O port
IRQ
Label
Connector
Mainboard
ttyS0
3F8
4
COM1 (Chassis rear)
RJ45
ttyS1
2F8
3
COM2 (Chassis front)
DB9ST
ttyS2
3E8
10
COM3 (Chassis front)
DB9ST
ttyS3
2E8
10
COM4 (Chassis front)
DB9ST
eth0
PCIe (Onboard)
Auto
ETH0
RJ45
eth1
PCIe (Onboard)
Auto
ETH1
RJ45
eth2
PCIe (Onboard)
Auto
ETH2
RJ45
eth3
PCIe (Onboard)
Auto
ETH3
RJ45
eth4
PCIe (Onboard)
Auto
ETH4
RJ45
eth5
PCIe (Onboard)
Auto
ETH5
RJ45
Table 1: variant L
3.2 Variant A
The device variant A corresponds to the part number HP.V5L.xyz0-1.x (see nomenclature).
Assembly
Linux
Device
I/O port
IRQ
Label
Connector
Mainboard
ttyS0
3F8
4
COM1 (Chassis rear)
RJ45
ttyS1
2F8
3
COM2 (Chassis front)
DB9ST
ttyS2
3E8
10
COM3 (Chassis front)
DB9ST
ttyS3
2E8
10
COM4 (Chassis front)
DB9ST
eth0
PCIe (Onboard)
Auto
ETH0
RJ45
eth1
PCIe (Onboard)
Auto
ETH1
RJ45
eth2
PCIe (Onboard)
Auto
ETH2
RJ45
eth3
PCIe (Onboard)
Auto
ETH3
RJ45
eth4
PCIe (Onboard)
Auto
ETH4
RJ45
eth5
PCIe (Onboard)
Auto
ETH5
RJ45
UART
Adapter
8x RS232
ttyS4
PCIe (Slot above)
Auto
COM5
DB9ST
ttyS5
PCIe (Slot above)
Auto
COM6
DB9ST
ttyS6
PCIe (Slot above)
Auto
COM7
DB9ST
ttyS7
PCIe (Slot above)
Auto
COM8
DB9ST
ttyS8
PCIe (Slot above)
Auto
COM9
DB9ST
ttyS9
PCIe (Slot above)
Auto
COM10
DB9ST
ttyS10
PCIe (Slot above)
Auto
COM11
DB9ST
ttyS11
PCIe (Slot above)
Auto
COM12
DB9ST
Table 2: variant A

Subject to alterations Version 1.1
IPCOMM GmbH - 12 - IPC191V5 Manual
Walter-Bouhon-Straße 4 Copyright © IPCOMM GmbH, 2022
90427 Nuremberg All rights reserved
Germany
3.3 Variant B
The device variant B corresponds to the part number HP.V5L.xyz0-9.x (see nomenclature).
Assembly
Linux
Device
I/O port
IRQ
Label
Connector
Mainboard
ttyS0
3F8
4
COM1 (Chassis rear)
RJ45
ttyS1
2F8
3
COM2 (Chassis front)
DB9ST
ttyS2
3E8
10
COM3 (Chassis front)
DB9ST
ttyS3
2E8
10
COM4 (Chassis front)
DB9ST
eth0
PCIe (Onboard)
Auto
ETH0
RJ45
eth1
PCIe (Onboard)
Auto
ETH1
RJ45
eth2
PCIe (Onboard)
Auto
ETH2
RJ45
eth3
PCIe (Onboard)
Auto
ETH3
RJ45
eth4
PCIe (Onboard)
Auto
ETH4
RJ45
eth5
PCIe (Onboard)
Auto
ETH5
RJ45
UART
Adapter
16x RS232
ttyS4
PCIe (Slot above)
Auto
COM5
DB9ST
ttyS5
PCIe (Slot above)
Auto
COM6
DB9ST
ttyS6
PCIe (Slot above)
Auto
COM7
DB9ST
ttyS7
PCIe (Slot above)
Auto
COM8
DB9ST
ttyS8
PCIe (Slot above)
Auto
COM9
DB9ST
ttyS9
PCIe (Slot above)
Auto
COM10
DB9ST
ttyS10
PCIe (Slot above)
Auto
COM11
DB9ST
ttyS11
PCIe (Slot above)
Auto
COM12
DB9ST
ttyS12
PCIe (Slot above)
Auto
COM13
DB9ST
ttyS13
PCIe (Slot above)
Auto
COM14
DB9ST
ttyS14
PCIe (Slot above)
Auto
COM15
DB9ST
ttyS15
PCIe (Slot above)
Auto
COM16
DB9ST
ttyS16
PCIe (Slot above)
Auto
COM17
DB9ST
ttyS17
PCIe (Slot above)
Auto
COM18
DB9ST
ttyS18
PCIe (Slot above)
Auto
COM19
DB9ST
ttyS19
PCIe (Slot above)
Auto
COM20
DB9ST
Table 3: variant B

Subject to alterations Version 1.1
IPCOMM GmbH - 13 - IPC191V5 Manual
Walter-Bouhon-Straße 4 Copyright © IPCOMM GmbH, 2022
90427 Nuremberg All rights reserved
Germany
3.4 Variant E4
The device variant E4 corresponds to the part number HP.V5L.xyz0-2.x (see nomenclature).
Assembly
Linux
Device
I/O port
IRQ
Label
Connector
Mainboard
ttyS0
3F8
4
COM1 (Chassis rear)
RJ45
ttyS1
2F8
3
COM2 (Chassis front)
DB9ST
ttyS2
3E8
10
COM3 (Chassis front)
DB9ST
ttyS3
2E8
10
COM4 (Chassis front)
DB9ST
eth0
PCIe (Onboard)
Auto
ETH0
RJ45
eth1
PCIe (Onboard)
Auto
ETH1
RJ45
eth2
PCIe (Onboard)
Auto
ETH2
RJ45
eth3
PCIe (Onboard)
Auto
ETH3
RJ45
eth4
PCIe (Onboard)
Auto
ETH4
RJ45
eth5
PCIe (Onboard)
Auto
ETH5
RJ45
Ethernet
Adapter 4x
eth6
PCIe (Slot above)
Auto
ETH6
RJ45
eth7
PCIe (Slot above)
Auto
ETH7
RJ45
eth8
PCIe (Slot above)
Auto
ETH8
RJ45
eth9
PCIe (Slot above)
Auto
ETH9
RJ45
Table 4: variant E4
4 Technical Data Sheet
A technical data sheet for the individual hardware models is available separately to this document. In
addition to pure technical data, the document also contains information on approval and applied
standards (EMC). A current version of these can be found on our website under Hardware / IPC191V5
/ Documentation:
IPC191V5 https://www.ipcomm.de/hardware/IPC191V5/en/sheet.html
5 EU Declaration of Conformity
An EU Declaration of Conformity for the individual hardware models is available separately to this
document. A current version of these can be found on our website under Hardware / IPC191V5 /
Documentation:
IPC191V5 https://www.ipcomm.de/hardware/IPC191V5/en/sheet.html

Subject to alterations Version 1.1
IPCOMM GmbH - 14 - IPC191V5 Manual
Walter-Bouhon-Straße 4 Copyright © IPCOMM GmbH, 2022
90427 Nuremberg All rights reserved
Germany
6 Nomenclature of the IPC191V5 Article Number
The IPC191V5 article number gives information about the equipment of the gateway.
Product Abbreviation
Value
Description
V5
IPC191V5
Operating System
Value
Description
L
LINUX
S
Special model
Power Supply
Value
Description
A
115 / 230 V AC
(approx. 85 –265 V AC)
B
12 / 24 V DC
(approx. 9 –32 V DC)
C
48 / 60 / 110 V DC
(approx. 30 –120 V DC)
RAM
Value
Description
I
8 GB
CFast / Storage Medium
Value
Description
F
4 GB
G
8 GB
H
16 GB
I
32 GB
J
64 GB
S
Special model
(e.g. CFast 4GB & SSD ~ 250GB)
PCI Slot 1
Value
Description
0
Not equipped
1
8port RS-232 interface card
2
Ethernet 4port
9
16port RS-232 interface card
HP.V5x.ABC0-0.1
Version
CFast
Storage medium
PCIe slot 1
- - - -
Product
abbreviation
RAM
Power supply
Operating system

Subject to alterations Version 1.1
IPCOMM GmbH - 15 - IPC191V5 Manual
Walter-Bouhon-Straße 4 Copyright © IPCOMM GmbH, 2022
90427 Nuremberg All rights reserved
Germany
7 Dimensions IPC191V5 (CAD)
Table of contents
Other IPCOMM Gateway manuals
Popular Gateway manuals by other brands

HMS Networks
HMS Networks Ixxat SG-gateway user manual

Eurotech
Eurotech ReliaGATE 10-05-34 Original user manual

InHand
InHand IG502 Quick installation manual

Garmin
Garmin Flight Stream 110/210 installation manual

Juniper
Juniper PowerConnect J-SRX210 quick start guide

ZyXEL Communications
ZyXEL Communications P-660HNU-F1 Quick start quide

Adman Technologies
Adman Technologies DH-1 user manual

Quasar
Quasar SmartCell 212 installation manual

Mennekes
Mennekes eMobility-Gateway Professional+ OPERATING AND INSTALLATION Manual

Motorola
Motorola BLADE series user guide

ADTRAN
ADTRAN 617600139-13A quick start

Opengear
Opengear ACM7008-2-LMx series quick start guide