6
3.0 OPERATION
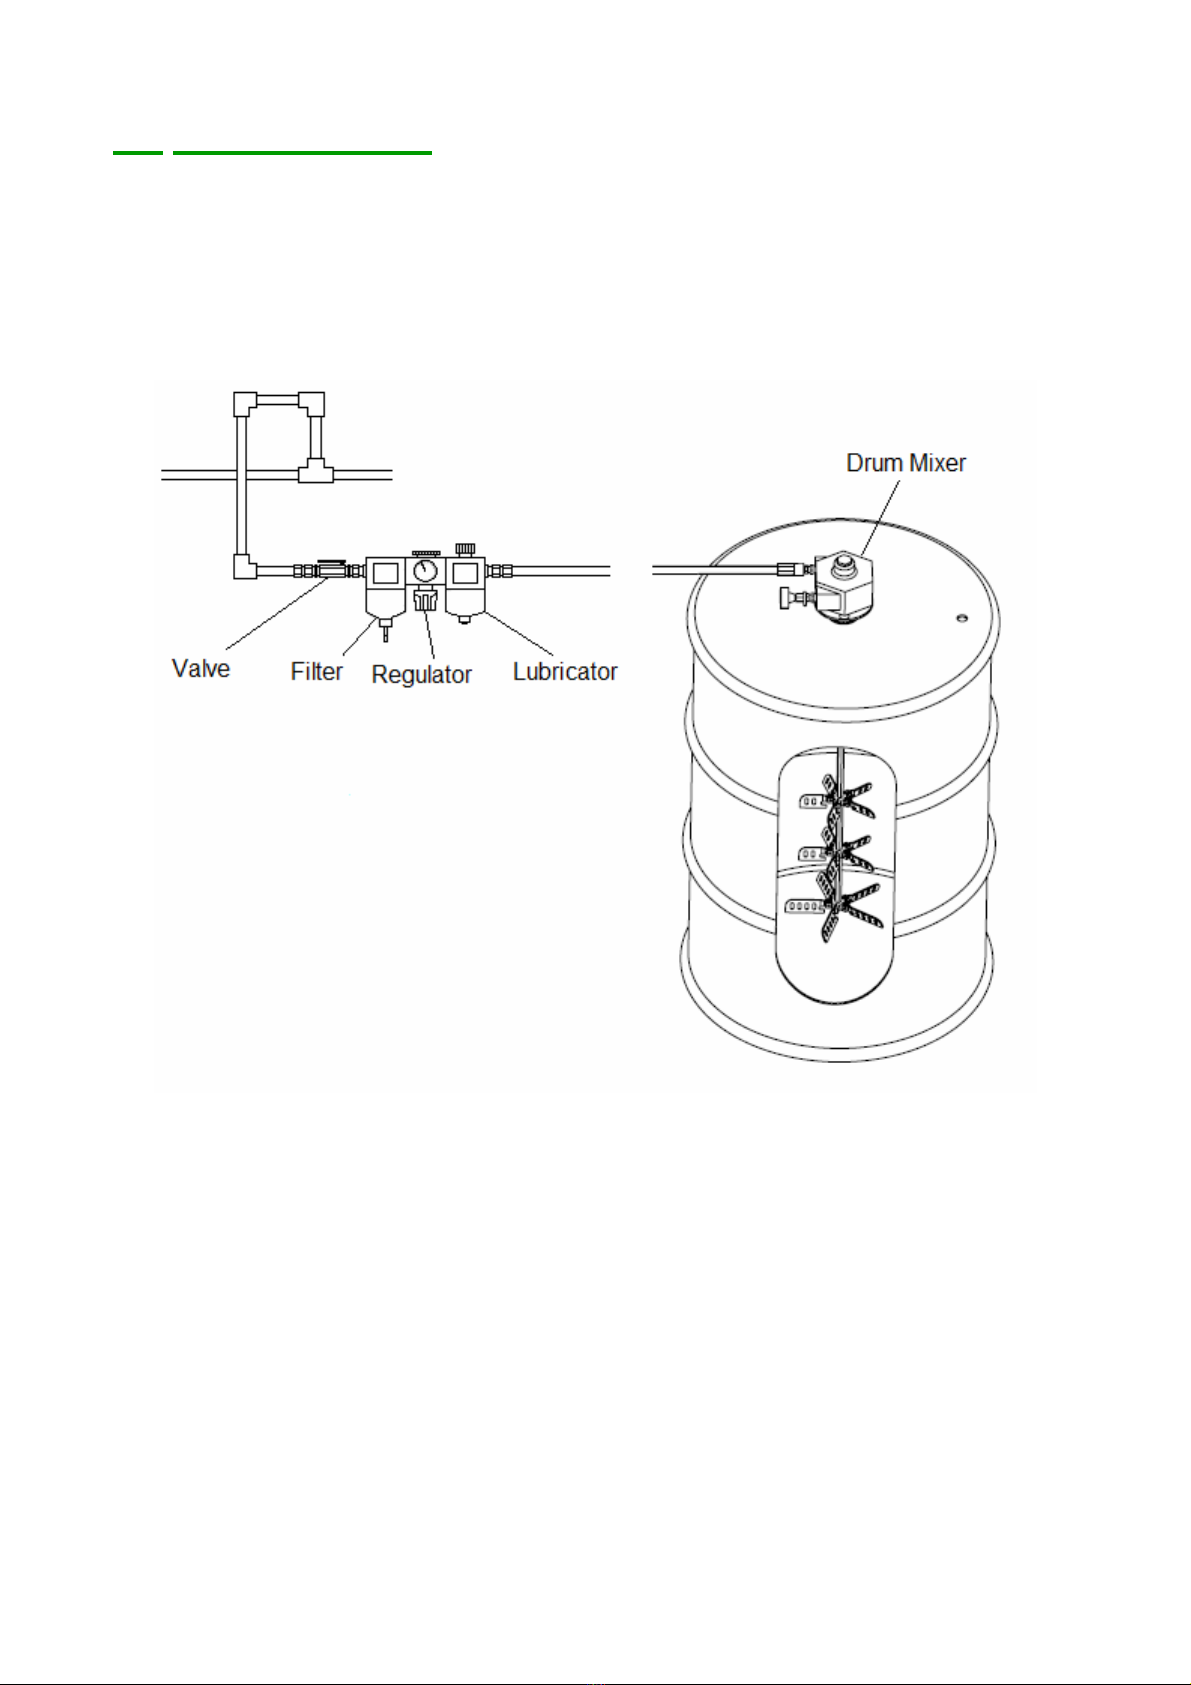
3.1 Drum mixer operating tips
An 8" blade on the bottom of the mixer shaft is standard on each drum mixer to get
maximum pull of heavy materials from the bottom of the barrel. Additionally, two 6” upper
blades assist in pulling fluid from the sides of the drum for optimum mixing capability.
If you do not have a center bung in your drum, IPM has designed an off-set bung adaptor
riser (IPM part # 500515) that angles the mixer shaft away from the sides of the drum to
allow proper chemical mixing. As a temporary measure, you can also take an 18" – 20”
piece of 2" diameter threaded pipe and screw into your bung. Carefully bend/point the top
of the pipe away from the center of the drum, tilting the bung for better mixer clearance.
The amount of air you will need to mix your fluids will depend on certain factors such as
viscosity, mixing speed, specific chemical, temperature, etc. Typically, 10 -20 CFM air
pressure is sufficient for mixing operations. A 1/4” ball valve can be used effectively as a
metering or speed control measure.
An automatic air line lubricator should be installed in the air line as close as possible and
no more than 18 inches (1/2 meter) from the air motor. Install the lubricator level with or
above the air motor so that the oil mist will blow directly into or fall down into the motor. Fill
the oil reservoir to the proper level with Gast #AD220 or SAE 10W high detergent or non-
detergent motor oil. Adjust lubricator to feed 1 drop of oil for every 50 - 75 CFM ((1.5 - 2
M3 per minute) air while the unit is running, or 1 drop of oil per continuous minute of run
time. Do Not overfeed oil or exhaust air may become contaminated.
Proper blade rotation is important for the swing out style blade assemblies to function
correctly. Looking from the bottom of the drum mixer, the shaft/blade rotation should be
clockwise for proper swing-out of the blades.
For the most efficient output and control of speed, use air lines that are the same size as
the motor inlet port if the connection is less than 7 feet (2 meters). For longer connections,
use the next pipe size larger than the motor intake port. Connect lines to motor in the
proper direction.
Do not add any thrust to the end or side of the shaft when making connections.
Check all connections before starting motor. It is your responsibility to operate this product
at recommended speeds, loads and room ambient temperatures. Do not run the motor at
high speeds with no load. This will result in excessive internal heat that may cause motor
damage.
Certain chemicals are the type that set up or seize the folding blades if allowed to solidify
on the blade assemblies. ENSURE YOU PERFORM THIS OPERATION IN AN AREA
THAT IS WELL VENTILATED AND HAS NO FIRE HAZARDS. If this should happen, an
effective way to remove the hardened chemicals is to heat the blades with a welding or
propane torch to burn the residue off. Since the blades are stainless steel, the heat will not
adversely affect them. It is not necessary to heat the blades to a point they become red hot.
Once the cleaned blade assemblies have cooled, clean the remaining debris from the
assembly and lubricate with WD-40 or an equivalent lubricant, then test to ensure they
swing freely for proper operation.