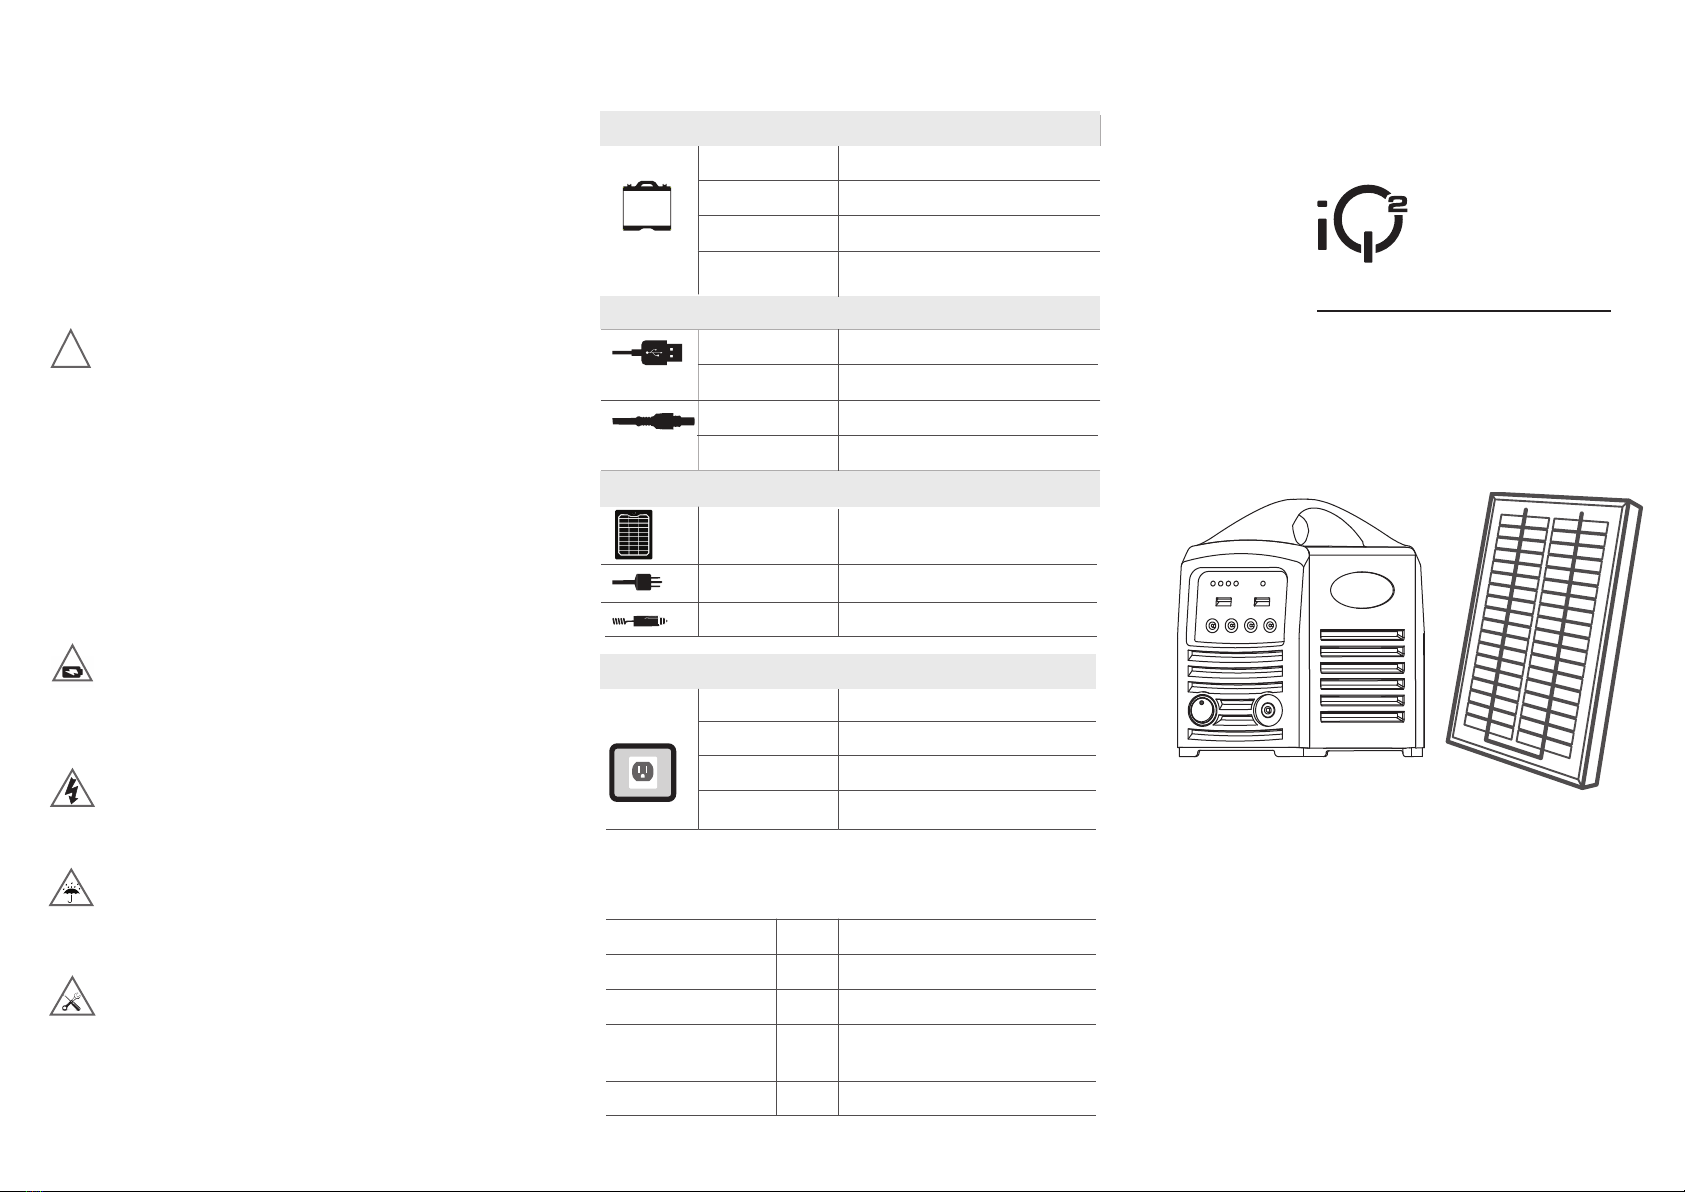
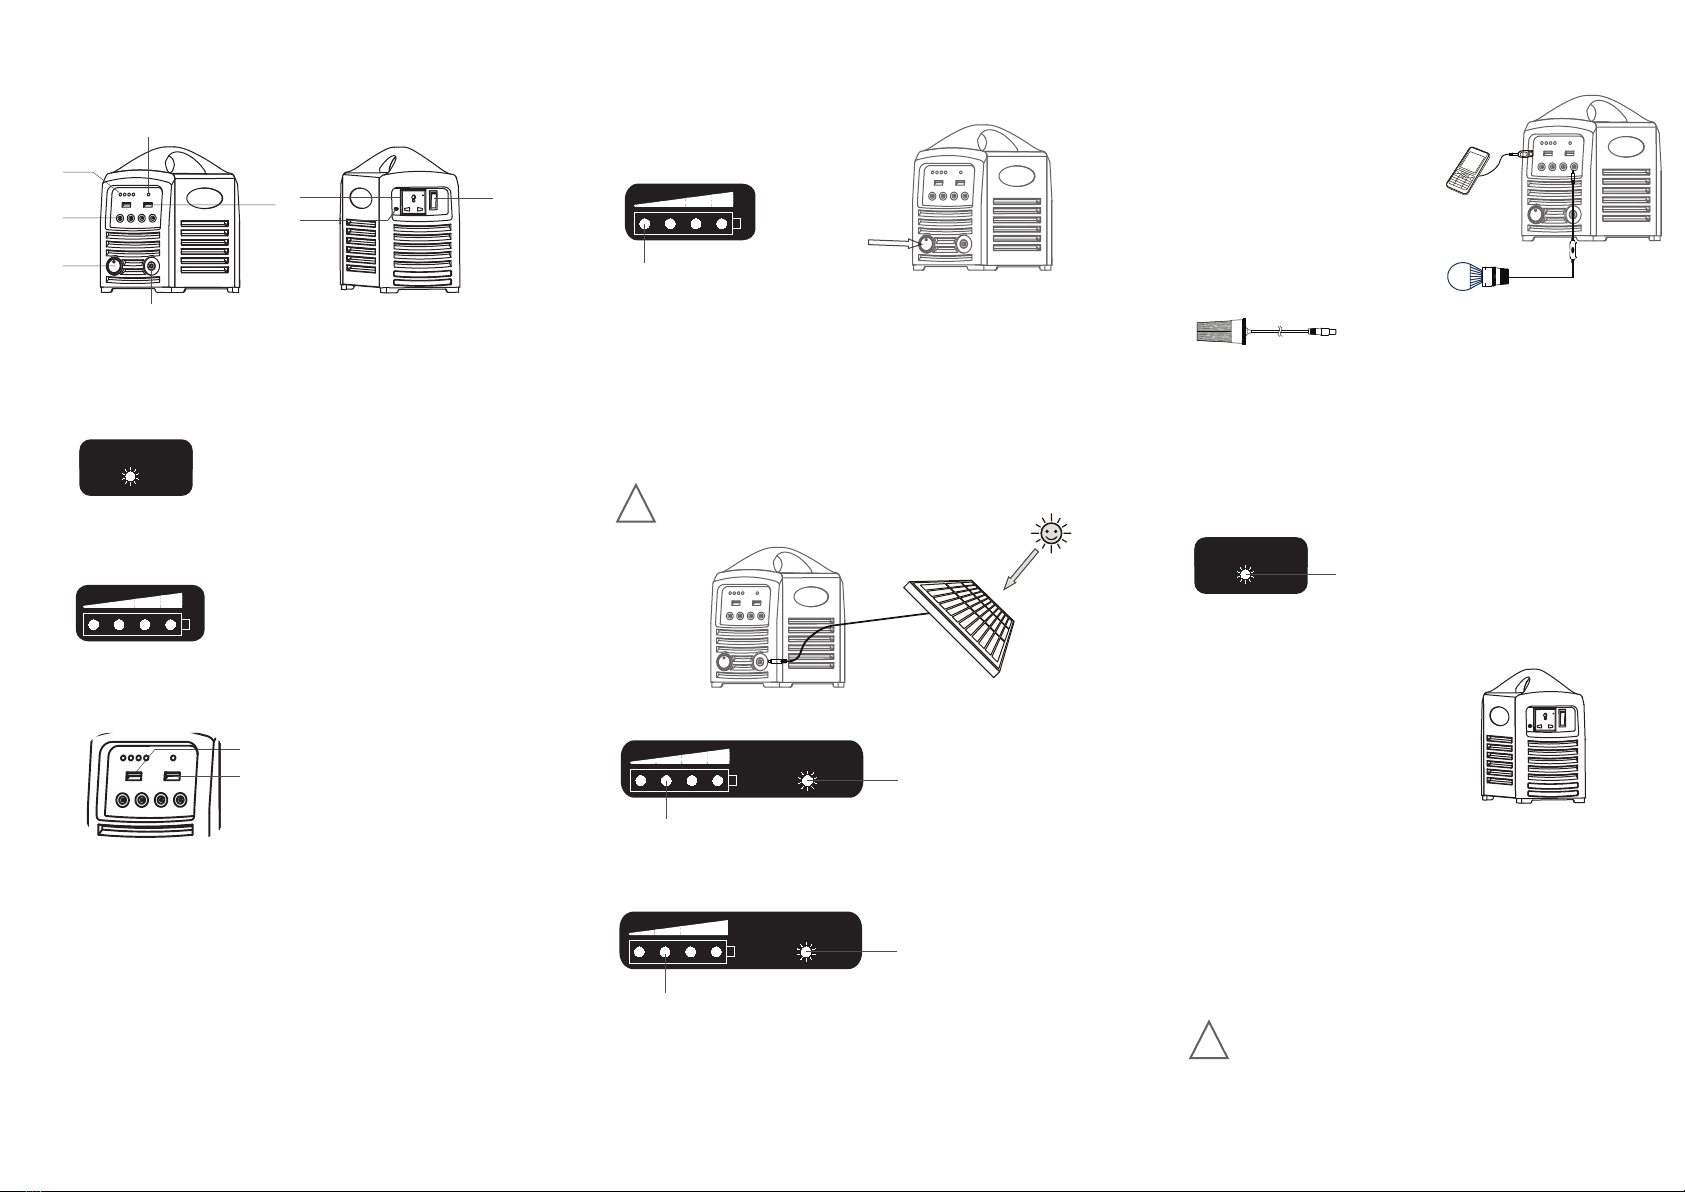
iQ2 Imports Smart AC Series User manual

The Smart AC Series
Operation Manual
This is an electrical device and should be handled as such.
To prevent shock or injury, please keep the iQ2 360W unit away
from re, water and any form of moisture.
This is an electrical device and should be handled as such.
To prevent shock or injury, please keep the iQ2 360W unit
away from re, water and any form of moisture.
DO NOT ATTEMPT to repair or dismantle the iQ2 360W unit.
If you are experiencing diculties operating your unit please
contact our Customer Tech and Service Department at
1-855-iQ2-7243. Any sign of tampering with the unit may
void any Warranty claims.
Use only the approved solar panel and AC charge adapter
that were included with your iQ2 360W. If either of those are
broken and or need to be replaced please contact our technical
support division.
Thank you for choosing the iQ2 360W Portable Power Station.
The iQ2 360W unit is designed to: provide DC power for lighting,
power and charge small accessories: cell phones, iPads, etc via the
USB ports, and provide an electrical power supply for small AC
appliances through the built-in inverter. For safe and optimum
performance please use this unit properly. Carefully read and
follow all instructions and guidelines in this manual and give special
attention to ALL WARNING STATEMENTS. Please read the entire
manual before operating the unit.
USB Port
INTERNAL
2000 cycles
Battery
DC OUTPUT
DC Port
12V, 30AH, 360WH
4A
1
WARRANTY and REGISTRATION should be done upon purchasing
your iQ2 360W unit. Simply visit our website at:
www.iQ2imports.biz
!
Due to battery capacity and storage, upon purchasing,
the iQ2 360W unit needs to be FULLY CHARGED. If you
are charging through the solar panel, simply follow the
instructions and let the unit charge for a FULL 12 - 15 hours,
depending on the amount of sunlight. If through the AC
adapter, follow the charging instructions and allow the unit
to charge overnight. The built-in overload protection will
keep the batteries from overcharging. However, in order to
prevent damage, DO NOT leave the iQ2 360W plugged
continuously into an AC outlet for more than 24 hours.
To guarantee maximum performance and life span, if the
unit is being stored and not in continual use, it is
recommended to charge the unit after each use and once
every 45 days.
LED Light
1
2
1
35W
14.6V, 4A
Accessories Number Designation
IMPORTANT NOTE
●
IMPORTANT
NOTE
WARNING
WARNING
WARNING
Technical Data
●
Capability, 5V 1.6A, 8W
2Port number
4
Capability, 12V
Port number
3A, 36W
Solar Panel
Power
AC wall charger
12V car adapter
Output Voltage
Port Number
Capability Max
110V
200W
Frequency 60Hz
CHARGING
AC Inverter Outputs
Lithium iron PhosphateBattery Type
Battery Capacity
Life-Span
Optimal Charging
Current
Annex
●
Solar Panel Power
AC wall charger
1
12V, 3W, and 5m Cables with
E27 pin connection and Switch
USB Output iPhone, HTC, Samsung, Nokia, etc.
14.6V, 4A
35 W
Need to car start
360W
PORTABLE POWER STATION
Simply Smarter

2
3
5
6
1
4
Front
3. Output USB Ports
USB Ports:2PCS
4. 0utput : DC ports
DC Ports:4pcs
Size:Φ2.1×6
Output: 12VDC 3A / SET
AC adapter
Car adapter
5. ON/OFF
The switch without control
the AC
6. Charger In(Solar In) ,1pc
Size:Φ2.5×6
Charger In: solar panel
1. Charging and fault lighting
Red-Lighting: charging
Red-Lighting: flash
SOLAR CHARGE
OUTPUT
USB DC 5V
OUTPUT
DC 12V
OUTPUT
DC 12V
OUTPUT
DC 12V
OUTPUT
DC 12V
OUTPUT
USB DC 5V
Battery level LED indicator
Starting up
Check that the power pack switches are in the “ON”position
before charging in.
Recovery voltage
Charging step – By Solar Panel
SOLAR CHARGE
Charging in
Flash - The battery power is low
Check that the power pack switches are in the “ON”position,
locate the solar panel in direct sun light up to the DC input .
SOLAR CHARGE
Indicates that the system will trigger the low battery Protection,
Charging to the recovery voltage , the system can start,
Charging to the recovery voltage 12 VDC.
Red-Lighting: charging
Check that the power pack switches are in the “ON”position.
Charge light will turn on while charging
Once charging completed, four Green lights will stop flashing.
Charging AC Adapter 110V
SOLAR CHARGE
Red-Lighting: charging
Charging in that the four instructions without rules of ash.
DC OUTPUT
Support USB charging or load
to use.
Mobile phone charging
USB*2 parallel output:
5 VDC / 1.6 A
General USB output,
Support USB charging or load use.
DC jack * 4pcs (5.5*2.1) output:12 VDC,
Single-port maximum output 12 VDC / 3A (36W)
General use as lighting and etc DC.
Includes overload and reverse polarity protection
connect using the extension leads of Cigarette Lighter
Adapter and turn on via the inline switch to each light.
AC Inverter output
Inverter unit runs a loss, when not in use,
please turn the main switch o.
SMART AC inverter output as independent system;
Please pay attention to the power AC load, no more
than inverter capacity 200W.
The iQ2 360W has a built-in intelligent temperature controlled
fan that cools the inverter and will automatically start at 45 C.
Overload and short circuit protection
SOLAR CHARGE
OUTPUT
USB DC 5V
OUTPUT
DC 12V
OUTPUT
DC 12V
OUTPUT
DC 12V
OUTPUT
DC 12V
OUTPUT
USB DC 5V
Red ash -
Includes overload and etc protection.
Please turn o the power switch & Disconnect the load and
then restart.
Includes overload and etc protection.
Please turn o the inverter of power switch & disconnect the
load and then restart.
2. Battery Charge Level
Green lighting
SOLAR CHARGE
!
Operation
●Operation
●
Variants
●
Push
!
Rear
7
8
9
7. AC ON / OFF
8. AC output, 1pc
9. AC output indicator light
5VDC 0.6A
5VDC 1A
The iQ2 360W Solar Power Pack is equipped with several built-in safety
features. In the event your battery has been fully depleted, and or the
unit is not taking a charge (RED charge light indicator will be on while
charging) you will need to follow the following charging instructions
below in order to reset the Battery Discharge Safety:
* Make sure unit power is "ON" while charging.
* Pull charging cord plug, either solar or AC charging, doesn't matter,
out of the charging port.
* Insert the charge cord plug into the #4 DC Output port. IMPORTANT
NOTE: Both the RED charge light indicator and GREEN light charge
gauge will light up immediately...REMOVE the charge cord plug from the
DC port.
* Re-insert charging cord plug into the charging port. The unit will
continue charging.
* Once the unit is charging the indicator lights will begin to flash.
The AC adapter box will get warm during charging.
SPECIAL NOTE: For maximum battery performance and longevity, it is
recommended that you do not fully deplete the battery. Keep the battery
charged above 25%.
This manual suits for next models
1
Table of contents
Popular Inverter manuals by other brands

Waeco
Waeco PerfectPower PP1002 Installation and operating manual

SamplexPower
SamplexPower PST-1500-12 owner's manual

Thermasol
Thermasol PROI Seres Installation & operation manual

Motomaster
Motomaster Eliminator 011-2103-8 instruction manual

INHENERGY
INHENERGY HI-3K-SL user manual

Outline
Outline NG01 user manual

Northern Lights
Northern Lights IM1000 installation manual

YASKAWA
YASKAWA SOLECTRIA XGI 1500-DCG Series Installation and operation guide

Dometic
Dometic Enerdrive ePOWER EN1105S-24V user manual

Huawei
Huawei SUN2000-4.95KTL-JPL1 user manual

ALLTO SOLAR
ALLTO SOLAR AS-SL-S01 user manual

Samlexpower
Samlexpower Evolution Series quick start guide