BEFORE USING
USER INFORMATION
PRECAUTION
............................ 1
................................... 2~3
LCD MENU
LIVE SCREEN
MAIN SCREEN
PLAYBACK
CAMERA
TIME
SOUND
ADAS
EVENT
VOLTAGE
MEMORY
SECRET MODE
LCD
INFO
.................................. 17~18
..................................... 19
............................................ 20
............................................... 21
..................................................... 22
................................................. 23
.............................................. 24~25
............................................ 26~27
........................................ 28~29
.............................................. 30
..................................... 31
................................................ 32~33
..................................................... 34
DEDICATED PC VIEWER
DEDICATED PC VIEWER
LIST OF RECORDINGS &
FRONT/ REAR PALYBACK
BACKUP
SETTINGS
....................... 35
..................... 36
................................................ 37
............................................ 38
PRODUCT INFORMATION
PRODUCT OVERVIEW
PACKAGE COMPONENT
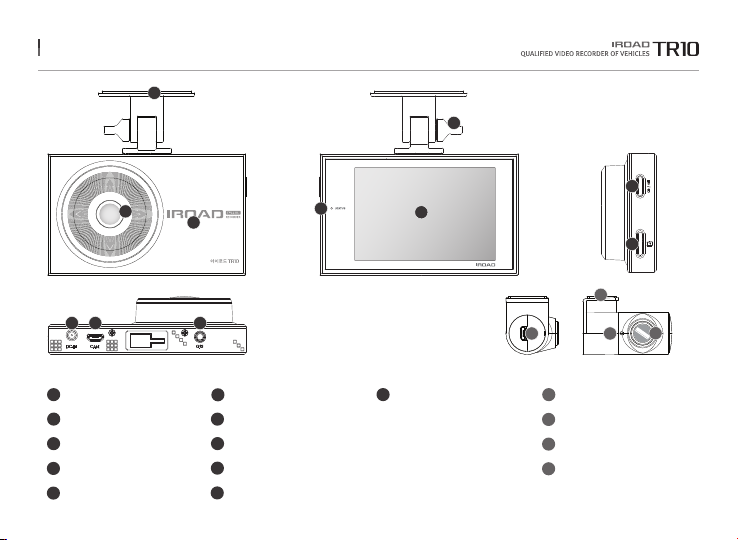
NAME OF EACH PART
SPECIFICATION
............................ 4
......................... 5
............................. 6
..................................... 7
SET UP
INSTALLATION
UNINTERRUPTED FUSE CABLE
................................... 8~9
........... 10
USING THE DEVICE
PRODUCT OPERATION
BUTTON SCENARIO
RECORDING MODE
VOICE GUIDANCE
VIDEO FOLDERS IN SD MEMORY CARD
FIRMWARE UPDATE
......................... 11
............................. 12
.............................. 13
................................. 14
. 15
............................. 16
TROUBLESHOOTING ... 39
INDEX