Istar PI00670 User manual

7-in 1 Safety Car Charger
with built-in power bank & torch
PI00670
This multifunction 7-in-1 car charger includes a safety hammer,
belt cutter, alarm and 3 mode torch. It also functions as a power
bank with a built-in lithium battery rechargeable via a DC car
socket or USB port.The charger also features overcharge, over
discharge, overload and short circuit protection, to extend the
life of the built-in battery and the battery of your USB devices.
Ideal for charging:
1 SOS Switch
2 Charge Indicators (Blue)
3 Micro USB Port (DC input)
4 USB Port (DC output)
5 LED Torch
6 Safety Belt Cutter
7 Leaf Spring
8 Alarm Speaker
9 Charge Status /
Torch Button
10 Car Charger Plug &
Safety Hammer
Mobiles Cameras TabletsSmartphones
Features

Safety Warnings
This product is not a toy and could cause injury or damage
to property if handled incorrectly; please keep it away from
children under 6 years of age.
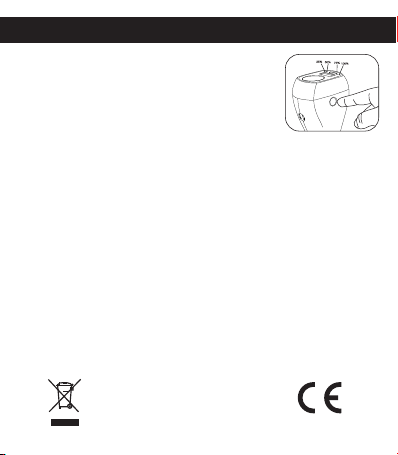
• The concealed point of the Safety Hammer ➉is sharp
be careful not to touch it.
• This charger is not waterproof, please do not expose to
liquids. If the unit gets wet, use a clean cloth to absorb
water on the unit's surface. If liquid has entered the sockets or
housing, use a hair drier on very low heat to dry the unit to
avoid a short circuit.
• This product contains a Lithium battery. It must be used and
charged properly. Improper use can cause the battery to
catch fire or explode resulting in serious or fatal injury.
• Do not leave the item in direct sunlight, temperatures over
70ºC, will damage the built-in battery.
• If the product is not charging properly:
1) Check if the adaptor is suitable for your device.
2) If the unit has shut down automatically you will need
charge the built-in battery.
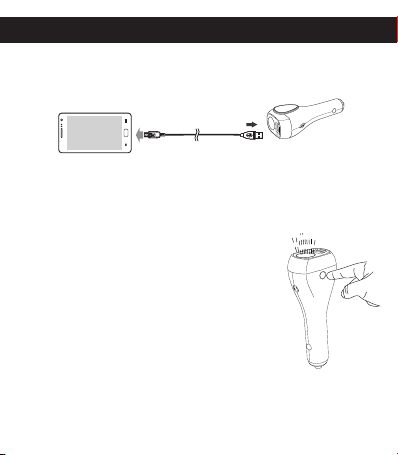
3) If the charger has not been used for six months or more
the built-in battery will lose its charge. Check the charge
(press the Check Charge button ➈if only 1 LED is lit you will
need to charge the unit before using it to charge your
mobile phone. Use the USB cable provided to connect to a
powered USB socket and charge the for 2-3 hours.
• To prolong the battery life, charge the unit fully at least
once every 6 months.

In-Car Charging and USB Charging
In-Car Charging - using the cigarette lighter socket
Step 1: Plug the charger into a car cigarette lighter DC socket,
the blue LED will start flashing to indicate there is power.
Step 2: Use the micro USB cable provided to connect
your device to the car charger USB DC out port ➃.
Tip: If you are charging an iPhone/iPad,
use your original cable to connect it
to the charger USB DC out port ➃.
Step 3: While charging, the blue LED
indicator will start to flash, when the
battery is fully charged, all four blue indicators will be lit.
PLEASE NOTE: In some vehicles the DC socket will only work
when the ignition is switched on or the engine is running.
USB Charging - using a PC, laptop or USB adaptor
To charge the built-in battery of the charger connect the micro
USB cable provided to the DC input port of the charger ➂
and connect it to a powered USB port on a PC, laptop or USB
mains adaptor.The blue LED indicator will start to flash, when
the battery is fully charged, all four blue indicators will be lit.
➂
100-240V
USB port to
Micro USB port

Once your charger is charged via USB
Step 1: Use the micro USB cable to connect the charger to
your USB device.The charging indicator on your device will show
when it is connected.
Note 1: If your device’s charging port is not a micro USB
(e.g. on an iPhone), please use the original cable supplied
with your device to connect to the charger.
Note 2: The charger will automatically start
charging your device when connected to it.
Using the built in 3 mode LED torch
1) Press and hold down the LED torch button
(9) for about 1.5 seconds to switch on the
LED torch at medium strength.
2) Press again to switch to full beam
3) Press a third time for a white flashing light
4) Press hold down the LED torch button ➈
in any mode to switch off the torch.
Power Bank & Torch Functions
➃

Hammer, Belt Cutter & Alarm Functions
Using the safety hammer
The safety hammer feature is designed to help you break a
car window/windscreen to allow you to escape or free
someone from a car in which the doors are jammed shut.
The hammer is concealed in the positive pole of the charger
plug ➉. Hold the car charger in your hand and strike the
window with the narrow end.
Tips: Make sure you hold the
charger at right angles to
the glass for best results.
Using the safety seat belt cutter
If after an accident a seat belt cannot be
released normally you can use the blade ➅
concealed in the torch end of the charger to
cut the fabric of the belt. Hold the narrow
end of the charger, hook the blade over the
belt and pull the charger towards you.
Pull back and forth to cut through the fabric of the belt.
Activating the personal alarm
Slide the SOS switch ➀on the side of the
charger to the up position to activate the
alarm. Slide the switch down to stop.
Note 1: For maximum volume make sure
you don’t cover the Alarm Speaker outlet ➇
with your hand.

Checking Battery Capacity
To check the charge status of the charger,
press the capacity indicator button ➈
• If 4 of the blue LED indicators ➁ are lit,
the capacity is at 100%.
• If 3 of the blue LED indicators ➁ are lit,
capacity is at 75%.
• If 2 of the blue LED indicators ➁ are lit the capacity is at 50%.
• If 1 of the blue LED indicators ➁ is lit the capacity is at 25%.
Waste electrical and electronic products must
not be disposed of with household waste.
Please recycle where facilities exist.
Check with your Local Authority for recycling advice
Technical Support
www.istarproduct.co.uk/support
Disposal
Do not dispose of this product with household waste at the
end of its life cycle. It should be disposed of separately from
household waste at an appropriate recycling point/centre
Table of contents
Popular Automobile Accessories manuals by other brands

Racelogic
Racelogic Performance Box Touch V1 quick start guide

Rydeen
Rydeen rdv360II owner's manual

RIVERSMITH
RIVERSMITH RIVEROUIVER SHORTCUT installation guide

CrimeStopper
CrimeStopper CS-5601 Installation and operating instructions

travall
travall TDG 1502 Fitting instructions

PERAGON
PERAGON R2-QC-CK Assembly, operating & maintenance instructions