iSys iTerra IJ875 User manual
1
www.isys‐group.com
iTerraIJ875
UserGuide
iSys - The Imaging Systems Group Inc. © Copyright 2009 Rev 005

2
Table of Contents
OrderingConsumableSupplies
4
UnpackingandInstallation
5
UnpackingthePrinter 5
Assembling the Input & Output Baskets 6
Installing the Toner Cartridges 7
Installing the Printheads 7
Loading Paper 8
IPConfigurationandDriverInstallation
9
Windows XP Add Printer Wizard and Driver Installation 9
Windows Vista Driver Installation 18
USBtoEthernetWindowsVistaDriverInstallation
26
USBtoEthernetWindowsXPDriverInstallation
33
SettinguptheIJ875withtheUSBEthernetAdapter
38
Setting up your computer 38
Setting up the IJ875 42
PrinterControlPanelOverview
43
WebInterface
44
TopofFormCalibration
48
Specs/FeaturesandBenefits
49
Troubleshooting
49
LimitationofLiability
50
iTerraIJ875Warranty
51
iSys is an ISO 9001 Registered Firm
3
Thank you for selecting the iTerra IJ875. iSys will make every effort to assist you with operation of your new
printer. It is our sincere desire that your ownership experience meets your highest expectations.
This user guide is provided to help you easily install and operate your new printer. It contains important
information on the features and functions of the iTerra IJ875.
Need Help?
If you require additional assistance or information, please contact the iSys Technical Support team at:
iSys - The Imaging Systems Group Inc.
911 28th Street N.E.
Calgary, AB T2A 7X1
Canada
Toll Free in North America: 1-800-415-4797
Phone: (403) 204-5200
Fax: (403) 204-1971
E-mail: support@isys-group.com
WARNING
: A WARNING indicates the potential for personal injury.
CAUTION: A CAUTION indicates the potential for damage to the IJ875.
NOTE: A NOTE indicates special attention is required.
This symbol indicates an area of possible concern due
to static discharge into the circuitry. When you see
this symbol in the manual, please observe proper
precautions to minimize damage to circuitry.
THE INFORMATION CONTAINED IN THIS DOCUMENT IS SUBJECT TO CHANGE WITHOUT NOTICE.
EXCEPT AS PROVIDED BY LOCAL LAW, THE IMAGING SYSTEMS GROUP INC. (ISYS) MAKES NO
WARRANTY OF ANY KIND WITH REGARD TO THIS MATERIAL, INCLUDING, BUT NOT LIMITED TO THE
IMPLIED WARRANTIES OF MERCHANTABILITY AND FITNESS FOR A PARTICULAR PURPOSE. ISYS
SHALL NOT BE LIABLE FOR ERRORS CONTAINED HEREIN OR FOR INCIDENTAL OR CONSEQUENTIAL
DAMAGES IN
CONNECTION WITH THE FURNISH
ING, PERFO
RMANCE OR USE OF THIS MATERIAL.

4
Ordering Consumable Supplies
Using non-Qualified iTerra IJ875 media and consumables will void the printer’s warranty.
•Reach iSys toll-free by phone at 1-866-415-4797 within North America, or 1-403-204-5200 globally.
•Reach iSys media by fax at 1-403-204-1971
•Order online at the iSys Media Shop www.isys-media.com
•All prices in are in US dollars.
•Credit Cards are accepted.
•Sales tax as well as shipping and handling charges are added where applicable.
•An iSys purchase order can be used to order products directly if the order value is over $500, excluding
freight and taxes and if you have been approved for credit. Please contact iSys for a purchase order form.
Paper
Media iSys Part Number
Coated Fanfold Paper IJ-SCFF1000
Non-Coated Fanfold Paper IJ-NCFF1000
Ink Cartridges
Color iSys Part Number
Black
IJ875-BK
Cyan
IJ875-CY
Magenta
IJ875-MG
Yellow
IJ875-YW
Printheads
Color iSys Part Number
Black and Yellow
IJ875-PHBY
Cyan and Magenta
IJ875-PHCM
5
Unpacking and Installation
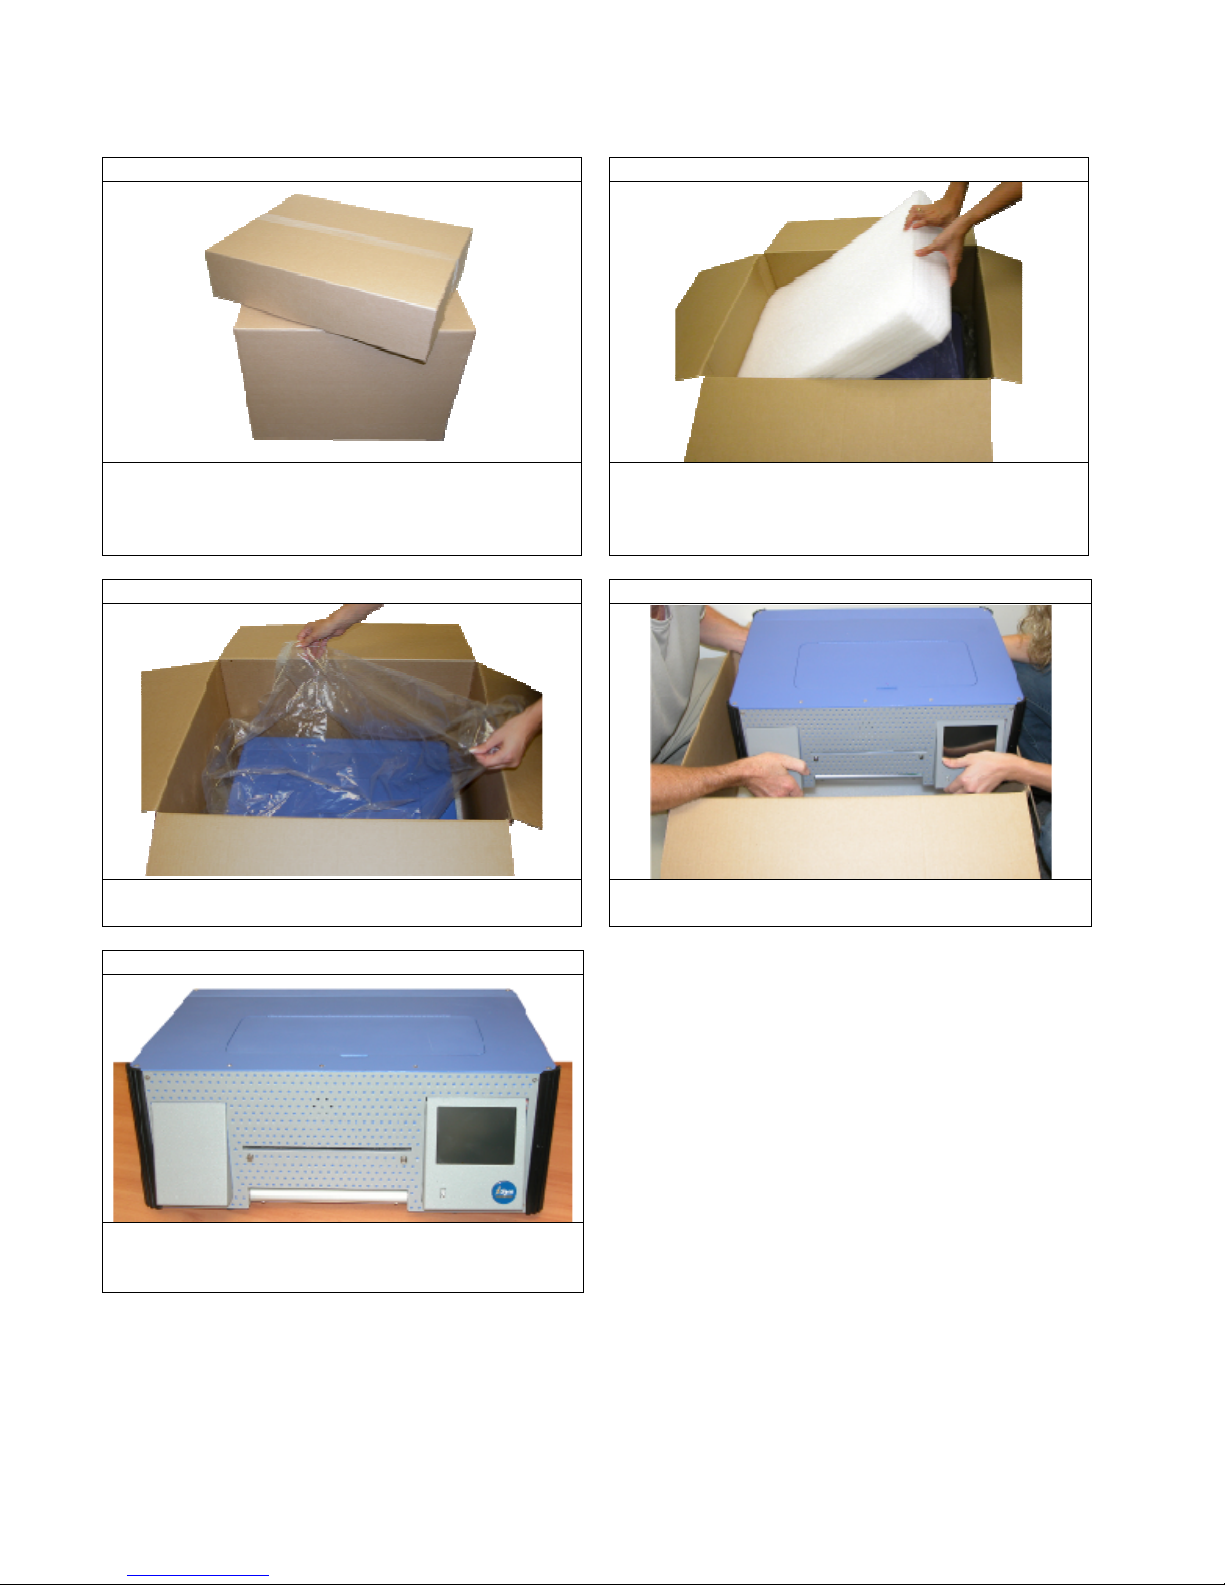
Unpacking the Printer
STEP 1 STEP 2
Open the box and remove the accessories box
from the top of the IJ875 box.
*Note – A small box containing accessories will lay
on the top of the Styrofoam that contains the IJ875.
Remove the top piece of Styrofoam from the top of
the IJ875.
STEP 3 STEP 4
Remove the piece of protective plastic wrapping
from the top of the IJ875 Using two people, gently remove the IJ875 from the
box.
STEP 5
Place the IJ875 on a table. (Store the box and
printer packaging in case future shipping is
required)

6
Assembling the Input & Output Baskets
STEP 1 STEP 2
Place the plate under the printer; the holes must
align with the back legs of the printer. *Note: the
plate must be parallel with the edge of the surface.
Locate the front output basket screws.
STEP 3 STEP 4
Align the holes on the output basket with the
screws. The output basket should be attached to the front of
the printer as shown in the image above.
STEP 5 STEP 6
Align the input basket holes to the hooks on the
plate. The input basket should be attached to the front of
the plate as shown in the image above.
7
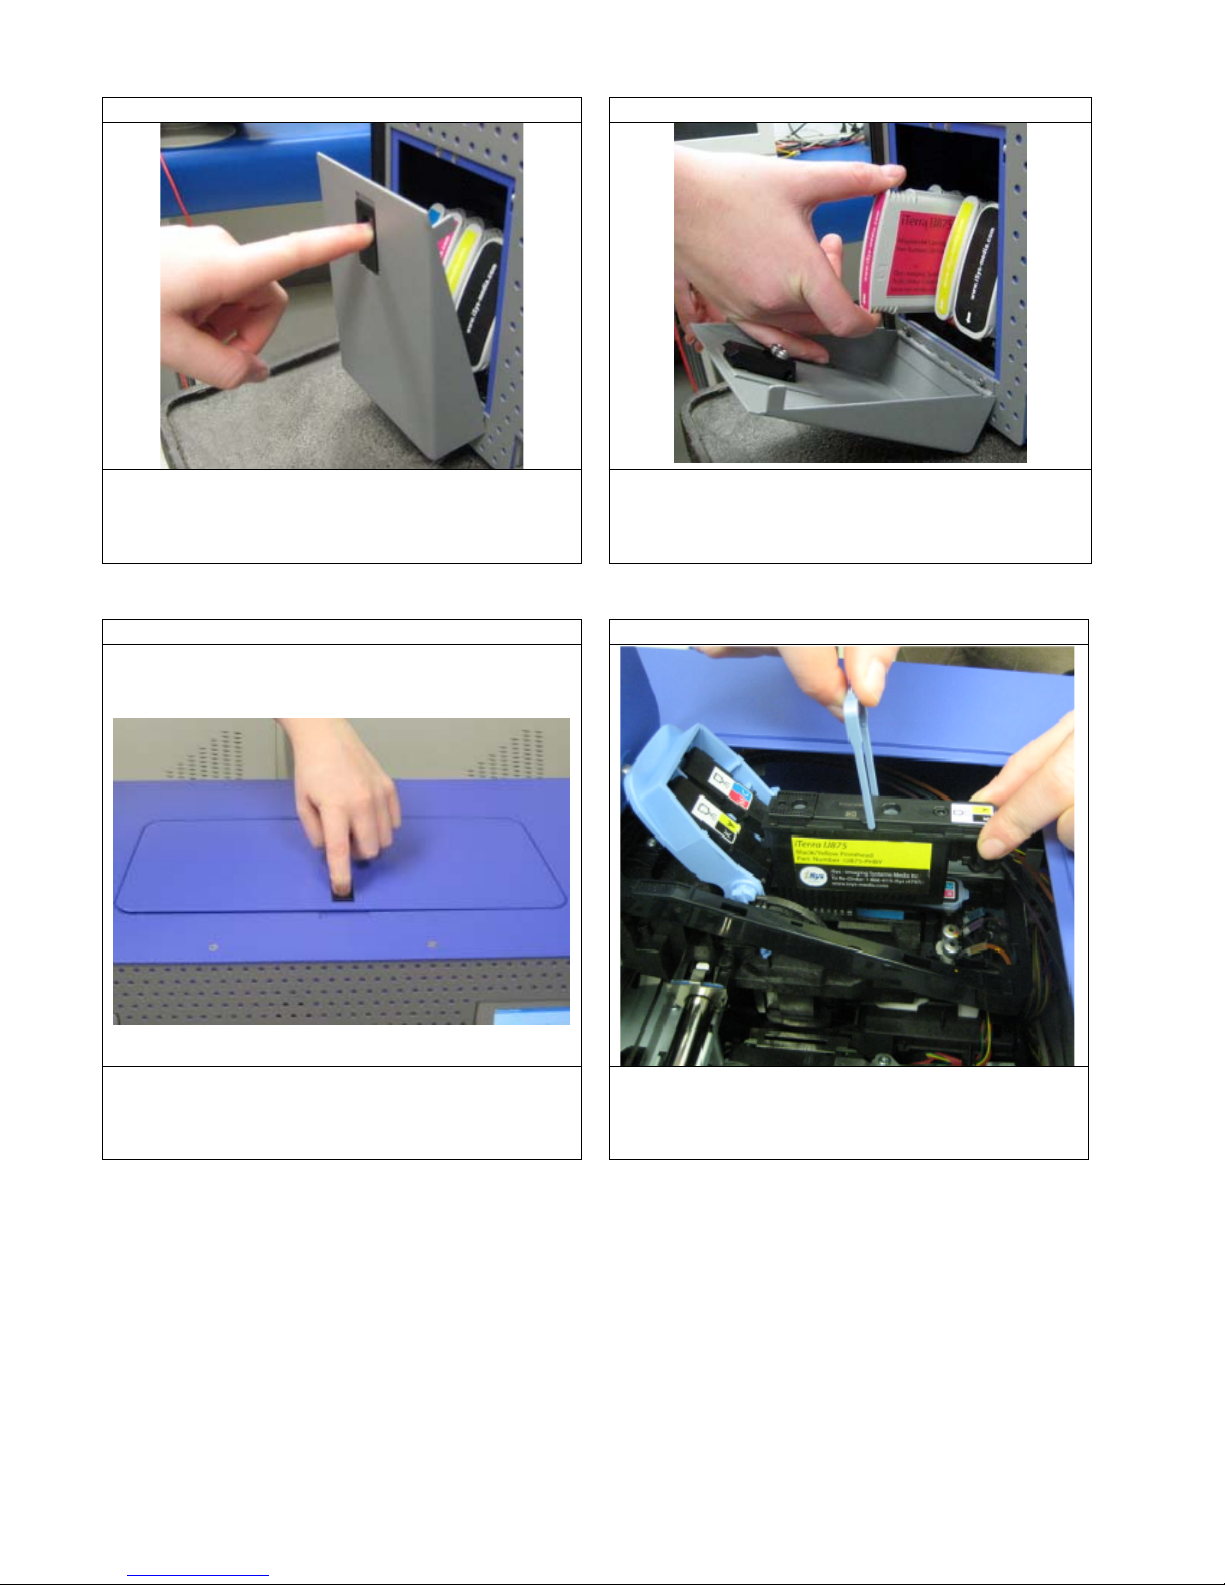
Installing the Toner Cartridges
STEP 1 STEP 2
Push the black latch down to open the toner door. Match the color of the cartridge to the slot in the
printer. Insert the cartridge until it clicks into place.
As the ink cartridges are inserted, the front panel
will display the ink levels.
Installing the Printheads
STEP 1 STEP 2
Push the black latch down to open the hinged
printhead cover located at the top of the printer. Lift the blue cover and press the printheads firmly
into their appropriate slots so they click into place,
returning the blue printhead handle to its lower
position.
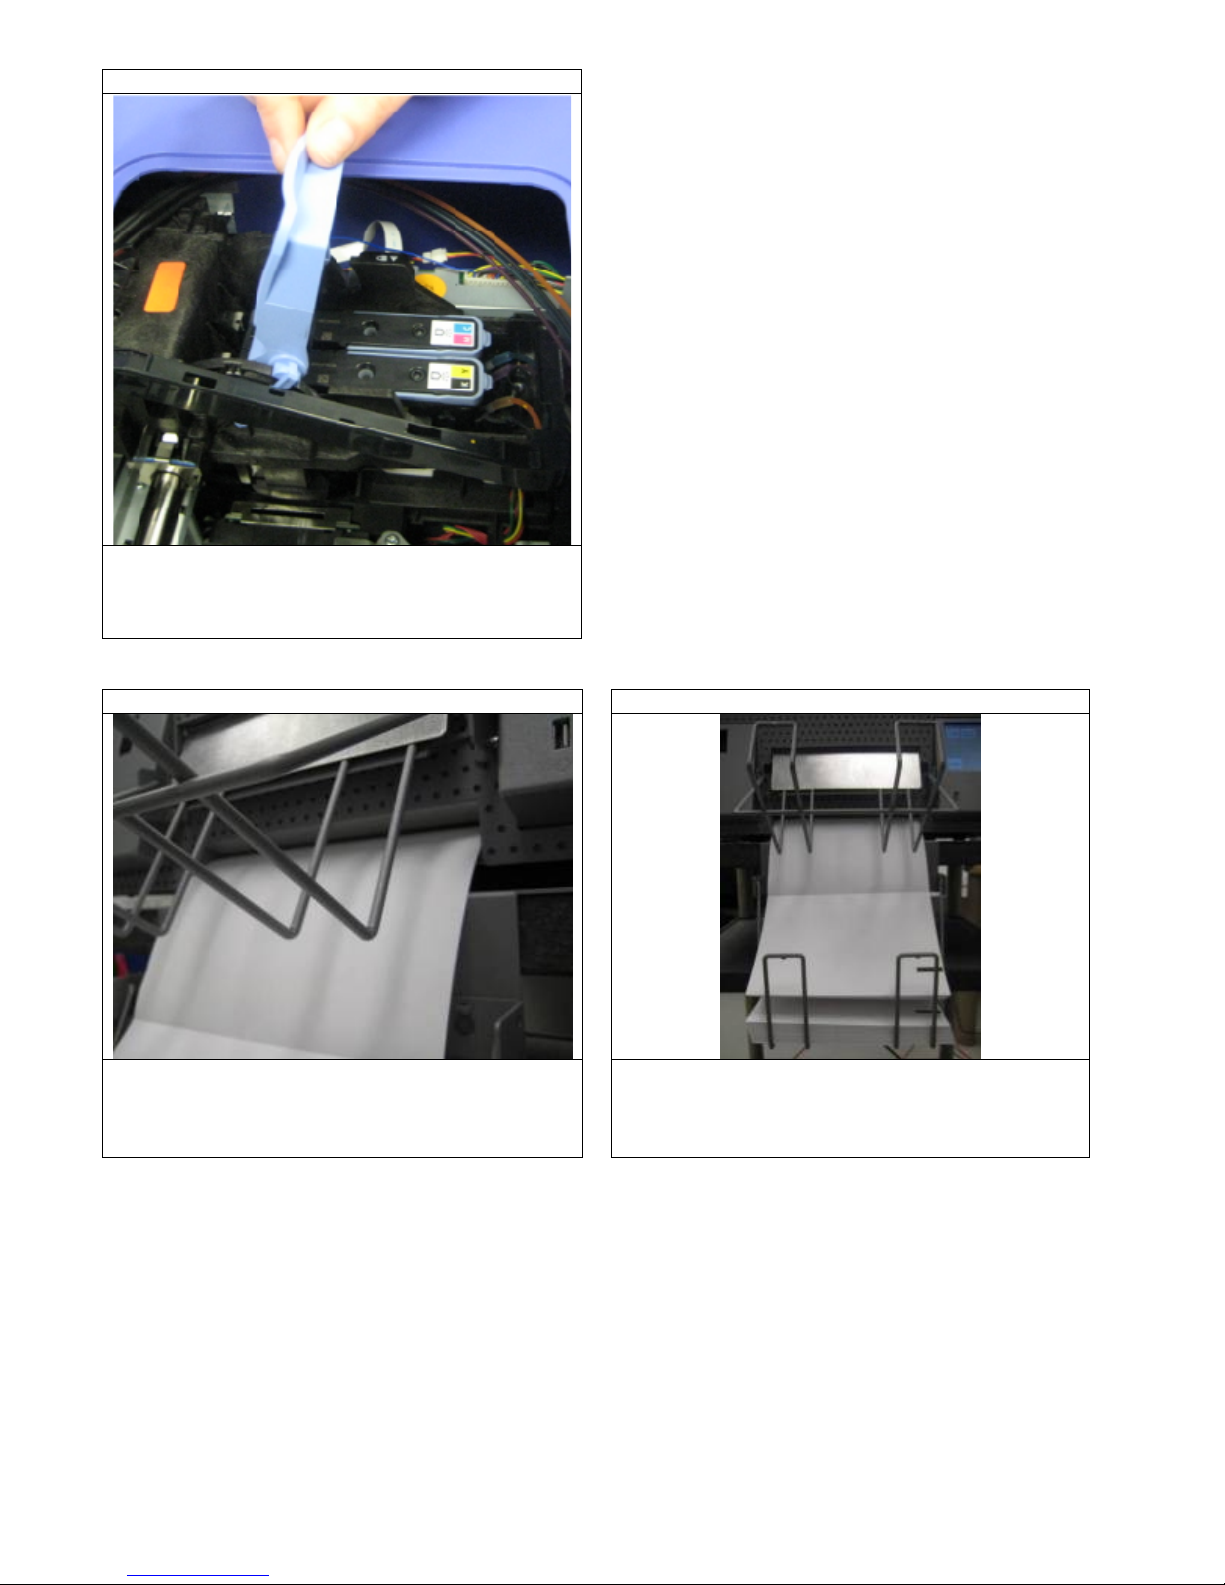
8
STEP 3
Once all of the printheads are in place, return the
blue printhead cover to its original position ensuring
that the hook and the latch engage. You may now
power on the printer.
Loading Paper
STEP 1 STEP 2
Start on a face up, non I-mark sheet of paper,
press the form feed button and feed the end of the
paper into the printer until the printer automatically
takes the paper.
Place the bundle of fanfold paper into the input
basket.

9
IP Configuration and Driver Installation
Windows XP Add Printer Wizard and Driver Installation
STEP 1
Go to Windows Start hSettings hPrinters and Faxes
STEP 2
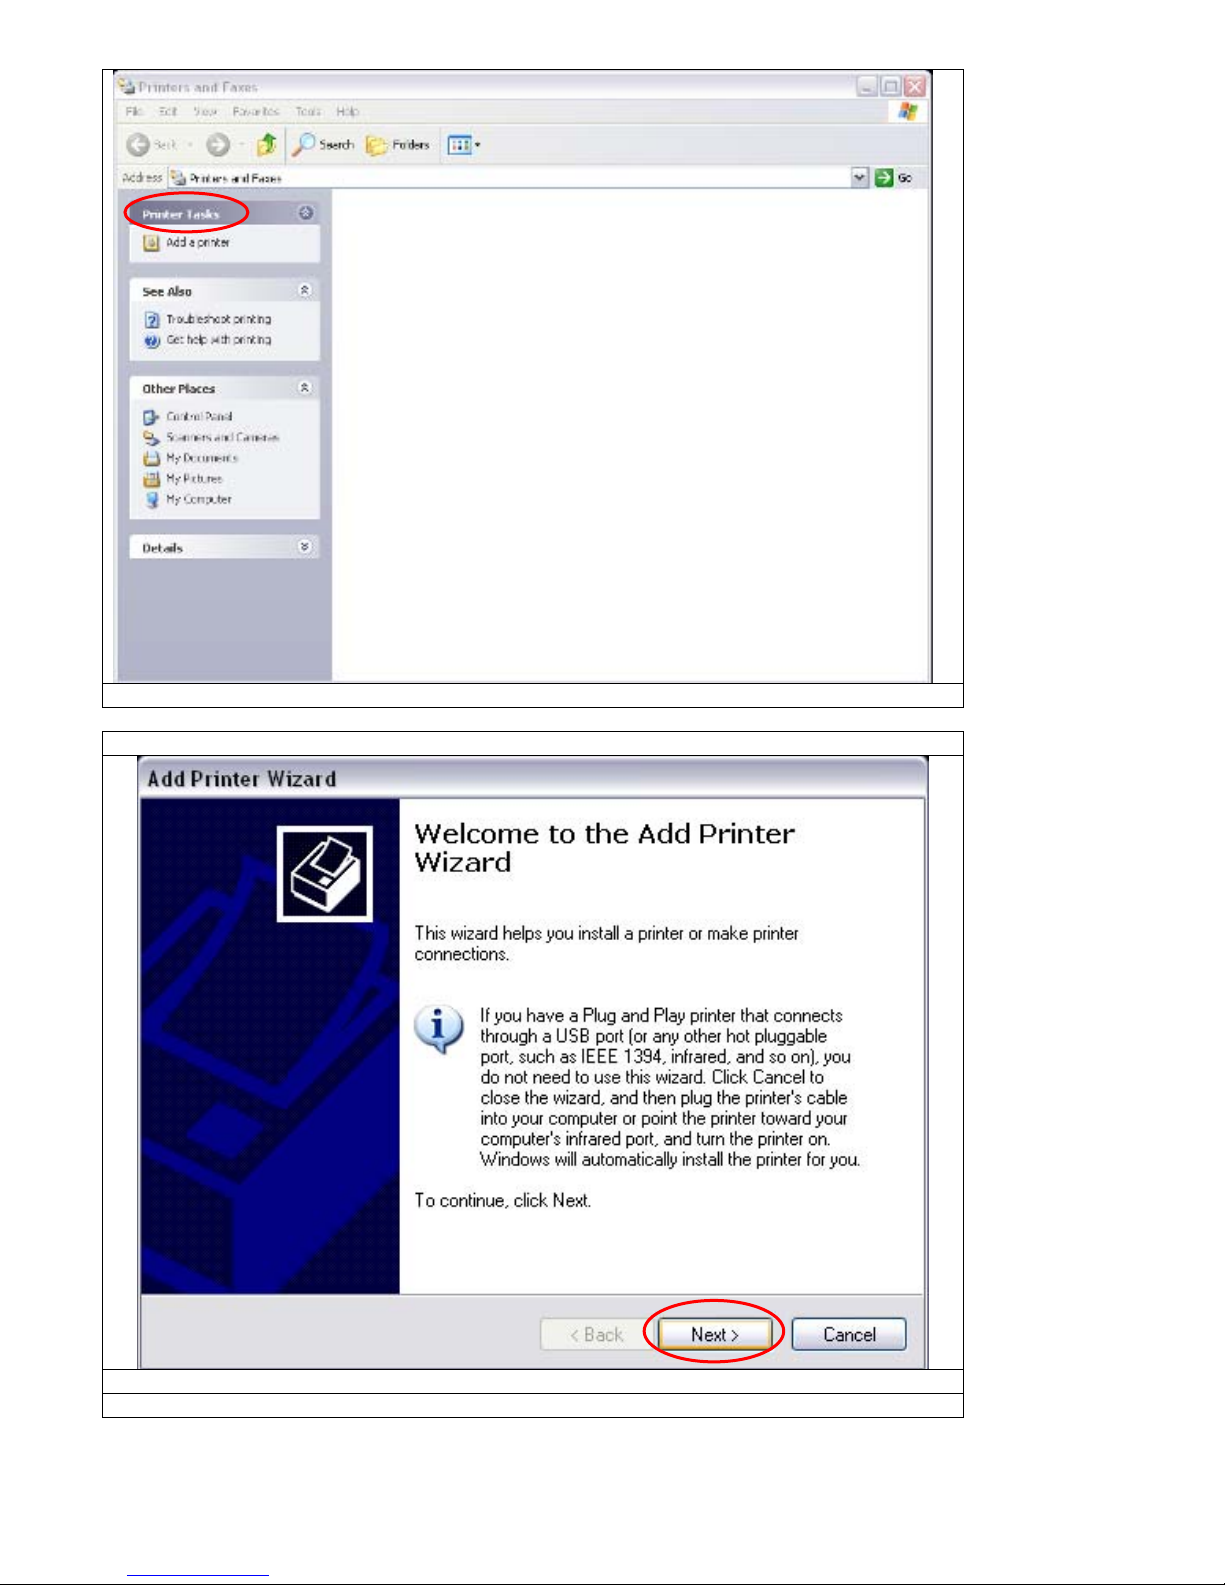
10
Select Add a Printer on the left hand side of the window hPress Next
STEP 3
Welcome to the Add Printer Wizerd hPress Next
STEP 4
Table of contents
Other iSys Printer manuals


