iTero Element 5D Plus User manual

iTero
Element® 5D Plus
User manual
it starts with


Patents
www.aligntech.com/patents
Trademarks
Align, Invisalign, ClinCheck and iTero among others, are
trademarks and/or service marks of Align Technology,
Inc. or one of its subsidiaries or affiliated companies and
may be registered in the U.S. and/or other countries.
Any other trademarks or registered trademarks appearing
in this manual are the property of their respective owners.
Copyright
© 2020 Align Technology, Inc. All Rights Reserved.
The information contained in this manual is subject to
change without notice.
The hardware and software described in this manual are
supplied under a Sales and Services Agreement and
may be used only in accordance with the terms of that
agreement.
No part of this manual may be reproduced, photocopied,
stored in a retrieval system, or transmitted in any
manner (electronic or mechanical) for any purpose other
than the customer’s normal usage, without the prior
written permission of Align Technology.
English language version
P/N: 210886 Rev. B
Updated November 2020
USA office
Corporate Headquarters
Align Technology, Inc.
2820 Orchard Parkway
San Jose, California 95134
www.aligntech.com
Tel: +1 (408) 470-1000
Fax: +1 (408) 470-1010
Customer Support
Tel: +1 (800) 577-8767
E-mail: iterosupport@aligntech.com
Align Technology Ltd.
3 Ariel Sharon Boulevard
Or-Yehuda 6037606
Israel
Tel: +972 (3) 634-1441
Fax: +972 (3) 634-1440
iTero Element® 5D Plus User manual
© 2020 Align Technology, Inc. All rights reserved. i

Contraindications
For persons who have been diagnosed with Epilepsy, there is a risk of epileptic shock from the flashing light of the
iTero scanner. These persons should refrain from any eye contact with the flashing light associated with the system
during operation.
Compliance
Class 1 laser compliance
This device complies with 21 CFR 1040.10 and IEC
60825-1.
Safety compliance
This device complies with the following safety standard:
IEC 60601-1 Medical electrical equipment - Part 1:
General requirements for basic safety and essential
performance.
CSA compliance
This device complies with the following CSA standard for
Canada and the USA: UL Std No. 60601-1 – Medical
Electrical Equipment Part 1: General Requirements for
Safety.
EMC compliance
This device complies with the following EMC standard:
IEC 60601-1-2 Medical electrical equipment - Part 1-2:
General requirements for basic safety and essential
performance - Collateral standard: Electromagnetic
phenomena - Requirements and tests.
FCC compliance
This device complies with Part 15 of FCC Rules and its
operation is subject to the following two conditions:
1. This device may not cause harmful interference.
2. This device must accept any interference received,
including interference that may cause undesired
operation.
FCC warning
Modifications to the device that are not expressly
approved by the manufacturer may void your authority to
operate the device under FCC Rules.
iTero Element® 5D Plus User manual
ii © 2020 Align Technology, Inc. All rights reserved.

Symbols
The following symbols may appear on iTero Element 5D Plus hardware components and may appear within this
document and other iTero Element 5D Plus literature.
Wherever this symbol appears on the device, it is
recommended to refer to this document for information on
the proper usage of the device.
Applied part type BF. Any component on which this
symbol appears is electric isolation type BF.
Separate collection of electrical waste and electronic
equipment is required. In compliance with the European
Directive on Waste Electrical and Electronic Equipment
(WEEE), do not dispose of this product in domestic or
municipal waste. This device contains WEEE materials.
Please contact the EARN service.
Link for the online request form: http://b2btool.earn-
service.com/aligntech/select
Attention! This symbol is used to highlight the fact that
there are specific warnings or precautions associated
with the device. Wherever this symbol appears on the
device, it is mandatory to refer to safety-related
information in this document.
Parts or accessories on which this symbol occurs should
not be reused.
CAUTION: US Federal Law restricts this device to sale
by or on the order of a licensed Dentist, Orthodontist, or
Dental Professional. The system serves as a
prescription medical device and should be operated by
qualified health-care providers only.
Medical device manufacturer.
Order number.
Serial number.
Alternating current.
Indicates a medical device that needs to be protected
from moisture.
Indicates the temperature limits to which the medical
device can be safely exposed.
iTero Element® 5D Plus User manual
© 2020 Align Technology, Inc. All rights reserved. iii

Manufacturer’s batch code.
Indicates the range of atmospheric pressure to which the
medical device can be safely exposed.
Indicates the range of humidity to which the medical
device can be safely exposed.
Fragile, handle with care.
This side should be up.
IEC 60417-5031: Direct current.
Wand (scanning unit).
This device complies with Council Regulations (EU)
2017/754 for Medical Devices.
Indicates the need for the user to consult the instructions
for use.
USB socket.
Electric battery.
IEC 60417-5009: STAND-BY.
Use-by date. This symbol is accompanied by a date to
indicate that the iTero Element 5D wand barrier sleeves
should not be used after the end of the year, month, or
day shown.
iTero Element® 5D Plus User manual
iv © 2020 Align Technology, Inc. All rights reserved.

Safety instructions
Before beginning to work with the system, all users are required to read these safety instructions.
Power supply Power is supplied to the system via an internal medical-grade power supply.
Battery power lCharging – the scanner battery will be fully charged after being plugged into a power source for
2.5 hours.
lWith a fully-charged battery, you can scan up to 30 minutes.
lThe scanner is provided with two Li-ion rechargeable battery packs. There is a
danger of battery explosion if the screen is damaged. Do not use the scanner if dropped or any
damage is noticed. Contact Customer Support. Use only the original AC/DC adaptor to
charge the batteries.
lThe screen should be stored and operated following the environmental conditions that appear
in this manual. Do not expose the scanner to extreme heat sources, such as radiators and
fireplaces.
lNever operate the device without batteries! Do not use the batteries for any purpose other
than the intended use of the product. Discard used batteries according to the manufacturer's
instructions and local requirements.
Electric
warnings
lDo not remove external panels, covers, and batteries in order to avoid electrical shock. There
are no user-serviceable parts inside. You can open the cover of the diagnostics panel in case
of system failure, only when required by Customer Support.
lDo not connect the scanner to a mains supply without protective grounding, in order to avoid
the risk of electrical shock.
Electric
precautions
lDo not connect a non-Align-approved web camera to the USB sockets on the rear of the touch
screen, in order to avoid the risk of electrical shock.
lDo not connect a power cable that is not approved by Align Technology to the system, in order
to avoid electrical shock.
Wireless LAN The system comes equipped with a wireless LAN unit.
Safety
classifications
lType of protection against electrical shock: Class 1.
lDegree of protection against electrical shock: Type BF.
lDegree of protection against harmful ingress of water: Ordinary.
lEquipment not suitable for use in the presence of flammable anesthetic mixtures.
lMode of operation: Continuous.
Prescription
health device
The system serves as a prescription medical device and should be operated by qualified health-
care providers only.
Scanner
precautions
lThe wand emits red laser light (680nm Class 1), as well as white LED emissions and 850nm
LED emissions. Normal usage of the wand does not present any danger to the human eye.
Avoid shining the wand directly into the patient’s eyes.
iTero Element® 5D Plus User manual
© 2020 Align Technology, Inc. All rights reserved. v

lAvoid twisting, knotting, pulling, and stepping on the wand cable and the power cable.
lWhen the system is not in use, the wand should be placed in the cradle with the probe facing
the touch screen, in order to avoid eye contact with the laser beam, flickering white LED
emission, and 850nm LED emission. Eye contact could cause damage to the eyes.
lAvoid activating the wand while the tip of the wand is outside the patient’s mouth, in order to
prevent eye damage.
lAvoid placing the wand in the cradle while the scanning operation is still active, in order to
prevent eye damage.
lDo not use the equipment if a scanner malfunction occurs or if physical damage is observed,
in order to avoid electrical shock or physical injury. Call Customer Support.
Cleaning &
disinfection
lTo avoid cross-contamination, it is mandatory to:
oClean and disinfect the wand, as described in section 1.1, and replace the wand barrier
sleeve, as described in section 4.1, before each patient session.
oRemove and replace gloves after each patient session.
oDiscard torn, contaminated, or removed gloves.
oDispose of wand barrier sleeves according to standard operating procedures or local
regulations for the disposal of contaminated medical waste.
Unpacking &
installing
The system should be unpacked and installed following Align Technology’s instructions,
described in section 2.1.
Work
environment
lThe system should be moved between rooms with utmost care to avoid damage.
lDo not block the air vents on the wand and the screen.
lThe system is intended for indoor use only. It should not be exposed to direct sunlight,
excessive heat, or humidity.
Electromagnetic
interference
precaution
This device has been tested and found to comply with the requirements for medical devices
according to standard IEC60601-1-2. This standard is designed to provide reasonable protection
against harmful interference in a typical medical installation.
Avoid placing this device near frequency transmitting equipment or other sources of electrical
and electromagnetic interference (e.g. cellular phones, mobile two-way radios, electrical
appliances, RFID). High levels of such interference, due to close proximity or strength of the
source, may result in disruption of performance of this device. In this case, the device can be
returned to operation mode after user intervention or by auto-recovery.
General Notes:
lDo not make any modifications to this equipment.
lDo not remove the touch screen from the stand after assembly.
iTero Element® 5D Plus User manual
vi © 2020 Align Technology, Inc. All rights reserved.

Table of contents
1 Introduction 1
1.1 Intended use 1
1.2 Benefits 1
1.3 iTero Element 5D Plus hardware 2
1.3.1 iTero Element 5D Plus wand 3
1.4 iTero Element 5D Plus software 4
1.5 Working with near infra-red imaging (NIRI) 5
1.5.1 Limitations 7
1.6 About this manual 7
2 Getting started 9
2.1 Assembling the iTero Element 5D Plus scanner 9
2.2 Logging in to the scanner for the first time 14
2.3 Registering the scanner – Make It Mine process 14
2.4 Working in Demo Mode 20
2.4.1 Exiting Demo Mode 25
3 Working with the iTero Element 5D Plus scanner 27
3.1 Logging in to the scanner 27
3.1.1 Resetting your password 30
3.1.2 Installing Windows security updates 32
3.2 Logging out of the scanner 33
3.3 Shutting down the scanner 33
3.4 Moving the scanner 34
3.5 User interface 35
3.5.1 Scanner toolbar 38
3.5.2 Touch-screen gestures 41
3.6 Defining the scanner settings 41
3.6.1 Defining the Computer settings 43
3.6.2 Defining the User settings 47
3.6.3 Defining the System settings 55
4 Starting a new scan 61
4.1 Applying a wand barrier sleeve 61
4.2 Starting the scan 63
iTero Element® 5D Plus User manual
© 2020 Align Technology, Inc. All rights reserved. vii

4.3 Patient management 65
4.3.1 Adding new patients 66
4.3.2 Searching for existing patients 69
4.3.3 Editing the patient details 73
4.3.4 Clearing the patient details from the New Scan window 75
4.4 Filling in the Rx 76
4.4.1 Working with restorative scan types 79
4.4.2 Disabling NIRI capture 84
4.4.3 Confirming a new wand barrier sleeve between patients 86
4.5 Scanning the patient 87
4.5.1 Scanning guidance 88
4.5.2 Scanning best practices 89
4.5.3 Scan options 90
4.5.4 Toggling the 3D and viewfinder display 92
4.5.5 Toggling between color and NIRI images in the viewfinder 94
4.5.6 Editing a scan 94
4.6 Viewing the scan 95
4.6.1 Missing scan segment notifications 96
4.6.2 Using the scan timer 97
4.7 Sending the scan 97
4.8 Working with the Viewer 98
4.9 Removing the wand barrier sleeve 102
5 Working with patients 105
5.1 Searching for patients 106
5.2 Viewing the patient details 107
5.3 Creating a new scan for a specific patient 107
5.4 Viewing the Rx 109
5.5 Viewing previous scans in the Viewer 110
6 Working with orders 113
7 Viewing messages 117
8 Working with MyiTero 119
9 iTero scanner features and tools 121
9.1 Comparing previous scans using iTero TimeLapse technology 121
9.2 Invisalign Go system 124
9.3 Invisalign Outcome Simulator 125
iTero Element® 5D Plus User manual
viii © 2020 Align Technology, Inc. All rights reserved.

9.4 Invisalign Progress Assessment 125
9.5 Editing tools 126
9.5.1 Deleting a segment 126
9.5.2 Deleting a selection 127
9.5.3 Filling in missing anatomy 129
9.5.4 Disabling A.I. cleanup 131
9.6 Working with the Eraser tool 132
9.7 Working with the Occlusal Clearance tool 135
9.8 Working with the Edge Trimming tool 138
9.9 Working with the Die Separation tool 141
9.10 Working with the Review tool 145
9.10.1 Zooming in to and out of the images in the image pane 147
9.10.2 Adjusting the brightness and contrast of images in the image pane 149
9.10.3 Capturing the Review tool images 150
9.11 Working with the Snapshot tool 150
10 Care and maintenance 157
10.1 Handling the wand and cable 157
10.2 Cleaning and disinfecting the wand 157
10.2.1 Preparation before cleaning and disinfection 157
10.2.2 Wand cleaning and disinfection 158
10.2.3 Drying – wand body 160
10.2.4 Storage and maintenance 160
10.3 Cleaning and disinfecting the cradle 162
10.3.1 Preparation before cleaning and disinfection 162
10.3.2 Cradle cleaning and disinfection 163
10.3.3 Drying – cradle 164
10.3.4 Storage and maintenance 164
10.4 Cleaning and disinfecting the scanner touch screen and the wheel-stand handle 164
10.5 General cleaning 164
10.6 Approved cleaning and disinfecting materials 164
A Clinic LAN network guidelines 167
A.1 Introduction 167
A.2 Preparations 167
A.3 Router guidelines 168
A.4 Internet connection guidelines 168
iTero Element® 5D Plus User manual
© 2020 Align Technology, Inc. All rights reserved. ix

A.5 Firewall 168
A.6 Wi-Fi tips 168
A.7 Align hostname recommendations 169
B EMC declaration 171
C FCC compliance information statement (SDoC) 175
D iTero Element product security whitepaper 177
E System specifications 181
iTero Element® 5D Plus User manual
x © 2020 Align Technology, Inc. All rights reserved.

Table of figures
Figure 1: Front view of the scanner 2
Figure 2: Rear view of the scanner 3
Figure 3: iTero Element 5D Plus wand 3
Figure 4: Protective sleeve 4
Figure 5: Wand barrier sleeve 4
Figure 6: Visible light spectrum showing NIRI on the 850nm wavelength 5
Figure 7: Reflective concept – healthy enamel is translucent while dentin and caries are reflective 5
Figure 8: Interproximal carious lesion 6
Figure 9: Removing the wand from the cradle 12
Figure 10: Moving the scanner 13
Figure 11: Do not lift the scanner using the main handle 13
Figure 12: Welcome screen 14
Figure 13: Connect page listing the available networks 15
Figure 14: Entering the security key 16
Figure 15: Scanner is connected to the Internet and online 16
Figure 16: Verifying the communication with Align 17
Figure 17: Selecting the time zone 17
Figure 18: Registering the system to customize the setup 18
Figure 19: iTero subscription package 18
Figure 20: License agreement 19
Figure 21: Checking for updates 19
Figure 22: System is registered and ready 20
Figure 23: iTero Element logo 21
Figure 24: Demo Mode option 21
Figure 25: Login window with a list of demo users 22
Figure 26: Demo Login button 22
Figure 27: Demo Mode home screen 23
Figure 28: Past Orders pane – options 24
Figure 29: Exiting Demo mode 25
Figure 30: Login window 27
Figure 31: Unexpected shutdown notification 28
Figure 32: iTero home screen 29
iTero Element® 5D Plus User manual
© 2020 Align Technology, Inc. All rights reserved. xi
Figure 33: Forgot Password button 30
Figure 34: Email field for forgotten password 31
Figure 35: Security answer field 31
Figure 36: Login window with notification about Windows security updates 32
Figure 37: Home screen with notification about Windows security updates 33
Figure 38: Notification about incorrect scanner shutdown 34
Figure 39: Moving the scanner 35
Figure 40: iTero home screen 36
Figure 41: Percentage of remaining battery charge 36
Figure 42: Help overlay 37
Figure 43: Scanner toolbar 38
Figure 44: Percentage of remaining battery charge 39
Figure 45: Help overlay 40
Figure 46: Settings window 42
Figure 47: Brightness settings 43
Figure 48: Volume settings 43
Figure 49: List of nearby Wi-Fi networks 44
Figure 50: Connecting to the clinic Wi-Fi network 45
Figure 51: Forgetting or Disconnecting from the network 45
Figure 52: Time zone settings 46
Figure 53: Scan Settings window 47
Figure 54: Only scanning range is highlighted 49
Figure 55: Rx Settings window 50
Figure 56: Rx Settings window – NIRI Captures option enabled 52
Figure 57: Disable NIRI confirmation 52
Figure 58: Rx Settings window – NIRI Captures option disabled 53
Figure 59: Signature Settings window 54
Figure 60: Language Settings window 55
Figure 61: Login Settings window 56
Figure 62: Diagnostics window 57
Figure 63: Licensing Information window 58
Figure 64: System Information window 59
Figure 65: Export Settings window – deleting exported files 60
Figure 66: Remove the protective sleeve 61
Figure 67: Remove the wand barrier sleeve from its packaging 62
iTero Element® 5D Plus User manual
xii © 2020 Align Technology, Inc. All rights reserved.
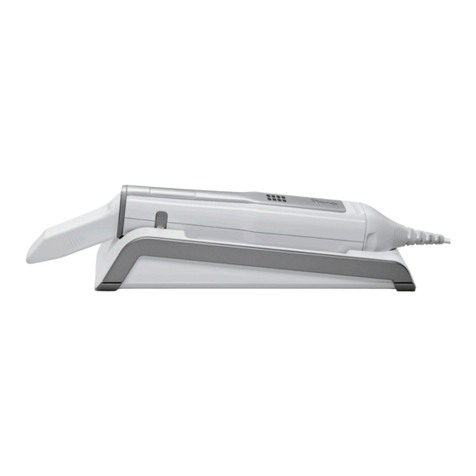
Figure 68: Slide the rigid section of the wand barrier sleeve into place 62
Figure 69: Gently pull the transparent sheath to cover the entire wand 63
Figure 70: New Scan window showing an empty Rx and the progress toolbar at the top of the window 64
Figure 71: New Scan window – adding a new patient 66
Figure 72: New Patient window 67
Figure 73: Adding the new patient 68
Figure 74: Message notifying that a patient with the same details exists 68
Figure 75: Confirmation message regarding an existing patient 69
Figure 76: New Scan window – searching for an existing patient 70
Figure 77: Search Patient window with search field 71
Figure 78: Search criteria in the search field and list of matching patients 72
Figure 79: Selecting the required patient 72
Figure 80: Selected patient displayed in the New Scan window 73
Figure 81: New Scan window – editing a patient 74
Figure 82: Edit Patient window and Update button 74
Figure 83: Message that a patient with the same details already exists 75
Figure 84: Clear patient data button 76
Figure 85: Selecting the required case type 77
Figure 86: New Scan window – iRecord case type 78
Figure 87: New sleeve attached check box 79
Figure 88: New Scan window – Restorative case type with a tooth chart 80
Figure 89: List of restorative treatment options 81
Figure 90: Defining the restoration properties 82
Figure 91: Treatment Information area 83
Figure 92: Disabling NIRI capture for a specific case 84
Figure 93: Scan tool without the option to display NIRI data in the viewfinder or to enlarge the viewfinder 85
Figure 94: Review tool is not displayed in View mode 85
Figure 95: Check box confirming a new wand barrier sleeve 86
Figure 96: Popup confirmation message before scanning 87
Figure 97: Recommended scanning sequence – lower jaw 88
Figure 98: Wand guidance 89
Figure 99: Areas with missing anatomy shown with and without additional scan feedback – monochrome 90
Figure 100: Areas with missing anatomy shown with and without additional scan feedback – color mode 91
Figure 101: Model displayed in color and monochrome mode 91
Figure 102: Tap the opposite arch or tap the arrows to select it 92
iTero Element® 5D Plus User manual
© 2020 Align Technology, Inc. All rights reserved. xiii
Figure 103: Default view – 3D scan in the center of the window and viewfinder on the left 93
Figure 104: Large viewfinder in the center of the screen and 3D image on the left 93
Figure 105: Viewfinder displaying a color image (left) or a NIRI image (right) 94
Figure 106: Editing tools 95
Figure 107: Missing scan message and missing segments highlighted in red 96
Figure 108: Scan timer button on the toolbar and scan time 97
Figure 109: Sending the scan 98
Figure 110: Viewer option in the Past Orders pane in the Orders page 98
Figure 111: Viewer option in patient’s profile page 99
Figure 112: Model in a 1-window view 100
Figure 113: Model in a 2-window view 100
Figure 114: Model in a 5-window view 101
Figure 115: Scrunch the transparent sheath halfway towards the tip 102
Figure 116: Slightly release the rigid section of the wand barrier sleeve from the tip of the wand 102
Figure 117: Remove the wand barrier sleeve 103
Figure 118: Optical surface of the wand 103
Figure 119: Patients page 105
Figure 120: Searching for a patient 106
Figure 121: Patients matching the search criteria are displayed 106
Figure 122: Patient’s profile page 107
Figure 123: Patient’s profile page – New Scan option 108
Figure 124: New Scan window with patient’s details already filled in 108
Figure 125: Patient’s profile page – View Rx option 109
Figure 126: Rx Details window 110
Figure 127: Patient’s profile page – Viewer option 111
Figure 128: Scan displayed in the Viewer 111
Figure 129: Orders page 114
Figure 130: In Progress pane – options 115
Figure 131: Past Orders pane – options 115
Figure 132: Messages page 117
Figure 133: iTero TimeLapse – selecting the scans to compare 122
Figure 134: iTero TimeLapse window showing the highlighted changes between the scans 122
Figure 135: Area of interest from the first scan displayed in the animation window 123
Figure 136: Area of interest from the second scan displayed in the animation window 123
Figure 137: iTero TimeLapse scale options 124
iTero Element® 5D Plus User manual
xiv © 2020 Align Technology, Inc. All rights reserved.

Figure 138: Progress Assessment window 125
Figure 139: Editing tools 126
Figure 140: Delete Segment tool 127
Figure 141: Delete Selection tool 128
Figure 142: Expanded Delete Selection tool 128
Figure 143: Selected area of the anatomy is deleted 129
Figure 144: Fill tool 130
Figure 145: Areas that require scanning are highlighted in red – Fill tool 130
Figure 146: Disable A.I. Cleanup tool 131
Figure 147: Scan displayed with excess material showing 132
Figure 148: Eraser tool 133
Figure 149: Eraser tool options 133
Figure 150: Mark the area to be modified 134
Figure 151: Selected area removed and scan tool enabled 134
Figure 152: Deleted area marked in red 135
Figure 153: Occlusal clearance between the opposing teeth 136
Figure 154: Occlusal Clearance range options 137
Figure 155: Occlusal Clearance tool and legend displayed in the Viewer 138
Figure 156: Edge trimming tool 139
Figure 157: Edge trimming tool options 139
Figure 158: Mark the area to be trimmed away 140
Figure 159: Selected area is highlighted and the confirmation icon is enabled 140
Figure 160: Selected area has been removed 141
Figure 161: Green hint point centered on the prepped tooth 142
Figure 162: Die separation is displayed in high resolution 142
Figure 163: Die Separation tool options 143
Figure 164: Scan is displayed in low resolution 143
Figure 165: Before selecting the die separation 144
Figure 166: Prepped tooth is displayed in high resolution 145
Figure 167: Review tool with the Snapshot tool on the toolbar and the loupe in the right pane 146
Figure 168: Image pane on the right showing the area of interest as both NIRI and colored intraoral images 147
Figure 169: Zoom-in buttons on the images in the image pane 148
Figure 170: Only the zoomed-in image is displayed in the enlarged image pane window 148
Figure 171: Brightness and contrast toolbar is collapsed 149
Figure 172: Brightness and contrast toolbars 150
iTero Element® 5D Plus User manual
© 2020 Align Technology, Inc. All rights reserved. xv

Figure 173: View mode – with Snapshot tool 151
Figure 174: Screen capture thumbnail is displayed after taking a screen capture 152
Figure 175: Screenshot with an annotations toolbar 152
Figure 176: Annotations toolbar 153
Figure 177: Adding text to the screenshot 153
Figure 178: Screenshot with annotations 154
Figure 179: Notification that the screenshots and annotations will be uploaded to MyiTero 154
Figure 180: Confirmation about the annotations being discarded 155
Figure 181: Notification that the screenshots will be uploaded to MyiTero 155
Figure 182: Option to download screenshots from the Orders page in MyiTero 156
Figure 183: Wand without a wand barrier sleeve 158
Figure 184: Remove gross contaminants using CaviWipes1 159
Figure 185: Remove marks and stains using a soft bristle brush 159
Figure 186: Wipe the optical surface of the wand with IPA 160
Figure 187: Release and remove the vent cover 161
Figure 188: Insert the tip of the wand into the new vent cover 161
Figure 189: Pull on the vent cover until it locks into place 161
Figure 190: Check that the rear end of the vent cover reaches the cable cap 162
Figure 191: Remove gross contaminants on the cradle using CaviWipes1 163
Figure 192: Remove remaining marks and stains on the cradle using the soft bristle brush 163
iTero Element® 5D Plus User manual
xvi © 2020 Align Technology, Inc. All rights reserved.

1 Introduction
The iTero Element Plus family of intra-oral scanners is Align Technology’s latest-generation of intra-oral scanners.
Its bright full HDtouch-screen display has wide visualization angles for an immersive and engaging experience and
its powerful computing power enables a smoother and intuitive scanning experience. The ergonomics and elegance
of the cart will smoothen your experience and elevate your practice brand image.
The integrated intra-oral camera eliminates the need for a second device while enhancing patient experience and
communication. NIRI technology aids you in the diagnostics and monitoring of interproximal carious lesions above
the gingiva, as well as patient communication. No additional scans are needed. No harmful radiation.
This all-in-one system is designed to take patient experience and your productivity to the next level, ultimately
helping you to grow your practice while making things easier.
1.1 Intended use
The iTero Element 5D Plus is an intra-oral scanner with the following features and intended use:
lThe optical impression (CAD/CAM) feature of iTero Element 5D Plus is intended/indicated for use to record the
topographical images of teeth and oral tissue. Data generated from iTero may be used in conjunction with the
production of dental devices (e.g. aligners, braces, appliances, etc.) and accessories.
liTero Element 5D Plus software is used with the iTero scanner in capturing 3D digital impressions of teeth, oral
soft tissue and structures, and bite relationship. The software controls the processing of the data, facilitating the
integration of data, and exporting of the data for CAD/CAM fabrication of dental restorations, orthodontic devices,
abutments, and accessories. In addition to scan data, various patient and case information can be
imported/exported or used for simulation purposes. Other functions are available for verification and service of the
system and to serve as an order management tool.
lThe iTero Element 5D NIRI functionality is a diagnostic aid for the detection of interproximal carious lesions above
the gingiva and for monitoring the progress of such lesions.
iTero Element scanners may be used on patients classified as Preadolescent, Adolescent, and Adult.
1.2 Benefits
lSingle all-in-one scan with 3D, color, NIRI, intra-oral camera – provides a faster, streamlined workflow
lFull integration of data to 3D model and all captured images are saved – enables faster evaluation and an
enhanced patient experience
lIndependent scanner review with all data available from MyiTero – enables remote diagnostics, a flexible
workflow, and promotes efficiency
lNIRI and color images can be captured at multiple angles – enables capturing more data and improved diagnostics
lNon-ionizing radiation – provides diagnostic flexibility and better monitoring, especially for women and children
iTero Element® 5D Plus User manual
© 2020 Align Technology, Inc. All rights reserved. 1

Refer to our website http://www.itero.com to learn how the iTero Service can enhance your business by increasing
patient satisfaction, improving clinical outcomes, and enhancing office efficiency.
1.3 iTero Element 5D Plus hardware
Front view of the scanner
AFull HD touchscreen
BPower switch
CMain handle
DWand
ECradle
FWheel stand
Figure 1: Front view of the scanner
iTero Element® 5D Plus User manual
2 © 2020 Align Technology, Inc. All rights reserved.
Table of contents
Other iTero Dental Equipment manuals