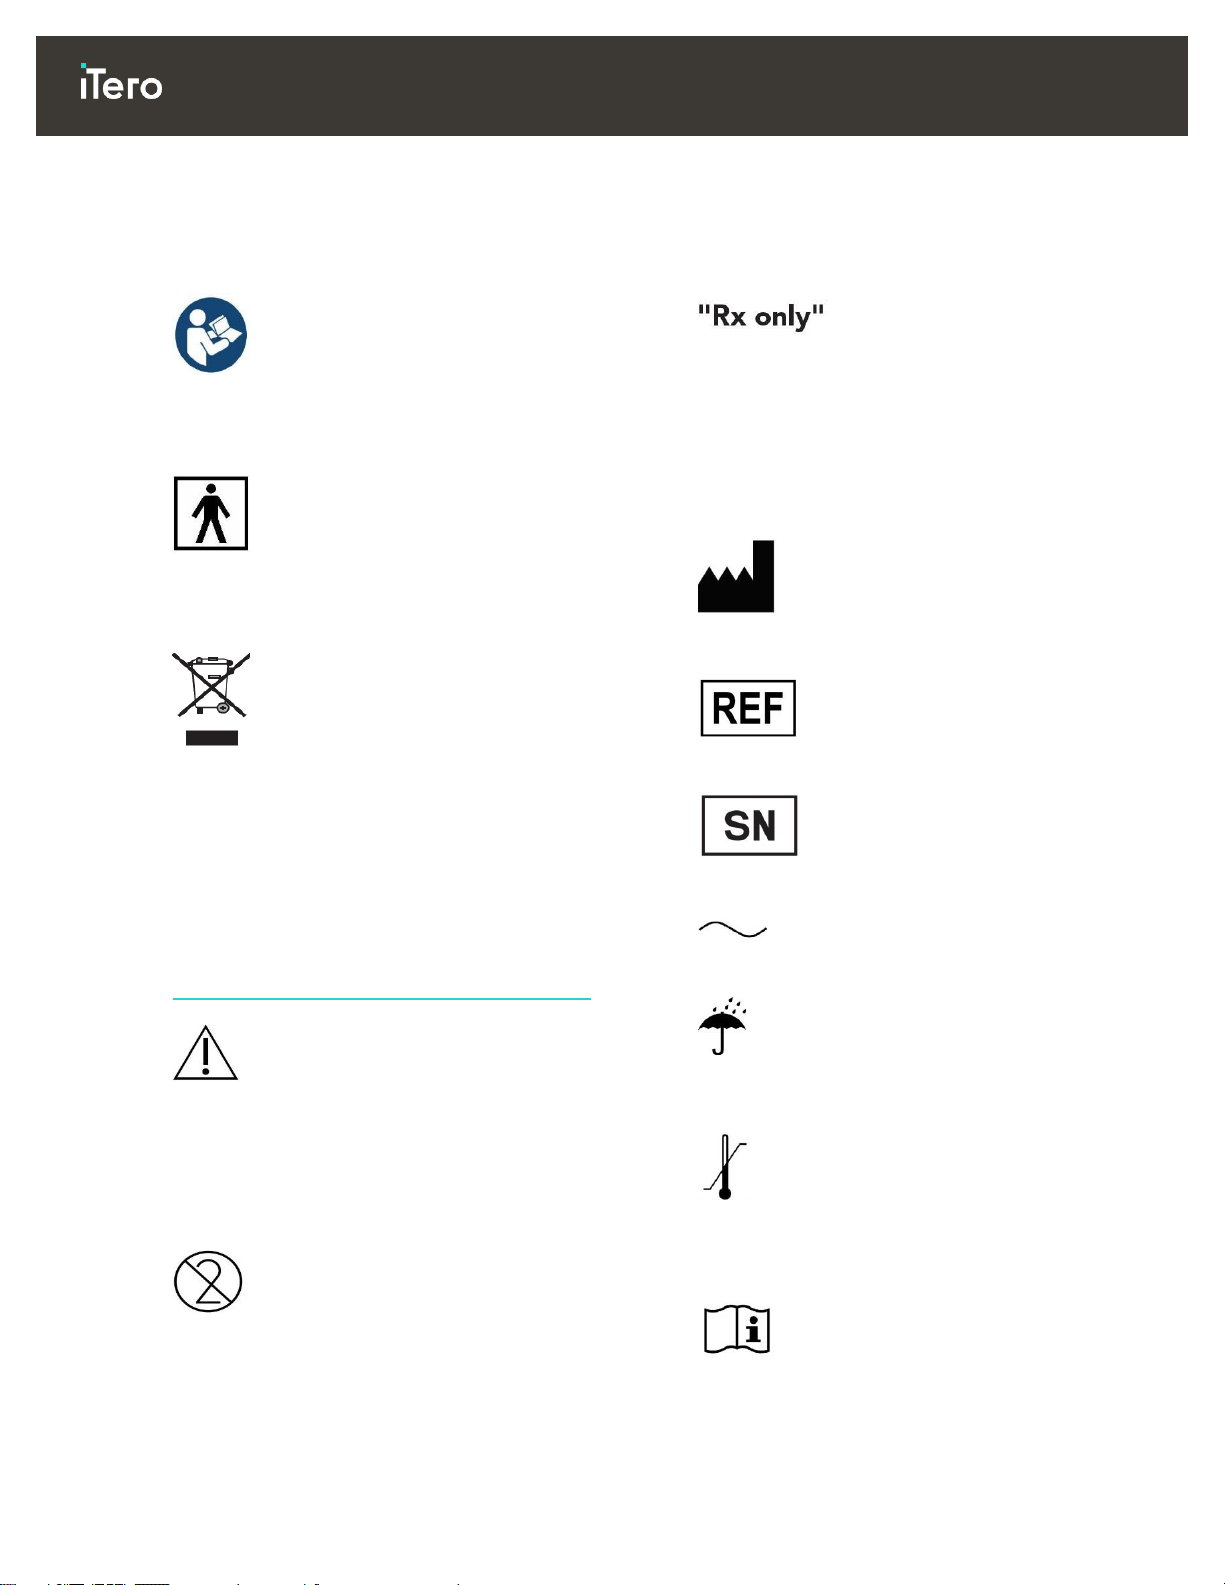
iTero Element 2 User manual

iTero Element 2
and
iTero Element Flex
User Manual

iTero Element 2 and iTero Element Flex User Manual
© 2019 Align Technology, Inc. All rights reserved.
ii
iTero Element 2 and iTero Element Flex User Manual

© 2019 Align Technology, Inc. All rights reserved.
i
iTero Element 2 and iTero Element Flex User Manual
Copyright
© 2019 Align Technology, Inc. All Rights Reserved.
The information contained in this manual is subject
to change without notice.
The hardware and software described in this
manual are supplied under a Sales and Services
Agreement and may be used only in accordance
with the terms of that agreement.
No part of this manual may be reproduced,
photocopied, stored in a retrieval system, or
transmitted in any manner (electronic or
mechanical) for any purpose other than the
customer’s normal usage, without the prior written
permission of Align Technology.
English language version.
Updated November 2019.
Trademarks
Align, Invisalign, iTero, iTero Element, and iTero
Element 5D among others, are trademarks and/or
service marks of Align Technology, Inc. or one of its
subsidiaries or affiliated companies and may be
registered in the U.S. and/or other countries.
Any other trademarks or registered trademarks
appearing in this manual are the property of their
respective owners.
USA office
Corporate Headquarters
Align
Technology, Inc.
2820 Orchard Parkway San
Jose,
California 95134
www.aligntech.com
Tel: +1 (408) 470-1000
Fax: +1 (408) 470-1010
Align Technology Ltd.
3 Ariel Sharon Boulevard
Or-Yehuda 6037606 Israel
Tel: +972 (3) 634-1441
Fax: +972 (3) 634-1440
Align Technology B.V.
Zekeringstraat 41
1014 BV Amsterdam,
The Netherlands

iTero Element 2 and iTero Element Flex User Manual
© 2019 Align Technology, Inc. All rights reserved.
ii
iTero Element 2 and iTero Element Flex User Manual
Contraindications
For persons who have been diagnosed with Epilepsy, there is a risk of epileptic shock from the flashing light
of the iTero scanner. These persons should refrain from any eye contact with the flashing light associated with
the system during operation.
Compliance
Class 1 laser compliance
This device complies with “21 CFR 1040. 10” and
“EN 60825-1”
EMC compliance
This device complies with the following EMC
standard:
“IEC 60601-1-2 Medical electrical equipment - Part
1-2: General requirements for basic safety and
essential performance - Collateral standard:
Electromagnetic phenomena - Requirements and
tests”.
CSA compliance
This device complies with the following CSA
standard for Canada and the USA: “UL Std No.
60601-1 –Medical Electrical Equipment Part 1:
General Requirements for Safety”.
Safety compliance
This device complies with the following safety
standard:
“IEC 60601-1 Medical electrical equipment - Part 1:
General requirements for basic safety and essential
performance”.
FCC compliance
This device complies with Part 15 of FCC Rules and
its operation is subject to the following two
conditions:
This device may not cause harmful
interference.
This device must accept any interference
received, including interference that may
cause undesired operation.
FCC warning
Modifications to the device that are not expressly
approved by the manufacturer may void your
authority to operate the device under FCC Rules.
CE compliance
This device complies with Council Directive
93/42/EEC for Medical Devices.

© 2019 Align Technology, Inc. All rights reserved.
iii
iTero Element 2 and iTero Element Flex User Manual
Contre-indications
Pour les personnes ayant un diagnostic d’épilepsie, la lumière clignotante du ITero Scanner peut engendrer
un risque de choc épileptique. Ces personnes doivent éviter tout contact visuel avec la lumière clignotante
inhérente au système pendant le fonctionnement.
Conformité
Conformité laser de classe 1
Cet appareil est conforme aux normes “21 CFR
1040. 10” et “EN 60825-1”
Conformité CEM
Cet appareil est conforme à la norme CEM suivante:
"IEC 60601-1-2 Equipement médical électrique -
Section 1-2: Exigences générales pour la sécurité de
base et les performances essentielles - Norme
collatérale: Electromagnétisme - Exigences et
essais".
Conformité CSA
Cet appareil est conforme à la norme CSA suivante
pour le Canada et les États-Unis: «UL Std No.
60601-1 - Appareils électromédicaux, partie 1:
Règles générales de sécurité».
Conformité aux normes de sécurité
Cet appareil est conforme à la norme de sécurité
suivante:
"IEC 60601-1 Appareils électriques médicaux –
Section 1: Règles générales sur la sécurité de base
et les performances essentielles".
Conformité FCC
Cet équipement est conforme à la section 15 des
règles la FCC. Son fonctionnement est soumis aux
deux conditions suivantes :
Cet appareil ne doit causer aucune
interférence nuisible.
Cet appareil doit accepter toute interférence
reçue, y compris des interférences pouvant
provoquer un fonctionnement non désiré.
Avertissement de la FCC
Les modifications apportées à l'appareil qui ne sont
pas expressément approuvées par le fabricant
peuvent révoquer votre droit d'utiliser l'appareil en
vertu des règles de la FCC.
Conformité CE
Cet appareil est conforme à la directive du Conseil
Européen 93/42/EEC relative aux dispositifs
médicaux.

iTero Element 2 and iTero Element Flex User Manual
© 2019 Align Technology, Inc. All rights reserved.
iv
iTero Element 2 and iTero Element Flex User Manual
Symbols
The following symbols may appear on iTero Element 2 and iTero Element Flex hardware components and
may appear within this document and other iTero Element 2 and iTero Element Flex literature.
Wherever this symbol appears on the device,
it is recommended to refer to this document for
information on the proper usage of the device.
Applied part type BF. Any component on
which this symbol appears is electric isolation
type BF.
Separate collection of electrical waste and
electronic equipment is required. In
compliance with the European Directive on
Waste Electrical and Electronic Equipment
(WEEE), do not dispose of this product in
domestic or municipal waste. This device
contains WEEE materials.
Please contact the EARN service.
Link for the
online request form:
http://b2btool.earn-
service.com/aligntech/select
Attention! This symbol is used to highlight the
fact that there are specific warnings or
precautions associated with the device.
Wherever this symbol appears on the device,
it is mandatory to refer to safety-related
information in this document.
Parts or accessories on which this symbol
occurs should not be reused.
CAUTION: US Federal Law restricts this
device to sale by or on the order of a licensed
Dentist, Orthodontist, or Dental Professional.
The system serves as a prescription medical
device and should be operated by qualified
health-care providers only.
Medical device manufacturer.
Order number.
Serial number.
Alternating current.
Indicates a medical device that needs to be
protected from moisture.
Indicates the temperature limits to which the
medical device can be safely exposed.
Indicates the need for the user to consult the
instructions for use.

© 2019 Align Technology, Inc. All rights reserved.
v
iTero Element 2 and iTero Element Flex User Manual
Manufacturer’s batch code.
Indicates the range of atmospheric pressure
to which the medical device can be safely
exposed.
Indicates the range of humidity to which the
medical device can be safely exposed.
Fragile, handle with care.
This side should be up.
IEC 60417-5031: Direct current.
Wand (scanning unit).
USB socket.
Electric battery.
IEC 60417-5009: STAND-BY.
CAUTION: Do not step on the iTero Element
Flex hub.
Indicates the Authorized representative in the
European Community.
Indicates that the device is RoHS compliant
for China.

iTero Element 2 and iTero Element Flex User Manual
© 2019 Align Technology, Inc. All rights reserved.
vi
iTero Element 2 and iTero Element Flex User Manual
Symboles
Les symboles suivants peuvent apparaître sur les composants matériels iTero Element 2 et iTero Element
Flex, ainsi que dans ce document et dans d’autres documents relatifs à iTero Element 2 et iTero Element Flex.
Partout où ce symbole apparaît sur l'appareil, il est
recommandé de consulter ce document pour
obtenir des informations sur sa bonne utilisation.
Partie appliquée de type BF. Tout composant sur
lequel ce symbole apparaît contient une isolation
électrique électrique de type BF.
Une collecte séparée des déchets électriques et
des équipements électroniques est requise.
Conformément à la directive européenne sur les
déchets d'équipements électriques et
électroniques (DEEE), ne jetez pas ce produit
avec les déchets ménagers ou urbains. Cet
appareil contient des matériaux DEEE.
Veuillez contacter le service EARN.
Lien vers le formulaire de demande en ligne:
http://b2btool.earn-service.com/aligntech/select
Attention! Ce symbole est utilisé pour souligner
le fait que des avertissements ou des précautions
spécifiques sont associés à l'appareil. Partout où
ce symbole apparaît sur l'appareil, il est obligatoire
de se référer aux informations relatives à la
sécurité contenues dans ce document.
Les pièces ou accessoires sur lesquels ce
symbole apparaît ne doivent pas être réutilisés.
MISE EN GARDE: La loi fédérale américaine
limite la vente de cet appareil par ou pour le
compte d'un dentiste, d'un orthodontiste ou d'un
professionnel dentaire agréé. Le système
constitue un dispositif médical sur ordonnance et
ne doit être manipulé que par des prestataires de
soins qualifiés.
Fabricant de dispositif médical.
Numéro de commande.
Numéro de série.
Courant alternatif.
Indique un dispositif médical qui doit être protégé
de l'humidité.
Indique les limites de température auxquelles le
dispositif médical peut être exposé en toute
sécurité.
Indique le besoin pour l'utilisateur de consulter les
instructions d'utilisation.

© 2019 Align Technology, Inc. All rights reserved.
vii
iTero Element 2 and iTero Element Flex User Manual
Numéro de lot de fabrication.
Indique la plage de pression atmosphérique à
laquelle le dispositif médical peut être exposé en
toute sécurité.
Indique la plage d'humidité à laquelle le dispositif
médical peut être exposé en toute sécurité.
Fragile, à manipuler avec soin.
Ce côté doit être placé vers le haut.
IEC 60417-5031: Courant continu.
Tige (unité de numérisation).
Prise USB.
Batterie électrique.
IEC 60417-5009: EN ATTENTE.
ATTENTION: Ne marchez pas sur le hub iTero
Element Flex.
Indique le représentant agréé dans la
communauté européenne.
Indique que l'appareil est conforme à la norme
RoHS pour la Chine.

iTero Element 2 and iTero Element Flex User Manual
© 2019 Align Technology, Inc. All rights reserved.
viii
iTero Element 2 and iTero Element Flex User Manual
Safety instructions
Before beginning to work with the system, all users are required to read these safety instructions.
Power supply
Power is supplied to the system via an internal medical-grade power supply.
Battery power
iTero Element 2 only:
Charging –the scanner battery will be fully charged after being plugged into a
power source for 2 hours.
With a fully-charged battery, you can scan up to 30 minutes.
Warning: The scanner is provided with a Li-ion rechargeable battery pack. There
is a danger of explosion if the battery is incorrectly replaced. Replace only with
the same type recommended by the manufacturer. Discard used batteries
according to the manufacturer’s instructions.
Electric
warnings
Electric shock hazard!! Only authorized Align Technology technicians can
remove external panels and covers. There are no user-serviceable parts inside.
To avoid the risk of electric shock, the scanner must be connected only to a
mains supply with protective grounding.
Only an Align Technology approved web camera or disk on key should be
connected to the USB sockets on the rear of the touch screen.
iTero Element Flex only:
iTero Element Flex is provided with a hub containing a power supply for the
wand. The Flex hub must be kept dry and be protected against breakage.
Connect the Flex hub only to a laptop that is approved according to IEC60950
and to UL60950-1. The laptop and all its accessories should be located at least
1.5m away from the patient. Do not scan a patient and touch the laptop or any of
its accessories at the same time.
Only the iTero wand and the approved laptop should be connected to the USB
sockets on the Flex hub.
Only the Align Technology approved power cable should be used to connect the
Flex hub to the AC outlet.
Wireless LAN
The system comes equipped with a wireless LAN unit.
Safety
classifications
Type of protection against electrical shock: Class 1.
Degree of protection against electrical shock: Type BF.
Degree of protection against harmful ingress of water: Ordinary.
Equipment not suitable for use in the presence of flammable anesthetic mixtures.
Mode of operation: Continuous.
Prescription
health device
The system serves as a prescription medical device and should be operated by
qualified health-care providers only.

© 2019 Align Technology, Inc. All rights reserved.
ix
iTero Element 2 and iTero Element Flex User Manual
Scanner
warnings
The wand emits red laser light (680nm Class 1), as well as white LED emissions.
Normal usage of the wand does not present any danger to the human eye.
However, you should refrain from shining the wand directly into the patient’s
eyes.
Avoid twisting, knotting, pulling, and stepping on the cable.
When the system is not in use, the wand should be placed in the cradle with the
probe facing the touch screen, so there will be no eye contact with the laser
beam, or the flickering white LED emission.
Activate the wand only while the tip of the wand is in the patient’s mouth.
Avoid placing the wand in the cradle while the scanning operation is still active.
If a scanner malfunction occurs or if physical damage is observed, stop scanning
and call Customer Support.
Cleaning &
disinfection
To avoid cross-contamination, it is mandatory to:
oClean and disinfect the wand, as described in section 10.2, and replace the
disposable wand sleeve as described in section 1.4.3.1.1, after each patient
session.
oRemove and replace gloves after each patient session.
oDiscard torn, contaminated, or removed gloves.
Dispose of scanner sleeves according to standard operating procedures or local
regulations for the disposal of contaminated medical waste.
Unpacking &
installing
The system should be unpacked and installed following Align Technology’s
instructions, described in section 2.1.
Work
environment
The system should be moved between rooms with utmost care to avoid damage.
Do not block the air vents on the wand and the screen.
The system is intended for indoor use only. It should not be exposed to direct
sunlight, excessive heat, or humidity.
iTero Element Flex only: If the iTero Element Flex has just been brought into the
office from a hot, cold, or humid environment, it should be set aside until it has
adjusted to the room temperature, to avoid internal condensation.
Electromagnetic
interference
WARNING: This device has been tested and found to comply with the requirements
for medical devices according to standard IEC60601-1-2.
This standard is designed to provide reasonable protection against harmful
interference in a typical medical installation. However, because of the proliferation of
radio-frequency transmitting equipment and other sources of electrical and
electromagnetic interference in the healthcare environments (e.g., cellular phones,
mobile two-way radios, electrical appliances, RFID), it is possible that high levels of
such interference due to close proximity or strength of source, may result in disruption
of performance of this device. In this case, the device can be returned to operation
mode after user intervention or by auto-recovery.
General
WARNINGS:
No modification of this equipment is allowed.
iTero Element 2 only: The touch screen must always be attached to the stand
after assembly.

iTero Element 2 and iTero Element Flex User Manual
© 2019 Align Technology, Inc. All rights reserved.
x
iTero Element 2 and iTero Element Flex User Manual
Consignes de sécurité
Avant de commencer à travailler avec le système, tous les utilisateurs doivent prendre connaissance de ces
consignes de sécurité.
Alimentation
électrique
Le système est alimenté via une batterie interne de qualité médicale.
Puissance de la
batterie
iTero Element 2 uniquement:
Chargement en cours - La batterie du scanner sera complètement chargée
après avoir été branchée à une source d'alimentation pendant 2 heures.
Avec une batterie complètement chargée, vous pouvez numériser jusqu'à 30
minutes.
Avertissement: Le scanner est fourni avec une batterie rechargeable Li-ion. Il
y a un risque d'explosion si la batterie est remplacée de manière incorrecte.
Remplacez-la uniquement par une batterie identique recommandée par le
fabricant. Jetez les batteries usagées conformément aux instructions du
fabricant.
Avertissements
électriques
Risque de décharge électrique!! Seuls les techniciens agréés par Align
Technology peuvent retirer les panneaux et les capots externes. L'appareil ne
contient aucune pièce réparable par l'utilisateur.
Pour éviter tout risque de choc électrique, le scanner doit être branché
uniquement sur une prise de terre.
Seule une caméra Web ou une clé USB approuvées par Align Technology
peuvent être connectées aux prises USB à l'arrière de l'écran tactile.
iTero Element Flex uniquement:
iTero Element Flex est fourni avec un hub contenant une alimentation pour la
tige. Le hub Flex doit être gardé au sec et protégé contre les chocs.
Connectez le hub Flex uniquement à un ordinateur portable respectant les
normes IEC60950 et UL60950-1. L'ordinateur portable et tous ses accessoires
doivent être situés à au moins 1,5 m du patient. Ne scannez pas un patient et
ne touchez pas l'ordinateur portable ou l'un de ses accessoires en même
temps.
Seuls la tige iTero et l'ordinateur portable approuvé doivent être connectés aux
prises USB du hub Flex.
Seul le câble d'alimentation approuvé par Align Technology doit être utilisé
pour connecter le hub Flex à la prise de courant.
Réseau local sans
fil
Le système est équipé d'une unité de réseau local sans fil.
Classifications de
sécurité
Type de protection contre les chocs électriques: Classe 1.
Degré de protection contre les chocs électriques: Type BF.
Degré de protection contre les infiltrations d’eau dangereuses: Ordinaire.
L'équipement ne convient pas à une utilisation en présence de mélanges
anesthésiques inflammables.
Mode de fonctionnement: En continu.

© 2019 Align Technology, Inc. All rights reserved.
xi
iTero Element 2 and iTero Element Flex User Manual
Dispositif médical
sur ordonnance
Le système constitue un dispositif médical sur ordonnance et ne doit être manipulé
que par des prestataires de soins qualifiés.
Avertissements
relatifs au scanner
Le scanner émet une lumière laser rouge (680nm de classe 1), ainsi que des
émissions à LED blanches. L'utilisation normale du scanner ne présente aucun
danger pour l'œil humain. Cependant, les médecins doivent éviter de placer le
scanner directement dans les yeux du patient.
Évitez de tordre, de nouer, de tirer ou de marcher sur le câble.
Lorsque le système n’est pas utilisé, placez la tige dans le socle avec la sonde
face à l’écran tactile afin d’éviter tout contact visuel avec le faisceau laser ou
l’émission de LED blanche vacillante.
N'activez la tige que lorsque son extrémité est dans la bouche du patient.
Évitez de placer la tige dans le socle tant que l'opération de numérisation est
toujours active.
Si un dysfonctionnement du scanner se produit ou si des dommages
physiques sont observés, arrêtez la numérisation et appelez le support client.
Nettoyage &
désinfection
Pour éviter la contamination croisée, il est obligatoire de:
oNettoyer et désinfecter la tige comme décrit dans la section 10.2 et de
remplacer le manchon jetable de la tige comme décrit dans la section
1.4.3.1.1, après chaque session patient.
oEnlevez et remplacez les gants après chaque session patient.
oJetez les gants déchirés, contaminés ou déjà enlevés.
Jetez les manchons du scanner conformément aux procédures d'utilisation
standard ou aux réglementations locales relatives à l'élimination des déchets
médicaux contaminés.
Déballage &
installation
Le système doit être déballé et installé conformément aux instructions fournies par
Align Technology, décrites dans cette section 2.1.
Environnement de
travail
Le système doit être déplacé d'une pièce à l'autre avec le plus grand soin pour
ne pas l'endommager.
Ne bloquez pas les bouches d'aération de la tige et de l'écran.
Le système est conçu pour une utilisation en intérieur uniquement. Il ne doit
pas être exposé directement à la lumière du soleil, à une chaleur excessive ou
à l'humidité.
iTero Element Flex uniquement: Si l'iTero Element Flex vient juste d'être
amené dans le bureau en provenance d'un environnement chaud, froid ou
humide, laissez le matériel s'adapter à la température de la pièce pour éviter la
condensation interne.

iTero Element 2 and iTero Element Flex User Manual
© 2019 Align Technology, Inc. All rights reserved.
xii
iTero Element 2 and iTero Element Flex User Manual
Interférence
électromagnétique
AVERTISSEMENT: Cet appareil a été testé et approuvé conforme aux exigences
des dispositifs médicaux selon la norme IEC60601-1-2.
Cette norme est conçue pour fournir une protection raisonnable contre les
interférences dangereuses dans une installation médicale classique. Cependant,
en raison de la prolifération des équipements de transmission sur fréquence radio
et d'autres sources d'interférence électrique et électromagnétique dans les
environnements de soins de santé (par exemple, téléphones portables, radios
mobiles bidirectionnelles, appareils électriques), il est possible que des niveaux
élevés d'interférences dûs à la proximité ou à la force d'une source puissent
entraîner des perturbations du fonctionnement de cet appareil. Dans ce cas,
l'appareil peut être remis en mode de fonctionnement après une intervention de
l'utilisateur ou par une récupération automatique.
Informations
générales
AVERTISSEMENTS:
Aucune modification de cet équipement n'est autorisée.
iTero Element 2 uniquement: l’écran tactile doit toujours être fixé au support
après le montage.

© 2019 Align Technology, Inc. All rights reserved.
xiii
iTero Element 2 and iTero Element Flex User Manual
Table of contents
1Introduction.................................................................................................................................................1
1.1 About this document........................................................................................................................1
1.2 Intended use....................................................................................................................................1
1.3 Benefits............................................................................................................................................1
1.4 iTero Element hardware..................................................................................................................2
1.4.1 iTero Element 2.........................................................................................................................2
1.4.2 iTero Element Flex....................................................................................................................3
1.4.3 iTero Element wand..................................................................................................................4
1.5 iTero software..................................................................................................................................6
2Getting started............................................................................................................................................7
2.1 Assembly instructions......................................................................................................................7
2.1.1 Assembling the iTero Element 2 scanner –wheel-stand configuration....................................7
2.1.2 Assembling the iTero Element 2 scanner –counter-stand configuration...............................10
2.1.3 Assembling the iTero Element Flex scanner..........................................................................12
2.2 Installing the iTero software –iTero Element Flex........................................................................13
2.3 Logging in to the scanner for the first time....................................................................................14
2.4 Working in Demo Mode.................................................................................................................14
2.4.1 Exiting Demo Mode.................................................................................................................18
2.5 Registering the scanner –Make It Mine process..........................................................................18
3Working with the iTero Element 2 and iTero Element Flex scanner...................................................23
3.1 Logging in to the scanner..............................................................................................................23
3.1.1 Resetting your password ........................................................................................................25
3.2 Logging out of the scanner............................................................................................................26
3.3Shutting down the scanner............................................................................................................27
3.4 Moving the scanner within the office.............................................................................................27
3.5 User interface................................................................................................................................27
3.5.1 Scanner toolbar.......................................................................................................................30
3.5.2 Touch-screen gestures...........................................................................................................31
3.6 Defining the scanner settings........................................................................................................32
3.6.1 Defining the Computer settings ..............................................................................................33
3.6.2 Defining the User settings.......................................................................................................37
3.6.3 Defining the System settings ..................................................................................................43

iTero Element 2 and iTero Element Flex User Manual
© 2019 Align Technology, Inc. All rights reserved.
xiv
iTero Element 2 and iTero Element Flex User Manual
4Starting a new scan..................................................................................................................................48
4.1 Filling in the Rx..............................................................................................................................49
4.1.1 Working with Restorative scan types......................................................................................51
4.2 Scanning the patient......................................................................................................................54
4.2.1 Scanning guidance .................................................................................................................55
4.2.2 Scanning best practices..........................................................................................................56
4.2.3 Scan options ...........................................................................................................................56
4.2.4 Editing a scan .........................................................................................................................58
4.3 Viewing the scan ...........................................................................................................................63
4.3.1 Missing scan segment notifications........................................................................................63
4.3.2 Working with the Eraser tool...................................................................................................64
4.3.3 Working with the Clearance tool.............................................................................................67
4.3.4 Working with the Edge Trimming tool.....................................................................................69
4.3.5 Working with the Die Separation tool......................................................................................71
4.3.6 Using the scan timer...............................................................................................................75
4.4 Sending the scan...........................................................................................................................75
4.5 Restorative scanning basics..........................................................................................................76
4.6 Orthodontic scanning basics.........................................................................................................76
4.7 Working with the Viewer................................................................................................................76
4.7.1 Clearance tool.........................................................................................................................80
5Working with patients..............................................................................................................................81
5.1 Searching for patients ...................................................................................................................82
5.2 Viewing the patient details.............................................................................................................83
5.3 Creating a new scan for a specific patient ....................................................................................84
5.4 Viewing the Rx ..............................................................................................................................85
5.5 Viewing previous scans in the Viewer...........................................................................................86
5.5.1 Comparing previous scans using iTero TimeLapse technology.............................................87
6Working with orders.................................................................................................................................91
7Viewing messages ...................................................................................................................................94
8Working with MyiTero..............................................................................................................................95
9iTero Invisalign features..........................................................................................................................96
9.1 Invisalign Outcome Simulator........................................................................................................96
9.2 Invisalign Progress Assessment ...................................................................................................96
9.3 Invisalign Go system .....................................................................................................................96

© 2019 Align Technology, Inc. All rights reserved.
xv
iTero Element 2 and iTero Element Flex User Manual
10 Care and maintenance.............................................................................................................................97
10.1 Handling the wand and cable........................................................................................................97
10.2
Cleaning and disinfecting the wand
.........................................................................................97
10.2.1 Cleaning the scanner touch screen........................................................................................97
10.3 Webcam maintenance...................................................................................................................97
11 Clinic LAN network guidelines................................................................................................................98
11.1 Introduction....................................................................................................................................98
11.2 Preparations..................................................................................................................................98
11.3 Router guidelines ..........................................................................................................................98
11.4 Internet connection guidelines.......................................................................................................99
11.5 Firewall..........................................................................................................................................99
11.6 Wi-Fi tips........................................................................................................................................99
11.7 Align hostname recommendations..............................................................................................100
12 EMC declaration .....................................................................................................................................101
13 iTero Element product security whitepaper ........................................................................................104
14 System specifications............................................................................................................................106
14.1 System specifications –iTero Element 2 ....................................................................................106
14.2 System specifications –iTero Element Flex ...............................................................................107
Index...............................................................................................................................................................109

iTero Element 2 and iTero Element Flex User Manual
© 2019 Align Technology, Inc. All rights reserved.
xvi
iTero Element 2 and iTero Element Flex User Manual
Table of figures
Figure 1: Front view of the iTero Element 2....................................................................................................... 2
Figure 2: Rear view of the iTero Element 2....................................................................................................... 3
Figure 3: iTero Element Flex ............................................................................................................................. 3
Figure 4: iTero Element Flex in the supplied carrying case............................................................................... 4
Figure 5: iTero Element wand............................................................................................................................ 4
Figure 6: Protective sleeve ................................................................................................................................ 5
Figure 7: Disposable sleeve............................................................................................................................... 5
Figure 8: Removing a wand sleeve ................................................................................................................... 5
Figure 9: Optical surface of the wand................................................................................................................ 6
Figure 10: Gently slide the new sleeve into place ............................................................................................. 6
Figure 11: Welcome screen............................................................................................................................. 14
Figure 12: iTero Element logo ......................................................................................................................... 15
Figure 13: Demo Mode option ......................................................................................................................... 15
Figure 14: Login window with a list of demo users.......................................................................................... 15
Figure 15: Demo Login button ......................................................................................................................... 16
Figure 16: Demo Mode home screen.............................................................................................................. 16
Figure 17: Demo cases displayed in the list of past orders............................................................................. 17
Figure 18: Past Orders pane –options............................................................................................................ 17
Figure 19: Exiting Demo mode ........................................................................................................................ 18
Figure 20: Selecting the network ..................................................................................................................... 19
Figure 21: Verifying the communication with Align.......................................................................................... 19
Figure 22: Selecting your time zone................................................................................................................ 20
Figure 23: Registering the system to customize the setup.............................................................................. 20
Figure 24: iTero subscription package............................................................................................................. 21
Figure 25: License agreement......................................................................................................................... 21
Figure 26: Checking for updates...................................................................................................................... 22
Figure 27: System is registered and ready...................................................................................................... 22
Figure 28: Login window.................................................................................................................................. 23
Figure 29: iTero home screen.......................................................................................................................... 24
Figure 30: Forgot Password button ................................................................................................................. 25
Figure 31: Email field for forgotten password.................................................................................................. 25
Figure 32: Security answer field ...................................................................................................................... 26
Figure 33: iTero home screen.......................................................................................................................... 27
Figure 34: Remaining battery charge .............................................................................................................. 28
Figure 35: Help overlay.................................................................................................................................... 29
Figure 36: Remaining battery charge .............................................................................................................. 30

© 2019 Align Technology, Inc. All rights reserved.
xvii
iTero Element 2 and iTero Element Flex User Manual
Figure 37: Help overlay.................................................................................................................................... 31
Figure 38: Settings window.............................................................................................................................. 32
Figure 39: Brightness settings ......................................................................................................................... 33
Figure 40: Volume settings.............................................................................................................................. 33
Figure 41: List of nearby Wi-Fi networks......................................................................................................... 34
Figure 42: Connecting to the clinic Wi-Fi network ........................................................................................... 34
Figure 43: Forgetting or Disconnecting from the network................................................................................ 35
Figure 44: Time zone settings ......................................................................................................................... 36
Figure 45: Scan Settings window .................................................................................................................... 37
Figure 46: Only scanning range is highlighted................................................................................................. 39
Figure 47: Rx Settings window ........................................................................................................................ 40
Figure 48: Signature Settings window ............................................................................................................. 41
Figure 49: Language Settings window............................................................................................................. 42
Figure 50: Login Settings window.................................................................................................................... 43
Figure 51: Diagnostics window........................................................................................................................ 44
Figure 52: Licensing Information window ........................................................................................................ 45
Figure 53: System Information window............................................................................................................ 46
Figure 54: Export Settings window –deleting exported files........................................................................... 47
Figure 55: New Scan window showing an empty Rx and the progress toolbar at the top of the window ....... 48
Figure 56: Selecting the required case type.................................................................................................... 49
Figure 57: New Scan window –iRecord case type ......................................................................................... 50
Figure 58: New Scan window –Restorative case type with a tooth chart....................................................... 51
Figure 59: List of restorative treatment options ............................................................................................... 52
Figure 60: Defining the restoration properties ................................................................................................. 53
Figure 61: Treatment Information area............................................................................................................ 54
Figure 62: Recommended scanning sequence –lower jaw............................................................................ 55
Figure 63: Wand guidance............................................................................................................................... 55
Figure 64: Areas with missing anatomy shown with and without additional scan feedback –monochrome.. 56
Figure 65: Areas with missing anatomy shown with and without additional scan feedback –color mode ..... 57
Figure 66: Model displayed in color and monochrome mode.......................................................................... 57
Figure 67: Tap the opposite arch or tap the arrows to select it ....................................................................... 58
Figure 68: Editing tools.................................................................................................................................... 59
Figure 69: Delete Segment tool....................................................................................................................... 59
Figure 70: Delete Selection tool....................................................................................................................... 60
Figure 71: Expanded Delete Selection tool ..................................................................................................... 60
Figure 72: Selected area of the anatomy is deleted........................................................................................ 61
Figure 73: Fill tool ............................................................................................................................................ 62
Figure 74: Areas that require scanning are highlighted in red –Fill tool ......................................................... 62

iTero Element 2 and iTero Element Flex User Manual
© 2019 Align Technology, Inc. All rights reserved.
xviii
iTero Element 2 and iTero Element Flex User Manual
Figure 75: Missing scan message and missing segments highlighted in red.................................................. 64
Figure 76: Eraser tool ...................................................................................................................................... 65
Figure 77: Eraser tool options.......................................................................................................................... 65
Figure 78: Mark the area to be modified.......................................................................................................... 66
Figure 79: Selected area removed and scan tool enabled.............................................................................. 66
Figure 80: Deleted area marked in red............................................................................................................ 67
Figure 81: Occlusal clearance between the opposing teeth............................................................................ 68
Figure 82: Occlusal Clearance range options ................................................................................................. 68
Figure 83: Edge trimming tool.......................................................................................................................... 69
Figure 84: Edge trimming tool options............................................................................................................. 69
Figure 85: Mark the area to be trimmed away................................................................................................. 70
Figure 86: Selected area highlighted and the confirmation icon enabled........................................................ 70
Figure 87: Selected area has been removed................................................................................................... 71
Figure 88: Green hint point centered on the prepped tooth............................................................................. 72
Figure 89: Die separation is displayed in high resolution ................................................................................ 72
Figure 90: Die Separation tool options ............................................................................................................ 73
Figure 91: Scan is displayed in low resolution................................................................................................. 73
Figure 92: Before selecting the die separation................................................................................................ 74
Figure 93: Prepped tooth is displayed in high resolution................................................................................. 74
Figure 94: Scan timer button on the toolbar and scan time............................................................................. 75
Figure 95: Sending the scan............................................................................................................................ 75
Figure 96: Viewer option in the Past Orders pane in the Orders page............................................................ 76
Figure 97: Viewer option in patient’s profile page............................................................................................ 77
Figure 98: Model in a 1-window view............................................................................................................... 78
Figure 99: Model in a 2-window view............................................................................................................... 78
Figure 100: Model in a 5-window view............................................................................................................. 79
Figure 101: Clearance tool and legend displayed in the Viewer ..................................................................... 80
Figure 102: Patients page................................................................................................................................ 81
Figure 103: Searching for a patient ................................................................................................................. 82
Figure 104: Patients matching the search criteria are displayed..................................................................... 82
Figure 105: Patient’s profile page .................................................................................................................... 83
Figure 106: Patient’s profile page – New Scan option..................................................................................... 84
Figure 107: New Scan window with patient’s details already filled in.............................................................. 84
Figure 108: Patient’s profile page – View Rx option........................................................................................ 85
Figure 109: Rx Details window ........................................................................................................................ 85
Figure 110: Patient’s profile page – Viewer option.......................................................................................... 86
Figure 111: Scan displayed in the Viewer ....................................................................................................... 86
Figure 112: iTero TimeLapse –selecting the scans to compare..................................................................... 87
This manual suits for next models
1
Table of contents
Other iTero Dental Equipment manuals