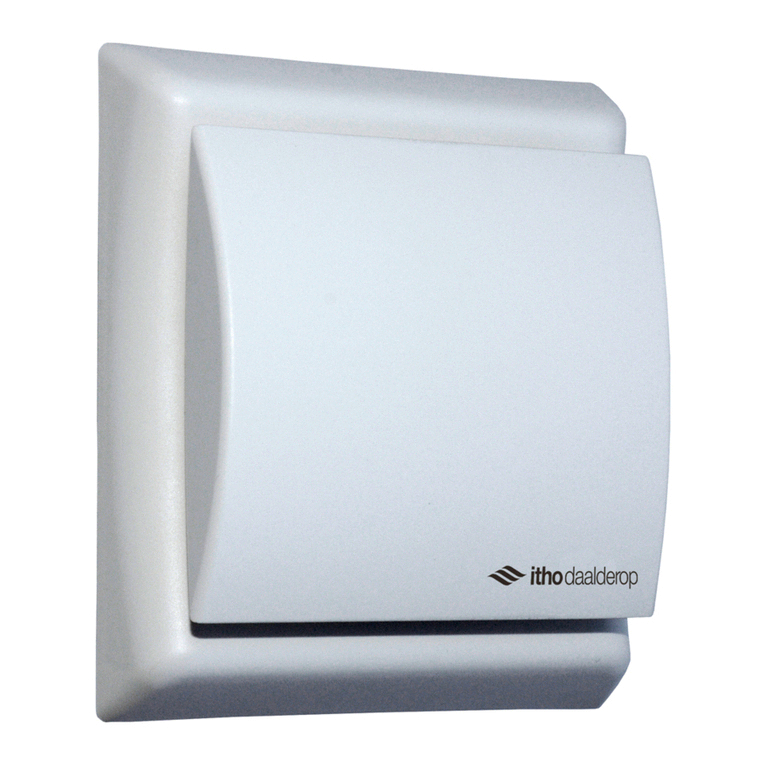
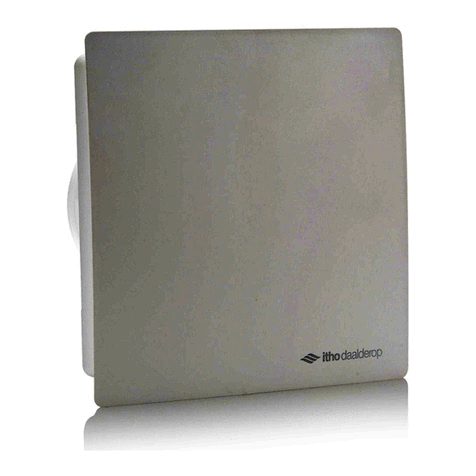
Itho Daalderop CVE-S ECO User manual


Original document.

Foreword
This abridged manual explains the functions for everyday
use and provides instructions for troubleshooting. More
information on installation, connection, operation and
maintenance can be found in the full manual(s).
On our website www.ithodaalderop.nl you can download
the following manual(s):
●Installation & use (nl) - CVE-S ECO
In order to view and print the manual, you need a
program that can open PDF files.
Warranty registration
All Itho Daalderop products come with a standard two-
year manufacturer's warranty. Within this period, the
product or parts thereof will be repaired or replaced free
of charge.
The manufacturer's warranty is extended by a three-year
parts warranty (1) by registering the product via the
website www.ithodaalderop.nl/garantie within two months
of the installation date. Only products supplied with a
warranty registration card and bearing a serial number
can be registered.
Some products are subject to additional validity periods
and conditions; see the product page on our website.
The guarantee is in addition to the legal guarantee
obligations of Itho Daalderop.
1) Spare parts guarantee means full reimbursement of the parts
only, and does not apply to labour costs and call-out charges.
3

Safety and regulations
General:
●Work on the ventilation system mayonly be
carried out by approved installers (1) in
accordance with the instructions in the manual.
Only accessories and parts as prescribed by the
manufacturer may be used.
●Safety instructions must be followed toprevent
physical injury and/or damage to the product.
●Handle electrical appliances with care:
-
Never touch the device with wet hands.
-
Never touch the device when youare
barefoot.
●Do not expose the product to
weather conditions.
●The electrical connection must always be
easily accessible in order to switch off the
power supply.
●The product must not be modified.
●Switch the product off when:
-
The product does not function properly.
-
You want to clean the outside of the product.
Usage:
●Do not use the product for purposes other than
those for which it is intended, as described in this
manual.
●Do not use the product in the presence of
flammable or volatile substances such as
alcohol, insecticides, petrol, etc.
●Do not use the appliance to vacuum
water boilers, heating systems, etc.
●Do not place any objects on the device.
●This product and/or system may be operated by
children aged 8 years and over and by persons with
reduced physical, sensory or mental capabilities or
lack of experience and knowledge if they are
supervised or instructed in its safe use and are
aware of the dangers of the product and/or system.
●Prevent children from playing with the
product and/or system.
4

Inspection and maintenance:
●Regularly inspect the product for defects. In
the event of defects, contact your installer or
Itho Daalderop immediately.
●Cleaning and maintenance by the user must not be
carried out by children or by persons with reduced
physical, sensory or mental capabilities or a lack of
experience andknowledge without supervision.
●Maintenance and cleaning may only be carried out
after the appliance has been de-energized.
●If the power supply cable is damaged, it must be
replaced by the manufacturer, his agency or a
qualified person in order to avoid danger.
●Keep valves and grids free and clean.
●Maintenance instructions must be followed to
prevent damage and excessive wear and tear.
1) A qualified installer is an installer working for a central heating
or mechanical installation company registered with the
Chamber of Commerce and included in the SEI recognition
register (Stichting Erkenning Installatiebedrijven) orwho has
a Sterkin recognition.
5

Operation
1
\..
(B. . [
,
-i
2
3
4
0
5
6
6._s,... ithodaalderop

Various positions are pre-programmed in the ventilation
unit. A number of control switches are available for
active tuning to the correct stand/ventilation capacity:
1.
Wireless control switch with three positions and
timer function.
2.
Wireless control switch with two positions, an
automatic position and a timer function.
3.
Wireless CO2 sensor with integrated control.
4.
Wireless stainless steel sensor with integrated
control.
5.
Wired 3-position switch for installation.
6.
Spider Base, climate thermostat with three modes,
an automatic mode and a timer function.
7.
A combination of the above possibilities.
To log on or off a wireless control switch at the unit, see
section Logging on or off a wireless control switch .
You can register up to 20 wireless products (controls
and/or sensors).
The ventilation unit can be set to one of the following
positions as required:
●Position 1, low position: when one person is present
during the day or night or when nobody is present.
●Position 2, middle position: for day or night when
more than one person is present.
or
Auto mode, automatic mode; control based on
existing sensors (CO2, RH and/or PIR). The capacity
is automatically controlled between low and high
position.
●Stand 3, high level: for when cooking, showering or
bathing or when many people are present.
Sign on and off wireless sensors
For information on optional sensors see the information
supplied with those sensors.
Subscribe and unsubscribe Spider Base
For information on how to register and unsubscribe the
Spider Base climate thermostat, please refer to the
documentation supplied with this product.
7

Sign in wireless controls
Preferably announce a wireless control switch in the
vicinity of the ventilation unit.
a)
Disconnect the power supply to the ventilation unit
by removing the plug from the wall socket.
b)
Wait at least 15 seconds.
c)
Power the ventilation unit by plugging the plug
back into the wall socket.
d)
Within two minutes after the ventilation unit has
been energised, press two diagonally placed
buttons on the control switch simultaneously.
The control switch is registered and the ventilation unit
briefly varies in speed to confirm the registration. The
ventilation unit is now ready to be operated using the
wireless control switch.
Log off wireless controls
Preferably sign off a wireless control switch in the vicinity
of the ventilation unit.
a)
Disconnect the power supply to the ventilation unit
by removing the plug from the wall socket.
b)
Wait at least 15 seconds.
c)
Power the ventilation unit by plugging the plug
back into the wall socket.
d)
Press the four buttons of the control switch
simultaneously within two minutes after the
ventilation unit has been energised.
The ventilation unit no longer reacts to the wireless control
switch(s). Logging off one control switch automatically logs off
all control switches, controllers and sensors.
8
Note
If several radio controls and/or sensors are logged
on to the ventilation unit, all controls and sensors
must be logged on again after logging off.

Note
The following faults can be solved by the user. Please contact your installer for unlisted faults.
Malfunctions
The fan is no longer running
Oorzaak Solution
a) The plug of the ventilation unit is not plugged into a wall
socket.
●Plug the plug into a wall socket.
b) There is no voltage at the socket outlet.
●Restore the voltage at the wall socket.
The fan always runs at the same speed and does not react to the remote controls
Oorzaak Solution
a) The battery of a paired RF control, sensor is empty.
●Replace the battery.
(b) The distance between the fan and the RF control is
too great or the signal encounters too many
obstacles.
●Move the RF control if the wireless signal is
affected by the presence
of many steel/obstacles.
9

The remote control does not work (anymore)
Cause
Solution
a) The battery of a paired RF control, sensor is empty.
●Replace the battery.
(b) The distance between the fan and the RF control is
too great or the signal encounters too many
obstacles.
●Move the RF control if the wireless signal is
affected by the presence
of many steel/obstacles.
c) The control is not (or no longer) logged on to the fan.
●Start the IBS procedure (again) and log on
the RF control.
●Move the RF control if the wireless signal is
affected by the presence of many
steels/obstacles.
(d) RF control is defective.
●Replace the RF control and report it
on again.
(e) The brand names of the RF control and the ventilation
system.
unit do not match.
●Replace the RF control with one of
The same brand as the ventilation unit.
The ventilation unit does not respond to the 3-position switch
Cause
Solution
a) The plug of the ventilation unit is not plugged into a wall
socket.
●Plug the plug into a wall socket.
b) There is no voltage at the socket outlet.
●Restore the voltage at the wall socket.
10

●Disconnect the ventilation unit from the
power supply for 15 seconds. Log off an
already logged on RF control (and sensors)
and log it (and sensors) again.
(b) The RF control of an adjacent dwelling has been logged
on to this fan.
De ventilator gaat (zonder duidelijke reden) plotseling veel harder of zachter draaien
Oorzaak Solution
a)
After using the timer function, the ventilation unit
switches back to the last selected position before the
timer function was switched on.
●This is not a malfunction.
11
Other manuals for CVE-S ECO
1
Table of contents
Other Itho Daalderop Fan manuals
Popular Fan manuals by other brands

Monte Carlo Fan Company
Monte Carlo Fan Company Lowden 5LWDR52 D Series Owner's guide and installation manual

Maico
Maico ALD 10 Mounting instructions

BLAUBERG
BLAUBERG Valeo user manual

EuroFans
EuroFans MORENO Owner's instruction manual

dreo
dreo DR-HAF004S user manual

Broan
Broan LOSONE SELECT L900L instructions

MAGMATIC
MAGMATIC MAGMAFAN1 user manual

Rittal
Rittal 3237 Series Assembly and operating instructions

Vitek
Vitek VT-1948 BK user manual

Panasonic
Panasonic WhisperSense FV-08VQCL6 installation instructions

Hunter
Hunter 42947-01 installation guide

Ruck Ventilatoren
Ruck Ventilatoren ETALINE Series Assembly instruction