IWAKI PUMPS ST-900N User manual

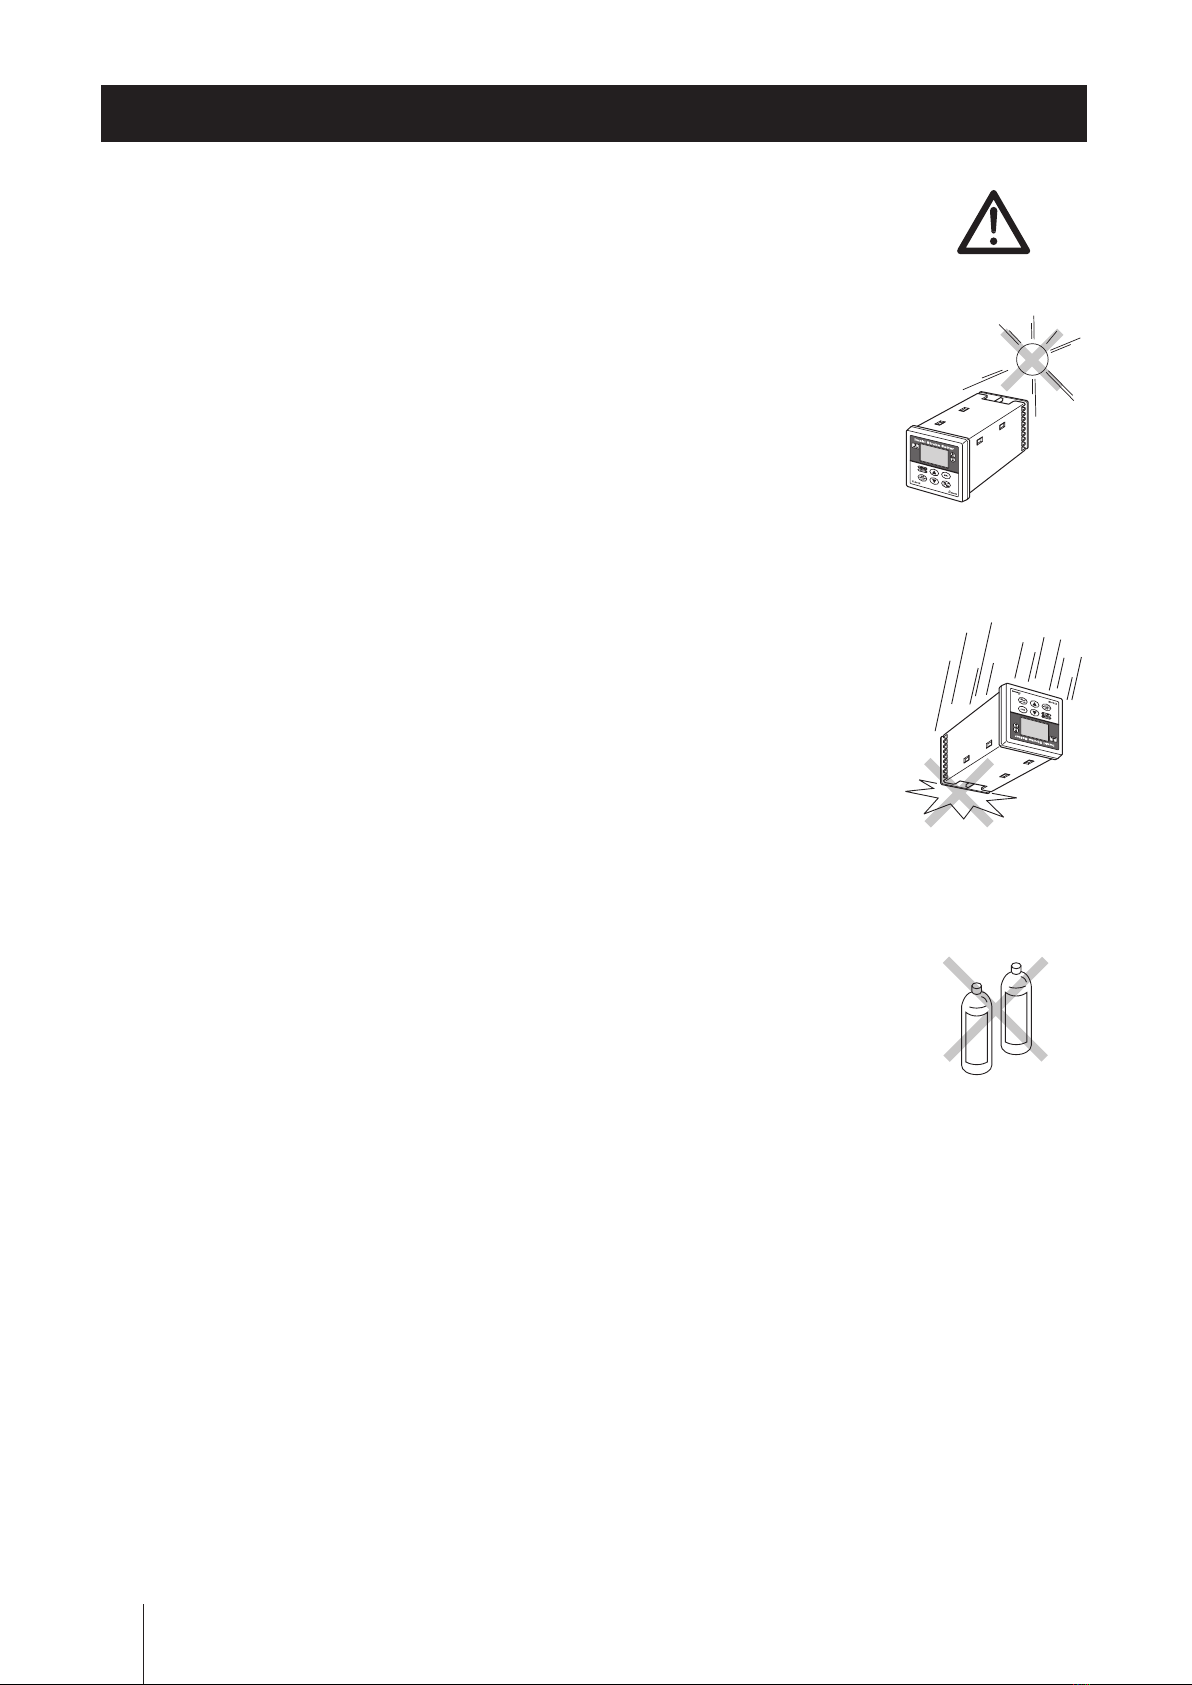
Safety instructions Overview Installation Operation Maintenance Specications
( )Country codes
IWAKI CO.,LTD. 6-6 Kanda-Sudacho 2-chome Chiyoda-ku Tokyo 101-8558 Japan
TEL:(81)3 3254 2935 FAX:3 3252 8892
Australia IWAKI Pumps Australia Pty. Ltd.
TEL : (61)2 9899 2411 FAX : 2 9899 2421
Italy IWAKI Italia S.R.L.
TEL : (39)0444 371115 FAX : 0444 335350
Austria IWAKI EUROPE GmbH
TEL : (49)2154 9254 0 FAX : 2154 9254 48
Korea IWAKI Korea Co.,Ltd.
TEL : (82)2 2630 4800 FAX : 2 2630 4801
Belgium IWAKI Belgium n.v.
TEL : (32)1367 0200 FAX : 1367 2030
Malaysia IWAKIm Sdn. Bhd.
TEL : (60)3 7803 8807 FAX : 3 7803 4800
China IWAKI Pumps (Shanghai) Co., Ltd.
TEL : (86)21 6272 7502 FAX : 21 6272 6929
Norway IWAKI Norge AS
TEL : (43)23 38 49 00 FAX : 23 38 49 01
China IWAKI Pumps (Guandong) Co., Ltd.
TEL : (86)750 3866228 FAX : 750 3866278
Singapore IWAKI Singapore Pte. Ltd.
TEL : (65)6316 2028 FAX : 6316 3221
China
GFTZ IWAKI Engineering & Trading (Guangzhou)
TEL : (86)20 8435 0603 FAX : 20 8435 9181
Spain IWAKI Iberica Pumps, S.A.
TEL : (34)943 630030 FAX : 943 628799
China
GFTZ IWAKI Engineering & Trading (Beijing)
TEL : (86)10 6442 7713 FAX : 10 6442 7712
Sweden IWAKI Sverige AB
TEL : (46)8 511 72900 FAX : 8 511 72922
Denmark IWAKI Nordic A/S
TEL : (45)48 24 2345 FAX : 48 24 2346
Switzerland IWAKI (Schweiz) AG
TEL : (41)26 674 9300 FAX : 26 674 9302
Finland IWAKI Suomi Oy
TEL : (358)9 2745810 FAX : 9 2742715
Taiwan IWAKI Pumps Taiwan Co., Ltd.
TEL : (886)2 8227 6900
FAX : 2 8227 6818
France IWAKI France S.A.
TEL : (33)1 69 63 33 70 FAX : 1 64 49 92 73
Taiwan
IWAKI Pumps Taiwan (Hsin-chu) Co., Ltd. TEL : (886)3 573 5797 FAX : (886)3 573 5798
Germany IWAKI EUROPE GmbH
TEL : (49)2154 9254 0 FAX : 2154 9254 48
Thailand IWAKI (Thailand) Co.,Ltd.
TEL : (66)2 322 2471 FAX : 2 322 2477
Holland IWAKI EUROPE NL Branch
TEL : (31)547 293 160 FAX : 547 292 332
U.K. IWAKI Pumps (UK) LTD.
TEL : (44)1743 231363 FAX : 1743 366507
Hong Kong IWAKI Pumps Co., Ltd.
TEL : (852)2 607 1168 FAX : 2 607 1000
U.S.A. IWAKI AMERICA Inc.
TEL : (1)508 429 1440 FAX : 508 429 1386
Indonesia
IWAKI Singapore (Indonesia Branch)
TEL : (62)21 690 6606 FAX : 21 690 6612
Vietnam IWAKI pumps Vietnam Co.,Ltd.
TEL : (84)613 933456 FAX : 613 933399
T803 '11/11 ©2011 IWAKI CO., LTD.
Thank you for choosing our product.
Please read through this instruction manual before use.
This instruction manual describes important precautions and instruc-
tions for the product. Always keep it on hand for quick reference.
Instruction manual
ST-900N
Iwaki Stroke setter

2
Order conrmation
Open the package and check that the product conforms to your order. If any problem or
inconsistency is found, immediately contact your distributor.
a. Check if the delivery is correct.
Check the nameplate to see if the information such as model codes is as ordered.
b. Check accessories are complete.
c. Check if the delivery is damaged or deformed.
Check for transit damage and loose bolts.
Order conrmation
Instruction manual
Mounting hardware ×2
©2011IWAKI CO., LTD.
Thank you for choosing our product.
Please read through this instruction manual before use.
This instruction manual describes important precautions and
instructions for the product. Always keep it on hand for quick reference.
Instruction manual
ST-900N
Iwaki Stroke setter
ALARM
Iwaki E.E. Positioner
I
W
A
KI
XP-900N
INC
DEC
MANUAL
AUTO
MAN SET
ENT
AUTO
MENU

3
Contents
Contents
Order conrmation ..........................................................................................................................................2
Safety instructions.................................................................... 5
Warnings........................................................................................................................................................ 6
Cautions......................................................................................................................................................... 7
Precautions for use ......................................................................................................................................8
Overview.................................................................................... 9
Introduction ...................................................................................................................................................9
Operating principle ..................................................................................................................................... 9
Features .....................................................................................................................................................9
Operational functions................................................................................................................................. 10
Manual mode ........................................................................................................................................... 10
Real-time SL adjustment..................................................................................................................... 10
Target SL setting ................................................................................................................................. 10
Auto mode ................................................................................................................................................ 10
Adjustment/Correction functions.............................................................................................................. 11
Stroke length cognition ....................................................................................................................... 11
Input current/voltage correction .......................................................................................................... 11
Servo unit control signal (AX mechanically-driven diaphragm pump) ................................................ 11
Control functions (Auto mode)............................................................................................................. 12
Inversely proportional line ................................................................................................................... 12
Proportional band/Current-Stroke setting (Proportional line programming) ....................................... 12
Upper/Lower limit setting..................................................................................................................... 13
Monitoring functions ................................................................................................................................. 13
Operating conditions ........................................................................................................................... 13
Operation history................................................................................................................................. 13
Other functions......................................................................................................................................... 13
Keypad lock......................................................................................................................................... 13
Remote control.................................................................................................................................... 13
Part names................................................................................................................................................... 14
Operation panel........................................................................................................................................ 14
Basic display ....................................................................................................................................... 15
Identication codes .................................................................................................................................... 16
Setter........................................................................................................................................................ 16
Installation ...............................................................................17
Setter mounting .......................................................................................................................................... 17
Wiring ........................................................................................................................................................... 18
End terminals ........................................................................................................................................... 19
Input signal (4-20mA/1-5V)................................................................................................................. 19
Power voltage ..................................................................................................................................... 19

4Contents
Frame ground...................................................................................................................................... 19
Electric servo unit................................................................................................................................ 19
Remote/Local control .......................................................................................................................... 19
Terminal assignment for the servo unit ............................................................................................... 19
Power voltage/Earthing ............................................................................................................................ 20
Electric servo unit..................................................................................................................................... 21
Measures against noise ........................................................................................................................... 21
Operation................................................................................. 22
Before operation .........................................................................................................................................22
Points to be checked................................................................................................................................22
Calibration ................................................................................................................................................22
Operation programming............................................................................................................................. 23
Programming ow .................................................................................................................................... 24
Menu mode ..............................................................................................................................................25
Stroke length cognition ....................................................................................................................... 25
Input current/voltage correction .......................................................................................................... 26
Inversely proportional line selection.................................................................................................... 27
Proportional line programming............................................................................................................ 28
Upper/Lower limit setting..................................................................................................................... 32
Real-time SL adjustment/Target SL setting ........................................................................................33
Operating history (Setting conrmation) .............................................................................................34
Other settings...........................................................................................................................................35
Keypad lock.........................................................................................................................................35
Remote control....................................................................................................................................35
Servo unit control signal setting (AX mechanically-driven diaphragm pump) .................................... 36
Operation ..................................................................................................................................................... 37
AUTO mode ............................................................................................................................................. 37
Manual mode ...........................................................................................................................................38
Real-time SL adjustment.....................................................................................................................38
Target SL setting .................................................................................................................................38
Operating conditions (Setting conrmation)............................................................................................. 39
4-20mA(/1-5V) input/ Control output...................................................................................................39
Target stroke length.............................................................................................................................39
Parameter setting (AUTO mode)......................................................................................................... 39
Default setting ..........................................................................................................................................40
Maintenance.............................................................................41
Troubleshooting.......................................................................................................................................... 41
Error message .............................................................................................................................................42
Input current/voltage switching ................................................................................................................ 42
Specications/Outer dimensions..............................................................................................................43
Specications...........................................................................................................................................43
Outer dimensions .....................................................................................................................................44

5
Safety instructions
Read through this section before use. This section describes important
information for you to prevent personal injury or property damage.
■ Symbols
In this instruction manual, the degree of risk caused by incorrect use is noted with the follow-
ing symbols. Please pay attention to the information associated with the symbols.
Indicates mishandling could lead to a fatal or serious
accident.
WARNING
A symbol accompanies each precaution, suggesting the use of "Caution", "Prohibited actions"
or specic "Requirement".
Indicates mishandling could lead to personal injury or prop-
erty damage.
CAUTION
Caution marks Prohibition mark Requirement mark
Safety instructions
Safety instructions
Prohibited
Electrical
shock
Caution
Do not rework
or alter
Requirement
Wear
protection
Export restrictions
Technical information contained in this instruction manual might be treated as controlled tech-
nology in your countries, due to agreements in international regime for export control.
Please be reminded that export license/permission could be required when this manual is
provided, due to export control regulations of your country.
Grounding

6
WARNINGS
WARNINGS
Turn off power before service
Risk of electrical shock. Be sure to turn off power to stop this product and
related devices before service is performed.
Stop operation
If you notice any abnormal or dangerous conditions, suspend operation
immediately and inspect/solve problems.
Qualied personnel only
The product should be handled or operated by qualied personnel with a
full understanding of this product. Any person not familiar with the product
should not take part in the operation or management.
Do not modify this product
Alterations to this product carries a high degree of risk. It is not the manu-
facturer's responsibility for any failure or injury resulting from alterations to
this product.
Do not use this product in any condition other than its intended purpose
The use of this product in any conditions other than those clearly specied
may result in failure or injury. Use this product in specied conditions only.
Do not use a damaged setter
Using a damaged setter could lead to an electric leak or shock.
Grounding
Risk of electrical shock! Always properly ground this product. Conform to
local electric codes.
Do not use this product in a wet location
This product is not waterproof. Use of the product in wet or extremely hu-
mid locations could lead to electric shock or short circuit.
Keep electric parts and wiring dry
Risk of re or electric shock. Install this product where it can be kept dry.
Do not damage the power cable
Do not pull, knot or crush the power cable. Damage to the power cable
could lead to a re or electrical shock if cut or broken.
Use specied power only
Do not apply power other than that specied on the nameplate. Otherwise,
failure or re may result. Ensure this product is properly grounded.
Requirement
Do not remodel
Prohibited
Prohibited
Prohibited
Caution
Turning off power
Prohibited
Grounding
Prohibited
Prohibited

7
Safety instructions
Install a GFCI (earth leakage breaker)
An electrical failure of this product may adversely affect other devices on
the same line. Purchase and install a GFCI (earth leakage breaker) sepa-
rately.
Do not install/store this product:
• In a ammable atmosphere.
• In a dusty/humid place.
• In direct sunlight or wind & rain.
• Where ambient temperature can exceed 0-50ºC.
• Under vibration.
Disposal of a used setter
Dispose of any used or damaged product in accordance with local rules
and regulations. If necessary, consult a licensed industrial waste disposal
company.
Keep the spec label and nameplate clean
If labels and a nameplate come unglued or illegible, contact us to replace
them with new ones.
Electrical
shock
CAUTIONS
Requirement
CAUTIONS
Caution
Prohibited

8
Precautions for use
Precautions for use
• Electrical work should be performed by a qualied electrician. Otherwise,
personal injury or property damage may result.
• Do not install this product:
–In a ammable atmosphere.
–In a dusty/humid place.
–In direct sunlight or wind & rain.
–Where ambient temperature can exceed 50ºC or falls below 0ºC.
–Under vibration
Protect this product with a cover when installing it out of doors.
• Use care handling this product. Do not drop. An impact may affect setter
performance. Do not use a setter that has been damaged to avoid the risk
of electrical damage or shock.
• Do not clean this product or nameplate with a solvent such as benzine
or thinner. This may discolour the setter or erase printing. Use a dry or a
damp cloth or a neutral detergent.
Caution
Benzine
Thinner

9
Overview
Overview
Introduction
Setter characteristics, features and part names are described in this sec-
tion.
Introduction
Operating principle
An Iwaki ST-900N stroke setter is designed for use with the Iwaki AX metering pumps with a servo unit. The
setter controls the stroke length of the AX pumps in proportion to 4-20mADC or 1-5VDC signal from user's
controller (proportional control).
Principle of operation
The ST setter monitors pump stroke length via the feedback signal (signal voltage from the potentiometer) and
adjusts to a target length by controlling the servo motor (feedback control).
Features
● Manual control (stroke length)
Keypad operation changes the stroke length of the pump in between 0 and 100%.
● Auto control (stroke length)
The ST setter controls a stroke length in proportion to 4-20mA(/1-5VDC) signal from user's controller and the
operation programming.
● Remote control
"Local control (default)" is changed to "Remote control (AUTO mode with keypad locked)" while a no-voltage
contact signal or open collector signal is inputted to the terminal pin 8(plus) & 9(minus).
● Multivoltage operation
The ST setter is a multivoltage type (100-240VAC) and can be selected without concern for local power voltage.
pH sensor
Thermometer
Hygrometer
Flow meter
Concentration meter
Pressure gauge
Conductivity sensor
etc.
Feedback signal
4-20mADC (AX hydraulic pumps)
* Note a different signal range is used for the
AX mechanically-driven diaphragm pump.
User
controller ST-900N
Stroke length
control signal
Control circuit Drive circuit

10
Operational functions
Manual mode
■ Real-time SL adjustment
Use the UP and DOWN keys to change a stroke length in operation (MAN mode). Stroke length changes only
while either key is pressed. The "INC" LED lights when the stroke length extends and the "DEC" LED lights
when the stroke length retracts. This adjustment is the factory default setting.
■ Target SL setting
Use the UP and DOWN keys to set and the SET/ENT key to enter a target stroke length in operation (MAN
mode). The ST setter starts to control the servo motor to meet the target length. See page 33 for selecting this
method.
Auto mode
The pump extends/shortens the stroke length in the range of 0-100% in proportion to 4-20mA or 1-5VDC from
user controller. See page 37 for detail. A proportional line can be programmed by proportional band setting,
Current-Stroke setting or upper/lower limit setting as necessary.
Operational functions
Input signal (user controller)
0 4 12 20 (mA)
100
50
0
(%)
Pump stroke length
Key operation
Pump stroke length

11
Overview
Adjustment/Correction functions
■ Stroke length cognition
Give the ST setter the 0% and 100% stroke length positions through keypad operation. See page 25 for detail.
The setter automatically behaves to store the positions. Perform stroke length cognition every time the setter is
used with a unrecognized AX pump, the electric servo unit is repaired, or a displayed stroke length differs from
the actual length.
■ Input current/voltage correction
Measure a 4mA(/1V) and a 20mA(/5V) signal from a user controller with the ST setter. The setter corrects its
reading accordingly. Otherwise, a target stroke length may not be met in proportional control. See page 26 for
detailed procedure.
*The correction may fail if the signals from a user controller is far different from 4mA(/1V) or 20mA(/5V).
■ Servo unit control signal (AX mechanically-driven diaphragm pump)
The stroke length of the AX hydraulic pumps are controlled by the 4-20mA control signal from the ST setter,
however, different signal ranges as below need be set at each model for the AX mechanically-driven dia-
phragm pumps. See page 36 for programming procedure.
Model codes OUT.H OUT. L
AXA-K (KE) 90 8.0mA
4.0mA
AXA-K (KE) 120 9.3mA
AXB-K (KE) 150
AXB-K (KE) 180 10.4mA
Operational functions

12
Operational functions
Control functions (Auto mode)
■ Inversely proportional line
With this setting "ON", the ST setter controls the stroke length inversely proportional to the 4-20mA(/1-5V)
signal from a user controller. See page 27 for detailed procedure. Use this function along with the proportional
line programming below as necessary (e.g. for pH control).
■ Proportional band/Current-Stroke setting (Proportional line programming)
The default setting proportional line (4-20mA to 0-100%) can be changed by means of proportional band set-
ting ("P.B."), Current-Stroke setting ("2P" and "I.IN"). See page 28 for detail.
pH control
Two pumps may be needed to control pH in a sample. One is for acid, and the other is for alkaline dosing. In
this case, provide the ST setter at each servo unit to control the pump with 4mA(/1VDC)-20mA(/5VDC) signal
from a user controller.
Current-Stroke setting ("2P")
When a target is pH7, proportional line programming would be as follows.
Parameter
Inversely proportional line Proportional line programming
XP1 ON
Current-Stroke setting ("2P")
Hi-SL : 100, Hi-I : 12
Lo-SL : 0, Lo-I : 4
XP2 OFF
Current-Stroke setting ("2P")
Hi-SL : 100, Hi-I : 20
Lo-SL : 0, Lo-I : 12
Proportional band setting ("P.B.")
Sift the proportional line as necessary. 25% stroke length is obtained at 4mA in the following graph.
The left graph is in the following setting.
Hi-SL: 100 Hi-l: 16
Lo-SL: 25 Lo-l: 4
0 pH7 pH14
20mA
4mA
4mA 12mA 20mA
100%
0%
4mA 12mA 20mA
100%
0%
Signal
from user
controller
User controller Alkaline dosing pump
Stroke
length
Acid dosing pump
Stroke
length
4 16 20mA
100%
25
0
Stroke
length
Input signal
(user controller)
Shifted to 25%
pH meter User’s
controller
ST setter Servo unit
ST setter
P2
P1
Acid dosing
Alkakine dosingServo unit

13
Overview
Operational functions
■ Upper/Lower limit setting
Set the upper or lower limit of the proportional line in between 0 and 100%. See page 32 for detail. The up-
per limit is provided to control the discharge pressure not to exceed the piping limit pressure. The lower limit is
provided to keep the minimum ow rate at any signal current/voltage (user controller).
Monitoring functions
■ Operating conditions
In AUTO mode, the ST setter monitors operating conditions of 4-20mA(1-5V) input via the terminal pin 17(plus)
and 18(minus), the control signal output via the terminal pin 15(plus) and 16(minus), and the target stroke
length. Both the signals are converted into stroke length and shown up on the screen in % as well as the target
stroke length. See page 39 for detail. The parameter setting for AUTO mode such as inversely proportional line
selection, a proportional band ("P.B."), Current-Stroke ("2P" and "I.IN"), and upper/lower limits are checked
during operation.
■ Operation history
In the menu mode, the ST setter shows total power connection days (from being shipped or defaulted) and
recalls the previous parameter setting of an inversely proportional line, a proportional band ("P.B."), Current-
Stroke ("2P" and "I.IN"), upper/lower limits and a control signal. See page 34 for detail.
Other functions
■ Keypad lock
Activates/deactivates keypad lock for the prevention of erroneous key operation. Press and hold the MAN/
AUTO key. See page 35 for detail.
*Keypads can be locked/unlocked in MAN or AUTO mode. The "LOCK" indication appears while keypads are locked.
■ Remote control
"Local control (default)" is changed to "Remote control (AUTO mode with keypad locked)" while a no-voltage
contact signal or open collector signal is inputted to the terminal pin 8(plus) & 9(minus).
* Remote/Local control switching is accessible at any time during MAN or AUTO mode. Keypads are locked when "Re-
mote" is selected.
Stroke length
Input signal (user controller)
Stroke length
4 12 20mA
100%
75
50
25
04 12 20mA
100%
75
50
25
0
Input signal (user controller)
Upper limit setting Hi: 75% Lower limit setting Lo: 50%

14
Part names
Operation panel
% : Appears with a stroke length indication.
mA : Appears with signal current indication.
V : Appears with signal voltage indication.
TIME : Appears with a total power connection day
I.IN : Appears when the ST setter is set for receiving the signal current from user controller.
V.IN : Appears when the ST setter is set for receiving the signal voltage from user controller.
LOCAL : Appears when the Local control is selected.
REM. : Appears when the Remote control is selected.
REV. : Appears when a proportional line is inverted.
MENU : Appears when the ST setter is in the menu mode.
LOCK : Appears with keypads locked.
AUTO LED
Lights in green during operation in
AUTO mode.
UP/DOWN keys
Used for stroke length
increment/decrement,
numeric value change, and
scrolling up/down options.
Display
indicates current/target stroke lengths
and operating conditions.
MAN/AUTO key
Used for changing between the MAN
and AUTO modes
DEC LED
Lights when a stroke length
is decreasing.
ALARM LED
Lights in red in erroneous conditions.
SET/ENT key
Used for making a choice in the menu mode.
MAN LED
Lights in green during operation in
MAN mode.
Menu key
Used for going forward/back
to the main menu.
INC LED
Lights when a stroke length
is increasing.
Part names
ST-900N
MANUAL
AUTO
MAN SET
ENT
AUTO
MENU
ALARM
INC
DEC

15
Overview
■ Basic displays
Display MAN/AUTO LED INC/DEC LED ALARM LED Conditions
MAN LED lights
green. - - The ST is in Manual
mode.
MAN or AUTO LED
lights depending on
operating mode.
INC or DEC LED
lights during incre-
ment/decrement of
stroke length.
-
The ST increases/
decreases the pump
stroke length.
AUTO LED lights
green. - - The ST is in Auto
mode.
AUTO LED lights
green. - -
The ST in Auto mode
with an inversely pro-
portional line.
-
INC or DEC LED
lights during in SL
cognition behaviour.
-The ST is in the menu
mode.
AUTO LED lights
green. - - When the Remote con-
trol is selected.
MAN or AUTO LED
lights depending on
operating mode.
- - Keypad operation is
disabled.
MAN or AUTO LED
lights depending on
operating mode.
- -
The ST is set for receiv-
ing signal voltage from
user controller.
MAN or AUTO LED
lights depending on
operating mode.
-ALARM LED
lights red.
The ST is in erroneous
conditions.
Part names

16
Identication codes
Each code represents the following information.
Setter
ST - 900N
a b c
a. Series name
ST
b. Series code
900N
c. Special version
No code : Standard models
S : Customized models
Identication codes

17
Installation
Installation
This section describes the installation and wiring of the ST setter. Read
through this section before work.
Points to be observed
Do not install this product:
–In a ammable atmosphere.
–Where ambient temperature can exceed 50ºC or falls below 0ºC.
–Where humidity can exceed 85%RH or falls below 30%RH.
–In direct sunlight or wind & rain.
–In a dusty or a corrosive environment.
–Under mechanical vibration or electromagnetic eld.
–With exposed electrical terminals.
* Mounting panel should tolerate the weight of the setter.
Setter mounting
See the following instructions for installation. Use the attached mounting hardware.
a. Open a panel cutout, seeing the dimension below.
b. When two or more ST setters are installed in a control panel, keep the distance between each setter 33mm
or more in both vertical and horizontal directions.
c. Allowable thickness of the control panel is 1.5-5mm.
d. First insert the setter into the cutout.
e. Attach the mounting hardware to the ST setter and fix to the panel.
Mounting hole
Panel (thickness: 1.5-5mm)
Mounting hardware
Setter mounting
ALARM
ST-900N
INC
DEC
MANUAL
AUTO
MAN SET
ENT
AUTO
MENU
96 150
166
171
16
96
92
+1
0
92
+1
0
33 or more
33 or more
Iwaki Stroke Setter
Panel cutouts dimension

18
Wiring
Wiring
Wiring for power voltage, earthing and external signals.
Points to be observed
Observe the following points during wiring work.
• Risk of electrical shock. Be sure to turn off power to stop this product and related de-
vices before service is performed.
• Check that power voltage is turned off. The ST setter is still charged right after turning
off power. Wait for one minute before wiring.
Remove the terminal cover.
Connect the power, earth and signal wires to the ST setter.
Use the spade terminal for the wire connections. Fasten them to 0.6N•m.
NOTE
Always check that the wire connections are properly xed. Disconnection can cause malfunction.
Remount the terminal cover.
Wire terminals Use the spade terminal in the following size.
Terminal # 1 - 18
Terminal size
8.0 or
less
3.2 or
more
1F.G 10 NC
2L 100-240VAC 11 Feedback signal 1
3N 100-240VAC 12 Feedback signal 2
4NC 13 INC LED 3
5NC 14 DEC LED 4
6NC 15 Control signal 5
7NC 16 Control signal 6
8Remote/Local (IN) 17 Input signal (IN)
9Remote/Local (IN) 18 Input signal (IN)
5
6
7
8
9
4
3
2
1
14
15
16
17
18
13
12
11
10
2
1
3
ST-900N
Terminal cover

19
Installation
Wiring
End terminals
Observe the electric diagram shown on the terminal cover at the back of the ST-900N enclosure. Use M3
screws to x each wire connection.
■Input signal (4-20mA/1-5V)
Connect the lead wires from user's controller to the terminal pin 17(+) and 18(-). Input resistance is 75Ω
(4-20mA signal current) or 218kΩ (1-5V signal voltage). Observe polarity.
■Power voltage
Connect the AC power voltage line (50/60Hz) to the terminal pin 2 and 3.
■Frame ground
Connect an earth wire to the terminal pin 1.
■Electric servo unit
Electrically connect the ST setter and the servo motor through the corresponding terminals of "1", "2", "3", "4",
"5" and "6".
■Remote/Local control
"Local control" is changed to "Remote control (AUTO mode with keypad locked)" while a no-voltage contact
signal or open collector signal is inputted. Electrically connect the ST setter (terminal pin 8 and 9, observe
polarity) and an external device that can give the Remote/Local control signal as necessary.
NOTE
• When using a mechanical relay, its minimum application load should be 5mA or less.
•Any open collector output has polarity, and it must be observed. Otherwise, the ST setter may fail.
(Maximum applied voltage is 12VDC at 5mA.).
■ Terminal assignment for the servo unit
*Do not confuse the terminal pin # with terminal code for the servo unit.
1-2 : 4-20mADC feedback signal from the servo unit to the ST setter
3-4 : +10mA/-10mA/0mA INC/DEC LED signal from the servo unit
5-6 : Servo unit control signal from the ST setter to the servo unit
1
2
3
NC
NC
NC
NC
NC
4
5
6
G
SOURCE
Power voltage
100-240VAC
(50/60Hz)
9-M3
Remote/Local
contact input
Input signal
(4-20mADC)
(1-5VDC)
Power voltage
100-240VAC
(50/60Hz)
18-M3
ST-900N terminal end AX servo unit terminal block

20
Wiring
Power voltage/Earthing
Points to be checked
• Check that power voltage is turned off.
Connect power cable via crimp contacts.
Earth the pumps.
NOTE
• Do not share a power source with a high power device which may generate surge voltage. Otherwise an elec-
tronic circuit may fail. The noise caused by an inverter also affects the circuit.
• Energize the pump with a power voltage via a mechanical relay or switch. Do not uctuate the voltage, or
CPU may malfunction.
When power voltage is applied at a sitting When power voltage is applied gradually
Surge voltage
The electronic circuit in the control unit may fail due to surge voltage. Do not place the
pump close to a high power device of 200V or more which may generate large surge volt-
age. Otherwise, take any of the following measures.
• Install a surge absorption element (such as a varistor with capacity of 2000A or more)
via power cable or,
Recommended varisters. See manufacturer's catalogues for detail.
Panasonic ERZV14D431
KOA NVD14UCD430
• A noise cut transformer via the power cable.
POWER ON
OFF TIME
POWER ON
OFF TIME
1
2
Surge absorption element
Noise cut transformer
Table of contents
Other IWAKI PUMPS Controllers manuals
Popular Controllers manuals by other brands

Janson Controls
Janson Controls FC100 Series manual

Argo
Argo AZ-4CP Installation, operation & maintenance manual

S&P
S&P RMB Series manual

Omron
Omron E5CC-B instruction manual

Prolon
Prolon PL-C1000 Series Operational guide

Advanced Illumination
Advanced Illumination Pulsar 320 Operators manual and installation guide

Mercury Security
Mercury Security EP1501 quick start guide

REXROTH
REXROTH IndraDrive Mi operating instructions

Lattice Semiconductor
Lattice Semiconductor MachXO2 Series Programming and Configuration Usage Guide

John Gold
John Gold GoldCruise GC55 installation manual

SMAR
SMAR CD600 Plus user manual

Axis
Axis 295 installation guide