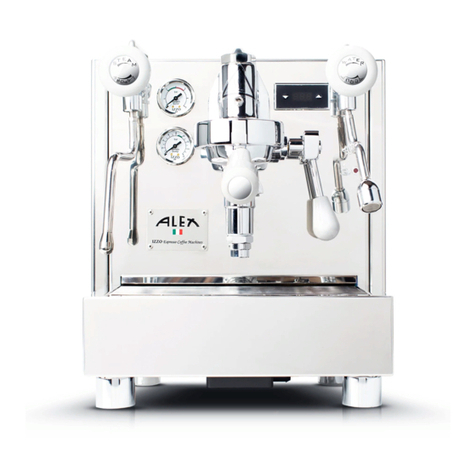
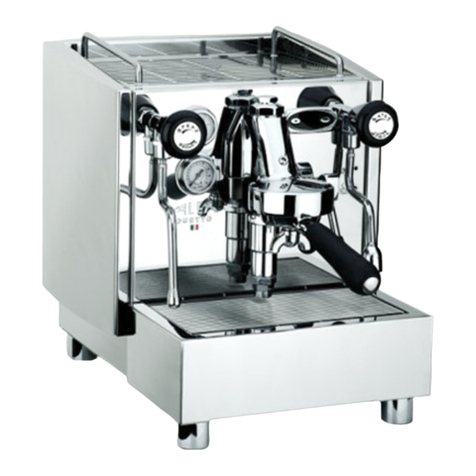
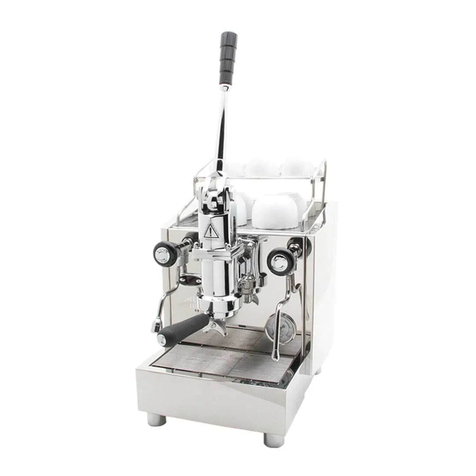
Izzo ALEX DUETTO 4 PLUS User manual


1
TABLE OF CONTENTS
GENERAL WARNINGS .....................................................................................................................................3
1. FOLLOW THE INSTRUCTIONS.................................................................................................4
2. GROUP IZZO SRL CONTACTS ..............................................................................................5
3. IMPORTANT ADVICE ...........................................................................................................................5
3.1 TRANSPORT ...............................................................................................................................................7
3.2 DISPOSAL ......................................................................................................................................................7
4. INSTALLATION.............................................................................................................................................8
5. GENERAL OPERATION .....................................................................................................................8
5.1 DISPLAY ...........................................................................................................................................................8
5.2 PARAMETER SETTING .....................................................................................................................9
5.3 PARAMETERS .............................................................................................................................................9
5.4 PRESET PARAMETERS ................................................................................................................. 10
5.5 DEFAULT PARAMETERS ............................................................................................................ 10
5.6 WATER AND STEAM BOILER TEMPERATURE RANGE ......................... 11
5.7 CHANGING TEMPERATURE SETPOINT ................................................................ 11
6. MACHINE START-UP ........................................................................................................................ 12
6.1 TURNING ON THE MACHINE .......................................................................................... 12
6.2 FIRST USE WITH RESERVOIR CONNECTION ................................................ 12
6.3 FIRST USE WITH WATER MAINS CONNECTION ...................................... 13
.......................................................................................................................................................................................... 13

2
7 WATER INPUT ........................................................................................................................................... 13
7.1 FILLING FROM RESERVOIR .................................................................................................. 13
7.2 FILLING FROM MAINS WATER ......................................................................................... 13
8 ALARMS............................................................................................................................................................ 15
8.1 VISUAL ALARMS FROM DISPLAY .................................................................................. 15
8.2 ACOUSTIC ALARMS FROM BUZZER UNIT ...................................................... 15
8.3 BEEP ON-OFF SWITCH ALARM (ONLY FOR VALEXIA MODEL)
.......................................................................................................................................................................................... 16
9. DISPENSING .............................................................................................................................................. 17
9.1 PREPARING ESPRESSO COFFEE .................................................................................. 17
9.2 PREPARING HOT DRINKS ...................................................................................................... 17
10. SWITCHING OFF .............................................................................................................................. 18
11. MAINTENANCE AND CLEANING ............................................................................... 18
12. DESCRIPTION OF COMPONENTS .......................................................................... 19
13. TECHNICAL DATA .......................................................................................................................... 21
.......................................................................................................................................................................................... 22
14. TROUBLESHOOTING ................................................................................................................. 23
15. WARRANTY TERMS AND CONDITIONS ............................................................ 24

3
GENERAL WARNINGS
Carefully read the warnings contained in these instructions, since they provide
important information regarding safe installation, use, and maintenance. Keep this
booklet carefully for future reference.
THIS MACHINE IS DESIGNED FOR DOMESTIC USE, OR SIMILAR, FOR
EXAMPLE:
- KITCHEN AREAS IN SHOPS, OFFICES AND OTHER WORK
ENVIRONMENTS;
-FARM HOUSES;
- BED AND BREAKFASTS AND SIMILAR STRUCTURES;
- HOTEL, MOTEL AND OTHER RESIDENTIAL FACILITIES (FOR GUESTS
ONLY).
THIS MACHINE SHOULD NOT BE USED BY PEOPLE
(INCLUDING CHILDREN UNDER THE AGE OF 8) WITH
REDUCED PHYSICAL, SENSORY, AND MENTAL
CAPABILITIES OR WITHOUT EXPERIENCE AND
TRAINING, UNLESS THEY ARE SUPERVISED OR GIVEN
INSTRUCTION CONCERNING ITS USE BY THOSE
RESPONSIBLE FOR THEIR SAFETY.
CHILDREN MUST BE SUPERVISED AND MUST NOT
PLAY WITH THE MACHINE.
CLEANING AND MAINTENANCE OF THE MACHINE
MUST NOT BE ENTRUSTED TO CHILDREN UNDER THE
AGE OF 8.

4
KEEP THE MACHINE AND THE ELECTRIC CABLE OUT
OF THE REACH OF CHILDREN UNDER THE AGE OF 8.
NEVER IMMERSE THE MACHINE, OR PARTS OF IT, IN
WATER. IF THE POWER CORD OF THE MACHINE IS
DAMAGED, IT MUST BE REPLACED BY A SERVICE
CENTRE AUTHORISED BY THE MANUFACTURER, SINCE
SPECIAL TOOLS ARE REQUIRED.
WHEN DISPENSING A BEVERAGE, MAKE SURE HOT
LIQUID DOES NOT SPLASH OUT. DO NOT TOUCH
THE HOT PARTS OF THE MACHINE IMMEDIATELY AFTER
USE. RISK OF BURNS. IMPROPER USE MAY CAUSE
INJURIES.
1. FOLLOW THE INSTRUCTIONS
WARNING
This is the safety warning symbol.
It is used to draw attention to the possible risks of personal injury.
Please follow the safety messages indicated in order to prevent possible injury.
NOTE
This symbol is used to highlight certain actions
that improve the use of the machine.

5
BURN HAZARD
This symbol is used to indicate a hazard concerning contact
with hot parts. Follow the warning messages highlighted in order to
avoid burns.
CHILD HAZARD
This is used to draw attention to possible risks to children.
2. GROUP IZZO SRL CONTACTS
Address: Strada Provinciale 12 Casilina Stazione Sgurgola 28 A - 03012
Anagni (FR) - Italy
Tel. +39 0775-774036 Fax. +39 0775.768524
info@gruppoizzo.it www.gruppoizzo.it
www.caffeizzo.it www.alexduetto.com
The freephone number is valid only for Italy.
3. IMPORTANT ADVICE
Carefully read the instructions contained in this use and maintenance manual
before using the machine to avoid risks of injury and damage to the machine.
The manual is an integral part of the coffee machine and must be kept for
future reference.

6
If the machine is sold or transferred to a third party, the manual must be given
to the new user.
For any doubts, or for further information, please contact the dealer.
The use of the espresso machine involves compliance with some
basic rules. In particular:
•Position the machine in a well-ventilated area and on a stable, flat
surface; never on surfaces that are excessively hot or cold.
•Before using the machine, verify that the local power supply voltage
corresponds with that of the machine.
•Do not touch the machine with wet or damp hands. The machine can
only be used by adults able to handle it.
•Do not allow children to approach the machine with the intention of
playing with it. In particular, the metal parts of the following
components must not be touched, since they are very hot during use:
dispensing unit, hot water and steam taps, filter holder.
•Do not pull the power cord to unplug it; remove by gripping the plug
in order to prevent it from being damaged. Do not leave the power
cord near hot surfaces, sharp objects, or edges.
•Make sure the electrical elements, plugs and cables are dry. Never
immerse the machine water or any other liquid. Electricity and water
together potentially cause fatal electric shock.
•Do not point the jet of hot water and/or steam towards yourself or
others.
•If the machine is not used for long periods of time (holidays, etc.),
disconnect the plug from the socket. Protect it from dust and dirt.

7
3.1 TRANSPORT
The machine should always be transported in a vertical position; do not turn
the machine upside down or lay it on its side. Proceed with caution, and
avoid impact and exposure to the elements.
When the package is received, make sure that the machine is the one
indicated on the accompanying documents, including any accessories. Also
make sure that it has not been damaged during transport; if damage has
occurred, immediately contact the shipper and the retailer. The packaging
material must not be disposed of in the environment; it should be entrusted to
specialist waste disposal companies.
3.2 DISPOSAL
This product complies with Directive 20012/19/EU.
• he crossed out heelie-bin symbol indicates that the product must be
disposed of separately from municipal waste at the end of its life, must be
handed in at a collection point for electrical and electronic equipment
waste, or returned to the dealer when purchasing a replacement.
• nce the machine has reached the end of its useful life, the user is
responsible for taking it to the appropriate waste collection facilities,
otherwise they may face a fine according to current waste disposal
legislation.
• he appropriate aste collection for the subsequent activation of the
decommissioned machine for environmentally-compatible disposal, recycling
and treatment contributes to the prevention of possible negative impact on
the environment and human health, whilst favouring recycling of the materials
comprising the product.
• or more detailed information regarding the collection sstems available,
contact a local waste disposal service or the shop where the product was
purchased.

8
• anufacturers and importers compl ith their responsibilit in
environmentally friendly recycling, treatment, and disposal either directly or by
participating in a collective system.
THE MANUFACTURER, AT ITS OWN DISCRETION,
RESERVES THE RIGHT TO MAKE
ALL NECESSARY CHANGES TO THE PRODUCTS, DICTATED BY LEGISLATIVE,
INDUSTRIAL, COMMERCIAL OR AESTHETIC PURPOSES.
4. INSTALLATION
Install the machine on a well-levelled, dry, smooth, and stable
supporting surface in a well-ventilated area.
Before using the coffee machine, make sure that:
•the dispensing lever is facing downward (fig. 8, tab. 1);
•the water and steam knobs are closed (fig. 6 and 7, tab. 1);
•the switch is in the "0" or "OFF" position (fig. 13, tab. 1);
•the lower drip tray is correctly positioned (fig. 10, tab. 1).
5. GENERAL OPERATION
5.1 DISPLAY
The machine is equipped with a display that provides the instructions
required for operation (Fig. 1, Tab. 1).
The display is divided into three channels and two keys in order to
use it. The picture below shows the DISPLAY of the machine.

9
5.2 PARAMETER SETTING
To turn the machine on, press and hold the keys simultaneously.
When the display shows F.01, release the keys.
The key scrolls the parameters while the key confirms the selected
parameter. To quit programming, turn the machine off and on again.
Note. It is recommend to use the default parameters set by the
manufacturer (see Par. 5.5).
5.3 PARAMETERS
PARAMETER
DISPLAY
DESCRIPTION
F.01
°F
Unit for measuring degrees in Fahrenheit
°C
Unit for measuring degrees in Celsius
F.02
2
Enabling coffee dispensing (channel 1)
3 Enabling water and steam dispensing
(channel 2)
4
Not used
5 Enabling coffee + water and steam
dispensing (channel 1 and 2)
6
Not used
7
Enabling coffee + water and steam
dispensing (channel 1 and 2)
with prevalence for coffee dispensing.
When the coffee channel is in the ON
position, it disables the water and steam
channel. When the
coffee channel is in the OFF position, it

10
enables the water and steam channel.
T1 XX Where XX indicates the coffee
temperature setpoint
T2 XX Where XX indicates the water and
steam temperature setpoint
T3
XX
Not used
E1 X Where X indicates the correction factor
of the coffee channel
E2 X Where X indicates the correction factor
of the water and steam channel
E3
X
Not used
5.4 PRESET PARAMETERS
It is possible to reconfigure the Display with default parameters (factory
settings) using the PRESET operation.
To perform the PRESET, press the key and turn on the machine. When the
display shows PrS, release the key and turn the machine off and then on
again.
5.5 DEFAULT PARAMETERS
CELSIUS
FAHRENHEIT
Parameters
Display
Parameters
Display
F.01
°C
F.01
°F
F.02
5
F.02
5-7
P
1.3
P
1.3
I
006
I
006
D
1.5
D
1.5
T1
93
T1
200
T2
123 (min 121
-
max 128)
T2
255 (min 248
-
max 626)
T3
0
T3
0

11
E1
10
E1
18
E2
0
E2
0
E3
0
E3
0
5.6 WATER AND STEAM BOILER TEMPERATURE RANGE
CELSIUS
FAHRENHEIT
BAR
INFORMATION:
When the machine is switched on,
it is necessary to wait about 14
to 15 minutes to reach the
operating temperature.
T1 = coffee boiler
T2 = water and steam boiler
Maximum limit
80
176
120
248
1
121
249.8
1.1
122
251.6
1.15
123
253.4
1.2
124
255.2
1.3
125
257
1.35
126
258.8
1.4
127
260.6
1.45
128
262.4
1.5
5.7 CHANGING TEMPERATURE SETPOINT
With the Display on, simultaneously press keys and . When the display
shows T1, press the key to select either channel T1 or T2, then confirm
with the key . This allows to view and adjust the temperature parameters.

12
6. MACHINE START-UP
6.1 TURNING ON THE MACHINE
Turn on the machine by placing the main switch in position “I” or “ON” (fig. 13, tab.
1).
The machine heats the steam boiler and the coffee boiler only after
they have been filled.
NOTE: The machine is set by default to be used with the reservoir
function.
WARNING: when the machine is first turned on, it is necessary to wait
about 14-15 minutes to reach optimal working temperatures.
WARNING: when the machine is first turned on, make sure to fill the
reservoir up to the maximum mark.
WARNING: when the machine is first turned on, the boilers will begin to
fill with water.
6.2 FIRST USE WITH RESERVOIR CONNECTION
Fill the reservoir to the maximum mark to allow water to fill the boilers.
Repeat the procedure to refill the container (par. 7.1).

13
6.3 FIRST USE WITH WATER MAINS CONNECTION
Make sure that connection to the mains water has been performed. Turn
the tap located under the drip tray (as shown below).
Then turn on the machine by placing the main switch in position “I” or “ON” (fig.
13, tab. 1).
7 WATER INPUT
7.1 FILLING FROM RESERVOIR
Fill the reservoir with clean, soft water (soft water= low calcium content, and
therefore less limescale, resulting in easier maintenance and a better result)
after having lifted the upper grill (fig. 1, tab. 2), being careful not to spill water
into the machine.
If using the machine with reservoir, set the front tap located behind
the tray, (fig. 10, tab.1) to "reservoir".
In this case, make sure there is water in the reservoir.
7.2 FILLING FROM MAINS WATER
Connect the water inlet and outlet pipes (if there is a drain nearby, otherwise
leave the drip tray plugged) respectively to the water filling and the plastic
tray connections, as shown in figure 2 and figure 3 of tab. 2. Then turn the

14
tap to the mains water option remembering to turn on the water tap (fig. 11,
tab.1), as shown below.
NOTE It is recommended to use filters to reduce the build up of limescale.
Make sure that the tap located under the drip tray, (fig. 11, tab. 1) is
in the appropriate position. If this check is not carried out, and the
tap is in the opposite water filling position, the pump could break (check the
adhesive label located near the tap, see image below).
IMPORTANT:
Lack of water can cause damage to the pump and the resistor.
Therefore, if the pump makes a noise that is different to usual when in
use and, at the same time, the pressure gauge reads a lower pressure level,
the machine must be immediately turned off using the specific button
(fig. 13, tab.1).

15
ADJUSTING THE PUMP:
The pump of the machine is adjusted and set at a value of
approximately 10 bar for the model that connects to mains water
and between 9-9.5 bar for the model that connects to the reservoir.
It is possible to change this value by raising the unit lever, reading the
pressure value on the pressure gauge 0-16 bar and adjusting the pump as
follows:
•Position the blind filter (supplied with the machine) in the filter holder,
having previously removed the filter present
•Lift the lever of the dispensing unit, and read the value on the 0-16 bar
pressure gauge.
•If the pressure is to be increased, turn the screw clockwise using a
screwdriver (fig. 5, tab. 2).
•If the pressure is to be decreased, turn the screw anticlockwise using a
screwdriver (fig. 5, tab. 2).
8 ALARMS
8.1 VISUAL ALARMS FROM DISPLAY
In the event of malfunction, the display (fig.1, tab. 1) shows the following alarm
messages:
•A1: channel 1 disconnected (coffee boiler)
•A2: short circuit on channel 1
•A3: channel 2 disconnected (steam boiler)
•A4: short circuit on channel 2
If the above malfunction occurs, contact technical support directly.
8.2 ACOUSTIC ALARMS FROM BUZZER UNIT
An alarm condition is signalled by an audible alarm. The buzzer will activate
automatically in one of the following cases; depending on how you choose

16
to operate the machine, reservoir or mains water, you may come across
different sound alerts.
MACHINE WITH RESERVOIR FILLING
Alarm 1: using the machine with reservoir filling, the buzzer will automatically
produce an audible signal if there is no water in the reservoir.
MACHINE WITH MAINS WATER OR RESERVOIR FILLING
Alarm 2: following continuous activity of the motor for longer than 60
seconds the buzzer will automatically produce an audible signal.
Alarm 3: in case of pump malfunction the buzzer will automatically produce
an audible signal.
NOTE Consult the following Paragraph 8.3.to find out how to proceed in the event
of an alarm.
8.3 BEEP ON-OFF SWITCH ALARM (ONLY FOR VALEXIA
MODEL)
Above the acoustic warning switch located on the front of the machine
(fig.15, tab. 1 - only for the Valexia model) is the following illustration:
Remember to turn on the switch when you choose to use the
machine with reservoir. An audible alert will signal a lack of water in
the reservoir. Turn off the switch if the machine is to be used with
mains water connection.

17
9. DISPENSING
9.1 PREPARING ESPRESSO COFFEE
Manually lifting the coffee dispenser lever (fig. 8, tab. 1) starts the dispensing
stage. Lowering the lever, dispensing is interrupted.
For every cup of coffee add 6-8 grams of ground coffee in the filter holder
and press it down. Insert the filter holder under the unit by rotating it from left
to right until it is tightened.
Place one or two cups under the filter holder spout and raise the lever (it is
recommended to warm the cups). The coffee will now begin dispensing, first in
drops, then it will flow out thick like hot chocolate, and the display will show
the time in seconds. When the cup has been filled with the desired amount of
coffee, lower the lever.
SHOT TIMER
When the dispensing starts, raise the lever and the Display shows the Shot
Timer. When the dispensing ends, lower the lever and the Display once again
shows the temperature.
9.2 PREPARING HOT DRINKS
Hot drinks (tea, chamomile tea, milk, chocolate, herbal tea) can be prepared
using the steam tap and the water tap.
WATER
Place a container under the water wand (fig. 6, tab. 1). Turn the knob of the
tap anticlockwise; the hot water will begin to come out. When finished, turn
the water knob clockwise to turn off the tap.
STEAM
Place a container under the steam wand (fig. 7, tab. 1) and immerse it in the
liquid to be heated. Turn the knob of the tap anticlockwise; the steam will
Table of contents
Other Izzo Coffee Maker manuals

Izzo
Izzo Vivi PID Plus User manual

Izzo
Izzo Alex Duetto 2 User manual

Izzo
Izzo Leva 1 GR User manual

Izzo
Izzo Alex leva Manual

Izzo
Izzo Alex Duetto IV MK 604 Operating manual
Izzo
Izzo Alex Duetto 3.0 User manual

Izzo
Izzo Alex User manual

Izzo
Izzo Alex-2 User manual

Izzo
Izzo Alex Pid III Operating manual
Izzo
Izzo Alex Duetto 1 User manual
Popular Coffee Maker manuals by other brands

La Marzocco
La Marzocco GB/5 operating manual

Zepter
Zepter ZEP-200 Zepresso Cafe instruction manual

de Jong Duke
de Jong Duke COEX 9CND SERIES user manual

Lance-Larkin
Lance-Larkin BREW EXPRESS BE112 Operation guide

Quickmill
Quickmill Achille 0996 instruction manual

Proficook
Proficook PC-KA 1152 instruction manual