CARACTERÍSTICAS
- Carcasa de acero inoxidable o pintada
- Modo automático y continuo
- Calentador
- Sistema de control de luz
- Sistema de control de temperatura
- Estructura del driver
FEATURES
- Stainless steel or painted shell
- Automatic and continuous mode
- Heater
- Light control system
- Temperature control system
- Driver structure
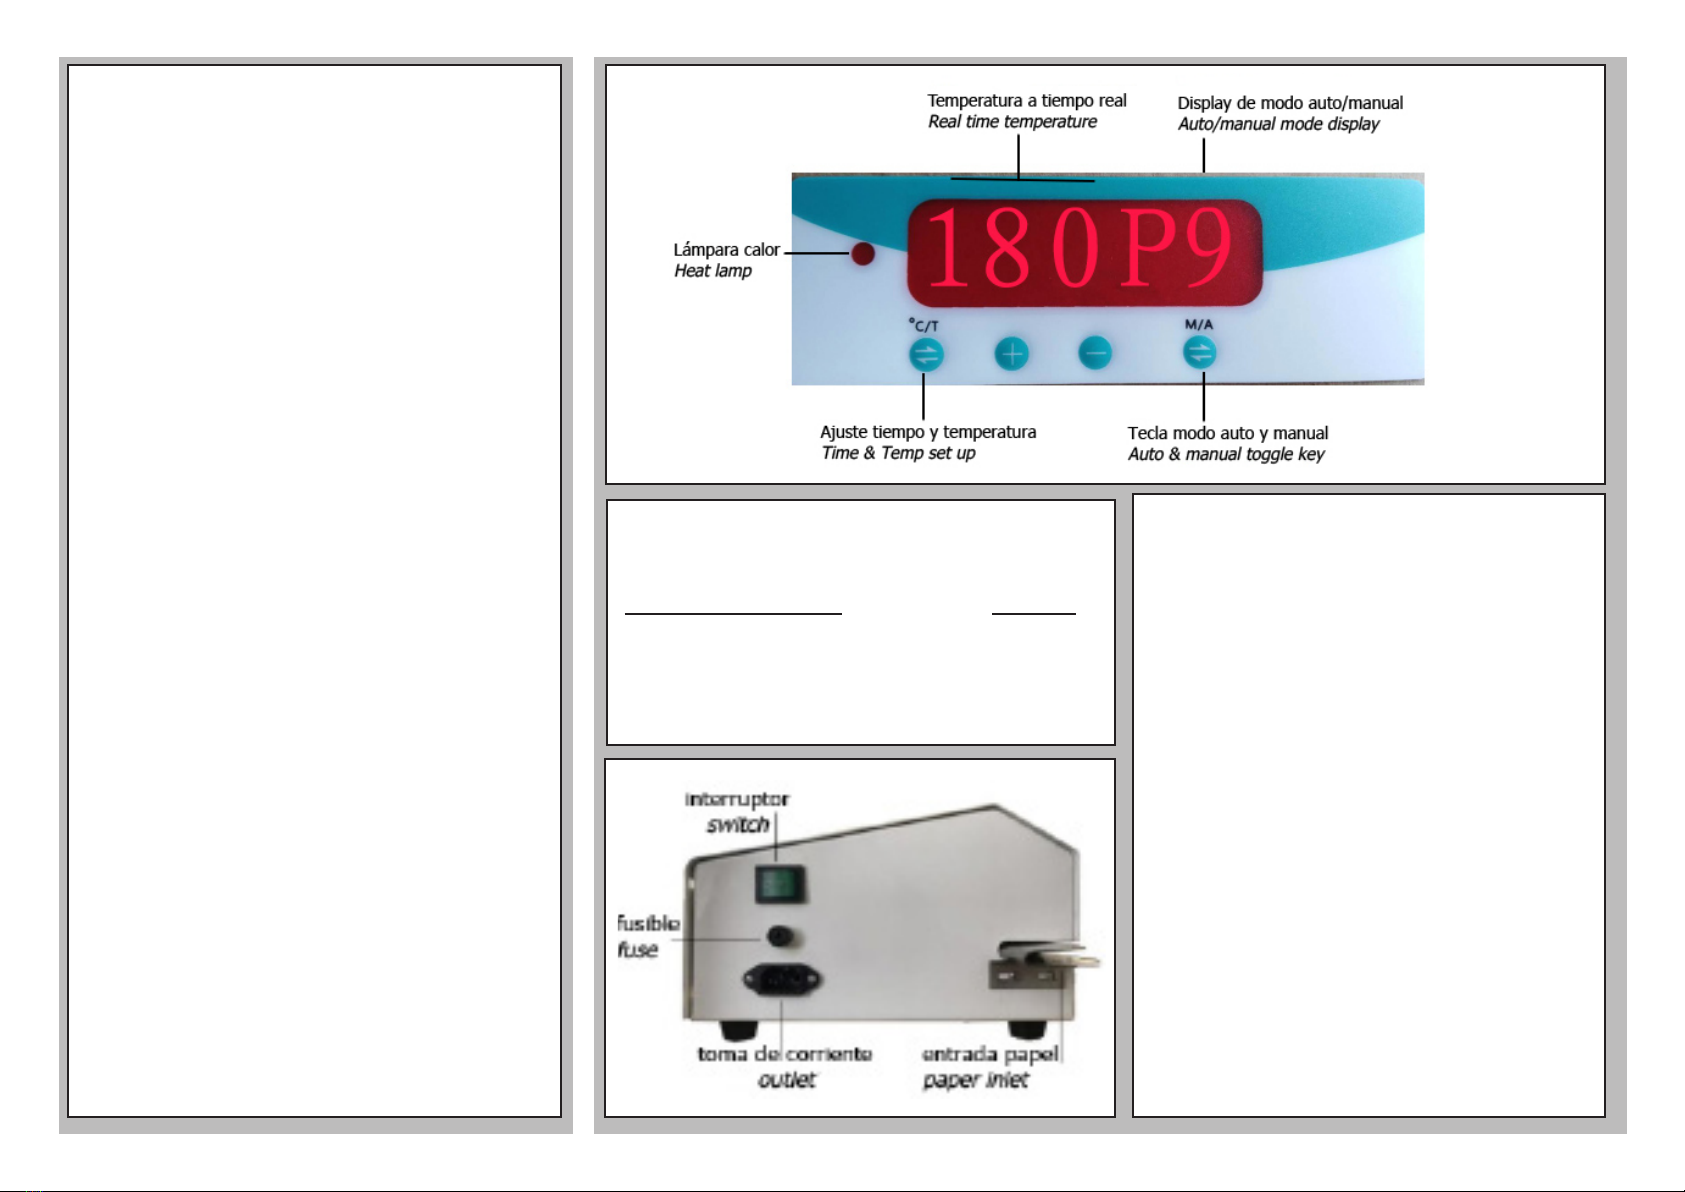
INSTRUCCIONES
1. Encienda el interruptor de encendido, la pantalla izquierda mostrará la
temperatura en tiempo real y la pantalla derecha mostrará el estado de
alimentación del papel. AsignicaautomáticoyPsignicaalimentación
de papel continua.
2. La máquina permanecerá termostática cuando se eleve a la temperatura
actual. En general, viene ajustada de fábrica a 180ºC. NO CAMBIE LOS
AJUSTES A MENOS QUE ES NECESARIO.
3. Pulse la tecla M/A para cambiar el estado de alimentación del papel.
Cuando la pantalla muestre A9, no habrá papel en 9 segundos y la má-
quina entrará en modo de espera automático.
4. Pulse de nuevo la tecla M/A, la pantalla mostrará P9. La máquina conti-
nuará trabajando.
5. Pulse la tecla ºC/T. Puede aumentar o reducir la temperatura usando las
teclas +o -.
6. Pulse la tecla ºC/T durante 3 segundos. La pantalla mostrará 00, y podrá
ajustar la desviación de temperatura pulsando +o -.
7. Pulse la tecla ºC/T durante 3 segundos. Luego pulse la tecla M/A. La
pantalla mostrará PO. Puede ajustar el tiempo de espera de alimentación
de papel pulsando +o -.
8. Pulse de nuevo la tecla M/A y volverá al estado original y mostrará la
temperatura en tiempo real.
INSTRUCTIONS
1. Turn the power switch on, the left screen will show the real time tempe-
rature and the right screen will show the paper feeding status. Ameans
automatic and Pmeans continue paper feeding.
2. The machine will stay thermostatic when it rises to the present tempera-
ture. Generally, it comes at 180ºC from factory. DO NOT CHANGE THE
SETTINGS UNLESS NECESSARY.
3. Press the M/A key to change the paper feeding status. When the screen
show A9, no paper in within 9s and the machine will enter the automatic
standby mode.
4. Press the M/A key again, the screen will show P9. The machine will
continue working.
5. Press the ºC/T key. You can increase or reduce temperature by using the
+or - keys.
6. Press the ºC/T key for 3sec. The screen will show 00, and you can adjust
the temperature deviation by pressing +or -.
7. Press the ºC/T key for 3sec. Then press the M/A key. The screen will show
PO. You can adjust the standby time of paper feeding by pressing +or -.
8. Press the M/A key again and you will go back to the original status and
show the real time temperature.
LISTA DE EMBALAJE / PACKING LIST
Descripción / Description Cant./Qty.
- Selladora / Sealing machine 1
- Manual instrucciones / Instructions manual 1


