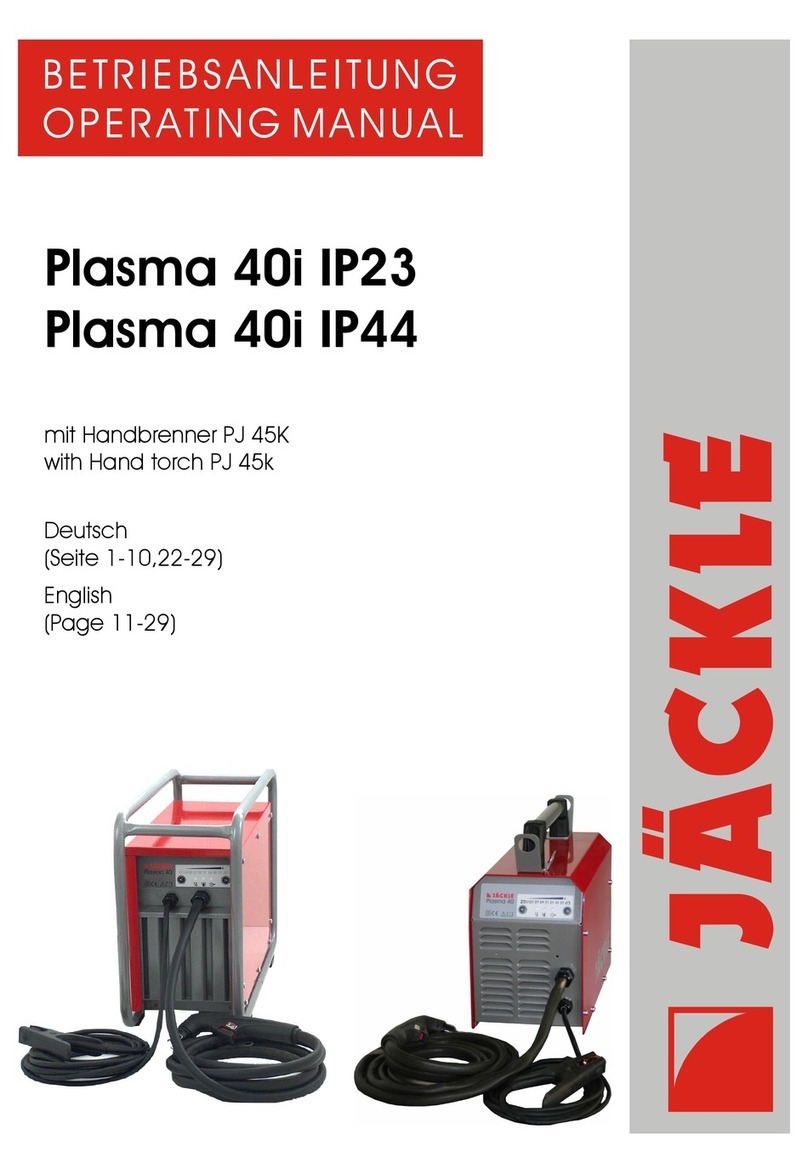
Jackle Plasma 70 S User manual

Plasma Cutting System
Plasma 70 S
Operating Manual

Plasma 70 S
These operating instructions are intended to ensure safe and efficient work with the
Plasma 70 S cutting unit.
Please read the instructions carefully prior to initial operation of the unit.
The information contained in this manual should be made available to all operational
staff. Please keep the instructions always ready-to-hand, near the machine.

Plasma 70 S
DECLARATION OF CONFORMITY
within the meaning of EC recommendation EMC 89/336/EEC, appendix I
respectively of EC recommendation 73/23/EEC, appendix III B
Manufacturer: Jäckle Schweiß- und Schneidtechnik GmbH
Riedweg 4
D – 88339 Bad Waldsee
Germany
We declare, that below mentioned current source corresponds to the safety
requirements of the recommendations.
Name of unit: Plasma Cutting System
Type of unit: Plasma 70 S
Relevant EMC recommendation 89/336/EEC,
EC recommendations: modified by recommendation 92/31/EEC
Low-voltage recommendation 73/23/EEC,
modified by recommendation 93/68/EEC
Applied EN 50199
harmonized standards: EMC product standard
for arc welding equipment
Especially: EN 60974-1
Arc welding equipment –
Welding power sources
Jäckle Schweiß- und Schneidtechnik GmbH
Reinhard Jäckle

Plasma 70 S
Contents Page
1. Some general information about plasma cutting ..........................................................1
2. Safety Requirements....................................................................................................2
3. Brief description............................................................................................................4
4. Technical Data..............................................................................................................5
5. Control Elements..........................................................................................................6
6. Initial operation.............................................................................................................8
7. Preparations for cutting ................................................................................................9
8. Cutting........................................................................................................................10
9. Service and Maintenance...........................................................................................11
10. Trouble-Shooting ....................................................................................................11
11. Description of board................................................................................................13
12. Spare Parts.............................................................................................................14
13. Circuit diagram........................................................................................................18
Pictures:
Picture 5.1 Control Elements...............................................................................................6
Picture 12.1 Frontview.......................................................................................................14
Picture 12.2 View from the side.........................................................................................15
Circuit diagram Plasma 70S ..............................................................................................18
Subject to mistakes and technical modifications
BA – Nr.: 700.024.002
Version 1.03
July 2003

Plasma 70 S
Operating Manual Page 1
1. Some general information about plasma
cutting
1.1 Operating principle
In a plasma torch, the air is heated to an extremely high temperature through an electric
arc, thus forming an electroconductive plasma which allows the cutting current to flow from
the electrode to the workpiece. The small-size bore of the cutting nozzle constricts the
cutting current and produces a strongly concentrated plasma cutting jet. It causes the
metal to melt very rapidly, and its highly kinetic energy ejects the molten metal from the
kerf. A clean, clear cut is the result.
1.2 Advantages
- Time saving due to high cutting speed in cutting thin sheet metal, if compared to
oxy-fuel gas cutting, nibbling or sawing.
- Heat build-up is kept at a reduced level due to the high cutting speed and a strongly
concentrated plasma arc. Therefore, warping of the workpiece is very unlikely.
- Ease of operation.
- Low operating expenses due to compressed air being used as plasma gas.
Low energy - high efficiency.
1.3 Field of Application
The plasma cutting method is applicable on almost any conductive metal, ie. high alloy
chrome nickel steels, any hardened and unhardened tool steels, constructional steels,
nonferrous metals like aluminium and its compounds, brass, copper and even grey cast
iron.

Plasma 70 S
Operating Manual Page 2
2. Safety Requirements
This cutting unit has been manufactured in accordance with the relevant international
standards. However, improper use or manipulation of the machine may cause hazards.
a) The unit is exclusively intended for plasma cutting processes. Service personnel must
be duly informed of all safety rules.
b) Electrical repair work must be carried out by qualified electricians.
c) Always disconnect mains prior to servicing, maintenance, and repair
work and before opening the casing.
The following safety instructions must be strictly observed:
2.1 Fumes
The plasma cutting process generates fumes and therefore the plasma cutting unit must
be operated in areas with adequate ventilation or outdoors. In the case of enclosed
working areas, a strong fume extraction system (preferably fitted below the cutting zone)
should be provided.
The cutting area of the workpiece has to be cleaned and free of solvants and degreasing
agents to prevent the formation of toxic gas.
The use of breathing equipment as well as a powerful extraction system and filtering of
toxic gas and fumes is obligatory when cutting materials which are likely to develope toxic
gases. Such materials include lead (also lead coatings), galvanized parts, cadmium,
cadmium-plated bolts, beryllium (usually as an alloying constituent, ie. beryllium copper).
2.2 Radiation
The radiation from the arc may cause eye damage and skin burn. Therefore, eye protec-
tion should be worn in the form of a welder’s shield or a helmet. The skin must be protec-
ted by adequate safety clothing (welder’s gloves, leather apron, safety shoes).
Persons working close by should also be protected from the radiation of the arc.
2.3 Fire risk
Inflammable substances must be kept away from the cutting zone. There is a risk of igni-
ting by sparks and hot slag.

Plasma 70 S
Operating Manual Page 3
2.4 Electrical hazard
Plasma cutting is carried out under high-tension conditions which require utmost precau-
tion.
Any defective or damaged parts on the torch must be replaced immediately. When ex-
changing a part, always disconnect the unit (master switch in pos. 0). Only original spare
parts may be used on the torch.
If any insulation damage is found on the hose pack or on the torch head, the operation of
the unit is to be discontinued until the damage has been repaired.
2.5 Further conditions and provisions
Apart from the instructions given in this operating manual, the general safety standards, in
particular the rules for prevention of accidents
BGV A2 (electrical installations and operating supplies) and
BGV D1 (welding, cutting and related working processes).
These rules may be obtained from
Carl Heymanns-Verlag KG (publisher)
Luxemburgerstraße 449
50939 Köln
Furthermore, we point out that in some operative ranges where, despite the observance of
radiation limits, this cutting unit can cause electromagnetic interferences which are the
responsibility of the user.
This means that in the domain of hospitals, for instance, the function of electromedical
units, data-processing equipment and the like (ECG, PC etc.) may be impaired.
Before putting the cutting unit into service, please make sure to inform the authorities in
charge of the above mentioned equipment. If you wish to apply for a special authorization
as provided by the Law on Electromagnetic Compatibility of Technical Equipment, §3
section 4, regarding the use of this cutting unit, please address to your competent
Authority.
If you wish to use the cutting unit in domestic areas, special precautions have to be taken
as well.
Adequate assistance in evaluating the operative range and minimizing electromagnetic
interferences (eg. use of screening lines) may be obtained from the Electromagnetic
Compatibility Standards for Arc Welding Systems.
See EN 50 199, annex A1 and A2.

Plasma 70 S
Operating Manual Page 4
3. Brief description
The Plasma Cutting Unit 70 S has been developed using the robust thyristor-control
technology.
It excells in multipurpose application for manual cutting operations.
Its operating priciple is characterized by the following:
Infinitely variable cutting current from 25 - 70 A.
Optimum tuning of the cutting current in accordance with cutting speed, thickness and
specific properties of the material.
Accurate control of cutting current. Once the cutting current has been set it remains
constant independant to fluctuations in line voltage, plasma arc length and material
thickness, which means good reproducibility of the cutting current values.
Compressed air serving as plasma gas and cooling medium for the plasma torch.
A filter pressure reducer comined with a semiautomatic water separator are standard
equipment of this unit. The water trap automatically empties itself when the air system
lacks of pressure.
The filtered, pressure-controlled air expands in the plasma torch and serves, for one thing,
as plasma gas and, for another, as a cooling medium for the torch body which is exposed
to high thermic load.
The central socket to connect the plasma torch permits quick interchanging of the
plasma torches intended for either high or low cutting current load.
HF-ignited pilot arc. A pilot arc which is initiated by a high-frequency spark starter
ensures reliable ignition of the cutting arc even on lacquered workpieces. In addition, this
appliance is suited for automatic cutting processes.
Automatic cutting process via control board.
Safety cut-out. In the event of a pilot-arc failure, the current source switches off after
approx. 2 seconds to protect the operator from a build-up of no-load voltage.

Plasma 70 S
Operating Manual Page 5
4. Technical Data
Supply voltage 3-phase 400 V, 50 / 60 Hz
Max. power draw 19 kVA
Fuse 20 A slow
Set-point range infinitely variable 20 - 70 A
Max. open-circuit voltage 250 V
60 % duty cycle 70 A / 110 V
100 % duty cycle 50 A / 100 V
Max. cutting thickness, quality cut 20 mm
severance cut 25 mm
System of protection IP 22
Insulation class H (180° C)
Type of cooling F
Dimensions L x W x H (mm) 530 x 610 x 810
Weight 95kg
Compressed-air supply 5,5 bar
(depending on torch used) 160 l/min
Manufactured the European Standards:
EN 60974-1 and EN 50199
in accordance with
Authorized for cutting under increased electrical hazard in accordance with
the European Standard EN 60974-1.
S

Plasma 70 S
Operating Manual Page 6
5. Control Elements
Picture 5.1 Control Elements

Plasma 70 S
Operating Manual Page 7
1 Master switch
Position "O": unit is switched off.
Position "I": unit is switched on.
Attention! The fan is controlled via the temperature of the current source.
At the instant of starting the cutting unit in a cold state, the fan is not
set to work. Only in the course of the cutting process when the current
source warms up, a thermostat activates the fan and, after cooling
down, switches it off again.
2 Fuse F1 for control transformer, 2 A slow
3 Control lamp ‘mains’
is lit when unit is switched on.
4 Rotary type control knob for infinitely variable regulation of cutting current
Regulates the cutting current between 20 A and 70 A. The display also shows the
appropriate cutting nozzle diameter.
5 Compressed-air test key
At pressed key, the compressed air is in full flow. This allows regulation of the
working pressure while air is flowing.
6 Compressed-air gauge
indicates the working pressure of compressed air downstream the filter pressure
reducer.
If, despite the availability of adequate supply pressure, the specified working
pressure cannot be reached, heavily clogged filters may be the cause. In this case,
the filter cartridges have to be changed.
7 Compressed-air fault indicator
lights up if there is insufficient supply of compressed air or if the working pressure
has been set too low. No starting of the arc via torch trigger possible. After
elimination of the deficiency, the plant will be operable again.
8 Temperature fault indicator
lights up if the current source is overheated. No starting of the arc via torch trigger
possible. With the fan running, the unit will be operable again after approx. 5 min.
9 Torch fault indicator
lights up in case of defects occurring on the torch. No starting of the arc via torch
trigger possible. The unit will not be operable again until the following steps
have been taken: switch off mains (1), eliminate cause of deficiency, restore power.
10 Workpiece connecting socket
11 Central connecting socket for plasma torch

Plasma 70 S
Operating Manual Page 8
6. Initial operation
6.1 Installation of the cutting unit
When putting the unit in place, please make sure there is sufficient space for inlet and
outlet cooling air so that the rated duty cycle will be attained.
The unit should neither be exposed to moisture not to the plasma arc or the spark ray
caused by grinding work.
6.2 Mains connection To be carried out only by a qualified electrician!
Connect mains plug to mains cable as specified on the rating plate. The yellow-green lead
is provided for PE earth conductor. The three phases (black, brown, and blue) may be
connected to L1, L2, and L3 at random.
6.3 Compressed-air connection
By means of the rapid action hose coupling provided at the rear of the unit. Take care that
there is always an adequate supply of compressed air of the specified pressure.
Moreover, the air should be free of oil or water.
If the system is firmly connected to a compressed-air feed line which is
permanently under pressure, it should be disconnected at regular intervals to
allow the water trap to empty.
6.4 Connection of cutting torch
Plug the hose pack into the central connecting socket and fasten fingertightly with the
coupling rings provided.
To be able to fully utilize the service capacity of the unit, the cutting torch must be
designed for a minimum current load of 70 A.
Cutting can be carried out bothways either with the plasma nozzle touching the work-piece
or by using a distance nozzle.
6.5 Connection to workpiece
Connect workpiece with workpiece cable to corresponding socket. Pinch workpiece termi-
nal to workpiece, choosing an appropriate spot without paint or rust for good conductivity.

Plasma 70 S
Operating Manual Page 9
7. Preparations for cutting
7.1 Regulation of cutting current
Set the cutting current dependant to the material and thickness of the workpiece.
In manual cutting operations, the current setting should be high enough to enable continu-
ous manipulation of the cutting torch.
7.2 Torch equipment
Select the correct plasma nozzle according to the table below. If the torch is fitted with an
oversized plasma nozzle, the performance and cutting quality will be impaired. An under-
sized tip bore will overload and destroy the plasma nozzle.
cutting current
20 - 60 A
50 - 70 A
plasma nozzle
1,0 - 1,2
1,2 - 1,4
When replacing a worn part, check for tight fit.
The plasma nozzle and the electrode are wearing parts. A plasma nozzle with a
gravely burnt bore and an electrode exhibiting a deep penetration crater will
degrade the ignition characteristics and thus the cutting quality.
The parts need to be exchanged.
7.3 Regulation of compressed air
Set master switch to „I“; control lamp ‘mains’ is lit.
Unlock the pressure reducer by pulling the control knob upwards. Set the working pres-
sure according to the torch manufacturer’s specification. The working pressure must be
regulated at flowing air (press compressed-air test key).

Plasma 70 S
Operating Manual Page 10
8. Cutting
8.1 Pilot arc ignition
Bring the nozzle of the cutting torch to the starting point of the cut to be executed.
Press torch trigger. After a short preweld gas flow time the pilot arc is ignited, and at the
instant of the pilot arc impacting the workpiece, the cutting arc is formed.
In the event of a cutting arc failure, the pilot arc is switched off after approx. 5 sec.
Repeated ignition of the pilot arc without actually initiating a cutting process
should be avoided. An overload of the pilot arc resistance might occur, resulting
in unnecessary wear of the torch parts.
8.2 Cutting
In a hand-operated cutting process, move the torch with light contact over the workpiece
at a constant speed.
For achieving an optimum cut, make it a point to keep the right cutting speed correspon-
ding with material thickness. If the cutting speed is too low, a blunt cutting edge will be the
result because of the unduly high thermal input. Optimum cutting speed becomes
apparent when the cutting jet slightly slopes backwards.
At the instant of releasing the torch trigger, the plasma jet is extinguished and the current
source cut off. The gas is post-flowing for approx. 1 minute to cool the torch.
Overshooting the workpiece at pressed torch trigger will initiate the same procedure.
The machine must not be switched off during gas post-flow. Danger of torch
damage by overheating!
In hand-operated hole-piercing, the hand cutter must be held in an inclinded position and
then slowly brought to a vertical position to avoid the formation of spatter.
In machine-operated hole-piercing, bring the cutting nozzle of the machine torch to ap-
prox. 7 - 8 mm distance to the workpiece. Then slowly approach to approx. 4 mm dis-
tance.

Plasma 70 S
Operating Manual Page 11
9. Service and Maintenance
This cutting unit should be serviced in regular intervals dependent on operating times and
working place conditions.
- Check filter pressure reducer unit. Change cartridge, if required.
- Clean unit from inside by air-blasting according to degree of soiling.
10.Trouble-Shooting
Malfunction/error
Cause
Remedy
mains connected and
master switch in pos.“I“ /
mains fuse has been
tripped
check mains fuse; if required,
increase fuse protection,
‘mains’ control lamp is
mains cable interruption
check mains cable
not lit
fuse F1 (front side)
defective
change fuse F1
(T 2 A / 250 V)
defective fuse F2 on control
transformer
change fuse F2
(T 2,5 A / 250 V)
defective control lamp
check / change control lamp
Torch trigger is pressed
down - no function
(no air, no tripping of
imperfect assembly of torch
head elements
(safety cutout)
check troch head
contactor)
torch trigger defective
check torch trigger
torch control line
interruption
check torch control line
fault indicators for
compressed air or
temperature are lit
see chapter 5 ‘Control elements’

Plasma 70 S
Operating Manual Page 12
Malfunction/error
Cause
Remedy
Pressing of torch trigger
actuates pilot contactor,
however,
one mains phase not
connected (mains fuse has
been tripped, interrupted
lead of mains cable)
check mains fuse
total failure of the pilot
arc or interruption of the
pilot arc
excessive working pressure
see chapter 7.3 ‘Regulation of
compressed air’
Pilot arc is availbale /
however, total failure of
one mains phase not
connected
check mains fuse
check mains cable
cutting arc
earth cable not connected
or without contact to
workpiece due to impurities
(paint ect.)
clamp earth cable to workpiece
or improve contact
torch fault indicator is lit
see chapter ‘Control elements’
defective torch elements
check / exchange torch elements
cutting arc available,
however, bad cut quality/
insufficient supply of
compressed air
see chapter 7.3 ‘Regulation of
compressed air’
insufficient cutting
performance
wrong plasma nozzle fitted
on torch
see chapter 7.2 ’Torch
equipment’
wear of the plasma nozzle
or electrode
check / exchange plasma nozzle /
electrode
Cutting arc switch-off
insufficient cutting speed
see chapter 8.2 ‘Cutting’
cutting current setting too
high
see chapter 7.1 ‘Regulation of
cutting current’

Plasma 70 S
Operating Manual Page 13
11.Description of board
TPLASMA1-1
Jumper open bridges LED`s
JP1 power frequency 50 Hz 60 Hz 1 water circ. cooling o.k.
JP2 mac. current 70 A 120 A 2 air pressure o.k.
3 temperature o.k.
4 cutting current flows
5 arc voltage o.k. O.K.
6 torch trigger “on“
7 reduction of cutting
current “on“ Ein
trimming potentiometer
T1 gas preflow
T2 gas post-flow
(fixed pilot time = 5s )
P2
P3 current-max
P4 current-min
P5 current-pilot
PL_CONT1
LED`s
1 electronic supply voltage o.k.
2 cutting current >0
3 arc voltage o.k.
trimming potentiometer
T1 adjust
T2 adjust

Plasma 70 S
Operating Manual Page 14
12.Spare Parts
Picture 12.1 Frontview

Plasma 70 S
Operating Manual Page 15
Picture 12.2 View from the side

Plasma 70 S
Operating Manual Page 16
Item
Designation
Stocknumber
1
case frame compl., coated black
715.024.001
2
case top
715.019.010
3
side panel, top left
715.019.007
4
side panel, top right
715.019.008
6
case push-handle incl. assembly parts
721.024.001
7
bonded tired wheel 200 mm d incl. assembly parts
720.200.020
8
front panel ‘Plasma 70 S’
304.024.001
10
master switch S225-647859
440.225.101
control knob for master switch
440.220.051
11
signal element 24 V, yellow
712.024.002
12
signal element 24 V, green
712.024.004
bulb 24V
463.024.012
13
gas test push button, green
441.507.009
14
fuse holder with bayonette type sealing cap
464.601.001
fine-wire fuse T 2 A
464.020.014
15
potentiometer 10 kOhm lin. (cutting current)
616.010.001
potentiometer control knob 36 mm D
711.036.005
16
insert tip jack, BEB 35-50
422.031.024
17
central connecting socket with protection locking
710.004.017
central connecting plug with protection locking
710.004.020
18
mains cable, compl. 4 x 2.5 sq.mm, 5 m, 32A
704.025.021
strain relief screw fitting PG 16 “
420.016.004
19
fan A4E 300, 230 V incl. capacitor + assembly parts
450.300.006
capacitor 1 µF (fan)
453.450.002
fan control board VR 1, 24 V
600.022.008
spacing piece CBS -09A to fasten board
421.008.005
20
cutting transformer with choke incl. cable
706.024.001
21
cutting transformer, incl. cable and thermoswitch
706.024.002
thermoswitch 170° C (break) for cutting transformer
445.170.002
thermoswitch 80° C (make) for cutting transformer
445.080.006
22
smoothing choke, incl. flexible cord
706.024.003
23
HF blocking choke PLD 10, incl. flex and assembly parts
721.024.002
24
Stern resistor 3 Ohm (pilot current) compl.
452.003.012
25
wire resistor 250 Ohm (base load) compl.
721.024.003
26
thyristor set incl. cooling block and connecting lines
705.024.004
thyristor set compl. (repair service)
705.024.004A
thyristor protecting unit compl.
705.024.004
thermoswitch 90° (break) for thyristor set
445.080.004
thermoswitch 50° (make) for thyristor set
445.050.005
27
HF starting device SIG 3.2, 24 V
438.032.002
28
HF blocking choke PLD 1
438.001.003
29
HF filter SLF 2
438.002.011
30
HF safety board HFS 1
600.024.001
Table of contents
Other Jackle Cutter manuals