manuals.online logo
Brands
  1. Home
  2. •
  3. Brands
  4. •
  5. JADO
  6. •
  7. Plumbing Product
  8. •
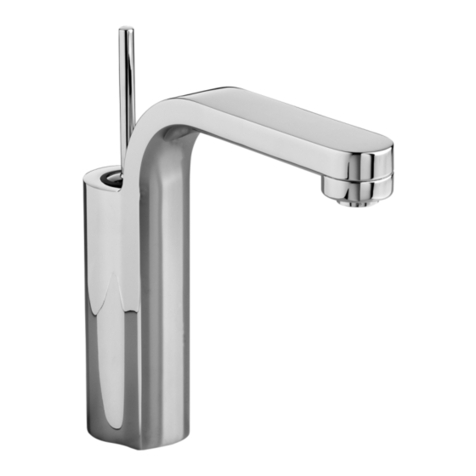
  9. JADO Borma 814 003 Series User manual

JADO Borma 814 003 Series User manual

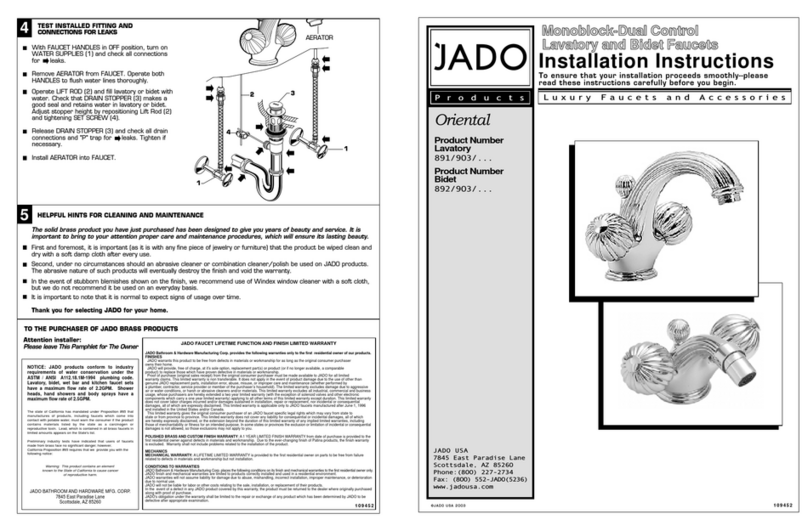
Installation Instructions
To ensure that your installation proceeds smoothly--please
read these instructions carefully before you begin.
©JADO USA 2003
Products Luxury Faucets and Accessories
JADO USA
7845 East Paradise Lane
Scottsdale, AZ 8526O
Phone:(8OO) 227-2734
Fax: (8OO) 552-JADO(5236)
www.jadousa.com
6TEST INSTALLED FAUCET AND
CONNECTIONS FOR LEAKS
Remove AERATOR from faucet.
With HANDLES (1) in OFF position, turn on
WATER SUPPLIES (2) and check all
connections for leaks.
Operate both HANDLES to flush water
lines thoroughly.
4
5
2
2
Operate LIFT ROD (3) and fill lavatory with water.
Check that DRAIN STOPPER (1) makes a good
seal and retains water in lavatory. Adjust stopper
height by repositioning LIFT ROD (3) and
tightening SET SCREW (4).
Release DRAIN STOPPER (5) and check all drain
connections and "P" trap for leaks. Tighten if
necessary.
Replace AERATOR.
3
109630 109630
7HELPFUL HINTS FOR CLEANING AND MAINTENANCE
The solid brass product you have just purchased has been designed to give you years of beauty and service. It is
important to bring to your attention proper care and maintenance procedures, which will ensure its lasting beauty.
First and foremost, it is important (as it is with any fine piece of jewelry or furniture) that the product be wiped clean and
dry with a soft damp cloth after every use.
Second, under no circumstances should an abrasive cleaner or combination cleaner/polish be used on JADO products.
The abrasive nature of such products will eventually destroy the finish and void the warranty.
In the event of stubborn blemishes shown on the finish, we recommend use of Windex window cleaner with a soft cloth,
but we do not recommend it be used on an everyday basis.
It is important to note that it is normal to expect signs of usage over time.
Thank you for selecting JADO for your home.
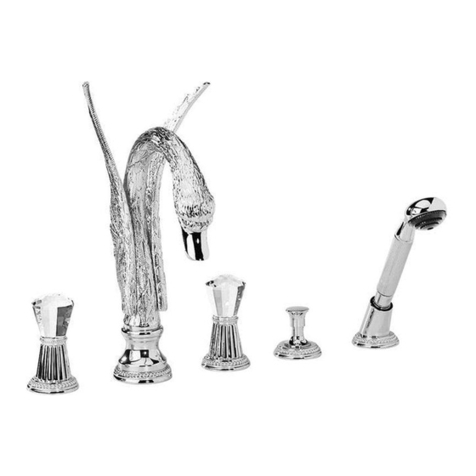
Widespread Lavatory Faucet
with Pop-Up Drain
TO THE PURCHASER OF JADO BRASS PRODUCTS
Attention installer:
Please leave This Pamphlet for The Owner
POLISHED BRASS AND CUSTOM FINISHWARRANTY: A 1YEAR LIMITED FINISH WARRANTY from date of purchase is provided to the
first residential owner against defects in materials and workmanship. Due to the ever-changing finish of Patina products, the finish warranty
is excluded. Warranty shall not include problems related to the installation of the product.
MECHANICS
MECHANICAL WARRANTY: A LIFETIME LIMITEDWARRANTY is provided to the first residential owner on parts to be free from failure
related to defects in materials and workmanship but not installation.
CONDITIONSTO WARRANTIES
JADO Bathroom & Hardware Manufacturing Corp. places the following conditions on its finish and mechanical warranties to the first residential owner only.
JADO finish and mechanical warranties are limited to products correctly installed and used in a residential environment.
JADO warranties will not assume liability for damage due to abuse, mishandling, incorrect installation, improper maintenance, or deterioration
due to normal use.
JADO will not be liable for labor or other costs relating to the sale, installation, or replacement of their products.
In the event of a defect in any JADO product covered by this warranty, the product must be returned to the dealer where originally purchased
along with proof of purchase.
JADO's obligation under the warranty shall be limited to the repair or exchange of any product which has been determined by JADO to be
defective after appropriate examination.
The state of California has mandated under Proposition #65 that
manufactures of products, including faucets which come into
contact with potable water, must warn the consumer if the product
contains materials listed by the state as a carcinogen or
reproductive toxin. Lead, which is contained in all brass faucets in
limited amounts appears on the State's list.
Preliminary industry tests have indicated that users of faucets
made from brass face no significant danger, however,
California Proposition #65 requires that we provide you with the
following notice:
NOTICE: JADO products conform to industry
requirements of water conservation under the
ASTM / ANSI A112.18.1M-1994 plumbing code.
Lavatory, bidet, wet bar and kitchen faucet sets
have a maximum flow rate of 2.2GPM. Shower
heads, hand showers and body sprays have a
maximum flow rate of 2.5GPM.
Warning: This product contains an element
known to the State of California to cause cancer
of reproductive harm.
JADO BATHROOM AND HARDWARE MFG. CORP.
7845 East Paradise Lane
Scottsdale, AZ 85260
JADO warrants this product to be free from defects in materials or workmanship for as long as the original consumer purchaser
owns their home.
JADO will provide, free of charge, at it’s sole option, replacement part(s) or product (or if no longer available, a comparable
product) to replace those which have proven defective in materials or workmanship.
Proof of purchase (original sales receipt) from the original consumer purchaser must be made available to JADO for all limited
warranty claims.This limited warranty is non transferable.It does not apply in the event of product damage due to the use of other than
genuine JADO replacement parts, installation error, abuse, misuse, or improper care and maintenance (whether performed by
a plumber, contractor, service provider or member of the purchaser’s household).The limited warranty excludes damage due to aggressive
air or water conditions, or harsh or abrasive cleaners and/or materials.This limited warranty excludes all industrial, commercial and business
usage, whose purchasers are hereby extended a two year limited warranty (with the exception of solenoid valves and other electronic
components which carry a one year limited warranty) applying to all other terms of this limited warranty except duration.This limited warranty
does not cover labor charges incurred and/or damages sustained in installation, repair or replacement, nor incidental or consequential
damages, all of which are expressly disclaimed.This limited warranty is applicable only to JADO faucets manufactured after June 1, 1996
and installed in the United States and/or Canada.
This limited warranty gives the original consumer purchaser of an JADO faucet specific legal rights which may vary from state to
state or from province to province.This limited warranty does not cover any liability for consequential or incidental damages, all of which
are hereby expressly disclaimed, or the extension beyond the duration of this limited warranty of any implied limited warranties, including
those of merchantability or fitness for an intended purpose. Insome statesor provinces the exclusion or limitation of incidental or consequential
damages is not allowed, so those exclusions may not apply to you.
JADO Bathroom & Hardware Manufacturing Corp. provides the following warranties only to the first residential owner of our products.
FINISHES
JADO FAUCET LIFETIME FUNCTION AND FINISH LIMITEDWARRANTY
AERATOR
Product Numbers
814/OO3/...
JADO
JADO
1
™
2TEE AND HOSE ASSEMBLY
1-1/2" MAX.
1-1/8" D.
KNOB
HANDLE
2" D.
3" TO 6"
5
3
WATER SUPPLY CONNECTIONS
Connect water supply to VALVE BODIES (1) with 1/2" IPS
FLEXIBLE SUPPLIES (3) or 3/8" O.D. BULL-NOSE RISERS (4).
Use wrench to tighten connections.
Do not over tighten. Be careful not to kink copper supply when
bending. Use tubing cutter to cut to proper length.
1
4
FERRULE
NOTE: FLEXIBLE SUPPLIES OR BULL-NOSE RISERS MUST BE
PURCHASED SEPARATELY.
COUPLING
NUT
2" MAX.
2-1/8" D.
3" TO 6"
2" MAX.
7" MAX.
109630 109630
ROUGHING-IN
DIMENSIONS
Plumbers' Putty or Caulking
Adjustable Wrench
Phillips Screwdriver
Channel Locks
TOOLS REQUIRED
Tubing Cutter Regular Screwdriver
Basin Wrench
MOUNTING
SURFACE
1-1/4" O.D.
NOTE: MOUNTING HOLES
ARE 1-1/8" D.
1/2" NPT INLETS
APPLY SEALANT
OR TEFLON TAPE
4A FOAM SEAL (1) is installed on underside of FLANGE (2). (Plumbers
Putty may be used in place of FOAM SEAL (1) if desired.)
Apply sealant or Teflon tape to threads of TAILPIECE (10) and
thread into DRAIN BODY (7) making a water tight seal.
Drop FLANGE (2) into LAVATORY DRAIN (3). From below assemble
RUBBER GASKET (4), PLASTIC WASHER (5) and LOCK NUT (6) onto
DRAIN FLANGE (2). Do not tighten fully.
INSTALL POP-UP DRAIN
FIG. 4a
FIG. 4b
FIG. 4c
FIG. 4c
FIG. 4a
FIG. 4b
1
4
3
2
5
6
7
8
6
9
2
Adjust STOPPER (13) height by repositioning POP-UP ROD (16) in SWIVEL (15)
and tightening SET SCREW (18).
Assemble POP-UP SWIVEL (15) to PIVOT ROD (11) but do not tighten.
Drop POP-UP ROD (16) through other hole in POP-UP SWIVEL (15) and
tighten SET SCREW (17)
Assemble PIVOT ROD (11), and PIVOT NUT (12) as shown. Install CONCAVE
WASHER (19) into PIVOT ROD OPENING (9) if not preinstalled. Hand tighten
PIVOT NUT (12). Drop STOPPER (13) into drain.
(
To vandal proof drain rotate STOPPER (13) so PIVOT ROD (11) goes
through EYE (14) of STOPPER (13)
. Make connection to "P" TRAP.
Inspect inside DRAIN BODY (7) that SEAL (8) is installed. Thread
DRAIN BODY (7) tight against FLANGE (2) to make a water tight seal.
10
9
7
6
12
19
16
1517
18
2
10
14
13
11
The PIVOT ROD OPENING (9) in DRAIN BODY (7) should face the rear
of the lavatory. Tighten LOCK NUT (6) on FLANGE (2) to make a water
tight connection with channel locks. Do not over tighten.
2" D.
Teflon Tape
15
COLD
10 12
13
14
1SPOUT ASSEMBLY
Make sure SHANK O-RING (1) is in place. Thread TEE (2)
onto end of SPOUT SHANK (3).
Rotate TEE (2) about10 degrees from center. Insert HEX
COUPLING NUT (4) into TEE (2) and tighten on end of spout
shank to make a water tight connection. Do not over tighten.
Make sure FIBER WASHERS (5) are installed in TEE (2).
Connect HOSE ENDS (6) of FLEX HOSE (7) to TEE (2).
Tighten securely.
31
5
4
567
2
Make sure RING WASHER (3) is properly positioned into
SPOUT BASE (8). Insert SPOUT SHANK (1) through center hole
of SINK (2).
Assemble RUBBER WASHER (4), BRASS WASHER (5) and
LOCKNUT (6) onto threads of SPOUT SHANK (1) from
underside of SINK (2).
Insert LIFT ROD (7) through SPOUT (9) and cut out of BRASS
WASHER (5).
Align SPOUT (9) and tighten LOCKNUT (6). Be sure cut out in
BRASS WASHER (5) is positioned as shown.
7
8
1
3
4
6
5
CUT OUT
2
Turn off hot and cold water
supplies before beginning.
CAUTION
6
7
9
Insert BRASS FRICTION WASHERS (14) and RUBBER SEAL
WASHERS (15) into COUPLING NUTS (10). Loop SUPPLY
HOSES (12) if required to avoid kinking. Tighten COUPLING
NUTS (10) to outlets of VALVE BODIES (9).
3INSTALL VALVE BODIES AND HANDLES
INSTALL HANDLES
1-1/4'' MAX.
STEM ADAPTER
Thread LOCKNUT (8) to bottom of VALVE BODY (9). Make sure
FIBER WASHER (10) and RUBBER WASHER (11) are installed.
Insert VALVE BODY (9) through mounting hole from underside
of lavatory or mounting surface.
Note: VALVE BODY marked Hot is installed in the left mtg. hole,
VALVE BODY marked Cold in the right when facing front of fitting.
Maximum mounting surface thickness is 1-1/4".
From top install STOP RING (7). Thread LOCK RING (6) with seal washer
onto VALVE BODY (9) until tight against it's internal stop. Thread
ESCUTCHEON RING (5) onto VALVE BODY (9) until tight against it's
internal stop.
Set VALVE BODIES (9) so that their outlets are facing toward SPOUT
SHANK (13). Tighten LOCKNUT (8) using 35mm or adjustable
wrench to secure the valve bodies.
Thread counter-clockwise LEVER (1) from KNOB HANDLE (2) and
remove. With HEX WRENCH (3) (supplied) loosen SET SCREW (4)
and pull off handle from valve stem.
Remove ESCUTCHEON RING (5), LOCK RING (6) and STOP RING (7).
Note: Handle assemblies must be removed from valve bodies
before valve body installation.
HOT
JADO
MOUNTING
SURFACE
HOT
1
3
4
1011
5
6
7
8
9
2
HEX WRENCH
(SUPPLIED)
Align LEVER HANDLES (1) as shown or as desired and
install HANDLE (2) onto STEM ADAPTER.
Tighten HANDLE SET SCREW (4) with HEX WRENCH (5)
supplied to secure HANDLE.
Thread LEVER (1) into handle.
2"
7-7/8"
3/4" D.
11-7/8"
6-1/2"

Other JADO Plumbing Product manuals

JADO Hatteras 842/003 Series User manual

JADO

JADO Hatteras 842/003 Series User manual

JADO Borma 814 546 Series User manual

JADO

JADO Borma 814 546 Series User manual

JADO IQ 832 375 Series User manual

JADO

JADO IQ 832 375 Series User manual

JADO New Haven 826/003/ Series User manual

JADO

JADO New Haven 826/003/ Series User manual

JADO 832 860 Series User manual

JADO

JADO 832 860 Series User manual

JADO IQ 832 001 Series User manual

JADO

JADO IQ 832 001 Series User manual

JADO Oriental 981 User manual

JADO

JADO Oriental 981 User manual

JADO GLANCE 831/075/000/000 User manual

JADO

JADO GLANCE 831/075/000/000 User manual

JADO Glance 831/701 Series User manual

JADO

JADO Glance 831/701 Series User manual

JADO Borma 814 707 Series User manual

JADO

JADO Borma 814 707 Series User manual

JADO IQ 032 010 Series User manual

JADO

JADO IQ 032 010 Series User manual

JADO Borma 814 098 Series User manual

JADO

JADO Borma 814 098 Series User manual

JADO IQ 032 200 Series User manual

JADO

JADO IQ 032 200 Series User manual

JADO Borma 814 144 Series User manual

JADO

JADO Borma 814 144 Series User manual

JADO Borma 814 999 Series User manual

JADO

JADO Borma 814 999 Series User manual

JADO Perlrand Cristal H3980A4 User manual

JADO

JADO Perlrand Cristal H3980A4 User manual

JADO New Haven 826/083 Series User manual

JADO

JADO New Haven 826/083 Series User manual

JADO Classic Colonial Victorian 853/400 Series User manual

JADO

JADO Classic Colonial Victorian 853/400 Series User manual

JADO IQ 832 870 Series User manual

JADO

JADO IQ 832 870 Series User manual

JADO Classic 892/398 Series User manual

JADO

JADO Classic 892/398 Series User manual

JADO New Haven 825 850 User manual

JADO

JADO New Haven 825 850 User manual

JADO Oriental 893 User manual

JADO

JADO Oriental 893 User manual

JADO IQ 823 303 Series User manual

JADO

JADO IQ 823 303 Series User manual

JADO New Haven 826/431 Series User manual

JADO

JADO New Haven 826/431 Series User manual

Popular Plumbing Product manuals by other brands

Luxart Lumino LUM341-PS Installation

Luxart

Luxart Lumino LUM341-PS Installation

Hans Grohe Focus S Instructions for use/assembly instructions

Hans Grohe

Hans Grohe Focus S Instructions for use/assembly instructions

GSG ZENITH Series installation guide

GSG

GSG ZENITH Series installation guide

Glacier bay HD67190W-6104 Installation and care guide

Glacier bay

Glacier bay HD67190W-6104 Installation and care guide

Bristan CLUB VAC PBSM C MT Fitting instructions

Bristan

Bristan CLUB VAC PBSM C MT Fitting instructions

Endura 3935AX6 Installation

Endura

Endura 3935AX6 Installation

Grohe ESSENCE 20 297 manual

Grohe

Grohe ESSENCE 20 297 manual

saunalife Garden Series manual

saunalife

saunalife Garden Series manual

Kalia BF1220 CITE installation instructions

Kalia

Kalia BF1220 CITE installation instructions

Omnires Fresch FR7138/6 Installation and Maintenance

Omnires

Omnires Fresch FR7138/6 Installation and Maintenance

LIXIL SFV-802S Installation Guide and Manual

LIXIL

LIXIL SFV-802S Installation Guide and Manual

Hans Grohe Rainfinity Digital 500 1jet 25033000 Instructions for use/assembly instructions

Hans Grohe

Hans Grohe Rainfinity Digital 500 1jet 25033000 Instructions for use/assembly instructions

Zip HydroTap G5 BA60 user guide

Zip

Zip HydroTap G5 BA60 user guide

Hans Grohe 13132000 Assembly instructions

Hans Grohe

Hans Grohe 13132000 Assembly instructions

Watts SOCLA BA BM installation manual

Watts

Watts SOCLA BA BM installation manual

Bristan Descent DSC BAS C Installation instructions and user guide

Bristan

Bristan Descent DSC BAS C Installation instructions and user guide

IKEA EDSVIK Assembly instructions

IKEA

IKEA EDSVIK Assembly instructions

Oras HANSA HANSABLUEBOX Installation and maintenance guide

Oras

Oras HANSA HANSABLUEBOX Installation and maintenance guide

manuals.online logo
manuals.online logoBrands
  • About & Mission
  • Contact us
  • Privacy Policy
  • Terms and Conditions

Copyright 2025 Manuals.Online. All Rights Reserved.