Couching Designs
Enjoy embellishing your work with yarns.
Use the couching foot PC-1 or PC-2 for the couching
designs.
For weight 3 yarn (light), use the couching foot PC-1.
For weight 4 yarn (medium) use the couching foot
PC-2.
NOTE:
•Usetheweight3yarn(light)orweight4yarn
(medium) for the couching design project.
•Iftheyarnistoothickoruffy,orthedesign
is too bulky, press the adjust key wand
increase the presser foot height, otherwise
the couching foot may be trapped and to
break.
•Donotsewonahardstring.
•Testsewtocheckthesewingresults.
•Donotusethesinglecolorsewingkeyforthe
couching designs.
•Usethesamecolorthreadforthebobbinand
the needle thread as the yarns for the best
result.
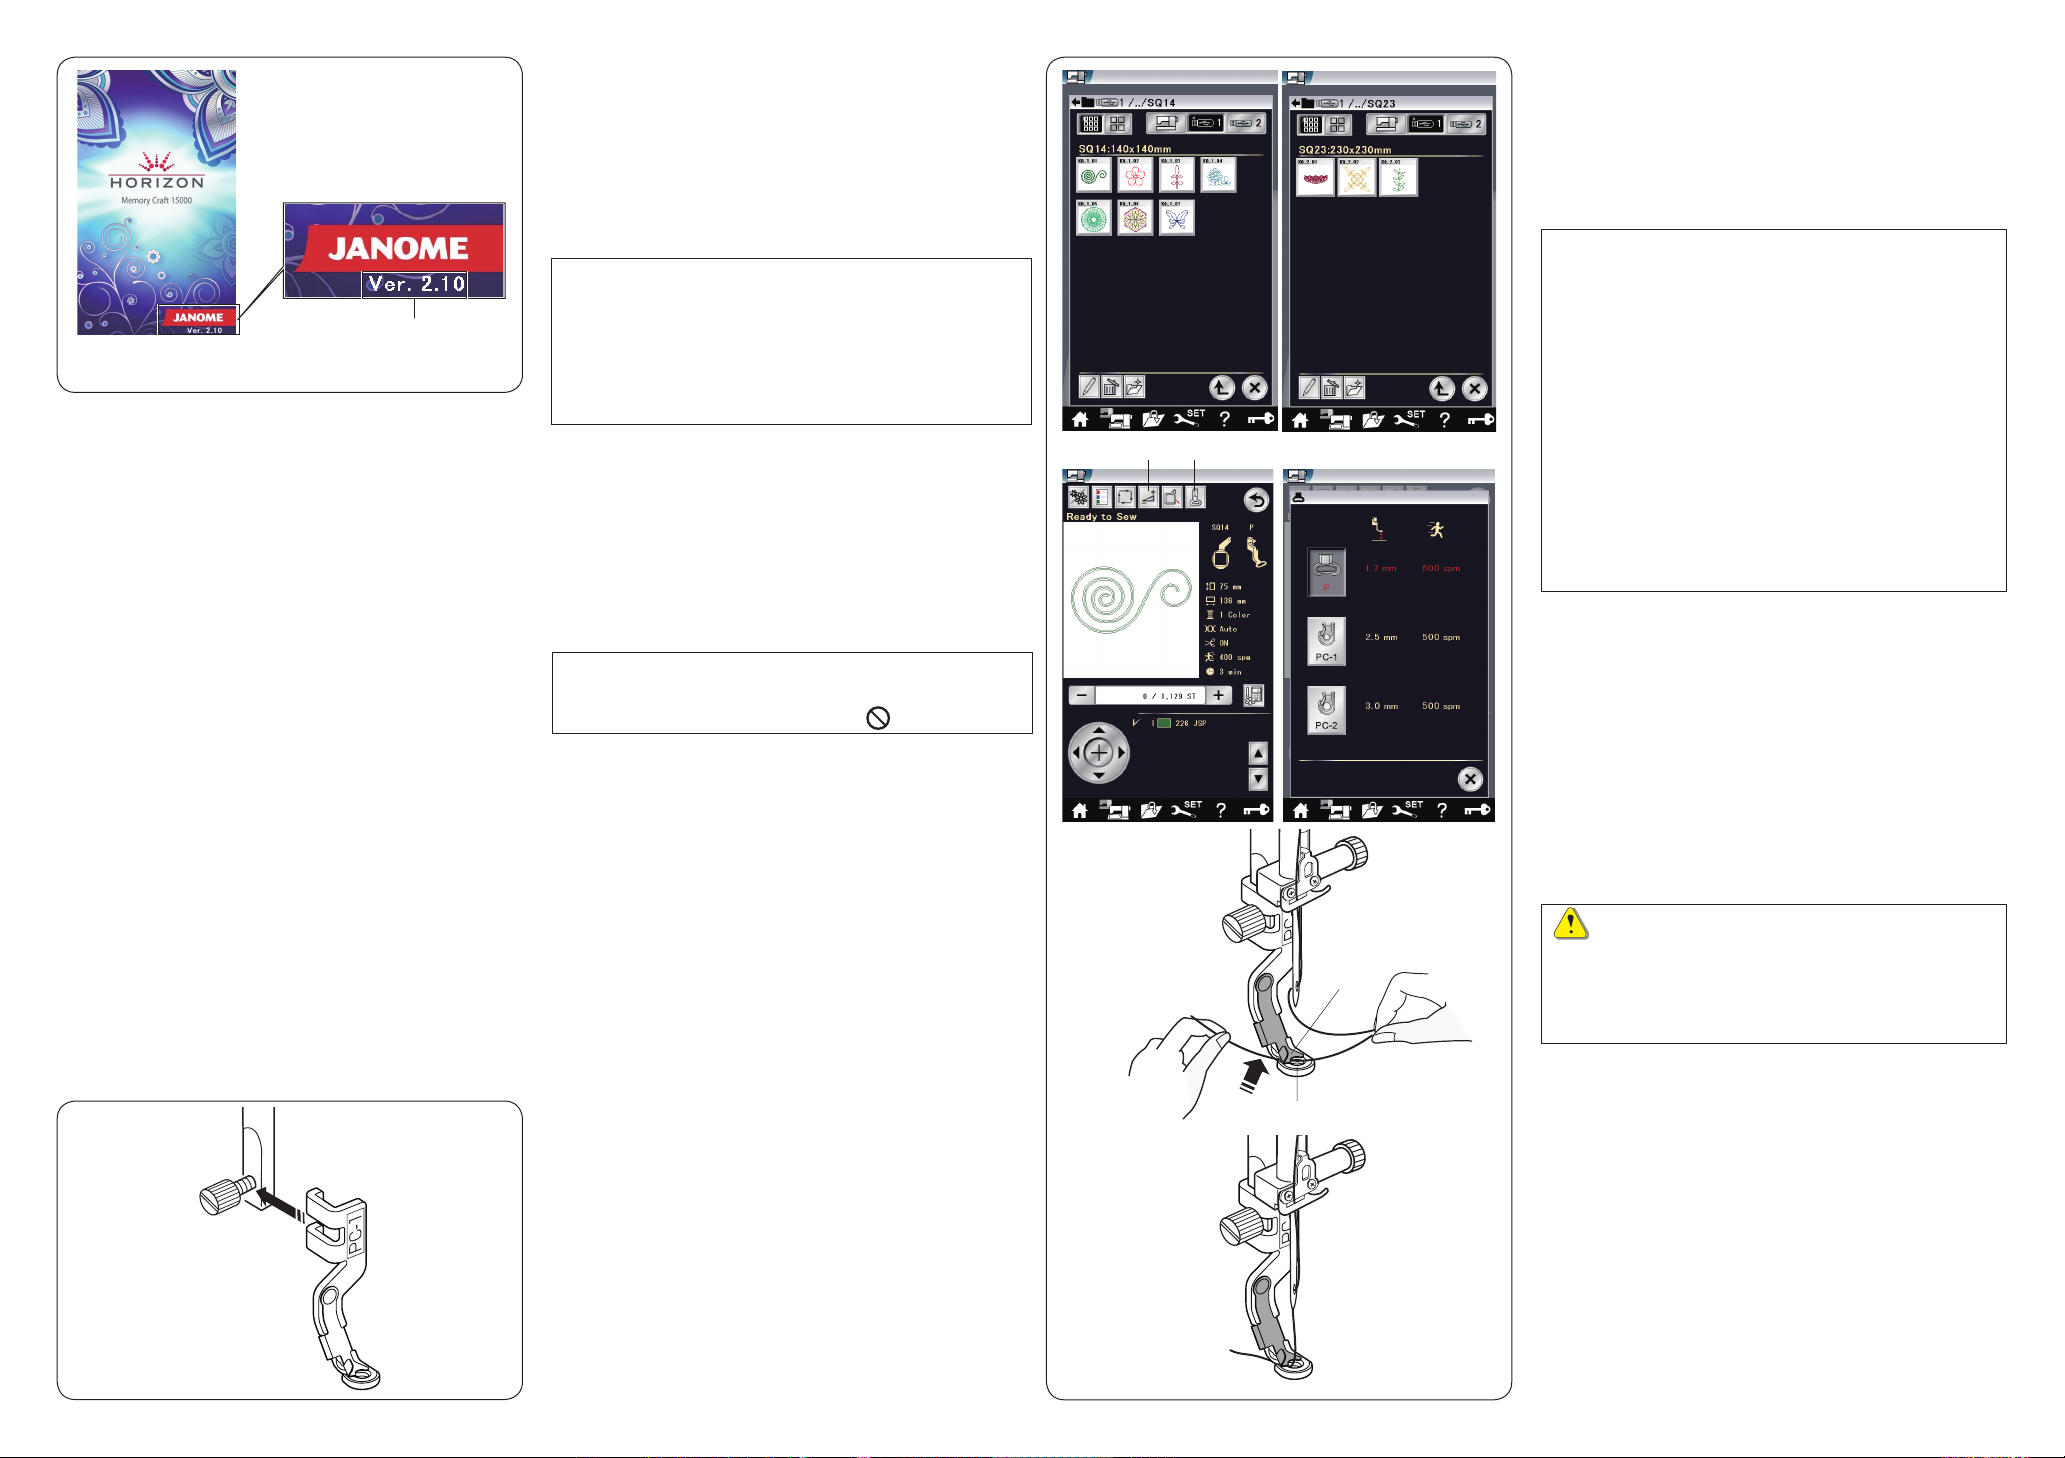
Select one of the couching design.
Inthereadytosewwindow,presstheembroidery
foot key q.
Select the couching foot PC-1 for the weight 3 yarn
(light).
Select the couching foot PC-2 for the weight 4 yarn
(medium).
Thepresserfootheightandsewingspeedwillbe
automatically adjusted to suite the selected couching
design sewing.
Iftheyarnlayersbecometoothick,presstheadjust
key wand adjust the presser foot manually.
CAUTION:
Press the lockout key to lock the machine when
attaching/removing the presser foot, yarn guide,
and threading the threads and yarns to the
machine.
q
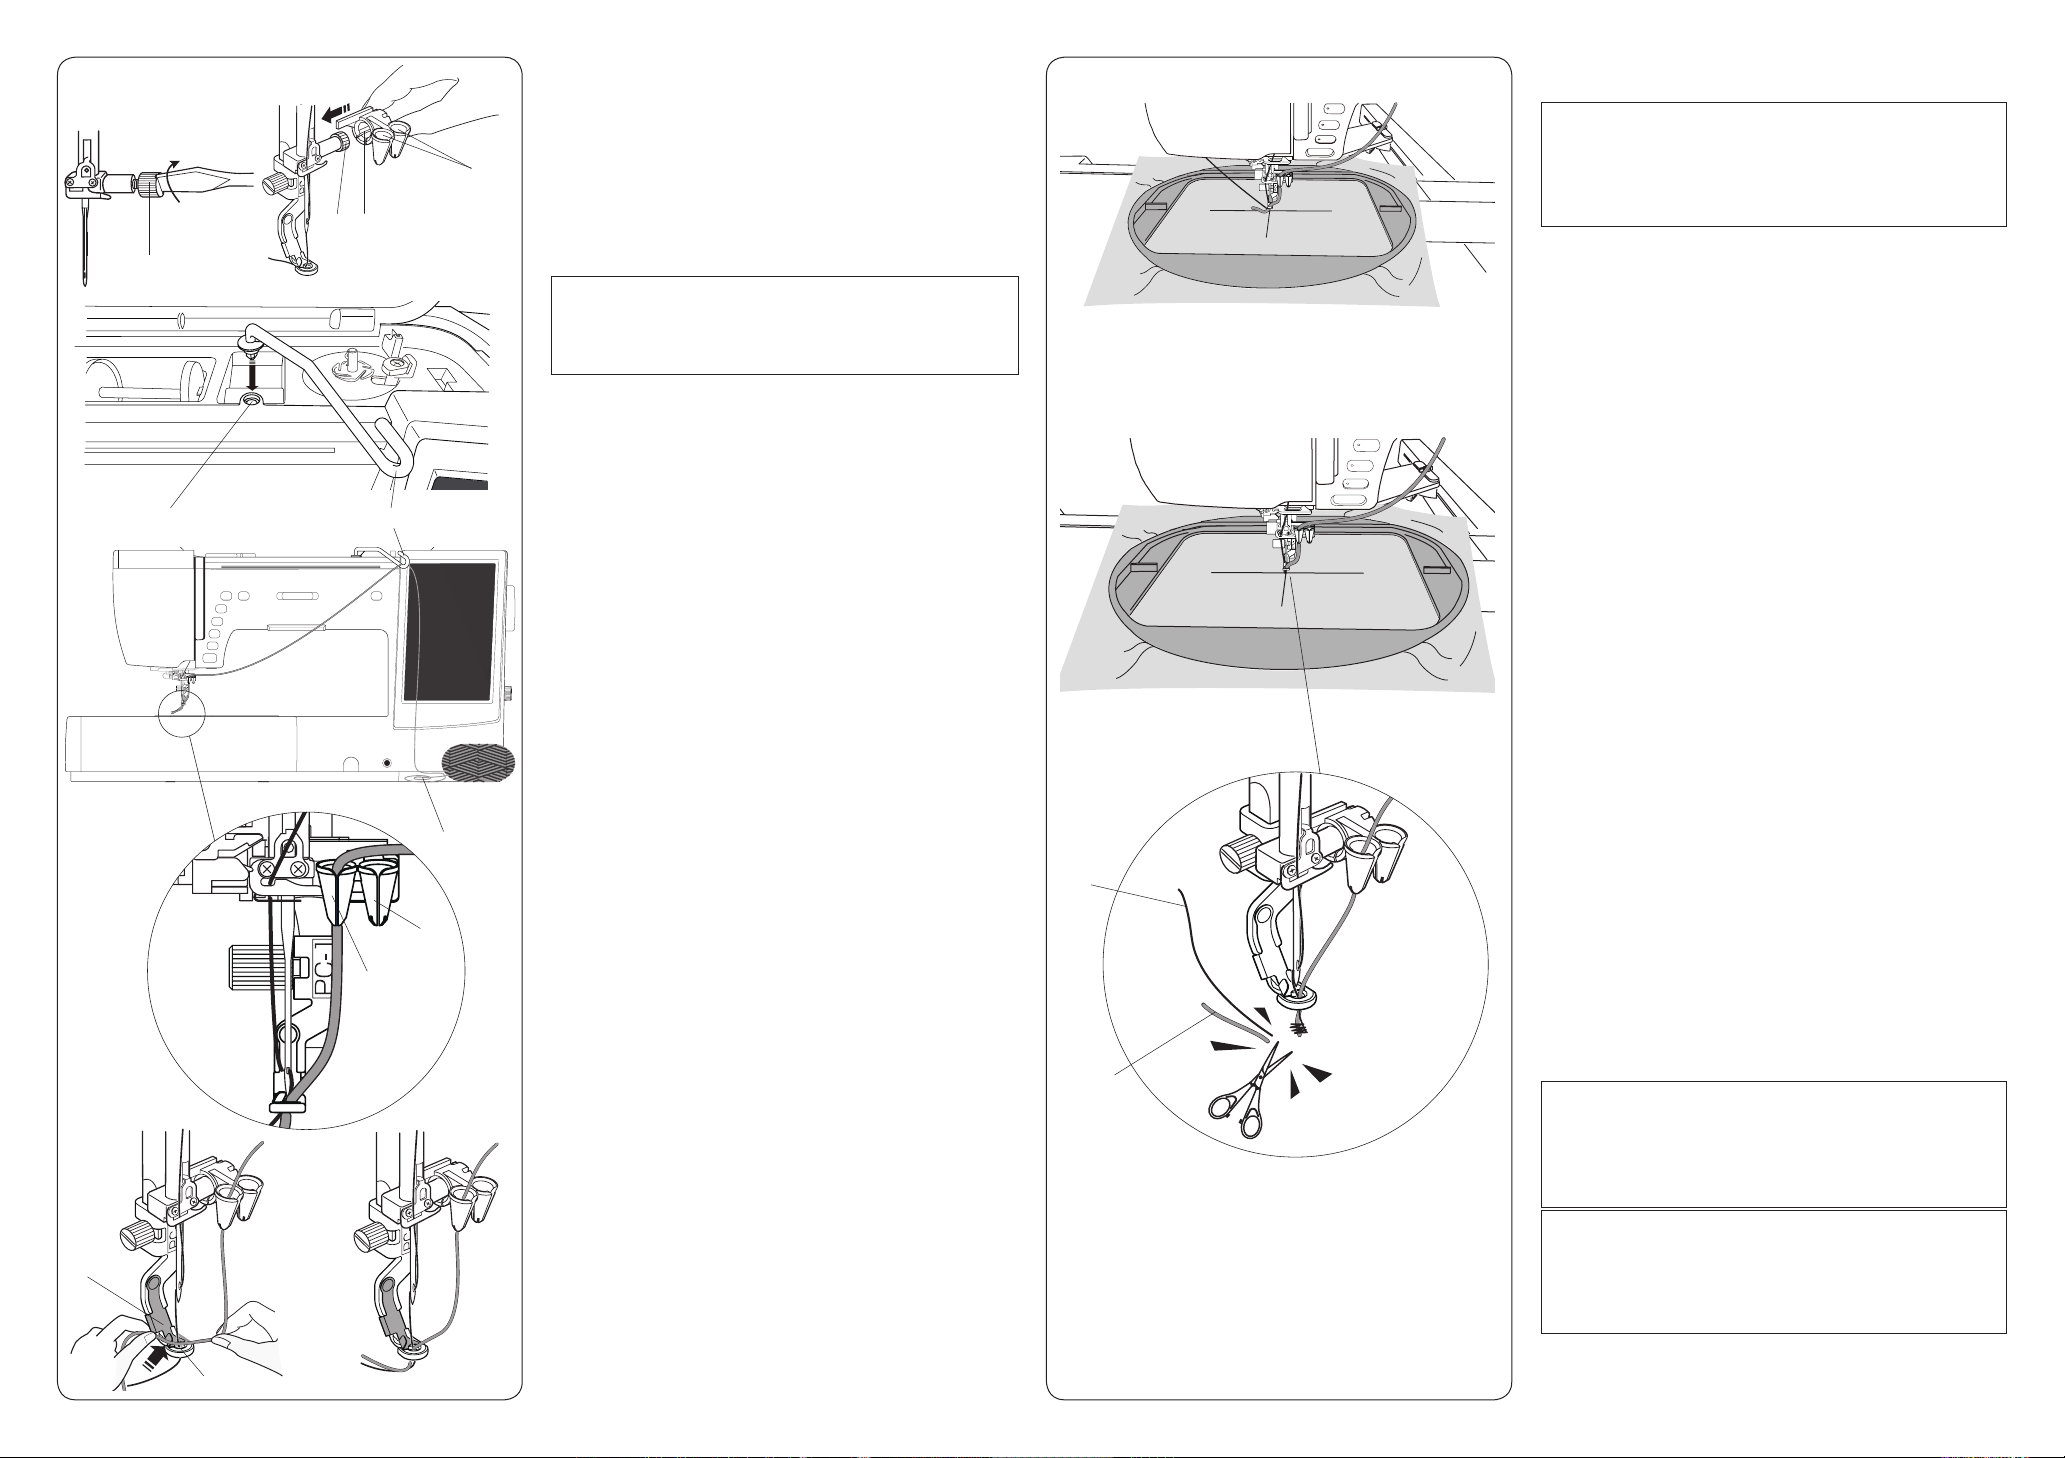
Turnthehandwheeltowardyou.
Be sure that the needle through the center of the
couching foot.
Hold the thread with both of your hands.
Slide the thread under the plate, and slip it into the
presser foot hole.
e Plate
r Presser foot hole
e
r
w
Attaching the couching foot PC-1 or PC-2
Attach the couching foot PC-1 or PC-2 to the
presser bar from front.
Tightenthethumbscrewrmlywiththescrewdriver.
Preparation
Updating your MC 15000
MC15000 must be updated to version 2.1 or later.
Theversionnumberisdisplayedontheinitial
screen qwhen the machine is turned on.
Visit the JANOME website (http://www.janome.
co.jp/e/e_downloads/machine.html) to update your
machine. Please refer to the update instructions.
NOTE:
When updating to version 2.1 or later from version
2.0 or earlier, it is necessary to delete stored data
forallfavoritedesignsettings.Ifstoreddataisnot
deleted, problems with sewing may occur after the
update is carried out. Please refer to the update
instructions.
Creating EMB/Embf folder
1. Inordertodownloadtheembroiderycouching
designs,prepareaUSBashdrive.
2. InserttheUSBashdriveintoyourMC15000and
turn on the machine.
3. When the initial screen is displayed, turn off the
machineandremovetheUSBashdrivefromthe
machine. An embroidery folder “EMB/Embf” will
be created automatically.
NOTE:
Donotturnoffthemachinewhenthewarning
mark is displayed (Warning mark: ).
4. InserttheUSBashdriveintothePC.
Download the embroidery couching designs
1. Visit the JANOME website (http://www.janome.
co.jp/e/e_downloads/emb_couching.html).
2. Press the download button to download the
embroidery couching designs.
3. UnpacktheZipleandsavethefoldernamed
“Embroidery Couching” in the “EMB” folder on
theUSBashdrive(Clickthebutton“Clickhere
toseehowtounpacktheziple”toseethe
instructions.).
4. InserttheUSBashdriveintoyourMC15000and
opentheembroiderydesignles.
q