manuals.online logo
Brands
  1. Home
  2. •
  3. Brands
  4. •
  5. Janome
  6. •
  7. Sewing Machine
  8. •
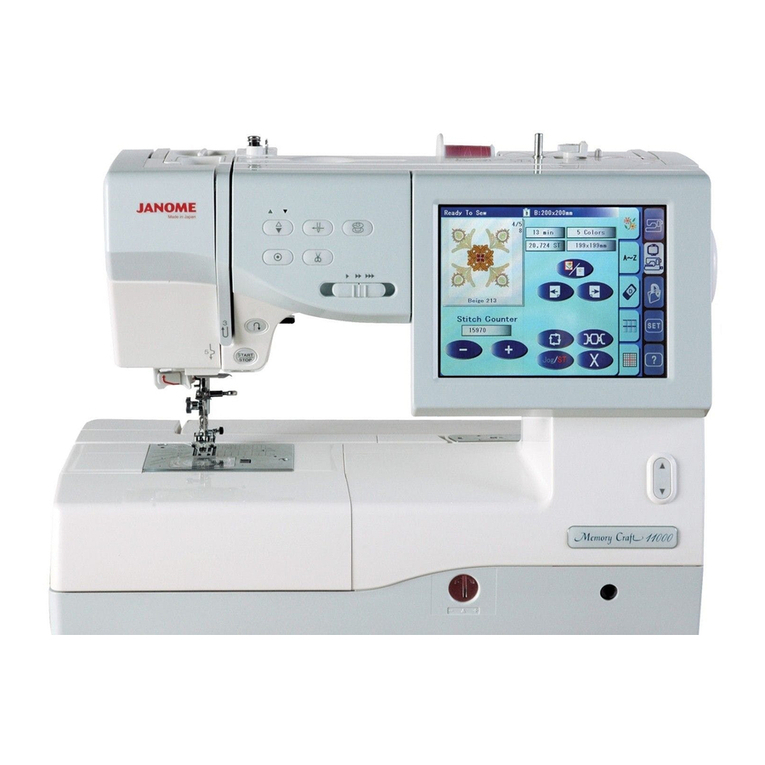
  9. Janome Memory Craft 11000 User manual

Janome Memory Craft 11000 User manual

Installation for
Version 2.0
Trim Upgrade Kit
id23920281 pdfMachine by Broadgun Software - a great PDF writer! - a great PDF creator! - http://www.pdfmachine.com http://www.broadgun.com
4. Slowly remove the top
cover slightly away
exposing the bobbin
winder motor plug.
Gently disconnect the
bobbin winder plug from
the top of the A-board.
5. Remove the top cover and
the pressure dial.
1
Removing the Top Cover
Removing the Belt Cover
1. Lift the handle and
loosen (do not remove)
the screw on the right
hand side.
2. Remove the large
white cap under the
hand wheel and the
large white cap under
the machine socket.
3. Remove the two screws.
2
4. Gently start
removing the cover
from the top rear side,
pulling the cover
away from the rear
panel
5. Make sure to
go carefully
around the
power ports and
machine socket.
6. Remove the
belt cover.
Locking Tab
3
Removing the Front Cover
1. Remove the screw
and the thread guide.
2. Loosen the screw
underneath the
free arm.
Thread guide
3. Remove the screw that
is holding the Front Cover
from this Bracket
4
6. Loosen the
screw above the
hand wheel.
4. Loosen the
screw above the
USB box making
sure not to pinch
your base plug
connector wires.
5. Remove Bracket
5
7. As you pull out the
front cover, disconnect
the hooks that hold
the front and the rear
covers together.
Push
on
Front
Cover
8. Lift Front Panel up
and out from the
bottom to unclip it
from the base unit.
Please make sure you
don’t pull the Front
Panel out to far as it is
still connect to the
machine.
6
9. Front Panel should be only sitting out from the machine as shown.
Please make sure you don’t pull the Panel out to far as some
connection may disconnect from the machine.
7
Tension Unit Removal
2. Remove the screw
from the top bracket of
the tension unit.
3. Open the face cover and remove the
screw from the bottom of the tension unit
that goes into the grey plastic tension
guide. Remove the tension unit.
1. Unplug the two wires
coming from the tension unit
going into circuit board U.
(Black 3-Pin, Grey 7-Pin).
8
9
10
2. Reinstall the two screws that hold the tension unit in.
1. With a small flat head
screwdriver in your left
hand, hold the micro
switch closed for presser
foot up/down. Slide the
tension unit with your
right hand being careful
of the micro switch.
Tension Unit Installation
11
1. Attach the front cover to
the machine being careful
not to pinch any wires.
3. Make sure the locking
hooks connect with the
rear panel to prevent
gaps between the two
panels.
Front Panel Installation
2. Lift Front Panel up
and into the bottom
of the Base Unit
Please make sure you
don’t pull the Front
Panel out to far as it is
still connect to the
machine.
12
6. Install the thread
guide and tighten the
screw.
5. Tighten the screw
underneath the
free arm.
Thread guide
4. Tighten the screw
above the hand wheel.
13
9. Tighten the
screw above the
USB box, making
sure that the white
wires are out of the
way when
tightening the crew
7. Insert Bracket, but
don’t screw in. Let the
Bracket rest up against
the Front Cover.
8. Insert screw to hold the
Front Cover to the
Bracket
14
Adjusting the Ordinary Foot Sensor
1. Press the Start-Stop and
reverse button and turn the
machine on. Wait for the
adjusting screen to appear
and then release the buttons.
2. Press the Foot UD on the
adjusting screen.
3. The screen will show H when the
presser bar is up and will show L
when the presser bar is down.
4. If an adjustment is needed, loosen the screw and move the foot
sensor switch plate left or right. Then tighten the screw. Press Xon the
screen and turn off the power switch.
Press
15
1. Install the belt cover.
2. Make sure to go
carefully around the
power ports and
machine socket.
3. Lift the handle and
tighten the screw.
Belt Cover Installation
16
Belt Cover Installation
5. Insert the two white caps.
4. Install and tighten the two screws.
17
Reinstalling the Top Cover
1A. Install the
presser bar dial,
making sure that
groove on the
dial lines up with
the slot on the
machine.
2. Gently reconnect the
bobbin winder plug from
the top cover into the A
board.
3. Make sure the top
cover is properly
positioned and no
wires have been
pinched, insert and
tighten the two screws.
1B. Lift the handle and gently
insert the top cover.
18
4. Lift the handle. Install and
tighten the small silver screw
on the left hand side of the
machine
5. Remove the two large
white caps on the top
cover.
19

Other Janome Sewing Machine manuals

Janome MEMORY CRAFT 9000 User manual

Janome

Janome MEMORY CRAFT 9000 User manual

Janome Magnolia 7318 User manual

Janome

Janome Magnolia 7318 User manual

Janome RE1306 User manual

Janome

Janome RE1306 User manual

Janome Memory Craft 3000 User manual

Janome

Janome Memory Craft 3000 User manual

Janome 2030DC-T User manual

Janome

Janome 2030DC-T User manual

Janome MS3015 User manual

Janome

Janome MS3015 User manual

Janome 1600P PROFESSIONAL - User manual

Janome

Janome 1600P PROFESSIONAL - User manual

Janome Continental M17 User manual

Janome

Janome Continental M17 User manual

Janome Memory Craft 350e User manual

Janome

Janome Memory Craft 350e User manual

Janome Continental M17 User manual

Janome

Janome Continental M17 User manual

Janome 1108 User manual

Janome

Janome 1108 User manual

Janome MC6600 User manual

Janome

Janome MC6600 User manual

Janome FM725 - User manual

Janome

Janome FM725 - User manual

Janome CoverPro 1000CP User manual

Janome

Janome CoverPro 1000CP User manual

Janome 2222 User manual

Janome

Janome 2222 User manual

Janome COVER PRO 900CP User manual

Janome

Janome COVER PRO 900CP User manual

Janome ML644D User manual

Janome

Janome ML644D User manual

Janome Memory Craft 5000 User manual

Janome

Janome Memory Craft 5000 User manual

Janome MC 350E User manual

Janome

Janome MC 350E User manual

Janome MEMORY CRAFT 9000 User manual

Janome

Janome MEMORY CRAFT 9000 User manual

Janome 2160DC User manual

Janome

Janome 2160DC User manual

Janome 204D User manual

Janome

Janome 204D User manual

Janome YC-482J-EC User manual

Janome

Janome YC-482J-EC User manual

Janome MYEXCEL 18W LE User manual

Janome

Janome MYEXCEL 18W LE User manual

Popular Sewing Machine manuals by other brands

Seiko CH-2B operating instructions

Seiko

Seiko CH-2B operating instructions

Singer 8280 instruction manual

Singer

Singer 8280 instruction manual

Toyota SP200 Series instruction manual

Toyota

Toyota SP200 Series instruction manual

Adler 20 Directions for use

Adler

Adler 20 Directions for use

ELNA 2003 manual

ELNA

ELNA 2003 manual

NLI DHR-6 Instruction manual & parts list

NLI

NLI DHR-6 Instruction manual & parts list

KANSAI SPECIAL SX Series instructions

KANSAI SPECIAL

KANSAI SPECIAL SX Series instructions

Consul OVERLOCK 1054 instruction manual

Consul

Consul OVERLOCK 1054 instruction manual

Alfa Network 1920 instruction manual

Alfa Network

Alfa Network 1920 instruction manual

Dürkopp Adler 884-xxx-M series Service instructions

Dürkopp Adler

Dürkopp Adler 884-xxx-M series Service instructions

Brother PR-600 parts reference list

Brother

Brother PR-600 parts reference list

Brother Serger 1034D Handboek voor de compacte

Brother

Brother Serger 1034D Handboek voor de compacte

Singer 281-30 Service manual

Singer

Singer 281-30 Service manual

Texi Fox 25 user manual

Texi

Texi Fox 25 user manual

DURKOPP ADLER 887 Series operating instructions

DURKOPP ADLER

DURKOPP ADLER 887 Series operating instructions

Pfaff Industrial 3108-1/1306 with BDF P1 instruction manual

Pfaff Industrial

Pfaff Industrial 3108-1/1306 with BDF P1 instruction manual

UnionSpecial 81200 SERIES Original instructions

UnionSpecial

UnionSpecial 81200 SERIES Original instructions

ELNA Elina 21 Instruction book

ELNA

ELNA Elina 21 Instruction book

manuals.online logo
manuals.online logoBrands
  • About & Mission
  • Contact us
  • Privacy Policy
  • Terms and Conditions

Copyright 2025 Manuals.Online. All Rights Reserved.