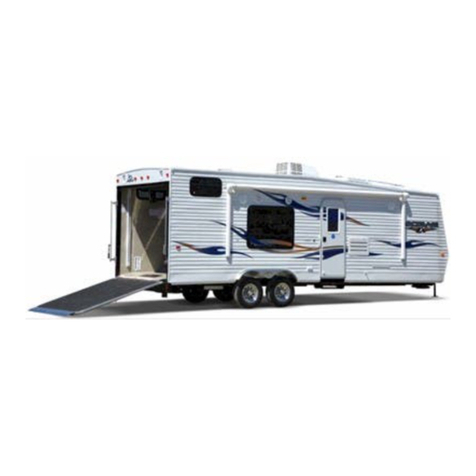
Jayco jaycardinal User manual


YOUR NEW JAYCO IS YOUR PASSPORT TO A WHOLE WORLD OF NEW FRIENDS,
CAMPING FUN AND TRAVEL ADVENTURE WHEN YOU JOIN THE THOUSANDS OF
JAYCO FAMILIES WHO MAKE UP THE . . .
JAYCO JAFARI INTERNATIONAL TRAVEL CLUB
You will find us enjoying the friendship and fellowship of JAFARI CAMPING as we join our
local area FLIGHTS at hundreds of weekend camp-outs all over North America each month . . .
WE’RE THE FAMILIES OF JAYCO!
There are special STATE, REGIONAL and INTERNATIONAL RALLIES where you can join
with your fellow JAFARIANS and their flights to enjoy a special kind of togetherness . . . fun,
games, and entertainment provide memories to last a lifetime.
And . . . how about the exotic surroundings of NEW ORLEANS, the sounds and color of
NASHVILLE and the GRAND OLE OPRY, the roar and rush of the INDIANAPOLIS 500, the
quiet surroundings of the CANADIAN ROCKIES, the color of the SMOKY MOUNTAINS in
the Fall. These and many other adventures can be yours when you join the. . .
JAYCO JAFARI INTERNATIONAL TRAVEL CLUB
Fill in the blanks on the reverse side, cut along dotted line and mail along with a check to:
JAYCO JAFARI INT’L TRAVEL CLUB
ATTN: Membership Coordinator
P.O. Box 192
Osceola, IN 46561-0192

Yes, it’s for everyone with a JAYCO RV; young couples just starting out, families spending quality
time together, the young at heart expanding their life experiences. Whether you belong to another
camping club, have always traveled alone, or are just starting, don’t miss out on one of the most
priceless benefits of being an RV family ...meetnewfriends and spend a bit of your camping life
with some of the finest people you will ever have the opportunity to share a campfire or treasure a
moment of golden living with a . . FIFTH-WHEEL TRAVEL TRAILER. . .SPORT UTILITY
TRAILER . . . CONVENTIONAL TRAVEL TRAILER . . . TYPE C MOTORHOME . . . FOLDING
CAMPING TRAILER ...itdoesn’t matter. If you are a JAYCO RV FAMILY, then you are eligible
to become a Jayco Jafari Member.
YOU WILL NEVER BE SORRY YOU MADE THE DECISION!
Your membership entitles you to:
•Special international decals for your unit.
•The Hitch newsletter with schedules of upcoming events and activities.
•A membership roster - containing the names and addresses of current members of the club
will be sent bi-yearly.
•Discount Cards for several national theme parks including Six Flags and Busch Corp. Parks.
•A special price is available on Wheeler’s Campground Guides.
•Discounts with Hertz Rental Car.
•Discounts with Coach Net, an emergency roadside service.
•Farm & City Insurance has RV insurance available at discounted rates to current Jayco Jafari
International Club members.
• All of this, plus the joy of meeting new friends and enjoy Jafari adventures around the
country.
Start with the first phase of your camping life...just complete the following application and forward it
to the Jayco Jafari International Travel Club office. Your membership application may also be
completed online, by visiting our website at www.jaycorvclub.com. If you have further questions,
contact the club office direct at the website or by calling
800-262-5178. Local calls can be made to 574-258-0571.
WELCOME TO THE JAFARI FAMILY!
TO: Membership Coordinator for the Jayco Jafari International Travel Club
Please enroll us as members in the Jayco Travel Club. We are ready to roll to where the “friends we
just haven’t met yet” have the coffee on the fire and are waiting for us to arrive: We are ...
Name: Spouse:
Address: Phone:
City: State: Zip:
Email:
Ages of Children at Home:
Our JAYCO is a: Our Dealer
(type & size)
Membership Dues:
One year $25.00 Amount enclosed. $
Two years: $45.00 Check #:
Three years: $65.00
(signature) (date)
"


OWNER'S
MANUAL
This
manual
has
been
prepared
to
acquaint you
with
the
operation
and
maintenance
of
your
JAYCO
tent camper.
Please
read
it
care-
fully
and follow
its
recommendations
to
assure the
most
enjoyable
and
trouble
-
free
operation of your
camper.
Listed
on
this
and
the
following pages
are
subjects
that deserve
your
special attention.

TO
OPEN
FOR
CAMPING:
-
1. Release all four corner latches.
2.
Turn winch handle until gauge cable in the right front corner appears
fairly tight.
3.
Drop rear jacks into down position and level trailer.
4.
Slide end bunks out
%
of the way, set up end bunk bows, bring canvas
over
the
bows, pull bunks out and insert bunk support poles under
xhe
the bunk. Fasten shock cord around cord holders under the bunk.
5.
Enter trailer and Iower the screen into position. Raise the screen door
against spring tension in the top most panel and position screen door
"U"
channel over entrance door and black vinyl posts over holes.
Now release pressure and allow screen door ro drop into place.
Sec-
ure
top
panel, inside of roof, by turning twist locks. Insert canvas
into door
frame
extrusion. After door is in place, Iower roof enough
to put
a
slight amount of weight on the door frame.
TO
CLOSE
TRAILER:
Reverse above
5
proceedings.
NOTE
-
After roof
is
latched, put
slight
pressure on lift system with
(A).
By turning the crank cable (B) is wrapped on the winch spool
(A)
pulling
cables
(S,T,U,V)
which are anchored to a block within
the
floor tracks
(O,P,Q,R)
thus forcing pushrods thru the curved pushrod tracks
(G,H,I,])
into corner posts
(K,L,M,N)
which raise
the
roof.
A.
Winch
B.
3/16"
main
cable
C.
Cable mounting block
D.
Adjustable eyebolts
E.
Pulley bracket is actually mounted on
(1)
F.
Pulley bracket
is
located behind
(G)
G,H,I,J.
Curved pushrod tracks
Right front corner
past
Left front corner post
Left rear corner post
Right
rear corner post
Right front floor track
Left
front floor track
Left
rear floor track
Right rear floor track
3/32"
cable that powers
L,R,
pushrod
3/32"
cable that powers R,R, pushrod
3/32"
cable that powers
L,F,
pushrod
3/32"
cable
that powers
R,F,
pushrod
Pulley rnounred
on
wall and above wheel well

ROOF
IN
CLOSED
POSITION
ROOF
iN
RAISED
POSlTfON
By
turning crank
on
raising and lowering
mechanism,
.
+
main
,.
,
cable
is
wrapped on winch,
thus
pulling
anchored to block within
the
floor tracl
into corner posts which
raise
1
cornet cames wnrcn are
<,
farcing push
rod
springs
:he roof.

ROOF
IN
CLOSED
POSITION:
Position of flexible pushrod in the closed
position is between
X
&
X.
D.
Adjustable eyebolts
C.
Cable mounting block
E.
Pulley
and bracket
J.
Curved pushrod track
L.
Left front corner post
P.
Push rod housing
-
(square tube)
ROOF IN RAISED POSITION:
To
service lift system, place a support be-
tween point
A
&
B,
Jayeagle, jayrobin, Jayking,
42",
Jayrhrush and Jay-
swift,
48".
Position
of
pushrod in open position isbetween
X
and
X.
L.
Telescoping square steel tube
P.
Pushrod housing (square steel tube)
j.
Curvedpushrodtrack
ROOF LATCHES:
The roof corner latches are adjustable for more or less
tension. Turn the clamp screw
KO
tighten
or
loosen asis needed.
FRONT
&
REAR JACKS:
Tkc
front dolIy jack should be completely raised
whiIe traveling. Dolly wheel must be removed. This may
be
done by giving
the wheel a quarter turn ro the indentation slot.
Rear Ieveling jacks recessed under the
frame
of rhe camper at the rear corn-
ers.
To swing the
jacks
into operacing position, reach under the camper,
grasp the jack body and ~ushaway from you. Then pivot the jack down and
allow it
to
spring into locked position. (To return to travel position, pull
down on
the
jack and pivot
it
back under the camper). Slide the jack foot
to ground level and take jack handle, flat end, insert rhru jack, applying
pressure downward to raise. To release, insert jack foot into catch and
raise.
CANVAS:
Sometimes dirt can
be
removed
with
a
dry soft
bristle
brush, or
use warm, mild soapy water to clean canvas. Apply with a damp cloth
or
sponge. Rinse with cool water and allow
to
dry
thoroughly. (Harsh deter-
gents or solvents will remove water repellency). Be sure that canvas is
dry for closed trailer storage, or when traveling, do not have trailer closed
with damp canvas for more than
24
hours, because mildew
will
develop and
cause the canvas to rot.
VINYL:
The white vinyl ends are the same material
as
convertible car
cops,
and
can be washed likewise. The clear vinyl windows need to be
cleaned with a soft cloth to keep from scratching the soft material.
VENTILATION:
Certain weather and atmospheric conditions, i.e. (high
humidity,
warm
inside
tent temperatures and low outside temperatures), will
cause the vinyl portions of the rent to sweat. This condition cap be over-
come by unzipping the windows and providing moderare ventilation.

UPHOLSTERY:
This fabric meets the code
302
fire retardant standard.
The cushion covers and draperies are made of high quality fabric which
is
treated with "Scotchgard".
To
keep them at their best, vacuum, brush, or
blot away loose dirt, spills and stains before they become embedded and
more difficult to remove.
DO NOT
remove rhe covers from the cushions.
DO
NO?'
dry-clean or wash by hand
or
machine.
The vinyl side of the cush-
ions may be cleaned wi'th a foam, vinyl cleaner or hand scrubbed with water
and
a
detergenr
HITCH:
(2"
ball) Be sure that the coupler tongue
is
properly latched un-
der the ball, and not only sitring on top of the ball. Also, have some spring
tension on the latch, which can be adjusted by turning the nut on underside
of
coupler.
NEW RUB-R-RIDE
-
SUSPENSION SYSTEM:
There
is
no maintenance to
the axle.
A
step is no longer necessary with the
RUB-R-RIDE
axle.
TABLES:
To convert into beds, fold the support leg under
the
table top,
raise the table top
until.
the wall fastening disengages and place table
be-
tween the seats on the ledges provided.
WATER SYSTEM:
Fill
the
tank through the cup-shaped receptacle out-
sidethecamper. Water inthe tank is pumped into the sink with
a
Fomp pump,
except when equipped with a
12
volt electric pump. When equipped with
an
electric pump, the fump pump comes equipped with a built-in
12
volt
pump
switch. Pull handle up to activate
pump.
Be
sure
12
volt pump is connect-
ed to a
12
volt power supply. Drain
12
volt water pump to prevent freeze
damage. Standard Finch mode[ has no water system.
CITY WATER HOOK-UP:
Attach hose to the connection on the outside
of the camper, and then use the faucet.
ICE
BOX:
Piace ice in the top tray, and a small tube will drain the melt-
ed ice water ourside
of
camper.
110
VOLT
ELECTRICAL SYSTEM:
This is a +wire manual reset breaker
system with the standard electrical color code as follows: Black/hot,
White/neutral, Bare ~ire/~round.
The electrical box
is
located in the front
left bunk. This is typical of rhe foIlowing models: Cardinal, King, Swift,
Eagle,
Hawk,
Robin, Thrush and Finch Deluxe.
12
VOLT POWER CONVERTER SYSTEM:
The power converter
is
supplied
with
110
volts through one
of
the manual reset: breakers. The power convert-
er supplies power for the ceiling light and the water pump. The Cardinal
and the Finch models have no power converter.
BATTERY PACK SYSTEM:
The Cardinal
is
equipped with a battery pack
to operate the water pump
and
the ceiling lights. The Cardinal comes equip-
ped with a
2
amp charger.
L
P
GAS SYSTEM:
The tubing and connections were checked
at
the fact-
ory with
LP
gas, but,
it
would
be
wise to re-check the connections after
installing the
LP
gas botcle. Use a
soap
solution around the joints to check
for leaks. The Standard Finch has no gas system.
EXTERIOR ALUMINUM:
Can
be
cleaned and waxed, same as any auto-
mobile finish.
LOADING:
Be certain to load within safe load capacity limits. Too light
of
a
tongue weight will cause trailers
to
sway while towing.

WtRlNG CODE:
White
-
Ground
Green
-
Right turn signal
Red
-
Left turn signal
Brown
-
Clearance lights
Black
-
12-volt interior light
Yellow
-
Back-up light
WIRING CODE:
(For
U.S.
and Canadian trailers after January
1,
1973).
Whire
-
Ground
Green
-
Clearance Lights
Red
-
Left turn signal
BIack
-
~~-voIEinterior light
Brown
-
Right turn signal
Yellow
-
Back-up light
RUNNING GEAR:
Check tire inflation.
A.
-
18/850
x
8
(P.
S.
I.
-45)
Finch only
B.
-
ZO.5/8OO
x
10
(P.
S.
i.
-50)
Check wheel lug bolts to be sure that
they
are
right.
Check wheel bearings to see
if
they are properly iubricated.
Check axle mounting bolts and nuts.
Be sure to check every
item
after
the
first
500
miles
and
after every 1000
ides,or twice during the season.
CHANGE TIRE:
While wheel
is
on ground, loosen wheel lugs, one at
a
time, driving forward each rime the lugs are on the lower side. Turn front
jacks down as fnr as you can, then lower rear jacks
as
far
as you can, next
turnfront jack ashigh as possible. This will lift the wheels from the ground.
Wheels need to be removed by sliding
the
bottom side of wheels towards the
center of che trailex instead of away from the trailer.
INSTRUCTIONS
FOR
SANITIZING
PORTABLE WATER
SYSTEMS
OF
RECREATIONAL
VEHICLES:
To assure completc sanitation of
your portable water system, it is recommended
that
the following pro-
cedures
be
followed on a new system, one that has nor been used for
a period of time, or one that may have become contaminared:
Prepare a chlorine solution by using one gallon of water and
%
cup
of Chlorolr or Pu~exhousehold bleach
(5%
sodium hypo-
chlorite solution). Pour one gallon of this solution into the
tank
for
each
15
gallons of tank capacity.
Complete filling of tank with fresh water. Open each faucet
and drain cock until all
air
has been released from the pipes
and the entire system is filled.
Allow to stand for three hours.
Drain and flush with potable fresh water.
To remove any excessive chlorine taste or odor which may re-
main, prepare a solution of one quart of vinegar to five gallons
of water and allow this solution ro agitate
in
the tank for sever-
al days by vehicle mocion.
Drain tank and again flush with potable water.

STANDARD SPEC1FICATIONS
'~vailable
onJAYCARDINAL only
listed includes units equipped with heater and refrigerator.
%eight
may vary
f
5%
dependingon
gas
and water fill.
411'
9" Measurement
raised
width, instead
of
raised length.


This manual suits for next models
9
Table of contents
Other Jayco Utility Vehicle manuals

Jayco
Jayco jay 2016 series User manual

Jayco
Jayco Eagle User manual

Jayco
Jayco Eagle User manual

Jayco
Jayco 2012 OCTANE SUPER LITE User manual

Jayco
Jayco 2009 Recon ZX User manual

Jayco
Jayco 2009 Octane ZX User manual

Jayco
Jayco Kiwi User manual

Jayco
Jayco Heritage User manual

Jayco
Jayco 2005 Talon ZX User manual

Jayco
Jayco 2008 Octane ZX User manual