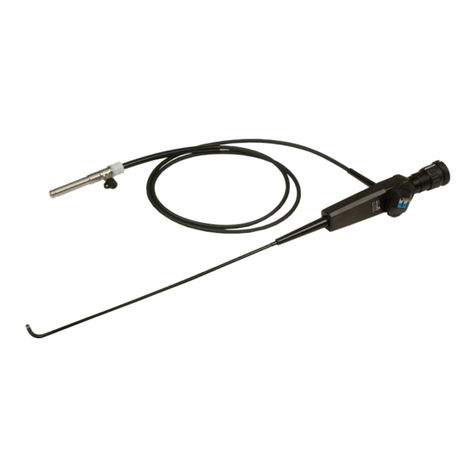
Jedmed Ergo-Flex User manual

Operating / Service
Manual
An Employee-Owned Company
IMPORTANT: Read all instructions before assembling or using this device.
Instructions for Use
Laryngo-Nasopharyngoscope
49-4930 EF-N (Ø3.4mm)
49-4928 EF-N Slim (Ø2.8mm)
Ergo-Flex

COPYRIGHT © 2013 JEDMED Instrument Company
All rights reserved.
pmnl117
Rev. 3
12-2015
For decades, JEDMED Instrument Company has built its reputation on principles
of quality, integrity, innovation and value. Continuous research and development
coupled with exceptional customer service and a world-class quality system has
placed JEDMED as an industry leader.
As always, our focus remains on you, our valued customer. Building rewarding
and lasting relationships is the cornerstone of JEDMED's business philosophy.
JEDMED is committed to delivering reliable and cost-effective solutions to
medical professionals everywhere.
The employee-owners of JEDMED would like to take this opportunity to thank
you for all your support. We are pleased and proud to serve the ever-changing
medical community.
Sincerely,

3
Ergo-Flex Operating / Service Manual
Precautions (general).................................... 4
Description & Indications for Use.................. 5
Contents........................................................ 5
Parts Identication......................................... 6
Device Operation
Connections.......................................... ..7
Focusing...................................................8
Angulation & Video Connection....................9
Light Source Risks.................................. 10
List of Warnings .................................... 11
Functional Test Before Using ....................12
Ventilation Cap & Leak Testing.......................14
Cleaning / Disinfection.................................. 17
Maintenance / Storage / Transport................19
Reorder Information...................................... 20
Specications............................................... 21
Approved Disinfectants & Detergents........... 22
Section Page
OPERATION
SERVICE
OPERATING
Information ................................................... 24
Troubleshooting............................................ 27
Note: Specications subject to change without notice.
CONTENTS
CONTENTS

Ergo-Flex Operating / Service Manual
4
The following conventions are used throughout this manual:
- Allow operation only by qualied personnel.
- Do not leave device(s) operating while unattended.
- Scope is shipped in a non-aseptic condition. Scope must be cleaned and
disinfected before use.
- Always use "Universal Precautions" when handling potentially infectious material.
- Always clean and disinfect endoscopes between patients.
- All beroptic light sources should be medical-grade, electrically isolated, and not
pose a heat risk to the patient.
- Ergo-Flex beroptic bundles are very fragile. Use care cleaning, handling and storing.
- When using beroptic light sources, keep ammables away from light port,
beroptic cable ends and endoscope tip.
- Disconnect from power before cleaning, servicing or storing.
- All cleaning and disinfecting should only be performed by appropriately-trained individuals.
- Do not allow liquid to enter any part of this device.
Safety Precautions
(general)
Alerts user to the possibility of PERSONAL INJURY.
WARNING
!
Alerts user to the possibility of DAMAGE to the EQUIPMENT.
Alerts user to PERTINENT FACTS or CONDITIONS.
CAUTION
NOTE
PRECAUTIONS
Additional Precautions and Warnings are found on
page 11 and throughout this manual.
This manual covers operation of this endoscope and is
not a substitute for working-knowledge of the physician.
NOTE
Federal (USA) law restricts this device to sale
by or on the order of a physician.
CAUTION

5
Ergo-Flex Operating / Service Manual
CONTENTS
Any shipping damage should be documented and
reported immediately to the carrier or JEDMED.
NOTE
DESCRIPTION & INDICATIONS FOR USE
System: EF-N Slim (2.8mm diameter)
Qty Item Item No.
1 49-4928 Scope (EF-N Slim)
1 49-4980 Leakage Tester
1 49-4985 Ventilation Cap
1 49-4172 Karl Storz Adaptor
1 49-4170 Wolf Adaptor
OR
Carefully unpack all components. Verify contents and inspect for shipping damage.
Refer to next page for illustrations.
System: EF-N (3.4mm diameter)
Qty Item Item No.
1 49-4930 Scope (EF-N)
1 49-4980 Leakage Tester
1 49-4985 Ventilation Cap
1 49-4172 Karl Storz Adaptor
1 49-4170 Wolf Adaptor
Ergo-Flex laryngo-nasopharyngoscope is also referred
to as “device”, “instrument” and/or “scope” throughout
this manual.
NOTE
JEDMED’s Ergo-Flex laryngo-
nasopharyngoscope is a exible beroptic
endoscope designed for examining the
larynx, nasal cavity and nasopharynx. These
areas encompass the upper respiratory tract
from the nasal passages to the vocal chords.
Ergo-Flex scopes are intended to be used by
ENT physicians in an ofce setting for routine
ENT procedures.
Ergo-Flex is available in two sizes: the
3.4mm standard insertion tube diameter
(EF-N) and the 2.8mm diameter size for
pediatrics (EF-N Slim). The ergonomic
shape of this scope creates a well-balanced
instrument, maximizing user comfort.
Ergo-Flex contains a high ber-count image
bundle producing exceptional, high-resolution
images which are large, sharp and bright.
An industry-standard “B-cup” endoscope
eyepiece allows the user to look through the
scope, directly, or to indirectly observe the
eld by attaching an optional video camera
and endoscope coupler. Unsurpassed light
transmission also makes this scope ideal for
stroboscopic examinations.
Ergo-Flex is a quality-designed and
manufactured medical device. Given
reasonable care, this product will provide
many years of trouble-free service.

Ergo-Flex Operating / Service Manual
6
PARTS IDENTIFICATION
EF-N EF-N Slim
beroptic cable
image bundle
Handle
Leakage
tester connector
Fiberoptic cable
connector Control lever to
bend the distal tip Focus
ring
Eyepiece
Insertion tube with
bendable distal tip
Features
Package Contents
Scope Leakage Ventilation Karl Storz Wolf
Tester Cap Adaptor Adaptor
(attached to scope) (attached to scope)

7
Ergo-Flex Operating / Service Manual
DEVICE OPERATION - Connections
Basic Connections
1. Connect suitable beroptic cable to Ergo-Flex.
Scope will accept Karl Storz, Wolf or ACMI (see bottom of page)
2. Connect other end on beroptic cable to suitable
beroptic light source.
Use only medical-grade beroptic light sources and
light cables to assure patient safety. See page 10-11.
Warning
!
Karl Storz adaptor (removable)
Wolf adaptor (removable)
ACMI port (xed)
1.
2.
3.
Light Port Adaptors
Fiberoptic Light
Source
(medical grade)
. . .
. . .
Type BF, medical-grade
Electrically isolated from patient
beroptic cable
Simply screw adaptors on
or off by hand.
Fiberoptic Connection
1
2
3

Ergo-Flex Operating / Service Manual
8
DEVICE OPERATION - Focusing
Scope is not aseptic, as received. Scope MUST be cleaned
and disinfected before initial and every use.
WARNING
!
Users wearing glasses or contact lenses
(corrected vision)
Users who remove glasses or contact lenses
(uncorrected vision)
Rotate focus ring to achieve
sharpest image.
Note: Focus settings will vary with each, individual user.

9
Ergo-Flex Operating / Service Manual
DEVICE OPERATION - Angulation
Hold scope comfortably in hand. Use thumb
to gently rock articulation lever forward and
backward. Observe corresponding angulation
of the scope distal end. Movement should be
smooth and symmetrical.
Articulation
Lever
Angulation at
distal end
DEVICE OPERATION - Video Cameras
Standard B-cup
eyepiece
Clip to endocoupler
with camera.
To connect scope to a video camera, rst
connect video camera to any standard
endocoupler. Next, connect the endocoupler
to the scope at the common B-cup eyepiece
interface. Rotate focus ring to align its dot to
dot on scope body. Focus as needed using
focus ring on endocoupler.
Connection
Moiré effects may occur whenever a ber
scope is viewed on a video camera. It displays
as an odd, interference pattern on the video
monitor. Moiré results from the pattern of the
image bers, aligning with the pattern of pixels
on the image chip of the camera.
To minimize moiré effects, rotate endocoupler
slightly on eyepiece of scope to un-align bers
with pixels. Slightly defocusing the image may
also be effective.
Moiré
All video cameras should be medical grade!

Ergo-Flex Operating / Service Manual
10
DEVICE OPERATION - Light Source Risks
Background
High-intensity light sources used for endoscope
illumination may pose multiple risks to the patient
and/or user. Primary risks include patient burns, re
and electrical shock. It is important to understand
and limit these risks in all cases.
Many types and manufacture of fiberoptic light
sources are readily available. Common types include:
halogen (incandescent), light-emitting diode (LED),
metal-halide, and xenon-arc. In general, all light
sources and cables must be medical-grade to ensure
patient safety.
Heat / Burn Hazards
Each light source emits different amounts of heat
associated with the light, depending on the nature
of the light and type of construction. LED sources
typically emit the least heat, while xenon-arc sources
generally emit the most.
Emitted light may cause the tip of the scope to heat,
at times, signicantly. Additionally, the emitted light
may be absorbed by tissue or material upon which it
is shining, also causing signicant heating. Broken
or missing heat lters, incorrect lamps in sources
and beroptic cable diameter can also affect heat at
the distal tip.
Before use, be sure to test any light source with the
scope to determine that the tip temperature remains
as cool as possible (ideally under 41ºC/106ºF) and
that the emitted light does not cause excessive
heating of tissue. Tip temperatures exceeding
41ºC/106ºF may be allowable, in some instances,
depending on location of viewing, type of tissue
contact and duration of use, among others.
In all cases, it is imperative to assure that tip heat
and/or emitted light does not cause an unacceptable
risk to the patient or user.
Due to the extreme nature of arc-lamps, JEDMED
does not recommend using xenon-arc sources with
this endoscope.
Fire Hazards
Along with patient burns, extreme light output at the
tips of endoscopes can also be a re hazard. Always
keep scope tip away from ammable materials and
turn off light source when not in use.
Never leave light operating while unattended.
Electrical Shock Hazard
Leakage current is always present on some level
in mains (ac) powered equipment. In some cases,
leakage current can be felt by the patient as a tingling
sensation on sensitive tissue such as mucus-lined
nasal passages. To minimize any possibility of
macro or micro shock from beroptic light sources, all
sources and beroptic cables used must be Type BF
and medical-grade. BF indicates that each device is
“oating” and not electrically connected to the patient
in any fashion.
Explosion Hazard - Do NOT use in the presence of
ammable anesthetics!
WARNING
!

11
Ergo-Flex Operating / Service Manual
DEVICE OPERATION - List of Warnings
WARNING -
!
Endoscope tip may become hot depending on the particular beroptic light source used.
ALWAYS test tip temperature and heat emitted from scope tip before use. ALWAYS ensure
either condition does not cause an unacceptable risk to the patient or user.
WARNING -
!
High-intensity, radiated light may be transmitted from the light emission window at the front of
the scope. To minimize potential heat-related issues, ALWAYS observe the following:
WARNING -
!
In the event of a scope malfunction (example: loss of light or angulation function) ALWAYS terminate
examination as soon as possible and carefully remove scope from patient so as to minimize any risk
or harm to the patient.
• Turn off or minimize light source intensity when scope is not in use.
• Before use, always test temperature of light emitted from scope tip
to determine adequacy.
• Do not allow light emitted from scope tip near sensitive tissue or
near ammable objects.
• Do not use more light than required to complete the task at hand.
• Do not leave light source operating while unattended.
WARNING -
!
ALWAYS verify any beroptic light source used contains the manufacturer’s specied lamp and any
associated optical lters.
WARNING -
!
This endoscope is intended to be “oating” or electrically isolated from any other equipment it is attached
to. In order to achieve this, any beroptic light sources, video cameras or other equipment attached
to the scope MUST be medical-grade and type BF (oating or electrically isolated connections). In
addition, ALWAYS use an isolated beroptic cable (never use a beroptic cable which contains an
internal, metal monocoil sheath or other means to electrically connect the two ends of the cable).
WARNING -
!
Before each use, ALWAYS inspect outer surface of scope to ensure there are no unintended rough
surfaces, sharp edges or protrusions which could cause harm.
WARNING -
!
When using a video camera on this endoscope, ALWAYS verify a live video image is being observed (as
opposed to a stored image in memory) before beginning an examination. Likewise, after storing a video
image in memory, always verify a live video image is being observed before continuing examination.
WARNING -
!
NEVER use this endoscope (or any high-frequency cautery or endotherapy device) in the presence
of ammable or explosive concentrations of medical gases or anesthetics.
WARNING -
!
All electrical equipment connected to this equipment will produce patient leakage currents which are
additive.
WARNING -
!
In the case where this endoscope is used along with LASER equipment, ALWAYS observe all pertinent
safety precautions governing laser devices including, but not limited to:
• User should wear suitable, laser-ltering, eye protection.
• Never shine a laser beam directly into any person’s eye(s)
WARNING -
!
Before using with accessories or other endoscopic devices, check compatibility of this scope with the
criteria for safe use as dened in the equipment’s instructions for use.

Ergo-Flex Operating / Service Manual
12
Leak test scope to verify no leaks
(pages 14-15)
Clean and disinfect scope
(page 17)
Check Scope Functions
1. Connect scope to light source
(pages 7, 10)
2. Look through scope to observe bright, clear image.
3. Move articulation lever and observe corresponding
movement of angulation section.
4. Inspect insertion tube and distal tip to verify both
are smooth and unblemished.
5. Test eyepiece focus adjustment.
6. Place scope near representative (anatomical)
target and verify colors observed by naked eye
under ambient light appear consistent with those
observed through scope using intended beroptic
illumination.
7. Verify high-intensity light exiting distal tip windows
is cool so as not to burn patient.
Scope is now ready for use.
Before Use:
DEVICE OPERATION - Functional Test Before Using
Ergo-Flex must be cleaned and disinfected
before each use.
Warning
!

13
Ergo-Flex Operating / Service Manual
Blank

Ergo-Flex Operating / Service Manual
14
DEVICE OPERATION - Ventilation Cap
1. Check venting connector - ensure connector had no scratches, defects or residues
2. Check leak tester - check for cracks, scratches, defects or residues.
- squeeze hand pump bulb (verify air exits connector)
Check Components
Tester connection cap
Air should exit here
Hand pump
DEVICE OPERATION - Leak Testing
To avoid damage to scope, perform leak test
before every cleaning, disinfection, sterilization or
immersion in any liquid.
CAUTION
A ventilation cap is used to open an airway to the inside of
the scope. When the cap is connected to the scope, internal
and external atmospheric pressures are allowed to equalize.
Pressure equalization is required when transporting the scope
via air-cargo or if placing scope in any low-pressure chamber.
Without venting, internal scope pressure could cause insertion
tube sheath to expand and rupture.
Installing ventilation cap:
- Align cap to connector on scope.
- Gently push inward while turning 1/8 turn.
Reverse procedure to remove cap.
Ventilation cap will allow uids to enter scope.
Ventilation cap MUST be removed from scope
before immersing scope in any liquid.
CAUTION
Scope is vented when
ventilation cap is installed.
Overview
1 - Instruction Card
2 - Ventilation Cap
3 - Leak test connector

15
Ergo-Flex Operating / Service Manual
DEVICE OPERATION - Leak Testing (continued)
1. Connect leak tester connection to scope (align pin to notch, push inward rmly, gently turn 1/8 turn
clockwise). This creates an air-tight connection.
2. Squeeze hand bulb slowly until pressure on gauge reads 160 mmHg. Do not over-inate.
Note: Angulation section of insertion tube (rubber sleeve) normally bulges slightly
while inated.
3. Observe gauge. If pressure reading drops more than 10 mmHg within 1 minute, DO NOT USE;
scope must be returned to JEDMED for service (see page 25).
If pressure remains constant after 1 minute, instrument passes leak test.
Connection MUST be dry
before connecting!
160 mmHg
(do not exceed!)
Pump to inate
If pressure drops more than 10
mmHg within 1 minute, scope fails!
(DO NOT USE - contact JEDMED)
1) Connect Tester to Scope
2) Observe Pressure After 1 Minute 3) Disconnect Tester
1. Push lever to
release pressure
2. Turn 1/4 turn counter-clockwise
and withdraw.
Procedure

Ergo-Flex Operating / Service Manual
16
Blank

LEAK TESTING
Step 1
PRE-CLEANING
Step 2
1. Wipe Insertion Tube
and distal tip immediately
after removal from patient
using alcohol wipe.
2. Remove All Parts
Fiberoptic cable
Fiberoptic adaptors
Video equipment
3. Perform Leak Test (dry)
Attach leak tester to scope
Pump up to 160mmHg
Wait one (1) minute
If pressure falls more than
10mmHg in one (1) minute
scope fails.
Do not use (contact JEDMED)
If scope passes go to Step 2
Clean scope immediately after use.*
Do NOT allow debris to dry on scope.
Remove all Loose
Material Deposits
Hold scope under lukewarm,
running tap water.
Gently wipe with cloth from
scope body to distal tip.
Concentrate on insertion
tube and distal tip windows.
Do not twist insertion tube!
Use soft toothbrush or similar
on difcult areas.
Rinse thoroughly.
Pat dry** with cloth.
Immediately go to Step 3
CLEANING
Step 3
1. Prepare Enzymatic
Detergent / Clean Scope
Follow manufacturer’s
instructions carefully.
Do not over-dilute or under-dilute.
Completely immerse scope in
detergent bath.
Brush and wipe scope until no
visible debris remain.
Continue brushing/wiping for two
(2) additional minutes.
Pay special attention to insertion
tube, distal tip windows, heavily
soiled areas and physician contact
areas.
2. Rinse Thoroughly
Immerse scope in clean basin
of fresh, lukewarm tap water.
Agitate gently. Remove and
rinse under lukewarm running
tap water. Rinse until all
detergent has been removed.
3. Dry Thoroughly
Dry with medical-grade forced air
until completely dry**.
4. Re-Inspect
Visibly re-inspect and re-clean if
any debris is found.
DISINFECTION
(High-Level)
Step 4
1. Fully Immerse Scope
in high-level disinfectant solution.
Follow manufacturer’s
instructions carefully.
Allow scope to soak specied
time (use timer).
Remove scope from disinfectant.
2. Rinse Thoroughly
Immerse in basin of sterile or
clean tap water. Agitate gently.
Discard water. Repeat above
two (2) additional times. Rinse
until all disinfectant has been
removed.
3. Dry Thoroughly
Dry with medical-grade forced air
until completely dry**.
4. Functionally Test Scope
ENZOL® Enzymatic Detergent
Do NOT use ultrasonic cleaner!
STORAGE
Step 5
1. Assure Scope is
Completely Dry
2. Store Scope
in a covered drawer,
enclosed storage cabinet or
original storage case. Area
should be well-ventilated and
dust-free.
Keep insertion tube and
angulation section straight.
Cleaning / Disinfecting Procedure
Ergo-Flex Laryngo-Nasopharyngoscopes
* Note: Clean scope immediately after use. Do NOT allow bio-materials to dry on scope, as cleaning is much more difcult. Residual bio-burden signicantly decreases effectiveness of disinfectants.
Effective cleaning is the most important part of the disinfection process.
** Note: Drying is critically important to minimize formation of biolm. Biolm will form on any surface containing non-sterile water. Biolms signicantly decrease effectiveness of disinfectants.
ENZOL®, CIDEX® and CIDEX®OPA are registered trademarks of ADVANCED STERILIZATION PRODUCTS, Division of Ethicon Inc., a Johnson & Johnson Company.
Steris 1E®is a registered trademark of STERIS Corporation.
www.JEDMED.com
314-845-3770
Steris 1E®Processing
1. Disinfect / Rinse Scope
Follow manufacturer’s
instructions carefully.
2. Dry** Thoroughly
Dry with medical-grade forced air
until completely dry**.
3. Functionally Test Scope
All cleaning and disinfecting to be
performed only by appropriately-trained
individuals.
Always use “Universal Precautions”
and protective attire when working with
potentially infectious material.
Only the aforementioned methods and
products have been validated. Do not
deviate.
All cloths and brushes should be clean,
lint-free and single-use.
Be particularly careful not to damage
ber bundle or optics while cleaning.
Refer to Ergo-Flex Instruction Manual
for additional information.
Effective cleaning and disinfecting is
absolutely required to avoid cross-
contamination between patients.
12-2015 Rev 2 Copyright © 2013 JEDMED Instrument Company All rights reserved.
Read and follow these
instructions completely!
CIDEX®2.4% CIDEX®OPA
Activated Dialdehyde
STERIS®Revital-OxTM Resert®
High-Level Disinfectant
(USA-Australia-New Zealand-
Europe-Middle East)

Blank

19
Ergo-Flex Operating / Service Manual
MAINTENANCE - STORAGE - TRANSPORT
This device is maintenance-free.
Maintenance
Instrument should be transported only in its original packaging. In the event of transporting
via airlines, make sure to install the ventilation cap onto the connection port for the leak
tester. This opens the scope sheath to allow pressure equalization and guard against the
sheath bulging due to reduced atmospheric pressure. Refer to page 14.
Transport
Scope and accessories should be thoroughly cleaned, disinfected, and dried before storing.
Keep the instrument lying at or hanging with the insertion tube and the angulation tip
straight. Store instrument in transport case or hanging, with dust protection.
Light cable should be loosely coiled.
Storage area should be dry, well-ventilated, and maintain a temperature of 64-73ºF / 18-22ºC.
Storage
If transporting by airlines, scope must have
ventilation connector installed. This allows pressure
to equalize and avoids damage to insertion tube.
CAUTION

Ergo-Flex Operating / Service Manual
20
For additional information or to order replacement parts contact your Regional Sales
Representative or JEDMED Technical Service. Refer to inside of back cover.
Contact Information
Refer to the assembly drawings located at the back of this
manual for replacement parts.
NOTE
Replacement / Accessory Items
Order #Description
49-4980 Leakage Tester
49-4985 Ventilation Cap
49-4172 Karl Storz Adaptor
49-4170 Wolf Adaptor
49-4104 ACMI / OLYMPUS Adaptor for beroptic cable (light source end)
49-4990 Carrying Case
99-8056 Fiberoptic cable: Karl STORZ instrument and light source ends
99-8090 Fiberoptic cable: STORZ instrument (90º end) and WOLF extended light source end
99-8060 Fiberoptic cable: Universal (selectable ends)
REORDER INFORMATION
This manual suits for next models
2
Table of contents
Other Jedmed Medical Equipment manuals
Jedmed
Jedmed PHOENIX III User manual
Jedmed
Jedmed Classic CSC ENT Instruction and safety manual
Jedmed
Jedmed Horus Scope User manual
Jedmed
Jedmed Horus Scope 3 Series User manual
Jedmed
Jedmed Omni-Steth User manual
Jedmed
Jedmed Combo 50 User manual
Jedmed
Jedmed S-II Plus Instruction and safety manual
Jedmed
Jedmed MACHIDA User manual
Jedmed
Jedmed api OS1 Service manual
