manuals.online logo
Brands
  1. Home
  2. •
  3. Brands
  4. •
  5. Jenn-Air
  6. •
  7. Oven
  8. •
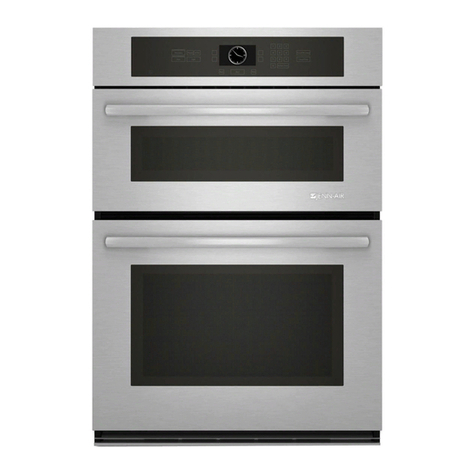
  9. Jenn-Air EXPRESSIONS WW30430S User manual

Jenn-Air EXPRESSIONS WW30430S User manual

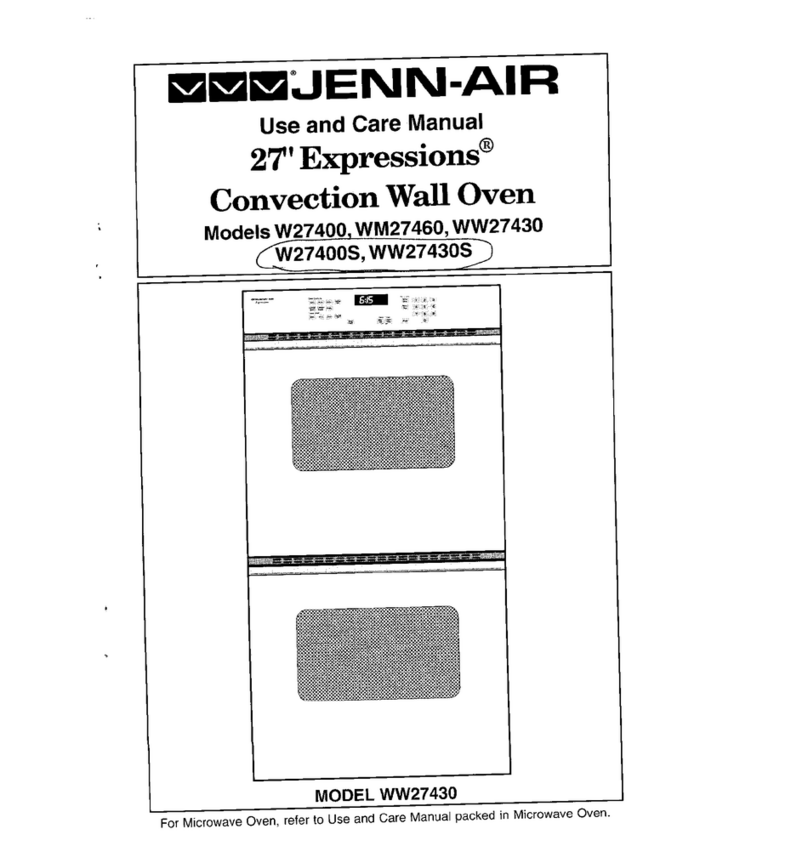
LIENN-AI!
Use and Care Manual
30" Expressions ®
Convection Wall Oven
Models W30 _30430
W30400S, WW30430_ (
MODEL WW30430
For Microwave Oven, refer 1o Use and Care Manual packed in Microwave Oven.
CongratulationsonyourchoiceofaJenn-Airwalloven.YourJenn-Airconvectionoven
combinesthebestoffourcookingmethods:conventionalbakingorroasting,convection
baking,convectionroasting,andbroiling,inaself-cleaningoven_
TheJenn-Airconvectionovenisactuallyaconventionaloventhatcirculatesheatedair
withintheoven.Asbothbakeandbroilheatingelementscycleonandoffwiththe
thermostat,afankeepstheheatedaircirculatingaroundthefood.Theconstantly
recirculatingheatedairintheconvectionovenstripsawaythelayerofcoolerair that
surroundsfeod. Consequently, many foods cook more quickly. Distributed heat makes
multiple rack cooking possible. Convection roasted meats retain their natural flavor and
juiciness with less shrinkage than conventional roasting.
Before you begin cooking with your new oven, please take a few minutes to read and
become familiar with the instructions in this book. On the following pages you will find
a wealth of information regarding all aspects of using your new oven. By following the
instructions carefully, you will be able to fully enjoy and properly maintain your oven and
achieve excellent results with the food you prepare.
Shoutd you have any questions about using your Jenn-Air oven, write to us. Be sure
to provide the model number.
Jenn-Air Customer Assistance
c!o Maytag Customer Service
P.O. Box 2370
Cleveland, TN 37320-2370
Model Number
Serial Number (numbers appear on the serial plate on the even front frame)
Date Purchased
JENN-ALR DEALER FROM WHOM PURCHASED
Address
City
Phone
Baking
Baking Chart ................................................................................................ 15
Causes of Cake Failure ............................................................................... 16
Convect Baking ...........................................................................................
Convect Cooking on Multiple Racks ............................................................ 17
Generat Recommendations ......................................................................... 14
Before You Call For Service ....................................................................... 35-36
Broiling
Broiling ......................................................................................................... 26
Broiling Tips ................................................................................................. 27
Broiling Chart ............................................................................................... 27
Caring for Your Oven
Adjust Oven Temperature ........................................................................... 34
Child Protection Lock ................................................................................... 34
Cleaning Other Surfaces ............................................................................. 32
Oven Light Bulb Replacement .................................................................... 33
Cleaning
Self-Cleaning Process28-32
Clock Controls
Clock Controlled Baking or Roasting ...................................................... 12-13
Time of Day Clock ........................................................................................ 10
Timer ........................................................................................................... 11
Oven Operation
Oven Control Panel ........................................................................................ 6
Rack Positions ............................................................................................. 9
Setting Controls ............................................................................................. 8
Probe ........................................................................................................... 22-25
Roasting
Conventional Roasting Recommendations18
Convect Roasting ................................................................................... 19-21
Frozen Convenience Foods ......................................................................... 21
General Roasting Recommendations .......................................................... 18
Roasting Chart ............................................................................................ 19
Safety Precautions .......................................................................................... 4-5
Read before operating your oven
All appliances - regardless of the manufacturer - have the potential through
improper or careless use to create safety problems. Therefore the following
safety precautions should be observed:
1. Be sure your appliance is properly installed and grounded by a qualified
technician.
2. Never use your appliance for warming or heating the room.
3. Children should not be left alone or unattended in area where appliance
is in use. They should never be allowed to sit or stand on any part of the
appliance.
4. Wear proper apparel. Loose-fitting or hanging garments should never be
worn while using the appliance.
5. Do not repair or replace any part of the appliance unless specifically
recommended in this manual. All other servicing should be referred to an
authorized Jenn-Air Service Contractor.
6. Flammable materials should not be stored in an oven.
7. Do not use water on grease fires. Smother fire or flame or use dry
chemical or foam-type extinguisher.
8. Use only dry potholders. Moist or damp potholders on hot surfaces may
result in burns from steam. Do not let potholder touch hot heating
elements. Do net use a towel or other bulky cloth.
9. Use care when opening oven door. Let hot air or steam escape before
removing or replacing food.
10. Do not heat unopened food containers. Build-up of pressure may cause
container to burst and result in injury.
11. Keep oven vent ducts unobstructed.
12. Always place oven racks indesired location while oven is coot. If rack must
be moved while oven is hot, do not let potholder contact hot heating
element in oven.
13. Do not clean door gasket. The door gasket is essential for a good seal.
Care should be taken not to rub, damage, or move the gasket.
14. Do not use oven cleaners. No commercial oven cleaner or oven liner
protective coating of any kind should be used in or around any part of the
oven,
15. Clean only parts listed in this manual.
16. CAUTION: BEFORE SELF-CLEANING THE OVEN, REMOVE FOOD,
BROILER PAN AND OTHER UTENSILS.
The control panel is designed for ease in programming. The Display Window features
Indicator Words which will flash to prompt you for the next step.
To program
1. Touch the function pad to give command desired.
2. Touch the appropriate number pads to enter time or temperature.
Note: Five seconds after entering the number, the time or temperature will
automatically be entered. If more than five seconds elapse between touching a
function pad and touching a number pad, the control is not set and Display will return
to previous Display.
U#p_t Oven
L_f O_e_ .............
Function Pads
!i!!iiii_!iiii!;;i!;i;!i;;
_a_'_: i
";_- !_"-_i! i!!_ii !i!i_i![_" ......
Use for conventional baking or roasting.
Use for top browning or oven broiling.
Use to set self-cleaning process.
Cancels all programming except Timer.
Use for conveet baking.
Use for convect roasting.
Use to set desired internal temperature when using Probe.
Use to turn oven light on and off.
Use for clock controlled cooking and cleaning when delayed start is desired.
(For lock function see page 34,)
Use for clock controlled cooking.
(For lock function see page 34.)
Use to signal expiration of a time period up to 11 hours and 55 minutes.
Use to set time of day.
6
Number Pads
Use to set time or temperature.
Oven Light Pad (Control Panel)
The oven light automatically comes onwhenever the oven door isopened. When door is closed, touch
the Oven Light Pad to turn oven light on or off. Note: A beep will sound every time the Oven Light
Pad istouched.
Display Window
Shows time of day, timer, and 88_8 8
oven functions. 1888: 888:
_IJlV BME ROUT _BNV BAKE BOnf
DELAY START CORK TIMED CL_D 8BDIL CLEANBROIL
Display Numbers: STOP TIMER m_ []O!OVEN LOCK PKEHEA! _LOCK PREHEAT
•Show time of day.
•Countdown of time remaining when using time functions.
• Show temperature of oven as it rises to reach programmed temperature and the set tempera-
ture once it is reached.
•Recatl programmed temperature or time when commanded.
•Rounding of Display Numbers: Temperature range is 100° to 550°F and can be set in 5°
increments. When setting temperature, the controt will round it to the nearest t 0°, For example,
if 237 ° is entered, the control wi!l round the temperature to 240_.
Prompts:
•Serve as a reminder to shut oven door, if it is open, for self-cleaning operation when the word,
door, is displayed.
•"Err" will appear in the Display when an improper temperature or time has been entered. "Err"
will flash and a beep will be heard three times. Then, the Display will return to the previous
Display before the error was entered.
Indicator Words:
• Flash to prompt next step.
• Indicate status of programmed function.
• Show programmed function when recalled.
• Show oven selected. U - is the upper oven; L - is the lower oven. (Model WW30430)
Chimes vs. Beeps
•A chime sound is used to designate the end of a timing or cooking operation.
• A beep sound will be heard when any pad is touched. A series of short beeps are used to
designate an incorrect entry, door is open when set for a self-clean, probe needs to be removed
and a fault code.
End of Cycle Chimes:
• The end of cycle chimes is four short chimes followed by "reminder" chimes for a specified
length of time, until you cancel that function. For the Timer function, there are two "reminder"
chimes every 30 seconds for five minutes. For the Timed Cook, functions there is one
"reminder" chime every minute for ten minutes. To cancel these "reminder" chimes, touch the
appropriate pad again (either the Timer Pad or Cook Time Pad). You may also touch the
Cancel Off Pad to cancel the "reminder" chimes, but it will also cancel all other oven functions.
• if you would like to eJiminate all the "reminder" chimes entirely, touch and hold the Cancel Off
Pad for twelve seconds. (This will not eliminate the initial four short chimes).
•To return the "reminder" chimes, touch and hold the Cancel Off Pad for twelve seconds.
INOTE: To change the oven to a 24 hourclock or Ce,sius (C) degrees, contact yourauthorizeddenn.AirService Contractor or installer, ]
7
To set oven on Bake or Convect Bake or Convect Roast
1. Place oven racks on proper rack positions. (See page 9.)
2. Touch Bake Pad or Convect Bake Pad or Convect Roast Pad.
Indicator Words BAKE or CONV BAKE or CONV ROAST will flash and three
dashes will be shown.
Note: If more than five seconds elapse between touching a pad and touching a
number pad, Display will return to previous Display.
3. Touch the appropriate number pads for desired oven temperature.
Allowable temperature range is 100 ° to 550°F. After five seconds the oven will
begin to preheat. The Indicator Words ON, PREHEAT, and either BAKE or CONV
BAKE or CONV ROAST will appear in the Display. The temperature shown wil!
be t00 ° or the oven temperature whichever is higher,
Example: If at 10 o'clock you set the oven for 350° for convect baking, after five
seconds the Display will show:
During the preheat, the Display will show a rise in 5° increments until programmed
temperature is reached. When the oven is preheated, the oven will chime, the ON
and PREHEAT Indicator Words will go off, and programmed oven temperature
will remain in the Display.
Note: Oven will preheat for approximately 7 to 11 minutes.
Important: Whenever ON appears in the Display, the oven is heating,
To recall temperature set during preheat: Touch the appropriate Bake Pad or
Convect Bake Pad or Convect Roast Pad. Temperature willbe briefly displayed,
then will automatically return to on-going program.
To channgetemperature set: Touch appropriate Bake Pad or Convect Bake Pad
or Convect Roast Pad and the appropriate number pads for the new desired
temperature.
Note: If you are lowering the temperature below the current oven temperature, the
Indicator Words PREHEAT and ON will appear briefly in the Display and the
preheat chime will sound. Then, the Display will show programmed temperature
and indicator word BAKE or CONV BAKE or CONV ROAST only.
4. Touch Cancel Off Pad to turn oven off at end of baking. The oven wilt continue
operating until the Cancel Off Pad is touched.
Therackpositionsnotedaregenerallyrecommendedforthebestbrowningresultsand
mostefficientcookingtimes.Formanyfooditems,excellentresultscanbeachieved
when using one of several different rack positions. Refer to baking and roasting sections
for recommendations for specific foods.
Different Racks
Two flat racks and one offset rack were packaged with your oven. The use of the offset
rack is denoted in the list below and the charts as an "o" after the rack number. Note
_nN30430 Owners: An additional offset rack and flat were packaged in your oven.
--4 (flat rack)
--3o (offset rack)
--1 (flat rack)
Rack Uses
Rack Position #4o (offset rack on #4):
Most broiling.
Rack Position #3:
Most baked goods on cookie sheets, cakes (sheet and layer).
Rack Position #30 (offset rack on #3):
Most baked goods on cookie sheets, frozen convenience foods, fresh fruit pie, cream
pie, layer cakes, main dish souffle.
Rack Position #2:
Roasting small cuts of meat, cakes (tube, bundt or layer), frozen fruit pie. pie shell,
large casseroles.
Rack Position #20 (offset rack on #2):
Roasting small cuts of meat, loaves of bread, angel food cake.
Rack Position #1:
Large cuts of meat and large poultry, angel food cake, loaves of bread, custard pie,
dessert souffle.
Multiple Rack Cooking:
Two racks, use #2o and #4. Three racks, use #1 ,#3o, and #4.
Whenelectricalpowerissuppliedorafterpowerinterruption,thelastclocktime
displayedbeforepowerwasinterruptedwillflash.Timewilladvanceandcontinueto
flashuntilclockisreset.
To set Time of Day
1. Touch Clock Pad.
Indicator word TIME will flash and time digits will appear in the Display. (If more
than five seconds elapse between touching Clock Pad and touching a number
pad, the Clock Pad must be touche d again in order to set clock,)
2. Touch the appropriate number pads until correct time of day appears in Display.
Note: Five seconds after touching the number pads, the time of day will
automatically be entered.
IMPORTANT
•To recall time of day when another time function is showing: Touch Clock Pad.
•Clock time cannot be changed when oven has been programmed for Timed
Bake, Timed Convect Bake, Timed Convect Roast or Self-clean. Cancel program
before reprogramming clock,
10
Important: This interval Timer can be used to remind you when a period, up to 11
hours and 55 minutes, expires. Itcan be used independently of any other oven activity
and can be set while another oven function is operating. T_heTimer does not_c_ntr_0J
the oven.
To set Timer
1. Touch Timer Pad,
The Indicator Word Timer and either 1 or 2 flashes and "0Hr:00" appears in the
Display.
2. Touch the appropriate number pads until the desired number of minutes or hours
and minutes appear in the Display.
Note: If more than five seconds elapse between touching a Timer Pad and a
number pad, the Timer Pad must be touched again.
Example: To set Timer One for 5 minutes, touch the Timer One Pad and the
number 5 pad. After five seconds, the display wil! show:
Example: To set Timer Two for 1hour and 30 minutes, touch the Timer Two Pad
and the numbers "1,3, 0" pads. After five seconds, the Display will show:
I" 30 I
Countdown will start after five seconds. Countdown will have display precedence
over other time functions. If both timers are set, the timer with the least amount
of time remaining wi!l have display precedence.
At the end of time set, the Timer will chime four times and "End" wil! appear in the
Display. If timer is not cancelled (see below), "End" will remain in the Display and
there will be two chimes every thirty seconds for five minutes.
To cancel Timer
1. Touch and hold the Timer Pad for four seconds.
OR
2. A. Touch the Timer Pad.
B. Touch "0" number pad. Five seconds later the Timer will be cancelled.
NOTE: Touching Cancel Off Pad to cancel chimes will cancel ALL selected oven l
programming.
11
To
1,
2_
3.
4.
you want ng to start
set oven to start immediately and shut off automatically
Touch Bake Pad or Convect Bake Pad or Convect Roast Pad,
Indicator Words BAKE or CONV BAKE or CONV ROAST willflash and three dashes
wil! be shown.
Touch the appropriate number pads for desired oven temperature.
After four seconds the oven will begin to preheat. The Indicator Words ON,
PREHEAT, and BAKE or CONV BAKE or CONV ROAST will appear in the Display.
The temperature shown will be 100°or the temperature of the oven, whichever is
higher. Example: If at 10 o'clock you set the oven for 350° for convection baking,
the Display will show: ,o,oo
During the preheat, the Display will show a dse in 50 increments until programmed
temperature is reached. When the oven is preheated, the oven will beep, the ON
and PREHEAT Indicator Words will go off, and programmed oven temperature will
be displayed. Important: Whenever ON appears in the Display, the oven is heating.
Touch Cook Time Pad.
Indicator Words COOK TIME will flash and Display will show "0 HR:00",
Touch the appropriate number pads to enter cooking hours in five minute
increments. Hours are to left of colon and minutes to right of colon, (Allowable range
is 5minutes to 11 hours and 55 minutes.) Example: If cooking time selected for
the oven is 2 hours and 30 minutes, the Display will show:
After fifteen seconds, the time of day returns to the Display.
Important: Oven will preheat for approximately 7to 11 minutes. At end of
programmed Cook Time, oven will shut off automatically; retained heat will continue
tocook food. Clock controlled cooking is not recommended for baked items that
require a preheated oven, such as cakes, cookies, pies, breads. For these foods,
place food in preheated oven, then use Timer to signal end of baking time.
At the end of programmed Cook Time, the oven will shut off automatically and a
"chime" will be heard four times and "End" will appear in the Display. If oven is not
cancelled, "End" will remain in the Display and there will be a chime every minute
for one hour. 12
To set oven to start at future time and shut off automatically
1-4. Follow preceding Steps 1-4, on page 12.
5. Touch Stop Time Pad.
Indicator Words STOP and TIME will flash. Display will show the calculated
stop time based on current time of day and cook time. Note WW30430 Owners:
The appropriate letter (U - upper oven; L - lower oven) and OVEN will also flash.
6. Touch the appropriate number pads to enter desired stop time.
A stop time can only be accepted for later in the day. Note: Since food continues
to cook if left in the oven, it is suggested that the clock controls be used primarily
to start the oven when no one is in the kitchen. Provisions should be made to have
the food removed as soon as the chime has sounded.
Example: If at 10 o'ctock you set the oven for 350 ° convection baking and 2 hours
and 30 minutes cooking time, the calculated stop time would be "12:30". The
Display would show: 12:3 0 !gP °
If you want the stop time to be 1 o'clock, touch the number pads "1,0,0". Five
seconds later, the Display will briefly show the start time:
II 0:30 3so°I_y 8_ArfT TW_
After five seconds, the display will return to current time of day, thus showing:
I 0:00 1O_,J,Y 31_
At the end of the delayed period, the DELAY Indicator Word will go off and the oven
will begin to heat. 100° will be shown. As the oven heats, the Display will show
a rise in increments of 5ountil programmed temperature is reached.
At the end of programmed Cook Time, the oven will shut off automatically and a
"chime" will be heard four times and "End" will appear in the Display. If oven is
not cancelled, "End" will remain in the Display and there will be one chime every
minute for ten minutes.
IMPORTANT
•Note WW30430 Owners: Clock controlled baking can be used with only one oven
at a time. To program, first set the bake or convect bake or convect roast function
for the desired oven, then set the cook time. If one oven is set for clock controlled
baking, the other oven cannot be set to self-clean.
• To recall time function programmed: Touch the appropriate time pad.
ITo cancel timed function only: Hold Cook Time Pad for four seconds. This witl
only cancel cook time and stop time, not programmed bake mode.
• if more than five seconds elapse between touching a function pad and touching
appropriate number pads, the oven is not set and Display will return to previous
Display.
13
• When cooking foods for the first time in your new oven, use recipe cooking times
and temperatures as a guide.
• Use tested recipes from reliable sources.
• Preheat the oven only when necessary, For baked foods that rise and for richer
browning, a preheated oven is better. Casseroles can be started in a cold oven,
Preheating takes from 7 to 11 minutes; place food in oven after PREHEAT indicator
Word cycles off.
• Arrange oven racks before turning on oven. Follow suggested rack positions on
page 9 and in various baking charts.
• Allow about 1to 11/2inches of space between the oven side walls and pans to allow
proper air circulation.
• When baking foods in more than one pan, place them on opposite corners of the
rack. Stagger pans when baking on two racks so that one pan does not shield
another unless shielding is intended. (See above left)
• To conserve energy, avoid frequent or prolonged door openings. At the end of
cooking, turn oven off before removing food.
• Always test for aloneness (fingertip, toothpick, sides pulling away from pan). Do not
rely on time or brownness as only indicators.
• Use good quality baking pans and the size recommended in the recipe.
• Dull, dark, enameled or glass pans will generally produce a brown, crisp crust. Shiny
metal pans produce a light, golden crust.
• Frozen pies in shiny aluminum pans should be baked on a cookie sheet on rack 2
or be removed to a dull or glass pan.
• If edge of pie crust browns too quickly, fold a strip of foil around rim of crust, covering
edge. (See above right.)
NOTE: A cooling fan will operate during all cooking modes. The fan may also continue
to operate after the oven is turned off until the oven has cooled down.
14
IBaking Chart i
Note: For Conventional Bake use the Bake Pad.
: _tmt
2!:_i!i¸!i!i_!;i!!i:iliT;ii_iiii_!i!i_iii!ii_!iii!i'!ii!i!Li:iiii__i_::i'_i_:i_iiW_;i_:
;:ii i:! iiiii ii!jii ii i il¸i
47!_17_!i:!!!if_:_!i_i!i!_i,iiiiiii_s_iiiiiT_!¸,i:_ii!_i
B_dWnt_ : i:
* An "o" after arack number implies that the offset rack should be used.
** The times given are based on specific brands of mixes or recipes tested. Actual
times will depend on the ones you bake.
*** The Convect Bake temperature is 25°F lower than recommended on package mix
or recipe.
15
•Use convection baking for breads, cakes, cookies, and p_es.
•As a generat rule, when using recipes or prepared mixes developed for a
conventional bake oven, set the oven temperature 25°F lower than the recipe
recommended temperature. Times will be similar to or a few minutes less than
recipe recommended times. The chart on page 15 compares times andtemperatures
of many baked foods. Use this as a reference.
•For better browning, place cookie sheets and baking pans lengthwise, side to side
on the rack.
•Cookie sheets should be without sides and made of shiny aluminum. The best size
to use for cookie sheets is 16" × 12" or smaller,
16
r
For best results, bake foods on one rack at atime as described in this manual. However,
very good results can be obtained when baking quantities of foods on multiple racks.
Quantity cooking provides both time and energy savings.
Convect Bake is suggested for most multiple rack cooking, especially three rack
cooking, because the circulating heated air results in more even browning. For two rack
cooking, the conventional bake oven provides very good baking results especially when
pans can be staggered, such as with layer cakes and fresh pies.
Many foods can be prepared on three racks at the same time. These are just a few
examples: cookies, cupcakes, rolls, biscuits, muffins, pies, pizzas, appetizers, and
snack foods.
To obtain the best results in multiple rack cooking, follow these suggestions:
• Use temperature and times in this manual as a guide for best results,
Q For two rack baking, rack positions #2o and 4 are best for most baked products but
positions #2 and 4 also provide acceptable results.
• For three rack baking use positions #1,3o and 4. One exception is pizza. (See page
21 .)
• Since foods on positions #1 and 4 will usually be done before foods on position #3o,
additional cooking time will be needed for browning foods on the middle rack. An
additional minute is needed for thin foods such as cookies. For foods such as
biscuits, rolls, or muffins, allow 1 to 2 more minutes. Frozen pies and pizzas, which
should be baked on a cookie sheet, need about 2 to 4 more minutes.
• Stagger small pans, such as layer cake pans, in the oven.
• Frozen pies in shiny aluminum pans should be placed on cookie sheets and baked
on rack positions #1, 3o and 4.
• Cookie sheets should be placed lengthwise, side to side, in front of the fan for more
even browning.
• Oven meals are recommended for energy conservation. Use rack positions #1 and
30 or #2o and 4 and Convect Roast.
17
•Preheating is not necessary.
•For open pan roasting, place meat or poultry on the slotted portion of the two-piece
pan included with the oven, Do not add water to the pan. Use open pan roasting
for tender cuts of meat. Less tender cuts of meat need to be cooked by moist heat
in a covered pan.
•For best results, a meat thermometer or probe is the most accurate guide to degree
of doneness. The tip of the thermometer or probe should be located in the thickest
part of a roast, not touching fat, bone, or gristle. For turkeys and large poultry
products, insert the tip of the thermometer or probe into the thickest part of the inner
thigh.
•Place roast fat side up to allow self basting of meat during roasting.
•Since meats continue to cook after being removed from the oven, remove roast
from oven when it reaches an internal temperature about 5 degrees below the
temperature desired,
•For less loss of juices and easier carving, alTow about 15 minutes "standing time"
after removing meat from oven.
•For best results in roasting poultry, thaw completely. Due to the structure of poultry,
partially thawed poultry will cook unevenly.
• If preferred, tender cuts of meat can be roasted in the conventional bake oven by
following the general recommendations given above. However, meats will roast
more quickly in the convect oven using Convect Roast.
• Conventional bake is best for less tender cuts of meat that require a longer, moist
heat method of cooking. Fo!low your recipe for times and temperatures for covered
meats.
• Meats cooked in oven cooking bags, dutch ovens, or covered roasting pans are best
cooked in the conventional bake oven using the Bake Pad.
• Use meat roasting charts in standard cookbooks for recommended times and
temperatures for roasting in a conventional bake oven.
NOTE: A cooling fan will operate during all cooking modes. The fan may also t
continue to operate after the oven is turned off until the oven has cooled /
down. ]
18
Chart time is based on thawed meats only. For Conventional Roasting use the Bake Pad.
BEEF _jo'
Rib Roast 4 tO8 325 t45o (rare) 25-30 30-35
•'160 (medium) 30-35 3540
Rib Eye Roast 4to6 325° ; 145°(rare) 25-30 30-35 _
l ' t", 160 ° (medium) _-35 35-40
Tenderloin Roast 2 to 3' "
Eye of Round Roast 4to 5 325
I
TopLoinRoast a to6 - _s ° "
R°undTipR°ast I°'°°'"
325o
:PonK " "
Shoulder Blade Roast '
Boneless
_l_der Blade Roast
Top Loin,boneless
Ham, Half (Fulty cooked)
Ham,Ha_Cook
Ibefore eating)
; _ _icrd¢Shoulder :
;:T_ey, ut_tu_ i t2 tOi6 i
Turkey, u_ed : _6 to20
I45_(rare): _ 1:8-23
!4s_(mre) 2S-_
!"60_(medium)
!60_ (medium),
i45 (rare) i
_60_(medium)
23-28
_.35
3035 '
]: i
i
* When using the Convect Roest mode, there is no need to preheat the oven or to lower the
temperature from conventional roast temperatures.
** Not recommended for convection cooking. Most precooked hams have to be covered while
roasting, thus there would be no time savings from using the eonvect mode.
19
• Tender cuts of meat and poultry can be roasted to a rich golden brown in the
convection oven. Follow general recommendations for roasting and use Conveet
Roast.
• Refer to convection meat roasting chart for recommended cooking temperature'
and time. The chart can serve as a guide to help plan meal serving time.
• Minutes per pound will vary according to the size, shape, quality, and {nitial
temperature of meat as well as the electrical voltage in your area. Times are based
on refrigerator cold meat.
• A large cut of meat wit! usually require fewer minutes per pound to roast than a
smaller cut of meat.
• Do not use a roasting pan with high sides; use pan provided with oven.
• Do not cover meat. Allow the circulating hot air to surround the meat and seal in
the juices.
• Since the breast meat on a large turkey cooks more quickly than the thigh area,
place a"foil cap" over the breast area after desired brownness is reached to prevent
overbrowning. (See above.)
• A stuffed turkey will require an extra 30 to 60 minutes depending on size. Stuffing
should reach an internal temperature of 165°F.
Convect Roasting: Frozen to Finish
Meats (except poultry) may be roasted frozen to finish, Follow these guidelines for the
most satisfactory results.
• Use temperatures for roasting fresh meats as recommended by most cookbooks,
Generally, most meats are roasted at 325°F, For best results do not use
temperatures below 300°F.
• Use times for roasting fresh meats given in your favorite cookbooks as approximate
guides for roasting frozen meats. Roasting times will vary due to factors such as
coldness of meat, size, quality, or cut, In general, roasting times for frozen to finish
in the convection oven will be approximately the same as fresh to finish in a
conventional bake oven.
• The guidelines given for roasting fresh meats in the convection oven also apply to
roasting frozen meats.
• Insert meat thermometer or probe midway during the cooking process.
26

This manual suits for next models

5

Other Jenn-Air Oven manuals

Jenn-Air JJW3830DB01 User manual

Jenn-Air

Jenn-Air JJW3830DB01 User manual

Jenn-Air JJW2427DS User manual

Jenn-Air

Jenn-Air JJW2427DS User manual

Jenn-Air PROSTYLE JJW9827DDP User manual

Jenn-Air

Jenn-Air PROSTYLE JJW9827DDP User manual

Jenn-Air W131 User manual

Jenn-Air

Jenn-Air W131 User manual

Jenn-Air JGW8130 User manual

Jenn-Air

Jenn-Air JGW8130 User manual

Jenn-Air W10419852A User manual

Jenn-Air

Jenn-Air W10419852A User manual

Jenn-Air JMW3430DT User manual

Jenn-Air

Jenn-Air JMW3430DT User manual

Jenn-Air JMW2427WB00 User manual

Jenn-Air

Jenn-Air JMW2427WB00 User manual

Jenn-Air JMW3430DS User manual

Jenn-Air

Jenn-Air JMW3430DS User manual

Jenn-Air JJW2327W Parts list manual

Jenn-Air

Jenn-Air JJW2327W Parts list manual

Jenn-Air JGW8130DDB - 30" Single Gas Wall Oven7 User manual

Jenn-Air

Jenn-Air JGW8130DDB - 30" Single Gas Wall Oven7 User manual

Jenn-Air W30100 User manual

Jenn-Air

Jenn-Air W30100 User manual

Jenn-Air JJW2327 User manual

Jenn-Air

Jenn-Air JJW2327 User manual

Jenn-Air JMW8527DAW User manual

Jenn-Air

Jenn-Air JMW8527DAW User manual

Jenn-Air JMW2327WS01 User manual

Jenn-Air

Jenn-Air JMW2327WS01 User manual

Jenn-Air 8101P423-60 User manual

Jenn-Air

Jenn-Air 8101P423-60 User manual

Jenn-Air JJW2827DB01 User manual

Jenn-Air

Jenn-Air JJW2827DB01 User manual

Jenn-Air WG24000 User manual

Jenn-Air

Jenn-Air WG24000 User manual

Jenn-Air SVD48600P User manual

Jenn-Air

Jenn-Air SVD48600P User manual

Jenn-Air JJW2327WS User manual

Jenn-Air

Jenn-Air JJW2327WS User manual

Jenn-Air JLG7130ADS Instruction Manual

Jenn-Air

Jenn-Air JLG7130ADS Instruction Manual

Jenn-Air JJW9630CAB User manual

Jenn-Air

Jenn-Air JJW9630CAB User manual

Jenn-Air JJW9330DDB User manual

Jenn-Air

Jenn-Air JJW9330DDB User manual

Jenn-Air W2451 User manual

Jenn-Air

Jenn-Air W2451 User manual

Popular Oven manuals by other brands

Siemens MB578G5 0B Series User manual and installation instructions

Siemens

Siemens MB578G5 0B Series User manual and installation instructions

Siemens CS856GN.7 User manual and installation instructions

Siemens

Siemens CS856GN.7 User manual and installation instructions

Blodgett SG2136 E & G Replacement parts list

Blodgett

Blodgett SG2136 E & G Replacement parts list

Parmco PPOV-6S-SIDE-1 Installation and operating instructions

Parmco

Parmco PPOV-6S-SIDE-1 Installation and operating instructions

Bosch VBC554FS0 instruction manual

Bosch

Bosch VBC554FS0 instruction manual

montpellier MON-FOCHP644Z Installation and operating instructions

montpellier

montpellier MON-FOCHP644Z Installation and operating instructions

Franke FSL 52 H user manual

Franke

Franke FSL 52 H user manual

NEFF B8762.0 instruction manual

NEFF

NEFF B8762.0 instruction manual

Kuppersbusch EDG 650.0 Operating instructions and installation instructions

Kuppersbusch

Kuppersbusch EDG 650.0 Operating instructions and installation instructions

GE JKP16 Use & care guide

GE

GE JKP16 Use & care guide

NEFF B6784N0GB Instructions for use

NEFF

NEFF B6784N0GB Instructions for use

KitchenAid SUPERBA KEBS276BBL0 parts list

KitchenAid

KitchenAid SUPERBA KEBS276BBL0 parts list

STOVES GTG 60 Series user guide

STOVES

STOVES GTG 60 Series user guide

AEG COMPETENCE 3200 B Instruction book

AEG

AEG COMPETENCE 3200 B Instruction book

Viking Professional Series installation guide

Viking

Viking Professional Series installation guide

Electrolux EOB64101X user manual

Electrolux

Electrolux EOB64101X user manual

Bakers Pride DP-2BL Specifications

Bakers Pride

Bakers Pride DP-2BL Specifications

Nordmende SO206IX user manual

Nordmende

Nordmende SO206IX user manual

manuals.online logo
manuals.online logoBrands
  • About & Mission
  • Contact us
  • Privacy Policy
  • Terms and Conditions

Copyright 2025 Manuals.Online. All Rights Reserved.