manuals.online logo
Brands
  1. Home
  2. •
  3. Brands
  4. •
  5. Jenn-Air
  6. •
  7. Range
  8. •
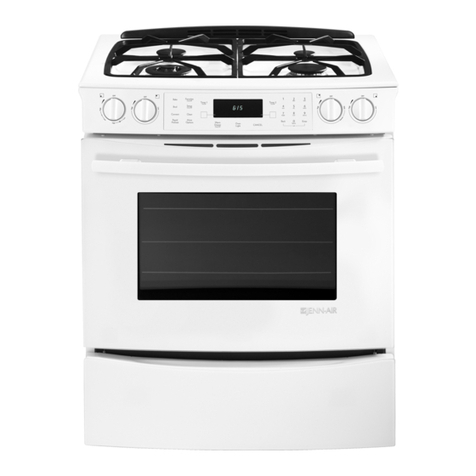
  9. Jenn-Air FCG20600 User manual

Jenn-Air FCG20600 User manual

This manual suits for next models

2

Other Jenn-Air Range manuals

Jenn-Air JDR8895AAB User manual

Jenn-Air

Jenn-Air JDR8895AAB User manual

Jenn-Air 30" (76.2 cm) Cooktop User manual

Jenn-Air

Jenn-Air 30" (76.2 cm) Cooktop User manual

Jenn-Air JDS8850AAB User manual

Jenn-Air

Jenn-Air JDS8850AAB User manual

Jenn-Air MGS8800PZ User manual

Jenn-Air

Jenn-Air MGS8800PZ User manual

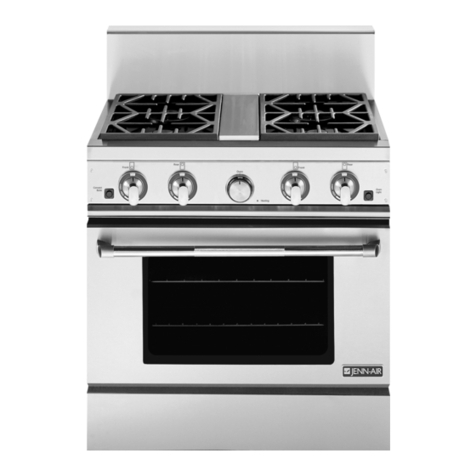
Jenn-Air PRO-STYLE JDRP430 User manual

Jenn-Air

Jenn-Air PRO-STYLE JDRP430 User manual

Jenn-Air JES9800CA Parts list manual

Jenn-Air

Jenn-Air JES9800CA Parts list manual

Jenn-Air 30" (76.2 cm) Cooktop User manual

Jenn-Air

Jenn-Air 30" (76.2 cm) Cooktop User manual

Jenn-Air Pro-Style PRD3630 User manual

Jenn-Air

Jenn-Air Pro-Style PRD3630 User manual

Jenn-Air JER8885RCB1 User manual

Jenn-Air

Jenn-Air JER8885RCB1 User manual

Jenn-Air JER8895BAS - 30" Electric Double Oven Range User manual

Jenn-Air

Jenn-Air JER8895BAS - 30" Electric Double Oven Range User manual

Jenn-Air JES9750AA Series Manual

Jenn-Air

Jenn-Air JES9750AA Series Manual

Jenn-Air PRO-STYLE User manual

Jenn-Air

Jenn-Air PRO-STYLE User manual

Jenn-Air W10526082A User manual

Jenn-Air

Jenn-Air W10526082A User manual

Jenn-Air JGS9900BDB User manual

Jenn-Air

Jenn-Air JGS9900BDB User manual

Jenn-Air JDRP548WP02 User manual

Jenn-Air

Jenn-Air JDRP548WP02 User manual

Jenn-Air JDS9865BDP23 User manual

Jenn-Air

Jenn-Air JDS9865BDP23 User manual

Jenn-Air JDS9860BD User manual

Jenn-Air

Jenn-Air JDS9860BD User manual

Jenn-Air JDS9860 User manual

Jenn-Air

Jenn-Air JDS9860 User manual

Jenn-Air PRO-STYLE JGRP748HL User manual

Jenn-Air

Jenn-Air PRO-STYLE JGRP748HL User manual

Jenn-Air JGR8890 Series User manual

Jenn-Air

Jenn-Air JGR8890 Series User manual

Jenn-Air JDS8850BD User manual

Jenn-Air

Jenn-Air JDS8850BD User manual

Jenn-Air JES9750CAW00 User manual

Jenn-Air

Jenn-Air JES9750CAW00 User manual

Jenn-Air JDRP548WP02 User manual

Jenn-Air

Jenn-Air JDRP548WP02 User manual

Jenn-Air PRG3010 User manual

Jenn-Air

Jenn-Air PRG3010 User manual

Popular Range manuals by other brands

Maytag MGR5875QDW - 30 Inch Gas Range Use and care guide

Maytag

Maytag MGR5875QDW - 30 Inch Gas Range Use and care guide

Frigidaire FFGF3024SS use & care

Frigidaire

Frigidaire FFGF3024SS use & care

Capital Precision Series GCR484W Specifications

Capital

Capital Precision Series GCR484W Specifications

Officine Gullo GGS8P Installation and use instruction

Officine Gullo

Officine Gullo GGS8P Installation and use instruction

LG LSD4913 Series owner's manual

LG

LG LSD4913 Series owner's manual

Kenmore 4101 - Elite 30 in. Slide-In Electric Range installation instructions

Kenmore

Kenmore 4101 - Elite 30 in. Slide-In Electric Range installation instructions

Moffat Blue Seal Evolution G576 Technical data sheet

Moffat

Moffat Blue Seal Evolution G576 Technical data sheet

CornuFé C1NF user guide

CornuFé

CornuFé C1NF user guide

GE JGS650SEFSS Dimensions and installation information

GE

GE JGS650SEFSS Dimensions and installation information

LG LDG3015ST Manual De Propietario

LG

LG LDG3015ST Manual De Propietario

Whirlpool RF350PXP Use and care guide

Whirlpool

Whirlpool RF350PXP Use and care guide

Samsung FCQ321HTUW Service manual

Samsung

Samsung FCQ321HTUW Service manual

Kenmore 790.45712 Use & care guide

Kenmore

Kenmore 790.45712 Use & care guide

Wolf CHR CHSSR owner's manual

Wolf

Wolf CHR CHSSR owner's manual

Smeg Built-in Microwave Oven Instructions for the user

Smeg

Smeg Built-in Microwave Oven Instructions for the user

Zanussi ZCG054G user manual

Zanussi

Zanussi ZCG054G user manual

GE JCSS630 quick start guide

GE

GE JCSS630 quick start guide

Samsung NX58M9960P series installation manual

Samsung

Samsung NX58M9960P series installation manual

manuals.online logo
manuals.online logoBrands
  • About & Mission
  • Contact us
  • Privacy Policy
  • Terms and Conditions

Copyright 2025 Manuals.Online. All Rights Reserved.

ENN-AIR
Use and Care Manual
Gas Range with
Convection
Models FCG20600, FCG20610 & SCG20200
r_
i
!
I
Model FCG20610
Congratulationson your choice of a Jenn-Air gas range.
WARNING: If the information in this Yourrangehasfoursealedgasburnerswitha self-cleaning
manual is not followed exactly, aelectroniccontrolledoven.As you useyour new range,we
know you will appreciate the many features that provide
fire orexplosion may resultcausing excellentperformance,easeofcleaning,convenienceand
property damage, personal injury dependability.
or death. Your Jenn-Air self-cleaning oven features flexibility in
conventional baking or roasting, convection baking or
-Do not store or use gasoline or roasting,and broiling.
otherflammable vapors and liquids Beforeyou begincookingwithyour newrange,pleasetake
in the vicinity of this or any other a few minutesto read and becomefamiliarwith the
instructionsinthisbook.Onthefollowingpages,youwillfind
appliance, awealthofinformationregardingallaspectsofusingyour
newrange.
-WHAT TO DO IF YOU SMELL GAS Byfollowingtheinstructionscarefully,youwillbeabletofully
• Do not try to light any appliance, enjoyandproperlymaintain yourrangeandachieve
excellentresultswiththefoodyouprepare.
•Do not touch any electrical Shouldyou haveanyquestionsaboutusingyourJenn-Air
switch; do not use any phone in gasrange,writetousorcall.Besureto providethemodel
your building, number.
•Immediately call your gas Jenn-Air CustomerAssistance
c/e MaytagAppliances SalesCompany
supplier fromaneighbor'seo.Box2370
phone. Follow the gas supplier'sCleveland,TN37320-2370
instructions. 1-800-688-1100
•If you cannot reach your gas
supplier, call the fire department.
-Installation and service must be
performed by a qualified installer,
service agency or the gas supplier.
WARNING
•ALLRANGESCANTIP AND
CAUSEINJURIESTOPERSONS.
] NST*LANTT"EVCES
PACKEDWITHRANGE.
•FOLLOWALL INSTALLATION
INSTRUCTIONS.
SAVETHESEINSTRUCTIONSFORFUTUREREFERENCE
2
Appliance Usage ConvectionBaking.......................... 16
Before You Gall For Service ................ 26 FrozenConvenienceFoods.................. 17
Caring ForYour RangeGeneralRecommendations.................. 15
Broiling...................................... 20
AdjustingOvenTemperature................. 25 ClockControls
Cleaning............................... 23-24 ClockControlledBakingorRoasting.......... 14
OvenLightBulbReplacement................ 24 TimeOfDay ............................... 13
RangeComponents............................ 6 Timer ..................................... 13
SafetyPrecautions......................... 2,4-5 OvenCleaning
Self-Cleaning........................... 21-22
CooktopUsageOvenOperation
Cookware..................................... 8 IgnitionSystemandOvenBurner............. 12
HowA SurfaceBurnerWorks.................... 9 OvenControlPanel......................... 10
SurfaceControls............................... 7 RackPositions............................. 12
SettingControls............................ 11
Oven UsageRoasting
Baking ConvectionRoasting........................ 19
BakingChart............................... 15 GeneralRecommendations.................. 18
CausesOfCakeFailure..................... 16 RoastingChart............................. 18
Read Before Operating Your Range
All appliances -regardless of the manufacturer - SHOULD BE TURNED INWARD AND NOT
havethepotentialthroughimproperor carelessuseto EXTEND OVER ADJACENT SURFACE
createsafetyproblems.Thereforethefollowingsafety BURNERS tominimize burns, ignition of
precautionsshould be observed: flammable materials, and spillage due to
1. Be sure your appliance is properlyinstalled and unintentionalcontactwith the cookware.
groundedby a qualifiedtechnician.13. CAUTION - Do not store items of interest to
2. Neveruseyour appliancefor warmingor heating childrenincabinetsaboverange-childrenclimbing
the room. This warning is based on safety on the range to reach items could be seriously
considerations, injured.
3.Childrenshouldnot beleft aloneor unattendedin 14.Donot touch surfaceburner areasor perimeter
areawhereapplianceisin use.Theyshould never areas around cooktop or interior surfaces of
be allowed to sit or stand on any part of the ovens. Duringand after use,these areas may be
appliance, hot enough to cause burns. Avoid contact with
these areas by clothing or other flammable
4. Wear proper apparel. Loose-fitting or hanging materials until they havehad sufficient time to
garmentsshould never be worn while using the cool.Other surfaces may become hot enough to
appliance, causeburns-amongthese surfacesarethe upper
5. Donot repairor replaceany partofthe appliance door frame and door, oven vent opening and
unless specificallyrecommendedin this manual,surfacesnearthe opening,andthetopedgeofthe
All other servicing should be referred to an controlpanel.
authorizedJenn-AirServicer.15.Do not heat unopenedfood containers.Build-up
6. Do not store combustible materials, gasoline or of pressure may cause container to burst and
other flammable vapors and liquid near range, resultin injury.
This also appliesto aerosol sprays and aerosol 16.Keep allcontrols"OFF"when unit isnot in use.
spraycans. 17.GREASE - Grease is flammable and should be
7. Donot use water on greasefires.Smotherfire or
flame or use dry chemical or foam-type handled carefully. Never leave any cooking
operation unattended.Let fat cool before
extinguisher,attempting to handle it. Do not allow grease to
8. Useonlydrypotholders.Moistor damppotholders collectaround the rangeor inthe vents.Wipeup
onhotsurfacesmayresultinburnsfromsteam.Do spilloversimmediately.
notusea towel or other bulkycloth.18.If the range is installed near a window, proper
9. Selectcookwarelargeenoughto properlycontain precautionsshould be taken to prevent curtains
food and avoid boilovers or spillovers. This will from blowing over burners creating a FIRE
save on cleaning and prevent hazardous HAZARD.
accumulationsof food, since heavysplatteringor
spilloversleft on a range can ignite. Pan size is 19.Do not use aluminumfoil to line burnerspillover
especiallyimportantin deep fat frying, bowl.Restrictionof normal air flow may result in
unsafeoperation.
10. Neverleaverangeunattendedat Hi heatsettings.
Boil over causes smoking and greasy spillovers 20. Clean only parts listed in this manual and use
that mayignite, proceduresrecommended.
11.TYPE OF COOKWARE - Avoid pans that are 21. Alwaysallow hot pans to cool in a safe placeout
unstableand easilytipped. Inchoosingpans, look ofthe reachof small children.
foreasily-graspedhandlesthatwillstaycool.Pans 22. A faint gas odor may indicatea gas leak.If a gas
that aretoo heavy when filled with food canalsoodor is detected, shut off the gas supply to the
be a hazard. If pan handlestwist and cannot be range. Callyour installeror local gas companyto
tightened,discardthe pan. have the possible leak checked. Never use a
12.HANDLES-Alwaysturn pan handlesto the side match or other flame to locate a gas leak.
orbackofthe range- notout intothe roomwhere 23.Use care when openingoven door.Let hot air or
they are easily hit. COOKWARE HANDLES steamescapebefore removingor replacingfood.
24. Keepovenvent ductsunobstructed.Yourrangeis 36. Be sure all packing materials areremoved from
ventedthroughthe baseof the backsplash.Never the range before operating it to prevent fire or
blockovenvent orair intakes.Donot obstructthe smokedamageshouldthe packingmaterialignite.
flow of combustionand ventilationair. Restriction 37.WARNING: To reduce the risk of tipping of the
of air flow to the burner prevents proper appliance, theappliance must be secured by a
performance, properly installed anti-tip device. To check if
25.Alwaysplaceoven racksin desiredlocationwhile device is installed properly:Use a flashlight and
oven is cool. If rangemust be movedwhile oven look underneaththe range to see that one of the
is hot, donot let potholder contactoven burner rear leveling legs is engagedin the bracketslot.
flame. When removing appliance for cleaning, be sure
26. Do not clean door gasket. The door gasket is anti-tipdeviceisengagedwhen rangeisreplaced.
Theanti-tipdevicesecuresthe rear levelingleg to
essentialforagoodseal.Careshouldbetaken not the floor,when properlyengaged.
to rub,damage,or movethe gasket. 38. Havethe installershowyou thelocationofthe gas
27'.Do not use oven cleaners. No commercial oven shut off valve and how to shut it off in an
cleanerorovenlinerprotectivecoatingofany kind emergency.
should beused in or aroundany partof the oven.39.Always place apan of food on a surface burner
28.CAUTION; BEFORE SELF-CLEANING THE beforeturning iton,andturn itoffbeforeremoving
OVEN, REMOVE FOOD, BROILER PAN AND the pan to preventexposureto the burnerflame.
OTHER UTENSILS. 40.This appliance has been tested for safe
29. Before servicing your appliance, disconnect performanceusing conventional cookware. Do
power to the range at the main fuse or circuit not use any devices or accessoriesthat are not
breakerpaneland atthe electricalreceptacle, specifically recommendedin this manual.Do not
30. Glazed cookware - only certain types of glass, use eyelid covers for the surface units, stovetop
glass-ceramic, ceramic earthenware, or other grills,or add-on convection systems.The use of
glazedcookwarearesuitablefor cooktopsurface devices or accessories not expressly
without breaking due to the sudden change in recommendedin this manual can create serious
temperature. Use only such cookware as you safety hazards, result in performance problems,
and reduce the life of the components of the
knowhas beenapprovedfor thispurpose.appliance.
31.Misuse of appliance doors, such as stepping,
leaningorsittingonthedoormayresultin possible IMPORTANT SAFETY NOTICE AND WARNING
tipping of the appliance, breakage of door, and The California Safe Drinking Water and Toxic
seriousinjuries. EnforcementActof 1986(Proposition65)requiresthe
Governorof Californiato publisha list of substances
32.Avoid placingthe range in amain"trafficpath"or knownto the State of California to cause cancer or
in an isolated location with no counter space reproductiveharm, and requires businessesto warn
nearby.Visualizethe ovenin usebeforeselecting customersof potentialexposuresto suchsubstances.
a location.Rememberthat open ovendoors may Users ofthis applianceare herebywarnedthat when
blocka passagewayand create a hazard,the rangeisengagedintheself-cleancycle,theremay
33.Alwaysremovesoiled broiler panfrom the broiler be some low level exposure to some of the listed
compartmentaftercookingforgrease left in thesubstances,includingCarbonMonoxide.Additionally,
panmay becomehotenoughto ignite, usersarealso herebywarnedthat theburningof gas
canresult inlow-level exposureto someof the listed
34. Donot use ovenfor storagespace,substances, including benzene, formaldehyde and
35. PREPARED FOOD WARNING: Follow food soot, due primarily to the incomplete combustionof
manufacturer's instructions. If a plasticfrozen natural gas or liquid petroleum (LP) fuels. Properly
food containerand/oritsfilmcoverdistorts,warps adjusted burners will minimize incomplete
or is otherwise damaged during cooking, combustion.Exposure to these substances can be
immediatelydiscard the food and its container, minimized by properly venting the range to the
Thefood couldbe contaminated, outdoors.
SAVE THESE INSTRUCTIONS FOR FUTURE REFERENCE
5
ClockandOven
SurfaceContmls Controls Panel
Oven
Ught
Door
Lever
• Useto provide variable heat to range surface burners. • Usetoturnovenandcooktoppanellightsonandoff. (See
(See page 7.) page 11.)
Oven Controls I
• Use to set oven for baking, convection, broiling, and •Use to latch the oven door for self-clean. (See pages
self-cleaning. (See pages 10-11.) 21-22.)
• Features time of day, minute timer and oven clock
controls. (See pages 13-14.)
ToSet Controls :'1 Suggested Control Settings
•Sincethecontrolsarea push-turn_ The controlsofferflexibilityin heat settingselection.An
type, they must bepushed in /_,,,V.,lV,,,__ infinitenumberofsettingsexistbetweenHi andLo.Forall
beforeturning. _settingsotherthan Hi, simplyadjustyourflame for best
•To set (fromthe OFF position), results.
push in on control knob and
immediately turn counterclock- Thesize andtype of cookwareandthe amountandtype of
wise to the Utesetting. After the foodbeingcookedwill influencethesetting neededfor best
burnerlights,turnthe knobto the desiredflamesize. results.Suggestedsettings are providedas guidelines.
• Igniter will continuetospark until knob is turned
counterclockwisepastLiteposition. Hi: A fast heat to start cooking
quickly,to bring liquidsto a boil,
• Note: The burnerflame may liftoff the burnerif a pan to preheat oilfor deepfatfrying.
isnotplacedonthe grate.MediumHigh: For fast frying or browning of foods, to
CAUTION: If flame should gooutduring a cooking I maintainrapidboiloflargeamountsoffood, tomaintainoil
operation,turnthe burneroff.If gashasaccumulated I temperaturefor deepfat frying.
and a stronggasodor s detected:wait'5 minutesfor I
gasto dissipatebeforetelghting burner.......... : " food.andMed:For mostfrying, sauteing, __slowboilof largeamountsof
ControlLocations(BTU Ratesfor Natural) IMediumLo: For simmering, maintaining boil of small
amountsoffood.
7 7 _ LO:Maintainingservingtemper- _ _
1.2. _. 4. aturesof foods,meltingbutteror
chocolate.
1. Leftrear surfaceburner (9,200BTUs)
2. Leftfront surfaceburner(9,200BTUs)
3. Rightrearsurface burner(9,200BTUs)
4. Rightfrontsurface burner (12,000BTUs)
Note:Usethe rightfrontsurface burnerson Hifor large
quantity cooking and canning because the BTU rate is
higher.
To achieve optimum cooking performance,usecookpots e
with flat bottoms, tight fitting covers, and sized for the COY red Cookware
surfaceburner. If the cookware is covered, less fuel will be needed;
therefore,a lower flamesize can be used.
ISize I Note: Food will not cookany faster when morethan the
t
Of Cookware
•Flame size should be adjusted so it does not extend amountof heatneededto maintaina gentleboil is used.
beyond the edge of the cookware. This instruction is
basedonsafety considerations.Adjustingthe size ofthe
flameto fit the sizeof the cookware also helps to save t"_lln;nnv.. ,,,_
fuel.
•Cookpotswhichextendmorethantwoinchesbeyondthe •Acceptablewater-bathorpressurecannersshouldnotbe
grate ortouch the cooktopmay cause heatto build up, oversized and should have a flat bottom.Thefollowing
resulting in damage to the burner grate, burner or arenotrecommended:Oversizedcannersor averylarge
cooktop, cannerthat restsontwo surfaceburner grates.
•Specialityitems such aswoks with a supportring,which •When canning, use the Hi setting just until the water
restrictaircirculationaroundthe burnerwill causeheatto comes to a boil or pressure is reached in the pressure
buildup and may result in damage to the burnergrate, canner,then reduce to the lowest flame setting that
burner or cooktop. Use Jenn-Air flat bottom wok maintainsthe boil orpressure.
accessory,ModelAO142. •Prolonged use of the Hi setting or the use of incorrect
canningutensils will produceexcessiveheat.Excessive
heatcan causepermanentdamageto the appliance.
•Aluminumcookwareheatsevenlyandquickly.A slightly
largerflamesizecanbeused.Theflamecanbe adjusted
so it comesto the edge of the cookware. However,the
flame should NEVER be adjusted so that it extends
beyondthe bottomofthe cookware.
•Stainlesssteelcookwarewith copperor aluminumcores
heatevenly andfairly quickly.The flame size should be
adjustedtoextendonlyhalfwaybetweencenterandedge
ofthe cookwarebottomfor best results.
• Castironcookware heatsslowly.
•Check manufacturer's recommendations before using
porcelain on steel,porcelain on cast iron,glass,
glass/ceramic,earthenware,or other glazedcookpots.
IMPORTANT ValveAdjustment ,
ThesurfaceburnersmaybedJfficu)ttolight dueto airin
thegaslineunderthefollowingconditions:a)whenfirst The Losettingshouldproducea stableflamewhenturning
installed,b) if disconnectedfrom the main gassupply, theknobfromHito Lo.Theflameshouldbe1/8inchor lower
or c) if range hasn't been used for several days. To and mustbestable onall portson Losetting.
removeair inthe gas line,hold a lightedmatchnext to
theburnerheadandturn thecontrolknobon. To adjust: Operateburner on Hifor about 5 minutes to
preheatburnercap. 1
Whenthe control knob is turned ON, gas will flow into the Turn knob back to I
burner.The solidstateigniterwill clickuntilthe gasisignited.Lo; remove knob,
(Note" All burner igniters will spark regardless of which and insert a small
burneris beingoperated.) screwdriverintothe
A properlyadjustedburnerwith cleanportswilllight within center of thevalve
afew seconds.Thecone-shapedflamewillbeclear bluein stem. Adjust flame
colorwith a clearlydefined innercone.There shouldbeno size by turning
traceofyellowinthe flame,ifthe burnerflameisyellow,lifts adjustmentscrew in
offtheports,orisnoisy,theair/gasmixturemaybeincorrect, eitherdirectionwhile
Therefore,contacta servicetechniciantomaketheneeded holding the valve
adjustment, stem securely.
Theinfinitesurfacecontrolsprovideflexibilityin heatsetting Flame must be of sufficientsize to be stable on all burner
selection.(Seepage7.) ports.Ifflameadjustmentisneeded,adjustONLYonthe Lo
Operatein theEvent of aPower } setting.Neveradjustflame sizeonahighersetting.
IR..FadureOWtoI servicerN°te:Allonly.gasadjustmentsshouldbe done by a qualified
In caseof prolongedpowerfailure, you canmanuallylight
the surface burner by holding a lighted match near the
burner ports and slowly turning the control knob
counterclockwise(afterdepressing)tothe Litesetting.
Caution:Whenlightingthe surfaceburner;be sureai! I
ofthecontrolsareintheOFF posEion;StrikethematchI
firstandholdit inpositionbeforeturningtheknobtOthe
Utepostion,, ,,
Note: Becauseyour overheadhoodfan iselectricit will not
workduringa powerfailuresosmokeandcondensationcan
gather.
.... Stop Cook|
Broil Clean Time Time Convecl Bake i Timer
Oven Control Panel: : : ,: Fun_ion Pads
The control panel is designed for ease inprogramming. The Cancels all programming except Timer and
Display Window features Indicator Words which describe Clock.
the functions set.
To Program: Use to set time of day.
1. Touch the function pad to give command desired.
2. Touch the Upor Down Arrow Padsto enter time or
temperature.Use for top browning or oven broiling.
Note: Four seconds later, time or temperature will
automatically be entered. If morethan 30 seconds elapse
between touching a pad and touching the Up or Down Use to set self-cleaning process.
Arrow Pads, the control is not set and Display will return to
previous Display. Usefor clock controlledcooking and cleaning
when a delayed start is desired.
Use for clockcontrolled cooking.
Use for convect baking or convect roasting.
Use for baking or roasting.
Use to signal expiration of a time period up to
9 hours and 50 minutes.
Use to set time, temperature, or to select Hi or
LoBroil.
10