Jenquip EC10 User manual

Made by
Handbook
EC10 Platemeter

Jenquip Pasture Management Soware is supplied with your platemeter on a USB
sck.
Contents
1. Introducon/ Important safety note
2. Assembly Instrucons
3. Top handle assembly instrucons /grooved rod extension
4. Operang the platemeter
4. EC10 Front Buon Displays
5. Zero calibraon
6. Start up/self test
6. Selecng the factory default formula
6. Other formulas
7. Seasonal variaons of formulas
8-9 Entering your own formula for displaying available covers
9-11 Using your platemeter/taking paddock readings (the pasture walk)
12. Soware
12. Maintenance
13. Replacing the baery
14-16 Fault nding
16. Servicing

1
Introducon
Congratulaons on the purchase of your EC10 Platemeter. This platemeter is a
highly engineered precision device for measuring the average height of pasture
relave to density of the pasture.
This is directly relave to the quanty of dry maer present (kilograms of dry mat-
ter – kg DM/ha).
Your platemeter will become an invaluable tool in your farming operaon for day-
to-day feeding decisions and long term feed budgeng.
Important safety note
Read and understand all the instrucons before using the platemeter. A copy of
this user guide can be downloaded from www.jenquip.co.nz or www.nzagriworks.
co.nz
Your platemeter is designed only for measuring pastures. Use it for no other
purpose (e.g. it is not a walking sck.) This platemeter has been manufactured
using quality materials and techniques, however, if faults do occur, have them
corrected before you use the platemeter.
Be careful around electric fences. Parts of the platemeter will conduct
electricity!
Store the plate correctly. Be careful that the wind does not blow the plate away. It
is not to be thrown.
Water blasng or submerging the unit will void the warranty.
!

Assembly Instrucons
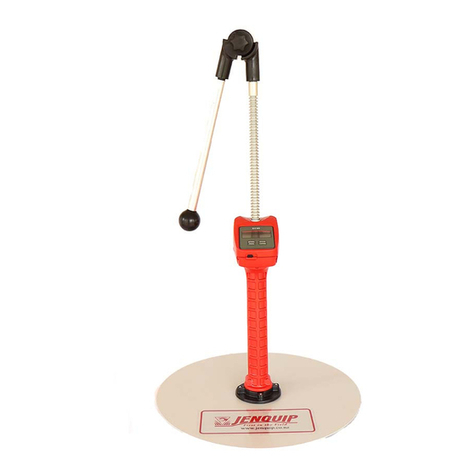
The platemeter is supplied in three parts:
The plate
The plate sits on top of the pasture to establish average height and density. The
area-to-weight rao of the plate has been carefully calibrated.
The rod with meter
The grooved rod allows pasture to be measured in 0.5 cm intervals (clicks). The
rod includes the electronic meter.
The handle
Aach top handle to the rod. Ensure that the rod does not fall through the coun-
ter as this will damage the gear and void warranty.
2

3
Handle assembly instrucons
Screw top handle onto the top of the
grooved rod where it comes out of
the counter.
Put 4 drops of thread locker into the
female end.
Screw threaded rod extension into grooved
rod and do up rmly by hand,
wiping o any excess thread locker that may
have leaked out with a dry cloth. Do not use
tools as this will damage the grooved rod.
Refer to the handbook for zero calibraon
before use.
Grooved Rod Extension (for the
400mm model)
Turn upside down and slip o the O ring.

Operang the platemeter
Switching the unit on and o
The platemeter is switched on and o using the
black switch at the back of the unit. O is in the
‘down’ posion. When the unit is o there are no
numbers displayed on the LCD screen.
Rubber Bung
On/o switch
4
EC10
Front display buons
The funcons of the EC10 are dened by the four buons
on the front of the unit.
The words in BOLD type (see below) are the primary
funcons. Acvate by pressing the buon briey. Acvate
the secondary funcons (in normal type, see below) by
holding the buon down unl the funcon operates.
Up/Down arrows used to scroll back and forth in some opons
When the Count buon is pressed the number of readings is displayed.
A “C” will show on the le side and count on the right. Hold the buon
down to view menu of further opons.
Height displays the average height of readings in clicks (0.5cm).
Pressing Reset will save the average height to memory and reset all data
ready for the next paddock.
Press Display to show the current paddock number selected (1-100)
Press Enter to show the current paddock number selected (1-100)
Height
Reset
Count
Menu
Disp
Enter
Disp/Enter
Height/Reset
Count/Menu
Up/down arrows

5
Zero Calibraon
To ensure that the platemeter accurately measures the compressed height of the
pasture the platemeter must be calibrated. This requires seng a base level of
zero so that measurements can be benchmarked against this. If the counter does
not return to zero aer each “plonk” it will not record the measurement – hence
the counter will not beep.
If the counter is removed from the grooved rod or receives a severe knock it may
jump a groove on the steel sha which will put the counter out of calibraon.
It will need to be recalibrated.
To do this, work through the following steps:
1. Ensure the plate is fully down (place on a rm at surface) and the unit is
switched o.
2. Hold the “Count” buon while switching the unit on. The display will
change to “CAL” briey and display a colon (:) followed by a number. Let’s
assume you see “.5” when you switch on. Proceed as follows:
3. The colon signies that it is in ne calibraon mode. Remove the
protecve rubber bung by levering it out gently using a at-bladed
screwdriver. Use a at bladed screwdriver and
turn the plasc or steel sha within the cog
an clockwise, unl the display reads “0”.
NB: the cog and steel sha must remain
staonary. DO NOT TURN THE SHAFT BEYOND
THIS POINT OR YOU MAY DAMAGE THE
POTENTIOMETER. Once the counter reads
zero, move the counter up the full length of
the sha. The colon will disappear once it
passes 9 and enter “clicks” mode. At the full height the display should
read approximately “50” which is 50 half cenmetres. The counter has
now been calibrated successfully.
4. Switch o when you have nished, and then back on again without
pressing any buons.
5. Test the zero calibraon by raising and lowering the plate several mes.
A beep should sound and the kgDM/ha displayed as the plate falls. If it
does not, repeat the steps above and retest.
If calibraon fails to hold, then the potenometer, which the cog drives, may
be damaged and will need replacing. This can occur with excessive wear, oen
compounded by dust and dirt entering the dry bearing of the potenometer.

6
Start up/self test
Switch the unit on. It will beep and show “EC10” in the display panel. If the baery
needs recharging it will beep 3 mes and “lo” will display on the panel. The
current formula in use will be displayed next with the “+” part of the equaon rst
(default 500) and then the “x” part second (default 140).
The kgDM/ha calculaon will be displayed based on that formula and any other
readings stored in the memory.
To clear the readings, press and hold the Reset buon unl the display shows 0.0
The unit has one default plate equaon (built into the chip and cannot be replaced
or edited) and one custom (user editable) equaon. This equaon is typically used
in New Zealand between April and September.
Dairy Pasture (reasonably consistent rainfall areas height reading x 158 + 1000 •
= Cover (kg DM/ha)
Dairy Pasture (moderate rainfall periods height reading x 158 + 200 = Cover •
(kg DM/ha)
Sheep pastures: height reading x 158 = Cover (kg DM/ha)•
The platemeter also provides an opon for selecng your own equaon or those
recommended by consultants. Your platemeter will be set up for the Dairy NZ
recommended equaon for autumn/winter months.
Entering the Factory Default Formula
While the EC10 is switched on, hold down the ‘Formula’ buon. The display shows
‘F_ _ d’ Press the ‘Reset’ buon briey. The display will then show (500) and
then (140). The default formula has now been loaded and saved to memory.
To enter your own formula refer to page 10 “Entering your own formula”.
Other Formulas
To beer reect the growth stages of pastures these formulas were derived:

7
Seasonal variaons of formulas
1 Winter & early spring - before stem growth x125 + 640
2 Late spring & early summer - during stem growth x130 + 990
3 Mid summer x165 + 1480
4 Early autumn - before autumn rain x159 + 1180
5 Late autumn - aer rain x 157 + 970
DEXCEL also developed these month based formulas:
Months
(Southern Hemisphere)
Platemeter Equaons
Dairy Pastures
Winter (April/September) Platemeter Reading x 140 + 500
(Factory Default)
October Platemeter Reading x 115 + 850
November Platemeter Reading x 120 + 1000
December Platemeter Reading x 140 + 1200
January Platemeter Reading x 140 + 1200
February Platemeter Reading x 185 + 1200
March Platemeter Reading x 170 + 1100
Months
(Northern Hemisphere)
Platemeter Equaons
Dairy Pastures
Winter (October/March) Platemeter Reading x 140 + 500
(Factory Default)
April Platemeter Reading x 115 + 850
May Platemeter Reading x 120 + 1000
June Platemeter Reading x 140 + 1200
July Platemeter Reading x 140 + 1200
August Platemeter Reading x 185 + 1200
September Platemeter Reading x 170 + 1100
Some equaons may change without noce and are inuenced by
seasonal dierences. If you are unsure of the current equaon contact
your local consultant.

Entering your own formula for displaying available covers: changes
to the EC10
Displays “Available” cover required in some markets.
All the current features of the EC10 are sll there and funcon in exactly the
same way.
There is now an extra opon in the menu called “A---”
This is to allow the user to input a number that the platemeter will treat as a
negave number.
The procedure for entering a number here is done in the same way you would
enter a custom formula (same buons pressed.)
For example: if the current formula was (h x 140) + 500 and the negave num-
ber entered was 1,000, then the new formula would be: “available cover” in kg
= (h x 140) + 500 – 1000”
Where “h” equals the average height recorded by the platemeter.
Each model will leave the factory with the “A---” set at “0000”
This means that the EC10 will funcon straight out of the box exactly as they
do now and this feature will have no eect, unless acvated.
When the platemeter is switched on, it will display the default seng of:
140
500
0.0.0.0 (The decimal points will ash 3 mes indicang a negave, of any
number the user has entered and saved.)
Any changes to the formula will be retained and displayed next me the plate-
meter is switched on.
When the platemeter is used with a negave number acvated and the result
in kg of dry maer is < “0”, then the LCD will display “0000”. The platemeter
will sll beep with each plonk and connue to count. The hyphens will ash on
and o with each beep. An “Actual” negave number cannot be displayed.
A posive number result aer calculaon will sll show as a posive number
as normal.
8

Examples:
Assume the formula used is (h x 140) + 500 – 1000
If the average “h” (height) = 4.0 then:
(4 x 140) + 500 – 1000 would result in a display of “60” kg
Any negave number entered by the user is saved to memory and ready to use
next me. If, in the menu the “F- - d” opon is selected, then all sengs are
reset to 140, 500, 0000
9

10
Entering Your Own Formula
To enter your own cover equaon or one that may have been recommended by a
third party, such as your consultant or Dexcel or Meat & Wool, do the following:
1. While the EC10 is switched on hold down the “MENU” buon. The display
reads: “F--d”. Press the UP arrow once to change the “d” (default to “c”
(custom). Press “Enter” and the display will show the rst gure of the current
“add” equaon and may look like this: “0_ _ _”. This is the rst of two numbers
you will enter. The rst number is the equaon “add” number and the second the
“mulply” number. e.g. in the equaon above, the number (115) is the “mulply”
number and (850) is the “add” number.
2. The “add” number is 4 digits long and can range from 0 - 9999. This
must be entered rst. Starng with the rst digit, press the “Up” arrow to
change this digit to a value from 0 - 9. Press the “Enter” buon when this is
correct. Repeat the process unl all four digits have been entered. The display
then changes to the “mulply” number, which has only 3 gures.
3. The “mulply” number can range from 0 - 199. The rst digit will appear as 0 or
1. Press the “Up” arrow buon to change this digit to the desired value from 0 - 9.
Press the “Enter” buon when it is correct. (850 for example would be entered as
0850.) The next digit displayed will be whatever gure is part of the old formula.
Use the “Up” arrow to change it, or just press “Enter” if it is correct. Repeat this
process unl all 4 digits have been entered. The display then changes to the
“mulply” number, which has only 3 gures.
4. The “mulply” number can range from 0 - 199. The rst digit will appear as 0
or 1. Press the “Up” arrow buon to change this digit to the desired value of 0 or
1. Press the “Enter” buon when it is correct and the next digit will appear. The
last two digits can have values from 0 - 9. Repeat this process unl all digits are
entered and press the “Enter” buon for the display to return to its normal state.
Your new formula is now acve and saved to memory.
As manufacturers we can only give broad guidelines with regard to the formula to
use.

11
Using your platemeter
Technique
Pracce the technique of an uninterrupted slow walking pace, taking care not to
“roll” the meter. (This is where the plate is not square to the ground and it will
provide a false HIGH reading.
Lowering the platemeter consistently rather than rolling it will provide a more
accurate reading.
Farmwalk
The more regularly you take readings the beer. Astute farmers will take readings
weekly, somemes more oen during crical mes of the year and less frequently
during mes of stac condions.
The more samples taken per paddock the less margin of error. We recommend 20
to 40 samples per paddock but if you have bad condions i.e. pugged paddocks,
more samples should be taken.
Most paddocks will have areas of good growth and areas of poor growth. If
recently grazed, the pasture may be clumpy. Ensure that your walk includes
representave samples of both areas. Avoid tracks, stock camp sites and other
uncharacterisc areas.
Take samples every 3 paces or so, rather than choosing by eye the spot to sample.
This removes operator preference for long or short patches.
Be consistent. Plan the same walk every me, although it can be done in reverse.
This allows each walk to be compared with another.
Taking Paddock Readings (The Pasture Walk)
The EC10 can save recorded average height readings to a specic paddock number
which can be selected on the EC10. These readings can then be downloaded via
the mini USB cable from the EC10 and aligned with your paddocks in “walk order”

12
How to take paddock readings:
Switch the unit on via the on/o switch at the back of the counter.1.
If starng the rst paddock ensure the EC10 does not contain any old data. 2.
Press and hold the “Reset” buon unl display changes to 0. (There will
be two short beeps.) Press and hold the “Menu” buon. Press the arrow
buon twice unl “P CL” appears (paddock clear). Press “Enter”. All recorded
paddock data will be set to 0.
Press and hold the “Enter” buon. You will see “E_ _ 1.” Scroll the numbers 3.
upwards using the arrow buon. If you want to scroll back, hold the “Count”
buon while briey pressing the “Arrow” buon. The screen will go blank.
The arrow (on its own) will scroll the numbers backwards. Press “Enter” at
the paddock number you want to record. The paddock number will now be
set. Check any me by pressing “Disp”.
Walk across the paddock taking readings every few paces. Every me a 4.
reading is stored a beep will sound. The kg/DM/ha is immediately recalculated
and displayed. Depending on the variance exisng in the cover, the number
of samples - or “plonks” - taken should range between 20 and 40 per paddock.
There will be 3 short beeps aer compleon of 29 plonks, and one long beep
at 30 plonks. This is recommended as the minimum number of readings to
be taken. Plonks should be taken on a regular basis - say every ve paces - to
even out any variaons. Avoid stockcamp areas, tracks or uncharacterisc
areas. The greater the variability of your paddocks, the higher number of
plonks you should take.
Switch the unit o whilst negoang obstacles - fences or creeks so that no 5.
readings are taken if the plate moves. (All data recorded so far is saved.) Once
on the other side of the obstacle switch the unit back on and connue taking
readings. UNDO feature: If you make a mistake while taking readings turn
the unit o and hold down the reset buon as you turn it back on. The word
“UNDO” will display in the LCD window and the previous DM/kg reading will
be displayed. The count will also be one less. Carry on taking readings from
this point.
Once the paddock walk is completed hold the “Reset” buon. The Average 6.
height of the paddocks will display rst, which is then saved to memory under
that paddock number. A small triangle icon will appear in the top le hand
corner indicang that paddock now contains data. The EC10 will also be reset
to zero ready for the next paddock.

13
Repeat steps 3 to 6 unl all the paddocks are complete.7.
Saved paddock data and paddock numbers can be viewed at any me by 8.
pressing the arrow key. The display will rst show the paddock number and
the average height that was recorded. Pressing the arrow key again will show
the next paddock with data in it. Once the last recorded paddock is displayed
the EC10 will beep and return to the normal display.
You can escape the paddock display funcon at any me by pressing “Disp”.

How to take paddock readings - step by step instrucons
Height
Reset
Count
Menu
Disp
Enter
Disp
Enter
Count
Menu
Disp
Enter
Height
Reset
Press & hold “reset” buon to clear any old data
Press & hold the “menu” buon
Press the arrow buon twice unl p cl (paddock clear) shows on the
display
Press & hold the “enter” buon. E _ _ 1 will show on the display
Press the arrow buon to scroll upwards
To scroll backwards hold the “count” buon
and briey press the arrow buon
start “plonking”
To save the data hold the “reset” buon. An arrow will show
up on the top le corner indicang that the paddock has data
stored in it
Press “enter” and all data will be deleted
+
To select the paddock press “enter”
14

15
Instrucons for downloading your platemeter soware
Load soware onto computer.
Connect USB cable to computer and to
the EC10. Aach cable to counter.

16

17

18
Table of contents
Other Jenquip Measuring Instrument manuals