ii
Thank you for choosing a Jensen product. We hope you will find the instructions in this owner’s
manual clear and easy to follow. If you take a few minutes to look through it, you’ll learn how to
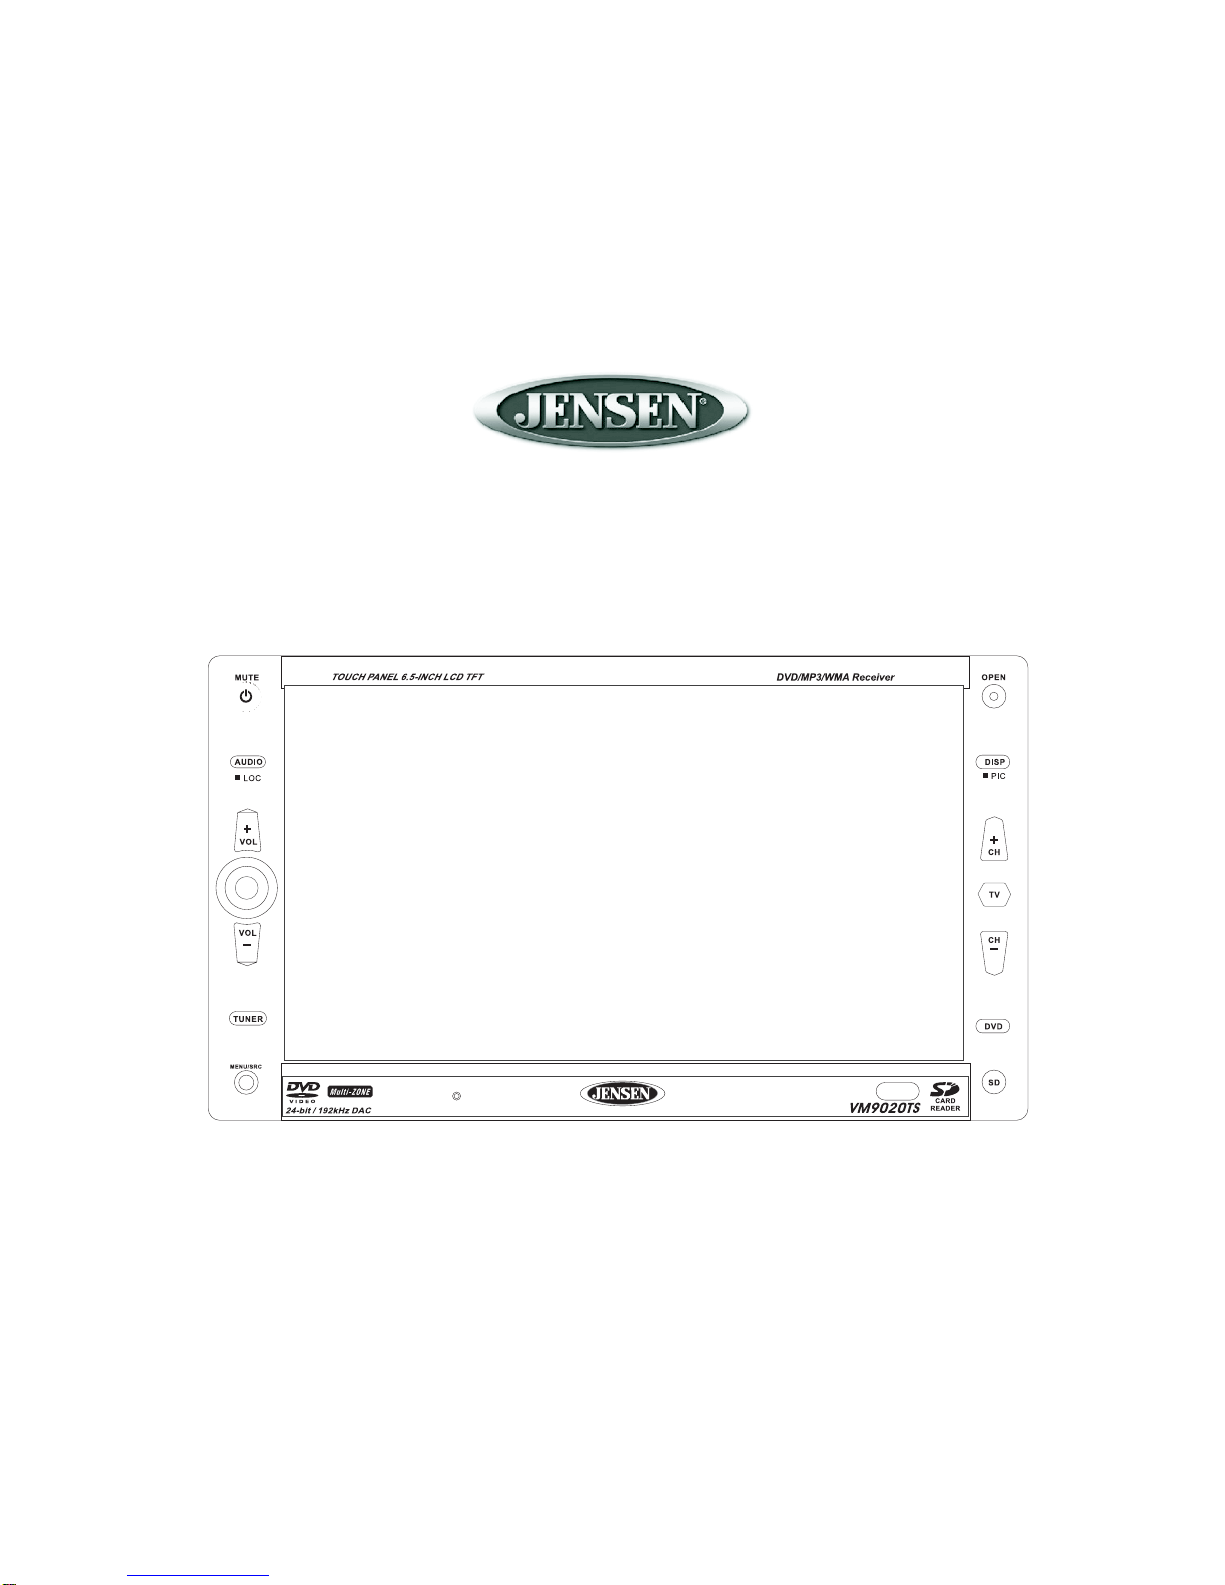
use all the features of your new Jensen VM9020TS Mobile Multimedia DVD/MP3/WMA
Receiver for maximum enjoyment.
Preparation.......................................................................................................... 1
Features........................................................................................................................ 1
Tools and Supplies........................................................................................................ 1
Disconnecting the Battery............................................................................................. 1
Installation........................................................................................................... 2
Using the Cosmetic Trim Ring ...................................................................................... 2
Replacing the Fuse....................................................................................................... 2
Wiring................................................................................................................... 3
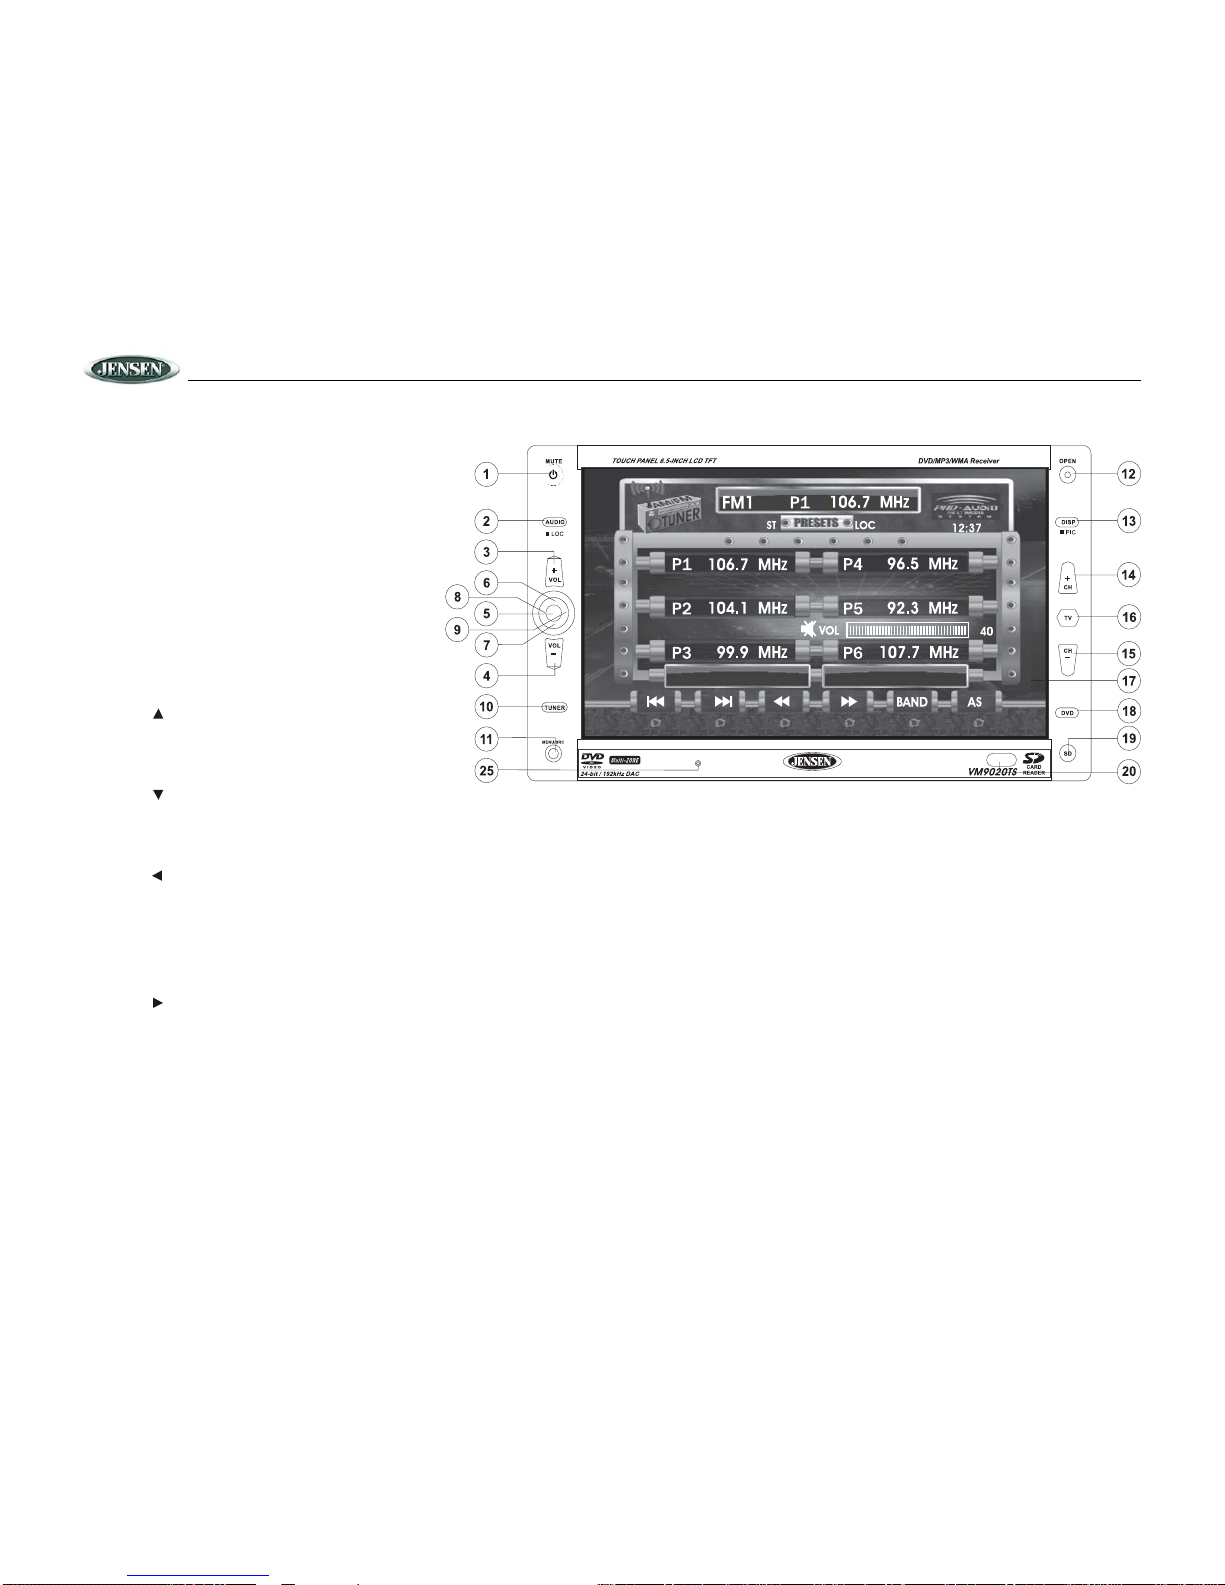
Controls and Indicators...................................................................................... 4
Controls and Indicators...................................................................................... 5
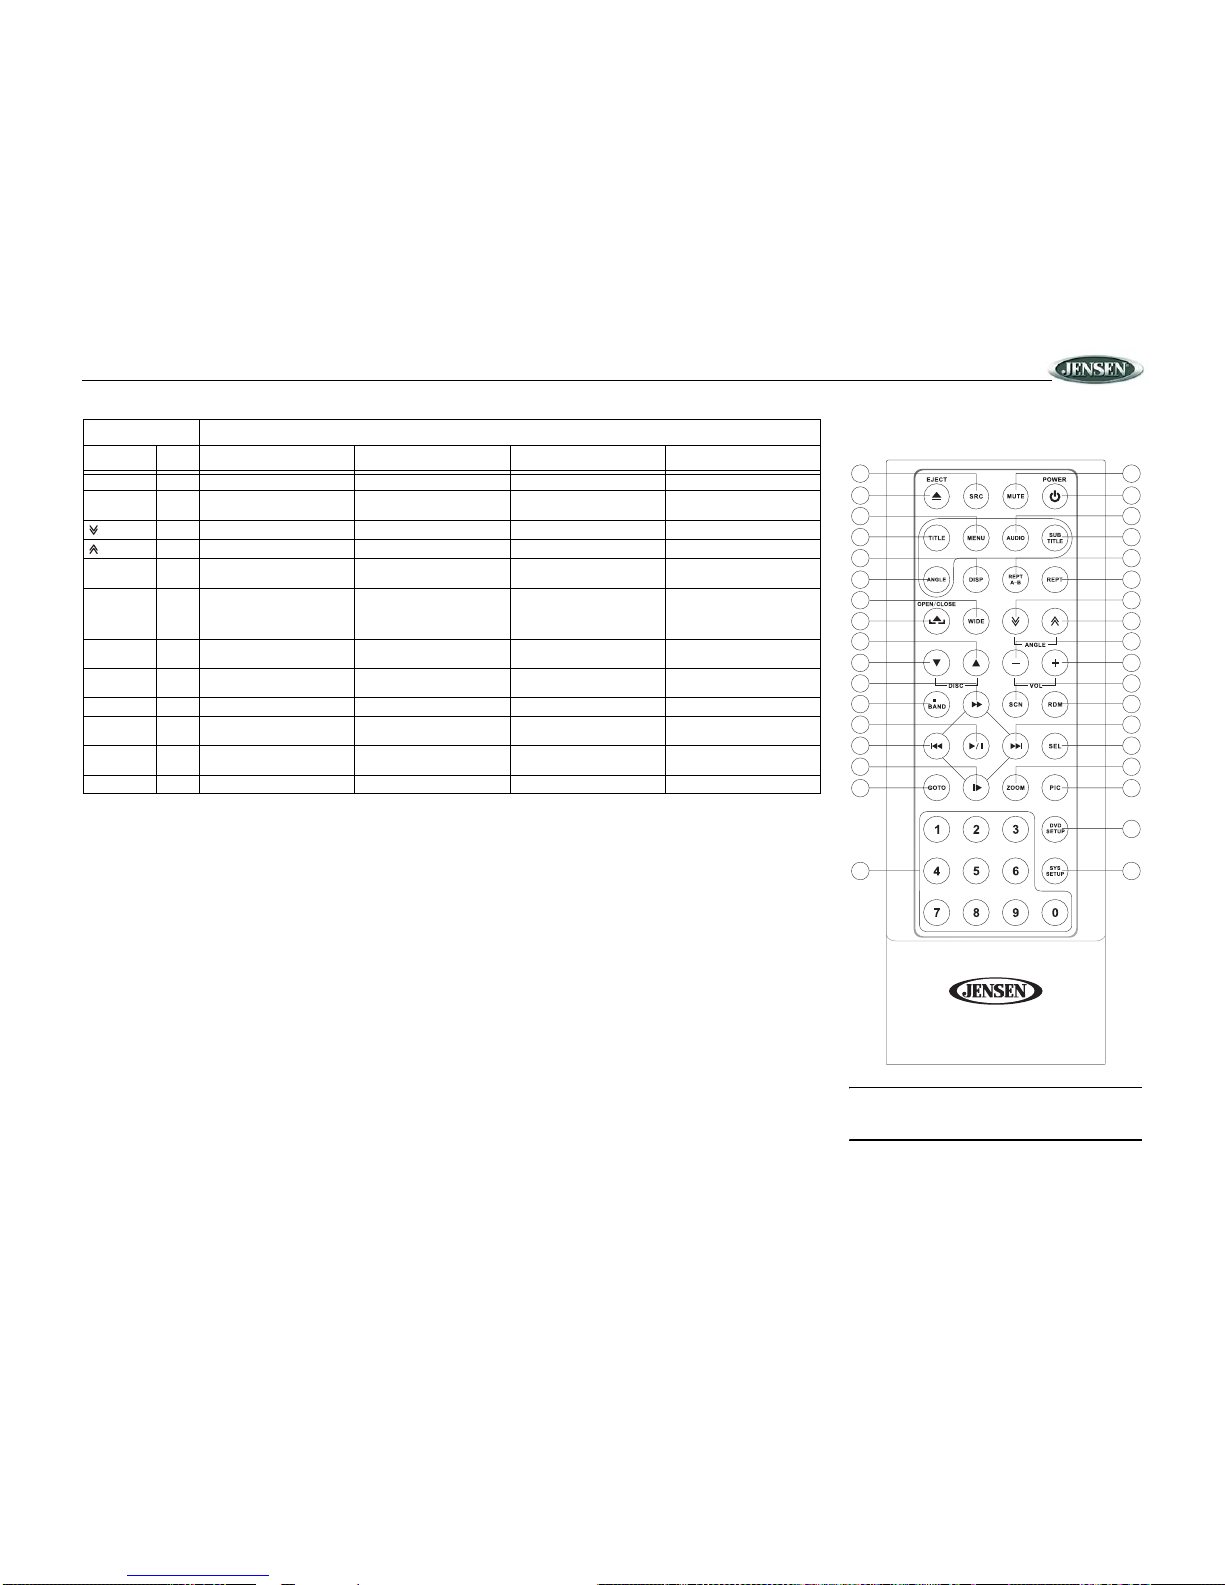
Front ZONE Remote Control.............................................................................. 6
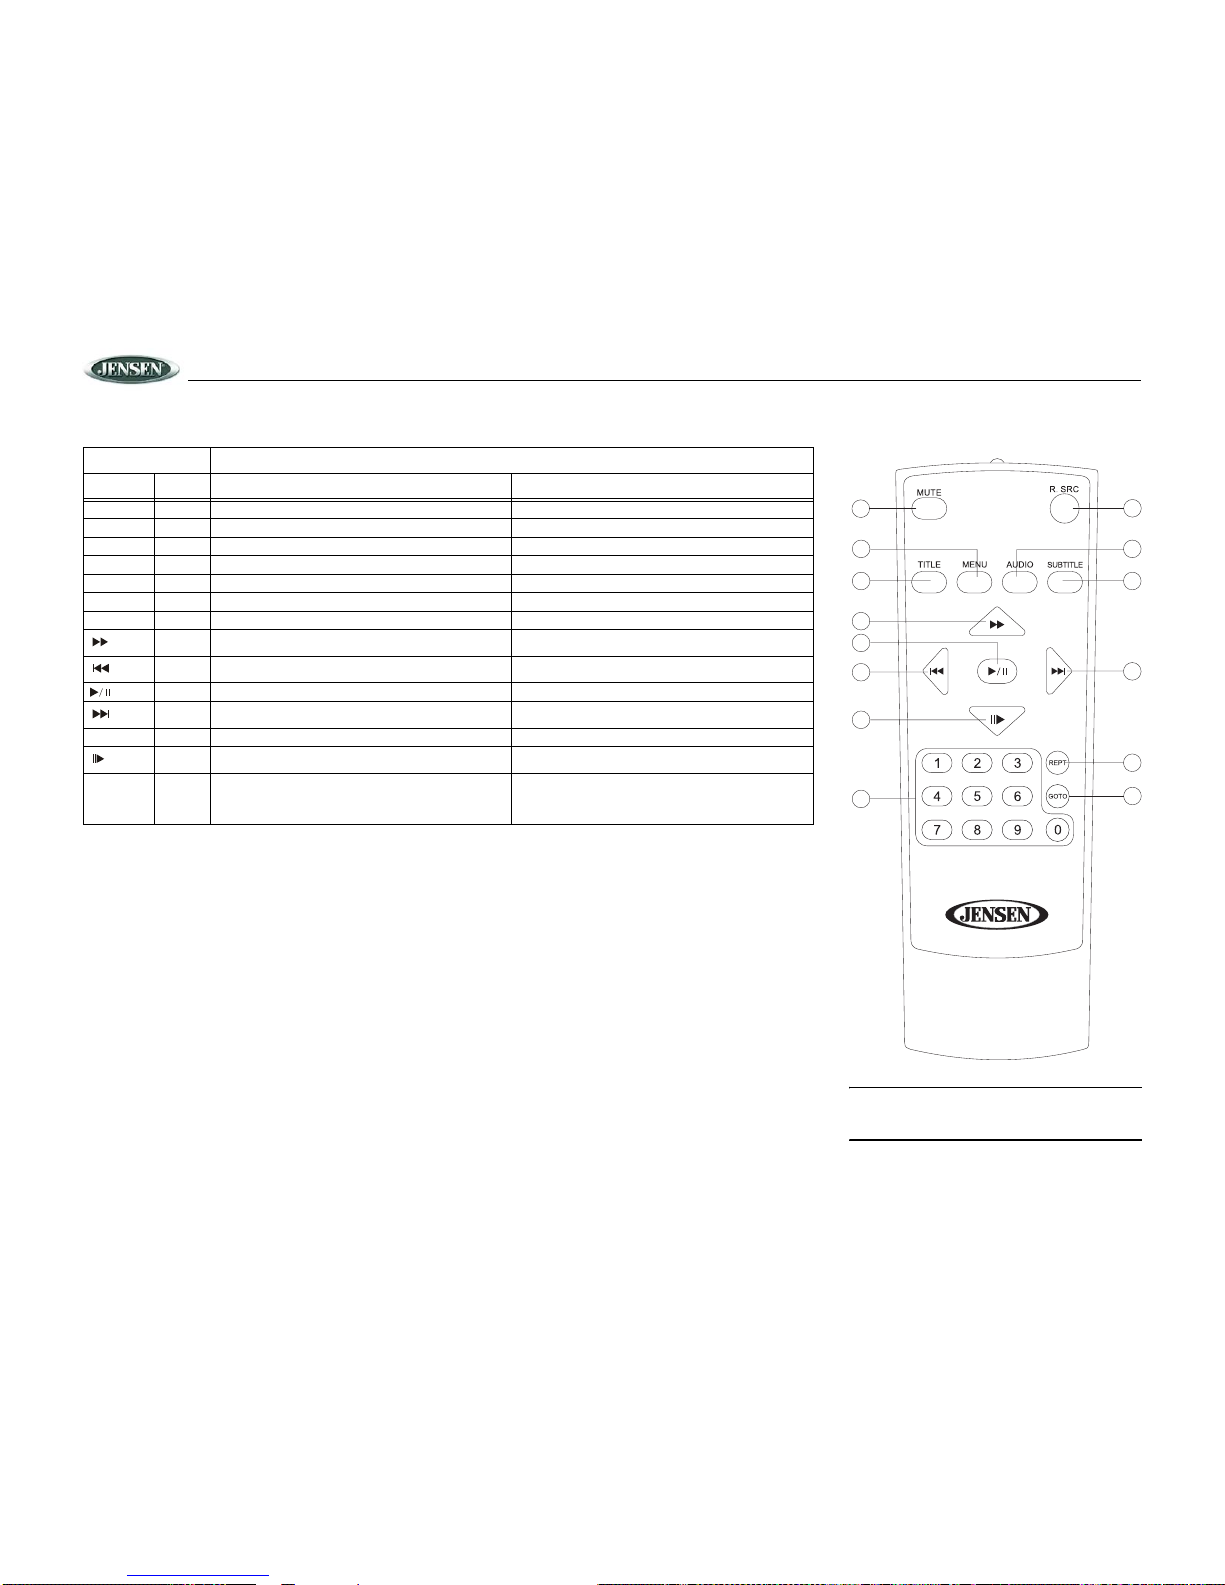
Multi-Zone Remote Control................................................................................ 8
Using the TFT Monitor........................................................................................ 9
Open/Close TFT Monitor............................................................................................... 9
TFT Monitor Auto Open ................................................................................................ 9
Monitor Tilt Angle Adjustment....................................................................................... 9
Rear Camera Mode....................................................................................................... 9
Aspect Ratio.................................................................................................................. 9
Image Setting................................................................................................................ 9
Parking Brake Inhibit..................................................................................................... 9
Monitor Movement Mechanism..................................................................................... 9
Operating Instructions ..................................................................................... 10
Power On / Off ............................................................................................................ 10
Audible Beep Confirmation ......................................................................................... 10
Mute............................................................................................................................ 10
Playing Source Selection............................................................................................ 10
Volume Adjustment..................................................................................................... 10
Audio Control Menu .................................................................................................... 10
Six-Channel Audio Control.......................................................................................... 10
Rear Zone................................................................................................................... 10
System Reset.............................................................................................................. 10
Line Mute .................................................................................................................... 10
System Setup Menu.......................................................................................... 11
General Setup Menu................................................................................................... 11
ASP (Audio Sound Processing) Config Menu............................................................. 11
Exiting the System Setup Menu.................................................................................. 12
Multi-ZONE Operation ......................................................................................12
Tuner Operation................................................................................................ 13
Tuner TFT Display ...................................................................................................... 13
Switch to Radio Tuner source..................................................................................... 13
Select FM/AM Band.................................................................................................... 13
Auto Tuning................................................................................................................. 13
Manual Tuning ............................................................................................................ 13
Using Preset Stations.................................................................................................. 13
Auto Store (AS)........................................................................................................... 13
Local Radio Station Seeking (LOC)............................................................................ 13
DVD Player Operation....................................................................................... 14
Opening/Closing the TFT Video Screen .................................................................... 14
Insert/Eject Disc......................................................................................................... 14
Ejecting a Disc ........................................................................................................... 14
Reset the Loading Mechanism................................................................................... 14
Accessing DVD Mode................................................................................................ 14
Using the Touch-Screen Controls.............................................................................. 14
Controlling Playback .................................................................................................. 14
Accessing the DVD Menu.......................................................................................... 14
Moving Through Chapters.......................................................................................... 14
Fast Forward/Fast Reverse........................................................................................ 15
Scanning.................................................................................................................... 15
Selecting 2-Channel and 6-Channel Audio Playback ................................................ 15
Goto Search............................................................................................................... 15
Direct Chapter / Track Selection ................................................................................ 15
Viewing an Alternate Picture Angle (DVD Only) ........................................................ 15
Zooming..................................................................................................................... 15
Multi-Language Discs (DVD Only)............................................................................. 15
PBC (Play back Control) (VCD Only)......................................................................... 15
Playback Information.................................................................................................. 15
General Disc Information ........................................................................................... 16
DVD Setup Menu .............................................................................................. 17
Accessing the DVD Setup Screen ............................................................................. 17
LANGUAGE Menu..................................................................................................... 17
VIDEO Menu.............................................................................................................. 17
AUDIO Menu.............................................................................................................. 18
SURR SETUP Menu.................................................................................................. 18
SURROUND FX......................................................................................................... 18
RATING (Parental Lock) Menu .................................................................................. 19
CD/MP3/WMA Operation.................................................................................. 20
CD Player User Interface........................................................................................... 20
MP3/WMA Discs........................................................................................................ 20
SD Card Reader Operation.............................................................................. 21
Accessing SD Card Mode.......................................................................................... 21
Using the Touch-Screen Controls.............................................................................. 21
Controlling Playback .................................................................................................. 21
Moving Through Chapters.......................................................................................... 21
Change Directory....................................................................................................... 21
Previous/Next Page ................................................................................................... 21
Direct Chapter / Track Selection ................................................................................ 21
TV TUNER Operation ....................................................................................... 22
Accessing TV Mode................................................................................................... 22
Auto Tuning................................................................................................................ 22
Manual Tuning ........................................................................................................... 22
Storing Stations (AS).................................................................................................. 22
Direct Channel Selection............................................................................................ 22
Display Current Channel............................................................................................ 22
Troubleshooting............................................................................................... 23
Error Messages.......................................................................................................... 24
Care and Maintenance............................................................................................... 24
Specifications................................................................................................... 25
CEA Power Ratings ................................................................................................... 25
12-Month Limited Warranty............................................................................. 26
CONTENTS