CONTENTS:
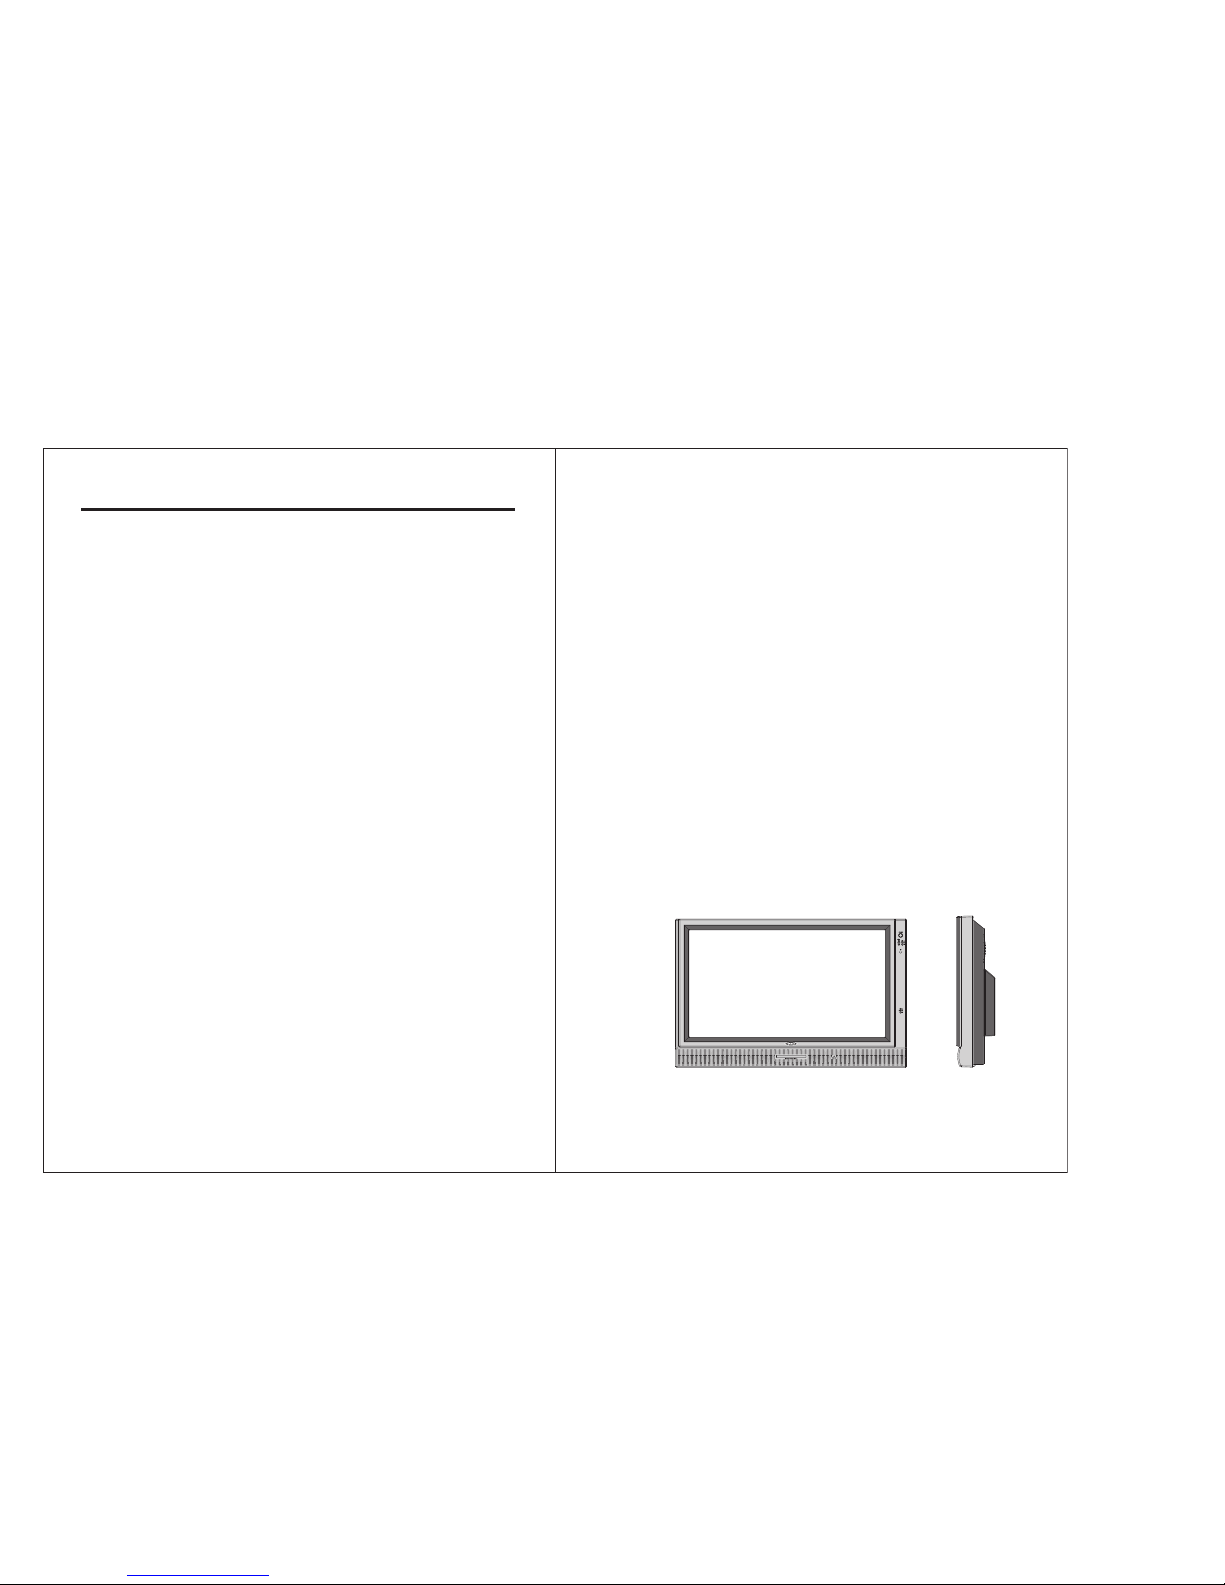
1. INTRODUCTION
Overview -------------------------------------------------------------------------
Product Specifications --------------------------------------------------------
Contents/Accessories --------------------------------------------------------
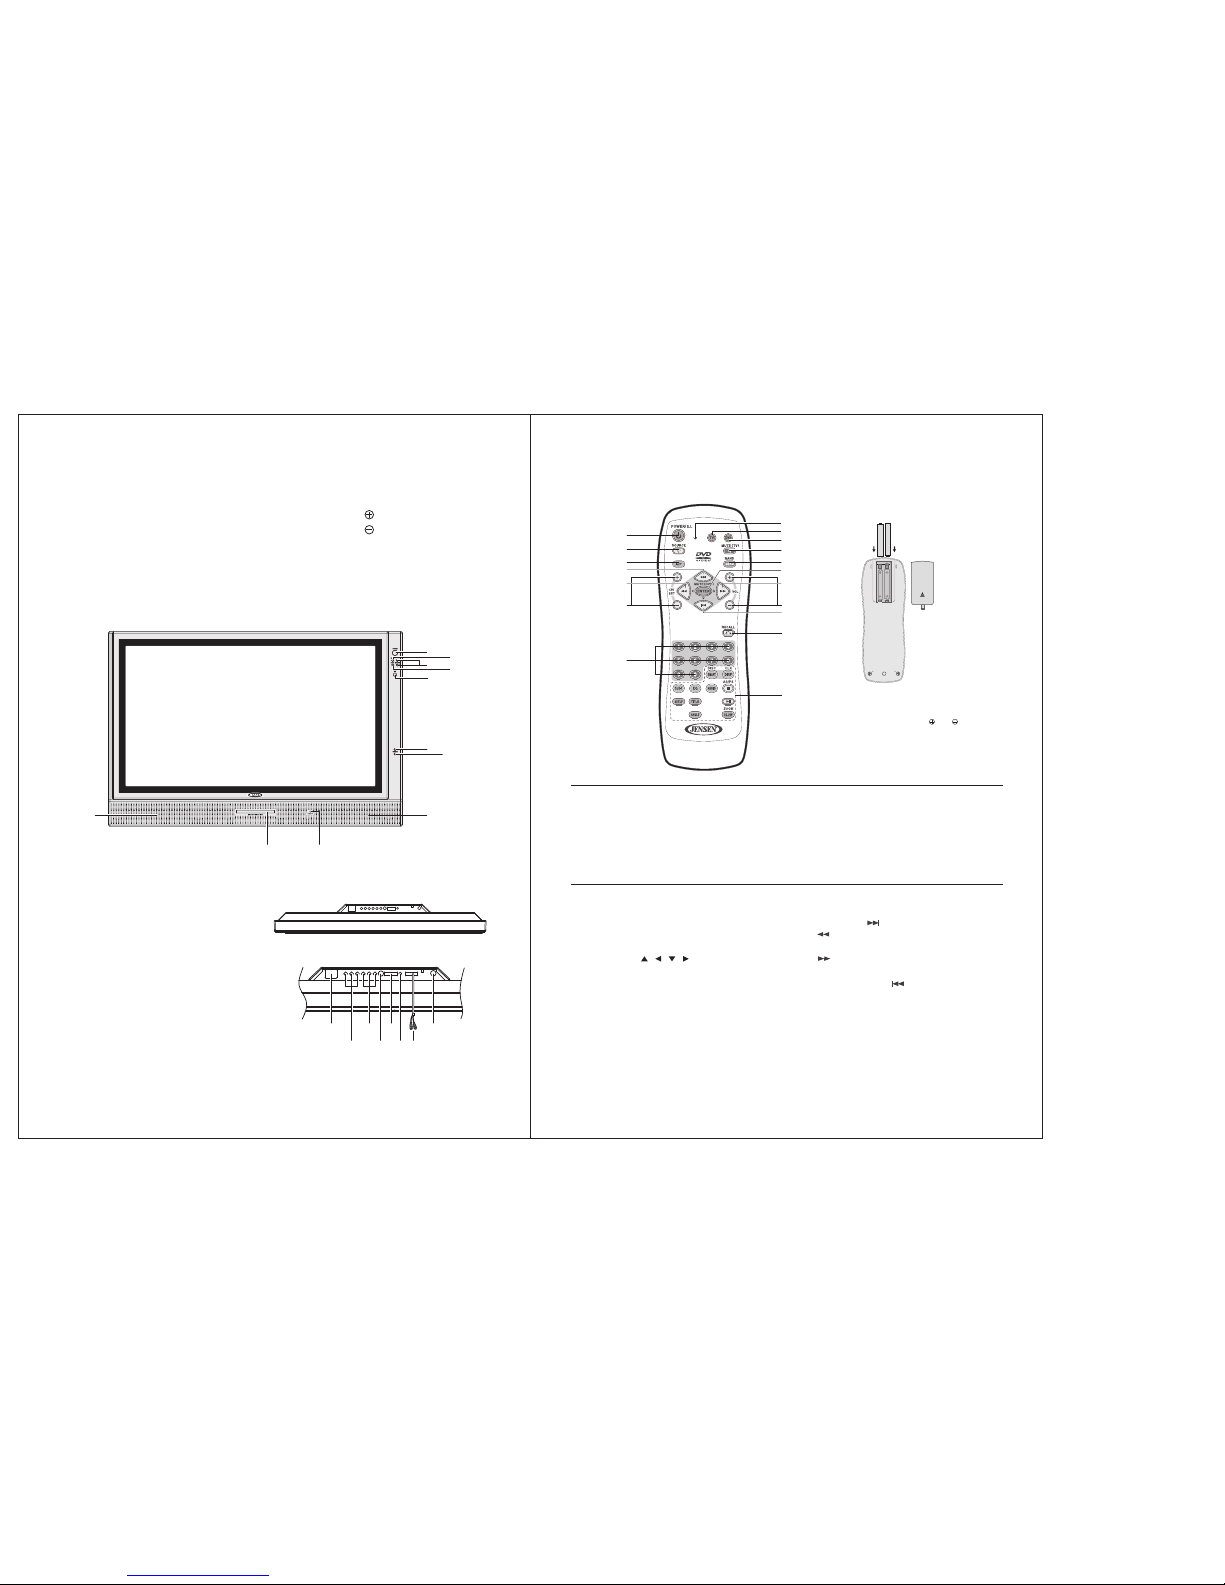
2. FRONT PANEL CONTROL
Panel Control -------------------------------------------------------------------
Input/Output --------------------------------------------------------------------
3. REMOTE CONTROL FUNCTION
Controls & Functions ---------------------------------------------------------
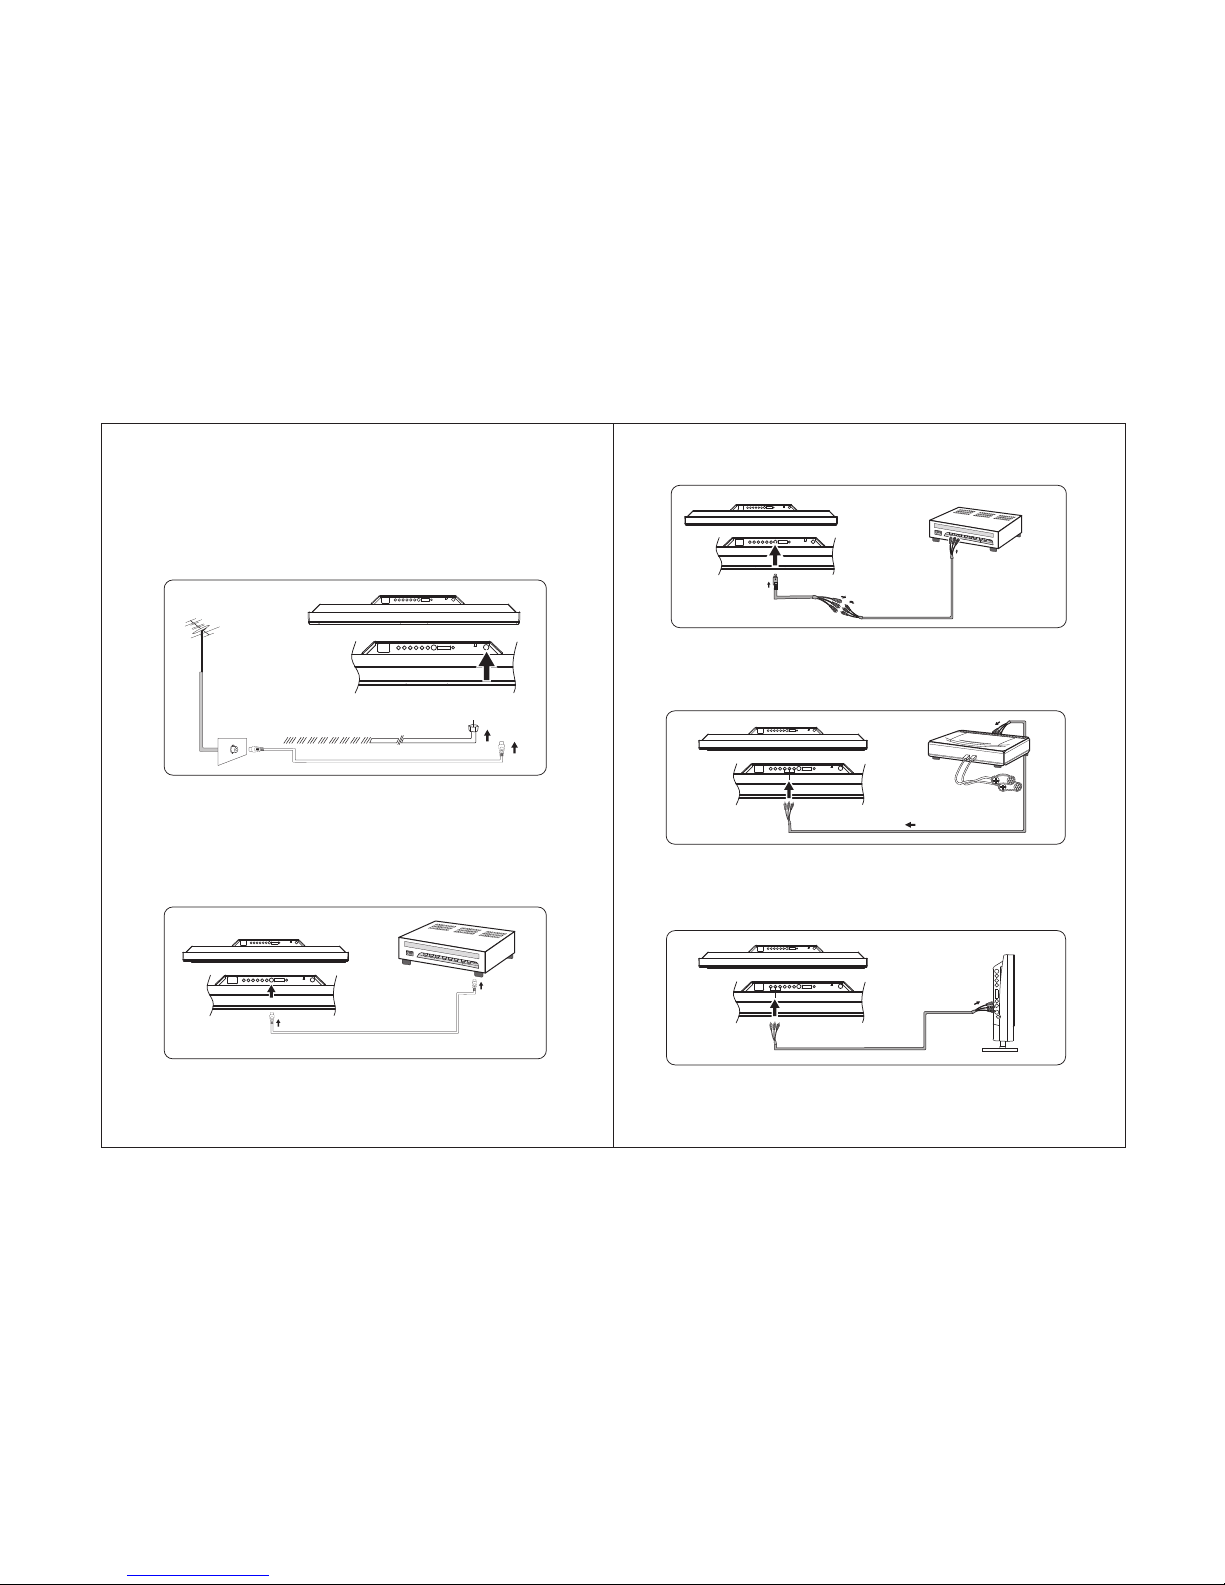
4. INSTALLATION GUIDE
When Connecting to a TV Cable ------------------------------------------
Connecting to Other Equipment -------------------------------------------
Input (RCA) from other Equipment ----------------------------------------
Output (RCA) to Other AV Equipment ------------------------------------
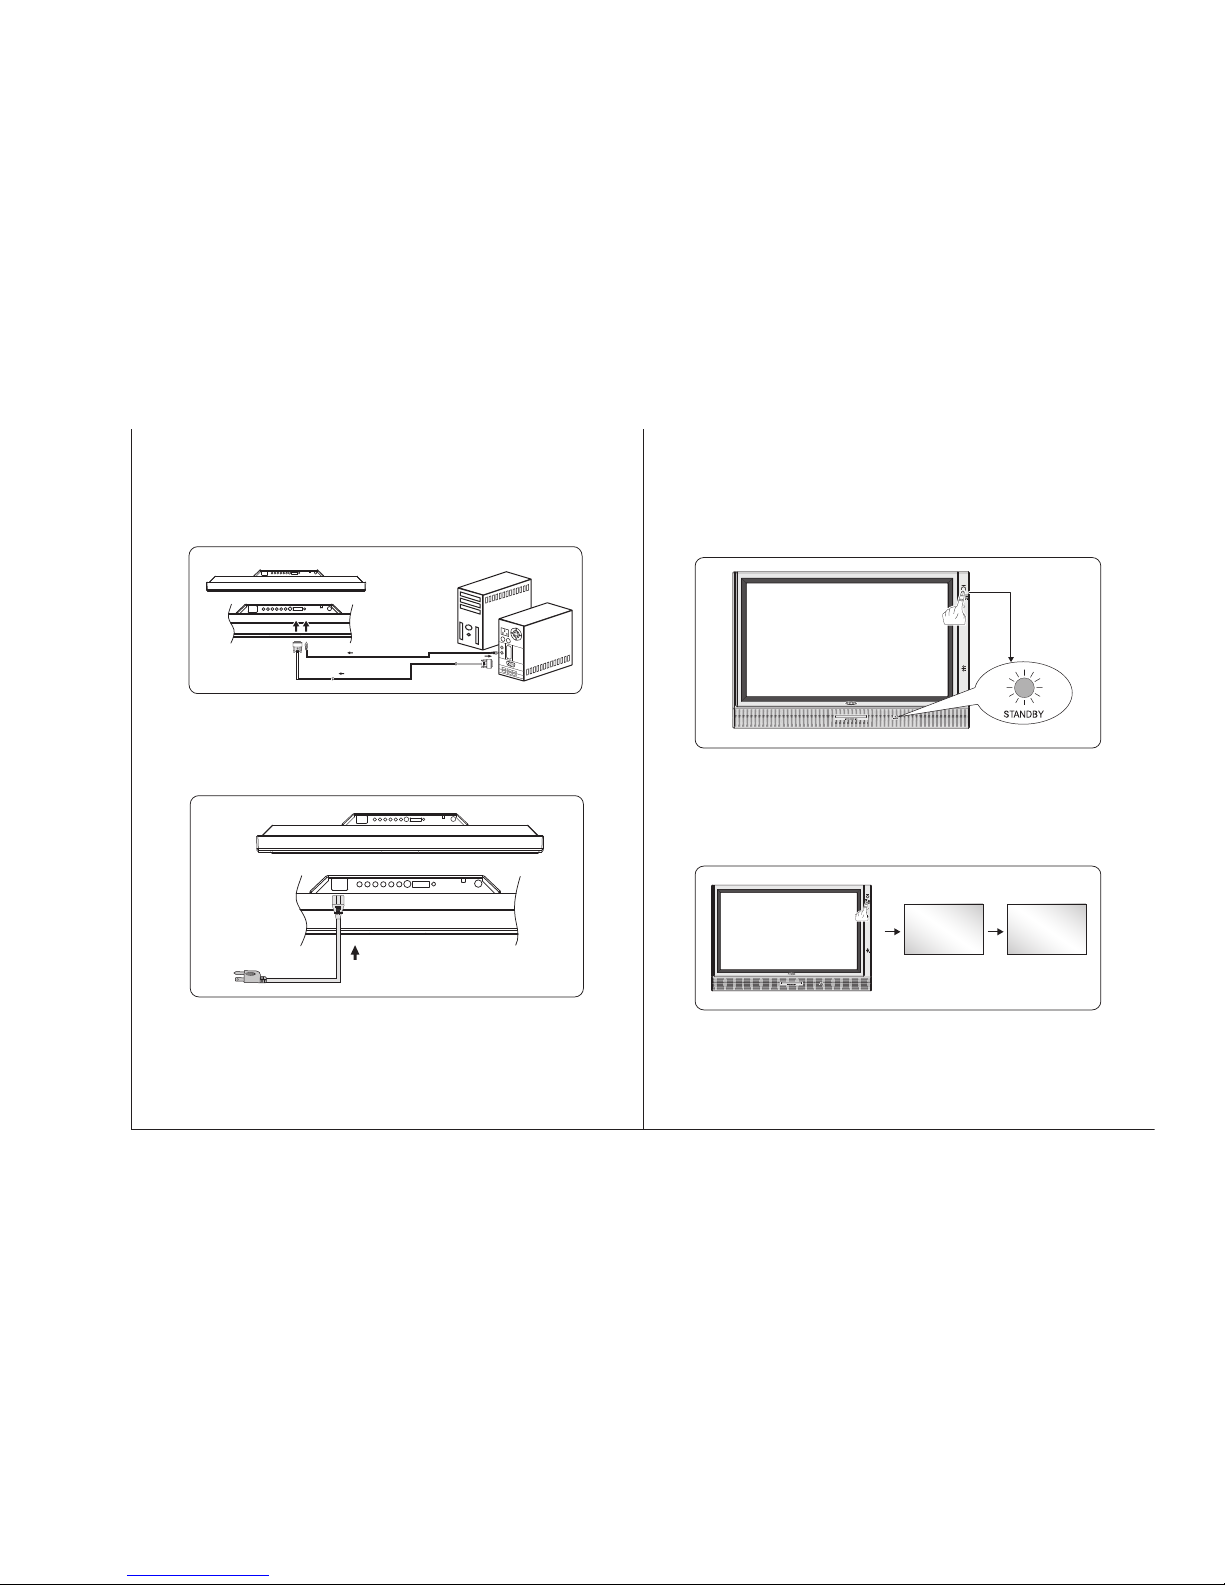
VGA Input ------------------------------------------------------------------------
Connect Power -----------------------------------------------------------------
5. BASIC FUNCTIONS
Power Signal -------------------------------------------------------------------
Mode(SOURCE) --------------------------------------------------------------
Volume Setting -----------------------------------------------------------------
Channel Search ---------------------------------------------------------------
OSD Setting --------------------------------------------------------------------
Mute Setting --------------------------------------------------------------------
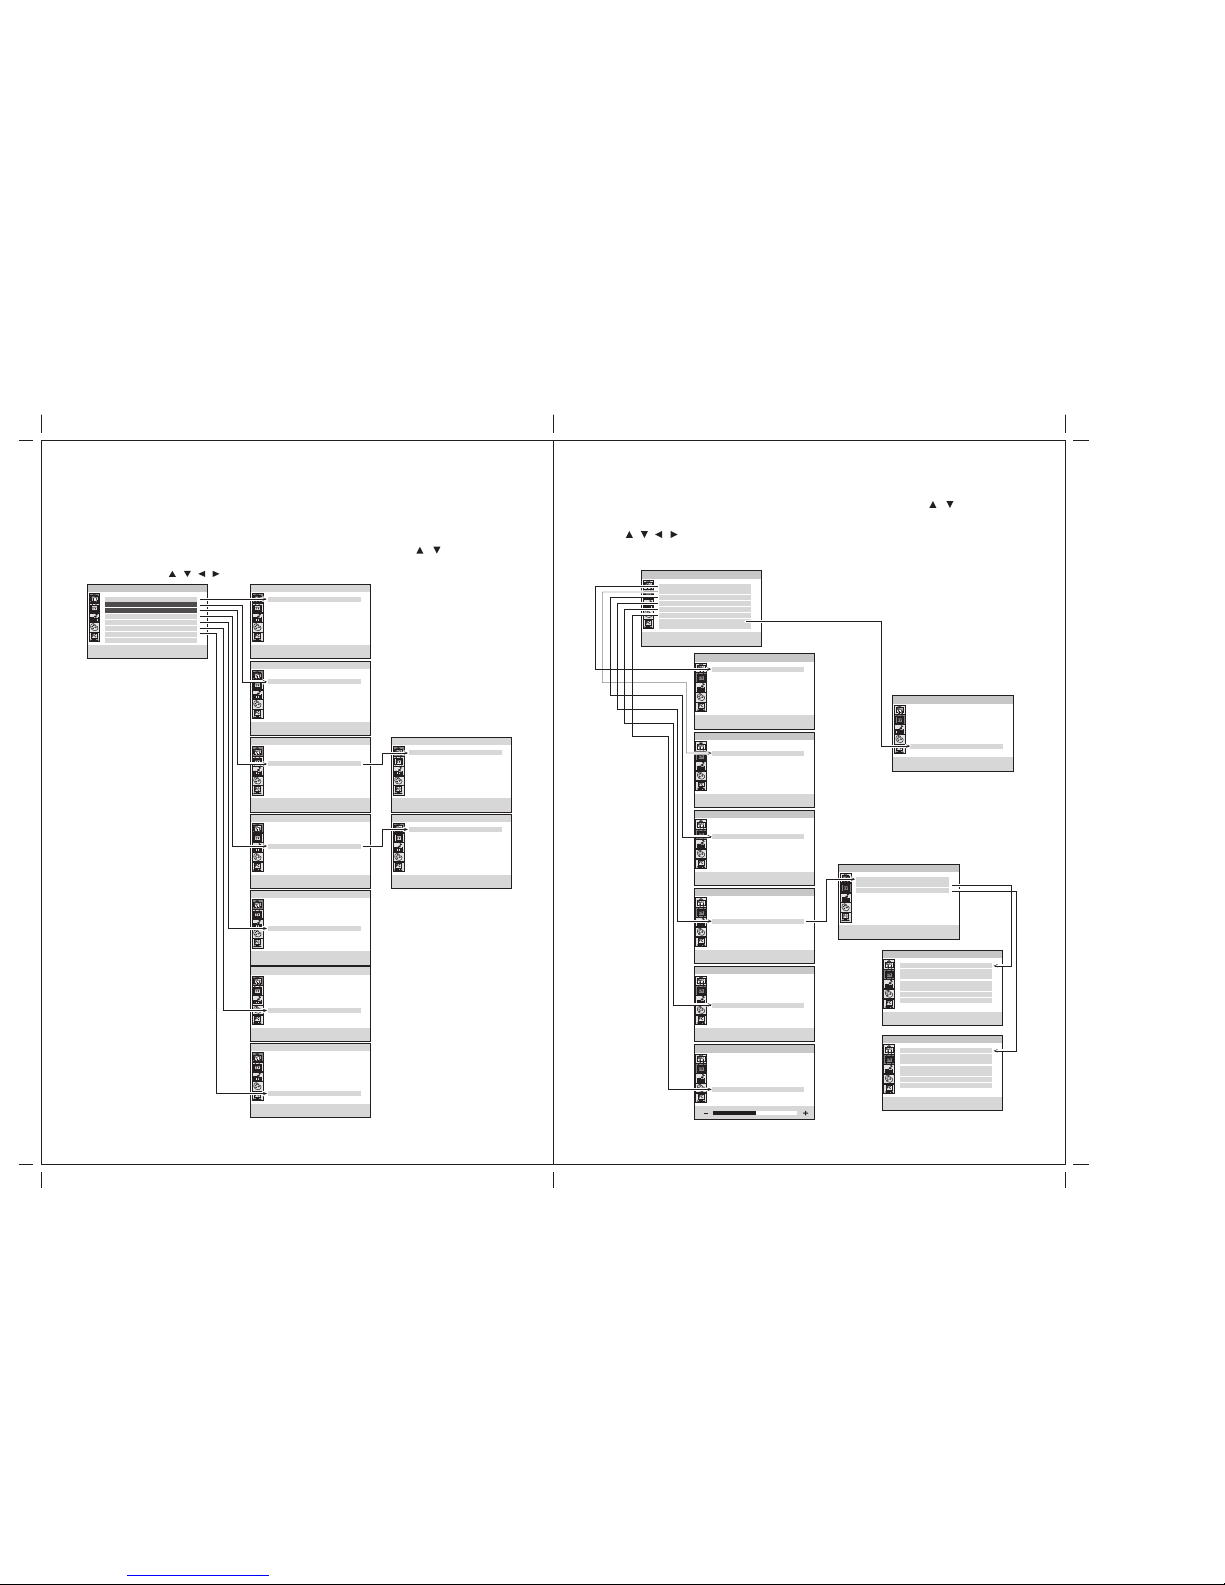
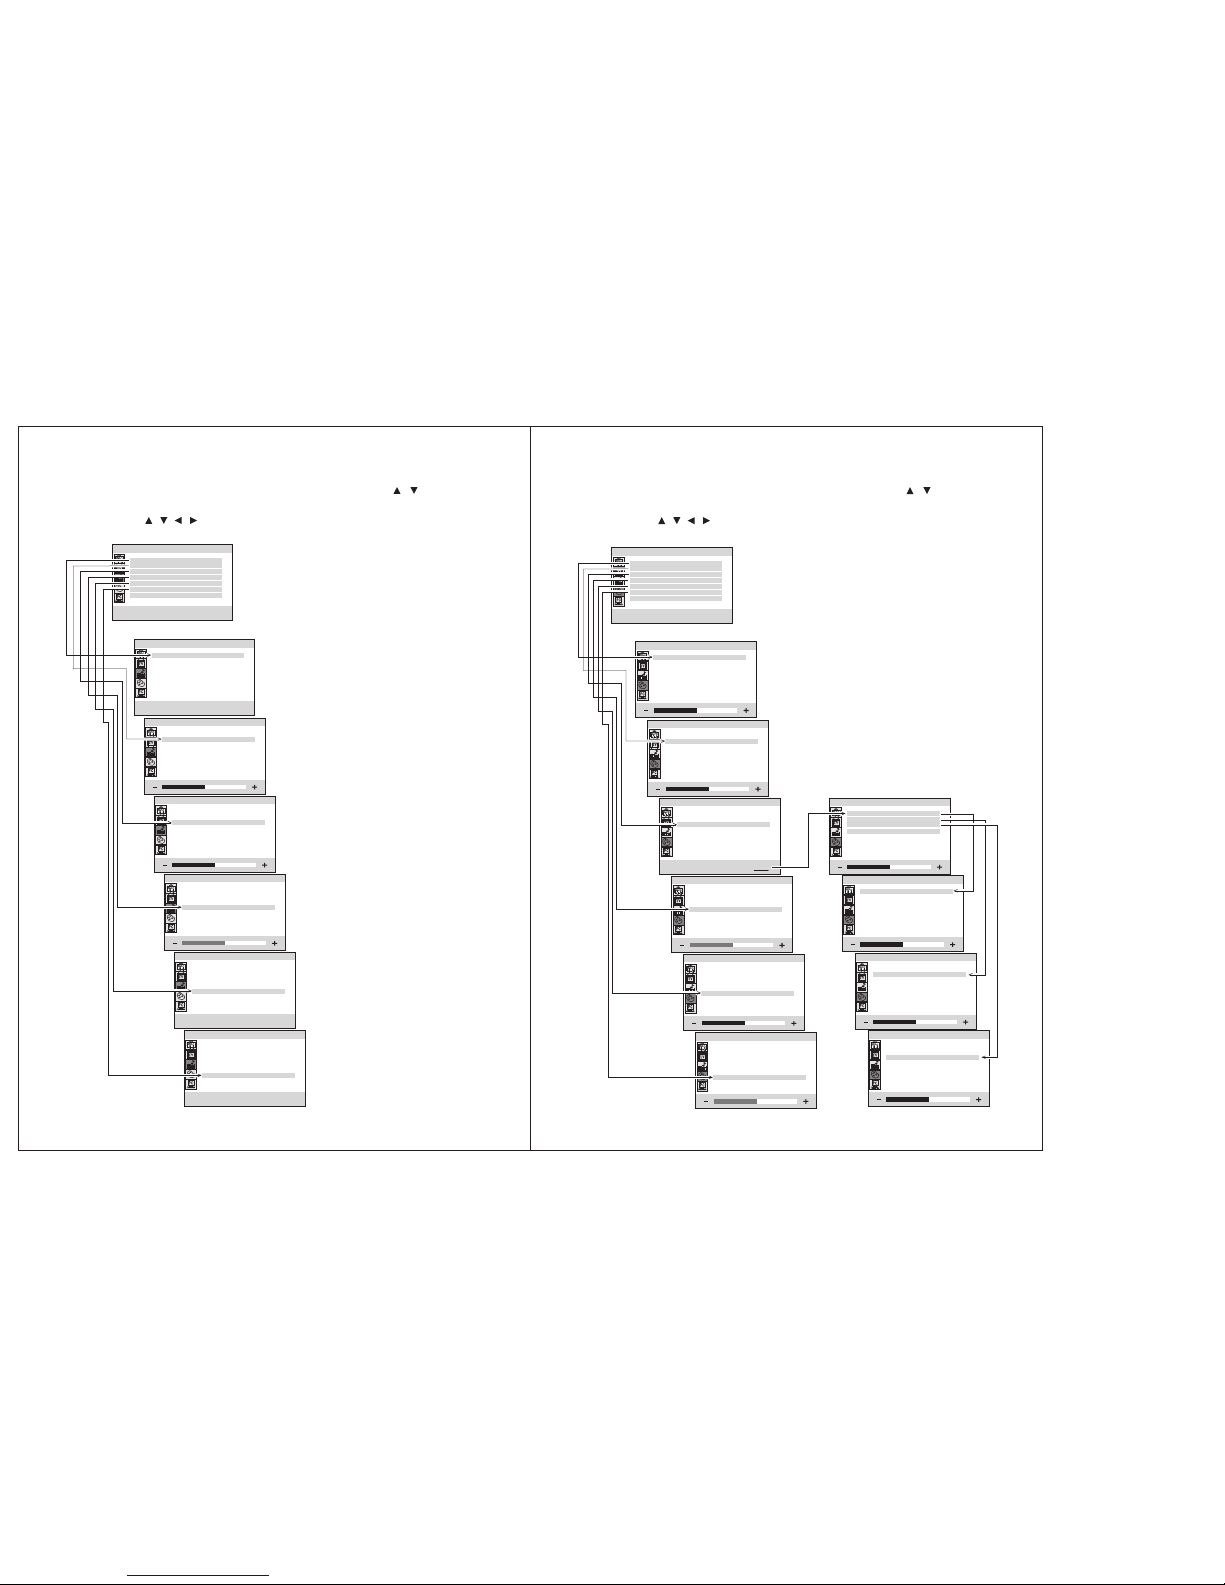
6. OSD SETTINGS
Management Setting ----------------------------------------------------------
TV Setting ------------------------------------------------------------------------
Audio Adjust Setting -------------------------------------------------------------
Picture Adjust Setting -----------------------------------------------------------
01
02
03
04
04
05
06
07
07
07
08
08
09
09
10
10
10
11
12
13
14
15
Safety Precautions:
1. Ensure the plug is securely plugged into the main socket before operating
the unit.
2. Ensure the Voltage on the main socket is the same as specified on the unit.
3. Use parts only manufactured by the unit manufacturers.
4. Request a repair report from the technician/service personnel.
5. Ensure the battery is correctly installed before using the unit.
In case of the following emergencies, remove plug from the main socket
immediately:
1. Plug or cables are damaged.
2. Any form of foreign objects dropped inside the enclosure.
3. Unit is being exposed to rain and/or water.
4. Unit unable to operate under normal operation.
CAUTION
RISK OF ELECTRIC SHOCK
DO NOT OPEN
Notices:
1.The changes or modifications not expressly approved by the party
responsible for compliance could void the user's authority to operate the
equipment.
2.To comply with the FCC RF exposure compliance requirments , no change
to the antenna or the device is permitted. Any change to the antenna or
the device could result in the device exceeding the RF exposure
requirements and void user's authority to operate the device.
This device complies with part 15 of the FCC RULES. Operations is subject to
the following two conditions:
(1)This device may not cause harmful interference and
(2)This device must accept any interference received, including interference that
may cause undisried operation.