Jepson HDC 8203E User manual
EN Operating instructions 03
DE Betriebsanleitung 17
FR Mode d’emploi 33
NL Handleiding 47
ES Instrucciones de servicio 61
PT Instruções de utilização 75
IT Istruzioni per l’uso 87
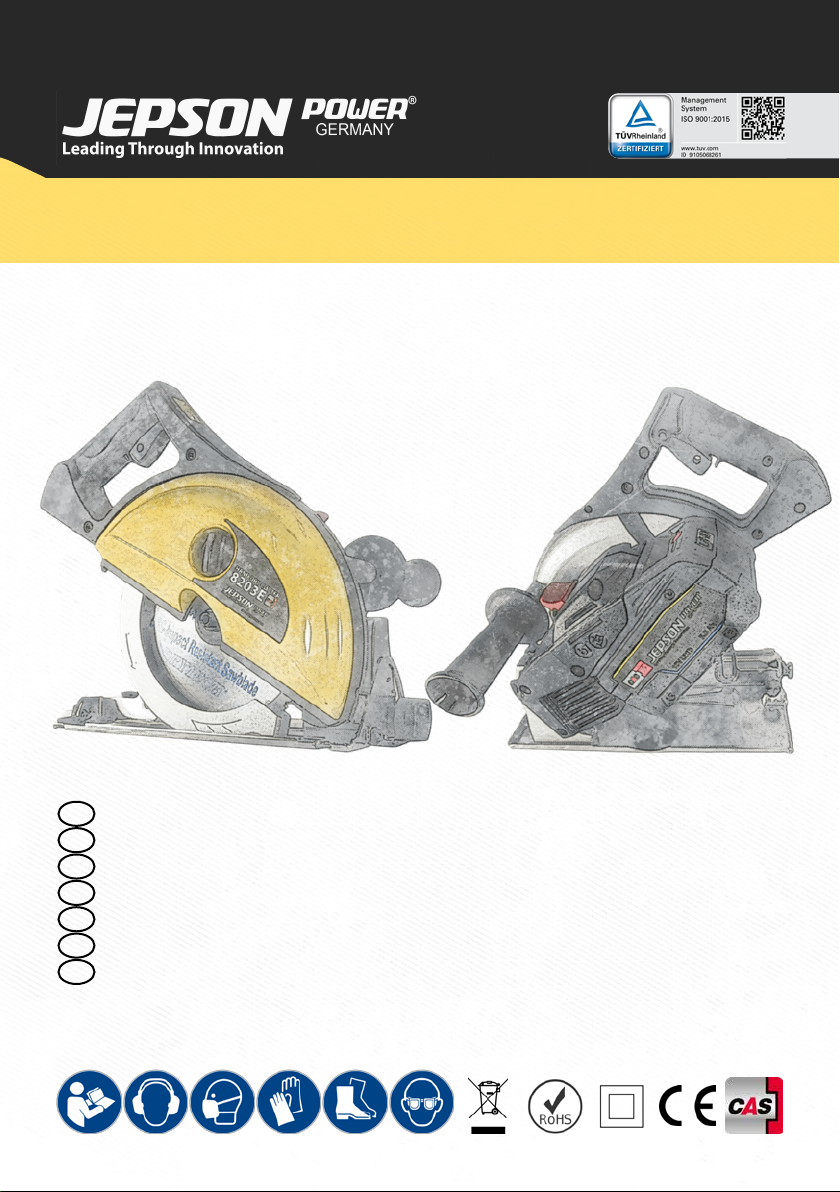
CORDLESS METAL CUTTING CIRCULAR SAW
HDC 8203E
EN CORDLESS METAL CUTTING CIRCULAR SAW
DE AKKUMETALLKREISSÄGE
FR SCIE CIRCULAIRE SANS FIL POUR LA COUPE DES MÉTAUX
NL DRAADLOZE METAAL CIRKELZAAG
ES SIERRA CIRCULAR PARA CORTE DE METALES INALÁMBRICA
PT SERRA CIRCULAR DE CORTE DE METAL SEM FIO
IT SEGA CIRCOLARE PER IL TAGLIO DEI METALLI A BATTERIA

2
6
10
3
7
11
4
8
5
9
1
1
3
5
6
2
89
10
11
4
7
2

EN
DE
FR
NL
ES
PT
IT
1. EC DECLARATION OF CONFORMITY 4
2. SPECIFICATIONS 5
3. USER INSTRUCTIONS 5
4. SAFETY INSTRUCTIONS 6
4.1. ILLUSTRATION OF SAFETY INSTRUCTIONS 6
4.2. DISCLAIMER 6
4.3. GENERAL POWER TOOL SAFETY WARNINGS 7
4.4. CIRCULAR SAW SAFETY WARNINGS 8
4.5. BATTERY SAFETY WARNINGS 10
5. APPLICATION 10
6. FUNCTIONAL DESCRIPTION 11
6.1. UNPACKING 11
6.2. CARTON CONTENTS 11
6.3. CHARGING THE RECHARGEABLE BATTERY 11
6.4. FITTING THE RECHARGEABLE BATTERY 11
6.5. REMOVING THE RECHARGEABLE BATTERY 12
6.6. INSTALLING THE BLADE 12
6.7. REMOVING THE BLADE 12
6.8. ADJUSTMENT DEPTH OF CUT 12
6.9. ADJUSTMENT OF BEVEL ANGLE 12
6.10. HOW TO USE THE SIGHTING NOTCH 12
6.11. STARTING AND STOPPING TOOL 12
6.12. REMOVING CHIPS 12
6.13. HOW TO USE THE RIP FENCE 13
6.14. LOWER RETRACTING BLADE GUARD 13
6.15. HOW TO USE THE TOOL 13
6.16. CLAMP THE WORK PIECE 13
7. MAINTENANCE 13
7.1. KEEP TOOL CLEAN 13
7.2. WARNING 13
7.3. TRANSPORT 14
7.4. DISPOSAL OF RECHARGEABLE BATTERIES/BATTERIES 14
8. QUOTATION 14
9. SPARE PARTS 14
10. WARRANTY 14
ENGLISH
3

1. EC DECLARATION OF CONFORMITY
(according to Appendix IIA of the machine Directive)
We, Jepson Power GmbH, Ernst – Abbe – Straße 5, 52249 Eschweiler, Germany, as the manufacturer
declare herewith under our responsibility that the product:
Name: Hand Dry Cutter HDC 8203E
Manufacturing date: See machine label
Serial number: See machine label
complies with the following standards, directives and referenced standard documents:
2006/42/EC Machinery Directive
2014/30/EU EMC Directive
2011/65/EU RoHS Directive
EN 62841-1 :2015
EN 62841-2-5:2014
EN 55011
EN 12100
Pierre Michiels, Managing Director
Name, Position Eschweiler, 01.01.2023
CE symbol to document compliance
with the basic safety and health
requirements according to Appendix I
of the Machinery Directive.
For EU countries only
Do not dispose of electrical tools
together with domestic waste!
In accordance with the European
directive 2002/96/EC on waste electrical and
electronic equipment and transposition into
national law, obsolete electrical tools must be
collected separately and recycled in an environ-
mentally-compatible manner.
To reduce the risk of injury, please read
the operating instructions.
Protect the rechargeable battery from
heat, excessive solar radiation, re, frost,
water and humidity.
Protect rechargeable battery packs
from humidity!
Protect rechargeable battery packs
from re! There is danger of explosion!
Cordless Allicance System (=CAS) is a
cross-manufacturer battery pack
system. Further information is available
at www.cordless-alliance-system
ENGLISH
4

EN
DE
FR
NL
ES
PT
IT
2. SPECIFICATIONS
Nominal voltage 18V
Saw blade speed while idling 3.500 min-1
Saw blade diameter 203 mm | 8”
Bevel angle 0°~45°
Bore 25,4 mm | 1“
Max. cutting depth 90°: 67 mm | 2.63”
45°: 42 mm | 1.65”
Net weight 5,4 kg | 12 lbs
Sound pressure level 87,3 dB
Sound power level 98,1 dB
Vibration - main handle ah = 2,05 K = 0,07
Vibration - auxiliary handle ah = 2,39 K = 0,3
Information referred to 2.2 of Annex 1 of the E. G. Directive on vibrations)
3. USER INSTRUCTIONS
Notes for the customer
The instruction manual includes important
instructions as to how to operate the machine
safely, correctly and economically. Observing
these instructions helps to avoid risks, repair costs
and downtimes and to increase the reliability and
lifetime of the machine.
The instruction manual must be read and used
by each person who works with the electrical
equipment. This applies in particular to the
“Safety Instructions” chapter. It is too late to read
the manual and safety instructions when work is
actually being carried out at the machine.
Always keep one copy of this manual next to the
machine so that it is at hand ready to be consulted!
In case of any doubt or questions, always contact
the machine manufacturer.
In addition to the instruction manual, the accident
prevention regulations which apply in the country
of use and the user location must be adhered to. In
addition, the recognised technical rules regarding
accident prevention must be observed.
Liability and warranty
All the information contained in this instruction
manual has been drawn up to the best of our
knowledge and belief, taking our experience to date
into consideration.
The original version of this instruction manual was
drawn up in the German language and was checked
by us for accuracy of content. The translation into
the respective national/contractual language was
carried out by a recognised translation agency.
This instruction manual has been put together with
the greatest of care. However, if you should discover
any incomplete items or mistakes, please inform us
in writing. Your suggestions for improvement will
help us to create a user-friendly manual.
Subsequent Orders and Copyright
Further copies of this instruction manual can be
ordered from the address below. We ask for your
understanding that further copies are subject to
charge.
Jepson Power GmbH
Ernst-Abbe-Straße 5
D-52249 Eschweiler
Phone: +49 (0)2403 – 6455-0
Fax: +49 (0)2403 – 6455-15
Mail: [email protected]
See page 2 - g. 1
1. Main handle
2. Side handle
3. Cover lock knob
4. Bevel lock
5. Base
6. Retracting blade guard
7. Sighting notch
8. Blade lock
9. Safety switch for unlocking
10. Depth lock lever
11. Battery lock
ENGLISH
5
All rights are expressly reserved. Duplication or
transfer on to third parties in any form whatsoever
is not allowed without our prior written permission.
Abbreviations
V Volt
A Ampere
Hz Hertz
W Watt
~ a.c.
/min Revolutions per minute rpm
N Newton
4. SAFETY INSTRUCTIONS
The basic prerequisite for safe handling and
disturbance-free operation of this electric tool
is knowledge of the basic safety instructions.
In addition, the accident prevention rules and
regulations which apply in the user location must
be adhered to, as well as the recognized rules of
the trade with regard to safety and correct working
methods.
It is not permitted to use the electric tool for other
purposes than those intended by the manufacturer.
Such use could give rise to unforeseeable risks.
Local working and safety rules and laws must always
be followed. The same applies to regulations which
apply to the environment.
Safety equipment must never by removed or
bridged over.
When using oils, greases and other chemical
substances, the safety regulations which apply to
the particular product must always be observed!
Contact with chemicals should be avoided as far
as possible. Before it is permissible to work with
these substances the instructions for use on the
packaging must be read and followed. This applies
for all chemicals, therefore also for cleaning media.
All notes and signs regarding safety and possible
risks must be kept in a fully legible condition.
4.1. ILLUSTRATION OF SAFETY INSTRUC
TIONS
The following symbols are used in the instruction
manual:
Warning against possible danger of
injury or danger to life for persons
Warning against possible damage to
property or the environment
Warning against dangerous electrical
voltage
Warning against hot surfaces
Ignoring these instructions can lead to serious
damage to health, up to life-threatening injuries!
This symbol indicates important
information
Hazardous to the environment
4.2. DISCLAIMER
This power tool fulls the basic EC
safety and health regulations.
Nevertheless, dangerous situations
can arise.
All safety equipment must be
maintained in perfect condition.
Always pay attention to moving
parts. These can cause injury because
of their movement or by sudden
movement.
Only use the power tool when it is in
perfect condition from the technical
point of view, and only use it for
intended purpose while being aware
of safety issues and risks, and paying attention
to the instruction manual! In particular, have any
disturbances which could have a negative eect
on safety corrected immediately!
ENGLISH
6
EN
DE
FR
NL
ES
PT
IT
4.3. GENERAL POWER TOOL SAFETY
WARNINGS
WARNING!! Read all safety warnings,
instructions, illustrations and speci-
cations provided with this power
tool.
Failure to follow all instructions listed below may
result in electric shock, re and/or serious injury.
The following term “power tool”, refers to
mains-powered power tools (with mains cable) and
battery-powered power tools (without mains cable).
SAVE ALL WARNINGS AND
INSTRUCTIONS FOR FUTURE
REFERENCE.
1. Work area safety
a) Keep work area clean and well lit. Cluttered or
dark areas invite accidents.
b) Do not operate power tools in explosive
atmospheres, such as in the presence of
ammable liquids, gases or dust. Power tools
create sparks which may ignite the dust or
fumes.
c) Keep children and bystanders away while
operating a power tool. Distractions can cause
you to lose control.
2. Electrical safety
a) Power tool plugs must match the outlet.
Never modify the plug in any way. Do not
use any adapter plugs with grounded power
tools. Unmodied plugs and matching outlets
will reduce risk of electric shock.
b) Avoid body contact with earthed or
grounded surfaces, such as pipes, radiators,
ranges and refrigerators. There is an increased
risk of electric shock if your body is earthed or
grounded.
c) Do not expose power tools to rain or wet
conditions. Water entering a power tool will
increase the risk of electric shock.
d) Do not abuse the cord. Never use the cord for
carrying, pulling or unplugging the power
tool. Keep cord away from heat, oil, sharp
edges or moving parts. Damaged or entangled
cords increase the risk of electric shock.
e) When operating a power tool outdoors, use
an extension cord suitable for outdoor use.
Use of a cord suitable for outdoor use reduces
the risk of electric shock.
f) If operating a power tool in a damp location
is unavoidable, use a ground fault circuit
interrupter (GFCI) protected supply. Use
of a GFCI reduces the risk of electric shock.
3. Personal safety
a) Stay alert, watch what you are doing and
use common sense when operating a power
tool. Do not use a power tool while you are
tired or under the inuence of drugs, alcohol
or medication. A moment of inattention while
operating power tools may result in serious
personal injury.
b) Use personal protective equipment. Always
wear eye protection. Protective equipment
such as dust mask, non-skid safety shoes, hard
hat, or hearing protection used for appropriate
conditions will reduce personal injuries.
c) Prevent unintentional starting. Ensure
the switch is in the o-position before
connecting to power source and/or BATTERY
pack, picking up or carrying the tool. Carrying
power tools with your nger on the switch or
energising power tools that have the switch on
invites accidents.
d) Remove any adjusting key or wrench before
turning the power tool on. A wrench or a key
left attached to a rotating part of the power tool
may result in personal injury.
e) Do not overreach. Keep proper footing and
balance at all times. This enables better control
of the power tool in unexpected situations.
f) Dress properly. Do not wear loose clothing
or jewellery. Keep your hair, clothing and
gloves away from moving parts. Loose clothes,
jewellery or long hair can be caught in moving
parts.
g) If devices are provided for the connection
of dust extraction and collection facilities,
ENGLISH
7

ensure these are connected and properly
used. Use of dust collection can reduce
dust-related hazards.
h) Do not let familiarity gained from
frequent use of tools allow you to become
complacent and ignore tool safety
principles. A careless action can cause
severe injury within a fraction of a second.
4. Power tool use and care
a) Do not force the power tool. Use the correct
power tool for your application. The correct
power tool will do the job better and safer at the
rate for which it was designed.
b) Do not use the power tool if the switch
does not turn it on and o. Any power tool
that cannot be controlled with the switch is
dangerous and must be repaired.
c) Disconnect the plug from the power
source and/or remove the BATTERY pack,
if detachable, from the power tool before
making any adjustments, changing
accessories, or storing power tools. Such
preventive safety measures reduce the risk of
starting the power tool accidentally.
d) Store idle power tools out of the reach of
children and do not allow persons unfamiliar
with the power tool or these instructions
to operate the power tool. Power tools are
dangerous in the hands of untrained users.
e) Maintain power tools and accessories. Check
for misalignment or binding of moving parts,
breakage of parts and any other condition
that may aect the power tool’s operation. If
damaged, have the power tool repaired before
use. Many accidents are caused by poorly
maintained power tools.
f) Keep cutting tools sharp and clean. Properly
maintained cutting tools with sharp cutting
edges are less likely to bind and are easier to
control.
g) Use the power tool, accessories and tool bits
etc. in accordance with these instructions,
taking into account the working conditions
and the work to be performed. Use of the
power tool for operations dierent from those
intended could result in a hazardous situation.
h) Keep handles and grasping surfaces dry,
clean and free from oil and grease. Slippery
handles and grasping surfaces do not allow
for safe handling and control of the tool in
unexpected situations.
5. Battery tool use and care
a) Recharge only with the charger specied by
the manufacturer. A charger that is suitable for
one type of battery pack may create a risk of re
when used with another battery pack.
b) Use power tools only with specically
designated battery packs. Use of any other
battery packs may create a risk of injury and re.
c) When battery pack is not in use, keep it away
from other metal objects, like paper clips,
coins, keys, nails, screws or other small metal
objects, that can make a connection from
one terminal to another. Shorting the battery
terminals together may cause burns or a re.
d) Under abusive conditions, liquid may be
ejected from the battery; avoid contact. If
contact accidentally occurs, ush with water.
If liquid contacts eyes, additionally seek
medical help. Liquid ejected from the battery
may cause irritation or burns.
e) Do not use a battery pack or tool that is
damaged or modied. Damaged or modied
batteries may exhibit unpredictable behaviour
resulting in re, explosion or risk of injury.
f) Do not expose a battery pack or tool to re
or excessive temperature. Exposure to re or
temperature above 130 °C may cause explosion.
g) Follow all charging instructions and do not
charge the battery pack or tool outside
the temperature range specied in the
instructions. Charging improperly or at
temperatures outside the specied range may
damage the battery and increase the risk of re.
6. Service
a) Have your power tool serviced by a
qualied repair person using only identical
replacement parts. This will ensure that the
safety of the power tool is maintained
b) Never service damaged battery packs. Service
of battery packs should only be performed
by the manufacturer or authorized service
providers.
4.4. CIRCULAR SAW SAFETY WARNINGS
Cutting procedures
1. DANGER!! Keep hands away from
cutting area and the blade. Keep
your second hand on auxiliary
handle, or motor housing. If both
hands are holding the saw, they cannot be cut
by the blade.
ENGLISH
8

EN
DE
FR
NL
ES
PT
IT
2. Do not reach underneath the workpiece. The
guard cannot protect you from the blade below
the workpiece.
3. Adjust the cutting depth to the thickness
of the workpiece. Less than a full tooth of
the blade teeth should be visible below the
workpiece.
4. Never hold piece being cut in your hands or
across your leg. Secure the workpiece to a
stable platform. It is important to support the
work properly to minimize body exposure, blade
binding, or loss of control.
5. Hold power tool by insulated gripping
surfaces when performing an operation
where the cutting tool may contact hidden
wiring. Contact with a “live” wire will also make
exposed metal parts of the power tool “live” and
shock the operator.
6. When ripping always use a rip fence or
straight edge guide. This improves the
accuracy of cut and reduces the chance of blade
binding.
7. Always use blades with correct size and
shape (diamond versus round) of arbour
holes. Blades that do not match the mounting
hardware of the saw will run eccentrically,
causing loss of control.
8. Never use damaged or incorrect blade
washers or bolt. The blade washers and
bolt were specially designed for your saw, for
optimum performance and safety of operation.
9. Kickback causes and related warnings
Kickback is a sudden reaction to a pinched,
bound or misaligned saw blade, causing an
uncontrolled saw to lift up and out of the
workpiece toward the operator;
• When the blade is pinched or bound tightly
by the kerf closing down, the blade stalls and
the motor reaction drives the unit rapidly back
toward the operator;
• If the blade becomes twisted or misaligned
in the cut, the teeth at the back edge of the
blade can dig into the top surface of the wood
causing the blade to climb out of the kerf and
jump back toward the operator.
• Kickback is the result of saw misuse and/or
incorrect operating procedures or conditions
and can be avoided by taking proper
precautions as given below.
10.Maintain a rm grip with both hands on
the saw and position your arms to resist
kickback forces. Position your body to
either side of the blade, but not in line with
the blade. Kickback could cause the saw to
jump backwards, but kickback forces can be
controlled by the operator, if proper precautions
are taken.
11.When blade is binding, or when interrupting
a cut for any reason, release the trigger and
hold the saw motionless in the material until
the blade comes to a complete stop. Never
attempt to remove the saw from the work or
pull the saw backward while the blade is in
motion or kickback may occur. Investigate and
take corrective actions to eliminate the cause of
blade binding.
12.When restarting a saw in the workpiece,
centre the saw blade in the kerf and check
that saw teeth are not engaged into the
material. If saw blade is binding, it may walk
up or kickback from the workpiece as the saw is
restarted.
13.Support large panels to minimise the risk of
blade pinching and kickback. Large panels
tend to sag under their own weight. Supports
must be placed under the panel on both sides,
near the line of cut and near the edge of the
panel.
14.Do not use dull or damaged blades. Blunt
or improperly set blades produce narrow kerf
causing excessive friction, blade binding and
kickback.
15.Blade depth and bevel adjusting locking
levers must be tight and secure before
making cut. If blade adjustment shifts while
cutting, it may cause binding and kickback.
16.Use extra caution when making a
“plunge cut” into existing walls or
other blind areas. The protruding blade
may cut objects that can cause kickback.
Lower guard function
17.Check the lower guard for proper closing
before each use. Do not operate the saw if
lower guard does not move freely and close
instantly. Never clamp or tie the lower guard
into the open position. If saw is accidentally
dropped, lower guard may be bent. Raise the
lower guard with the retracting handle and
make sure it moves freely and does not touch
the blade or any other part, in all angles and
depths of cut.
18.Check the operation of the lower guard
spring. If the guard and the spring are not
operating properly, they must be serviced
ENGLISH
9

before use. The lower guard may become
sluggish due to, gummy deposits, or a build-up
of debris.
19.Lower guard may be retracted manually
only for special cuts such as “plunge cuts”
and “compound cuts.” Raise lower guard
by retracting handle and as soon as blade
enters the material, the lower guard must be
released. For all other sawing, the lower guard
should operate automatically.
20.Always observe that the lower guard is
covering the blade before placing saw down
on bench or oor. An unprotected, coasting
blade will cause the saw to walk backwards,
cutting whatever is in its path. Be aware of the
time it takes for the blade to stop after switch is
released.
21.This appliance is not intended for use by
persons (including children) with reduced
physical, sensory or mental capabilities,
or lack of experience and knowledge,
unless they have been given supervision or
instruction concerning use of the appliance
by a person responsible for their safety.
22.Never hold piece being cut in your hands or
across your leg. Secure the workpiece to a
stable platform. It is important to support the
work properly to minimize body exposure, blade
binding, or loss of control.
4.5. BATTERY SAFETY WARNINGS
1. Protect the machine and the rechargeable
batteries from humidity!
2. Do not throw the rechargeable batteries into
a re!
3. Do not use any defective or deformed
rechargeable batteries!
4. Do not open the rechargeable batteries!
5. Do not touch the contacts of the rechargeable
batteries and do not short-circuit them!
6. A slightly acidic, combustible liquid may leak
from defective li-ion rechargeable batteries! If
any battery liquid is leaking and comes in
contact with the skin, immediately rinse with
a copious amount of water. If any battery
liquid gets into your eyes, rinse with clean
water and immediately consult a doctor for
medical treatment!
7. Remove the rechargeable batteries from the
machine before carrying out any setting,
retooling, maintenance or cleaning tasks.
8. Ensure that the machine is switched o when
you push in the rechargeable battery.
9. Please remove the rechargeable battery
from the machine if the machine is put down,
transported or stored unattended.
5. APPLICATION
1. Do not use abrasive wheels with this
machine. Use only original Jepson Power saw
blades
2. Use only original Jepson Power or CAS
(Cordless Alliance System) battery packs
and accessories.
3. Battery packs marked with CAS are 100%
compatible with CAS devices (Cordless
Alliance System).
4. Tighten blade retaining bolt and all clamps
before operating.
5. Secure work piece properly. Work piece
should be straight and rmly clamped to avoid
possible movement and pinching as the cut
nears completion.
6. Allow the blade to come to a complete stop
before removing or securing workpiece, or
changing workpiece angle.
7. Check the inside surfaces of the arbor
anges as well as the sides of the blade for
freedom from any foreign matter.
8. Check the blade for cracks or other damage
before operation. Replace cracked or
damaged blade immediately.
9. Never start the tool with the work piece
against the blade.
10. Allow the motor to achieve full speed
before cutting.
11. After turning tool“ON”, gently push the tool
forward to engage work piece, then slowly
increase pressure as required to produce
the least amount of“sparking”.
12. Important: After completing the cut,
release power switch and wait for coasting
blade to stop completely before putting the
saw down.
13. Never operate the tool in an area with
ammable solids, liquids, or gases. Sparks or
hot fragments could cause a re or explosion.
14. This tool is designed for ferrous metals only.
Do not attempt to cut wood, masonry,
magnesium, or any other pyrophoric
materials with this tool.
15. Do not use cutting uids or lubricants on
the blade.
16. Some metals have coatings, which can be
toxic. Take extra care to prevent inhalation
ENGLISH
10

EN
DE
FR
NL
ES
PT
IT
and skin contact when working with these
materials. Request, and follow, any safety
information available from your material
supplier.
17. There are certain applications for which
this tool was designed. The manufacturer
strongly recommends that this tool NOT be
modied and/ or used for any application
other than for which it was designed. If
you have any questions relative to its
application DO NOT use the tool until you
have written the manufacturer and have
been advised.
Metal chips are often very sharp and hot. Never
touch them with bare hands. Clean up with a
magnetic chip collector and a chip hook or other
appropriate tool.
6. FUNCTIONAL DESCRIPTION
This machine is a dry cutting circular saw designed
to cut ferrous metals, which uses carbide tipped saw
blades. The saw should only be used with original
Jepson Power saw blades.
6.1. UNPACKING
Carefully remove the tool and all loose items from
the shipping container. Retain all packing materials
until after you have inspected and satisfactorily
operated the machine.
6.2. CARTON CONTENTS
1. Metal cutting saw HDC 8203E
2. Original Jepson Power carbide tipped LBS saw
blade 203/48T
3. 2x 18V LiHD 5.5A high-performance battery
4. Air-Cooled LiHD charging station
5. Rip fence cutting guide
6. Hex wrench
6.3. CHARGING THE RECHARGEABLE
BATTERY
Check whether the rated voltage of the
rechargeable battery agrees with the information
specied on the machine.
Rechargeable battery and charger are matched to
each other. Only use the Jepson Power Air-Cooled
LiHD chargers for recharging.
Before using a new machine, rst of all charge the
rechargeable battery.
A description of how to start up and charge the
Jepson Power Air-Cooled LiHD charger can be
found in the appended instructions “Jepson Power
Air-Cooled LiHD charging station”.
The rechargeable battery is equipped with a
temperature monitoring system. This guarantees
that the rechargeable battery is only charged in
the temperature range between 0°C and 50°C. This
achieves a long service life for the rechargeable
battery.
A considerably shortened operating time per
charging procedure indicates that the rechargeable
battery is spent and needs to be replaced.
WARNING!! Explosion hazard
Protect the rechargeable battery
from heat, re and moisture.
Do not place the rechargeable
battery onto heating appliances and do not
expose the rechargeable battery to strong
solar radiation for a longer period of time.
Temperatures above 50°C are detrimental to the
rechargeable battery. Allow a heated rechargeable
battery to cool down before charging it.
The optimum storage temperature ranges between
10°C and 30°C.
CAUTION!! Do not open the
rechargeable battery and protect it
from impacts. Keep the rechargeable
battery in a dry and frost-proof place.
WARNING!! Cover the rechargeable
battery’s contacts if it is stored
outside the charger. There is a re and
explosion hazard in case of a short
circuit caused by metallic bridging.
Follow the instructions for the
protection of the environment.
6.4. FITTING THE RECHARGEABLE BATTERY
Slide the charged rechargeable battery into the
battery guide next to the handle until it perceptibly
engages.
CAUTION!! Before using the machine,
convince yourself that the
rechargeable battery is rmly seated
in the machine.
ENGLISH
11

6.5. REMOVING THE RECHARGEABLE
BATTERY
Unlock the rechargeable battery by pressing the
locking lever (See g. 11) and pull it out of the
battery guide.
CAUTION!! Do not use force to do so.
6.6. INSTALLING THE BLADE
1. Unplug the rechargeable battery for all service
work.
2. Remove any accumulated debris in the guards
and around the spindle. Check the lower
retracting blade guard to ensure that it is in
working order.
3. Clean the inner spindle ange. Orient the
ange so that the correct bore size faces the
blade and place the new blade on the spindle,
making sure that the teeth point forwards. (If
in doubt of the orientation of the blade, refer
to the legend cast into the lower retracting
blade guard) Avoid contact with blade teeth
to prevent personal injury.
4. NOTE: Only use original Jepson Power saw
blades.
5. Place the outer spindle ange on the spindle
with the at side toward the blade. See g. 2.
6. Replace and nger- tighten the blade retaining
bolt by turning it clockwise.
7. Push in the blade lock lever and rotate the
spindle by hand until the lock engages the
spindle See g. 3. Tighten the blade retaining
bolt securely with the provided wrench and
release the spindle lock.
6.7. REMOVING THE BLADE
1. Unplug the rechargeable battery for all service
work.
2. See g. 3. It is not necessary to remove the
outer blade cover, just leave it in place. Push
in the spindle lock and using the supplied
hex wrench, rotate the blade until the lock
engages the blade spindle.
3. Avoid contact with the blade teeth to prevent
personal injury.
4. While holding the blade lock lever, use the
provided wrench to loosen the blade retaining
bolt. Then remove it and the outer spindle
ange.
5. The blade may now be carefully removed.
6.8. ADJUSTMENT DEPTH OF CUT
Adjust the depth of cut so that the saw blade
protrudes through the thickness of work piece. To
adjust the depth of cut:
1. Unplug the rechargeable battery for all service
work.
2. Lift the depth lock lever at the rear of the saw.
See g. 4.
3. Raise or lower the saw base until the blade
extends the desired depth below the base.
(See the scale and pointer cast into the main
body casting.)
4. Press the depth lock lever down rmly, locking
the saw in the selected position.
6.9. ADJUSTMENT OF BEVEL ANGLE
To adjust the bevel angle, refer to the bevel gauge
on the base. There are markings for dierent angles
from 0 to 45 degrees. To adjust the bevel angle:
Loosen the bevel lock knob
( See g. 5 ) and the smaller knob at the rear. Lift the
bevel lock knob out of the slot and rotate the base
to the desired angle. The most commonly used
angles each have an individual slot. Simply drop the
bevel lock into the slot and tighten. If other angles
are needed, tighten the bevel lock knob to hold at
the desired position. Then tighten the smaller knob
at the rear of the base.
6.10. HOW TO USE THE SIGHTING NOTCH
To aid in free- hand cutting, a sighting notch is
located at the front of the base. See g. 6. Align
the cutting line on the work piece with the sighting
notch. Make the cut. Use the right-hand notch
(between the two marking dots) for straight cuts
and the left- hand notch (located below the rivet)
for 45- degree bevel cuts.
6.11. STARTING AND STOPPING TOOL
Do not press the trigger switch before or while
inserting the rechargeable battery. To start the
machine, rst press the safety lock button then
squeeze the trigger switch to start the motor.
Release the trigger switch to stop the motor. See
g. 7.
6.12. REMOVING CHIPS
This dry-cut metal saw has an internal chip collector.
When the chip collector is full, the chips
ENGLISH
12

EN
DE
FR
NL
ES
PT
IT
must be cleared. To do this, rst shut down and
Unplug the rechargeable battery. The outer blade
cover lock knob has a bayonet lock thread. See g.
8. To remove cover, turn knob anticlockwise while
pushing in against the spring tension. Then lift
cover away. Recently- cut chips can be very hot.
Take care when removing the cover to keep the
chips or shavings away from your hands or other
body
parts. Do not throw hot debris where paper or other
ammable materials are located. To replace the
outer blade cover, line up tang with slot and push in
against the spring while turning clockwise. Ensure
that the cover is properly seated.
6.13. HOW TO USE THE RIP FENCE
Using the rip fence will provide more accurate
straight cuts than by cutting free- hand. For instal-
lation, Unplug the rechargeable battery. Then insert
the rip fence in the mounting slots in the base.
6.14. LOWER RETRACTING BLADE GUARD
The lower retracting blade guard is a safety device
important for your protection. Every
time you use the saw, make sure that the guard
rotates freely and returns quickly and completely
to its closed position. Before each use, remove
any accumulated chips, or shavings from the area
around the hub of the guard. DO NOT LUBRICATE
THIS AREA. The hub has a dry lm lubricated surface
that does not need oiling. NEVER block or wedge
the blade guard in the open position. NEVER use
your saw if the blade guard is not in working order.
If blade guard movement is sluggish or if binding
exists, return the saw to your nearest AUTHORIZED
SERVICE CENTER for repair.
6.15. HOW TO USE THE TOOL
Eective control of this powerful saw requires
two- handed operation for maximum protection.
Support the work properly and to hold the saw
rmly WITH BOTH HANDS to
prevent loss of control which could cause personal
injury. Always hold the side handle with the left
hand and the rear handle with the right hand for
proper hand support of the saw. Protect your eyes
from injury with safety glasses or goggles.
Do not use cutting uids or lubricants on the blade.
6.16. CLAMP THE WORK PIECE
Secure the work piece properly. The work piece
should be straight and rmly clamped to avoid
possible
movement and pinching as the cut nears
completion. Provide adequate support for long or
wide work pieces. Conrm that the blade has come
to a complete stop before removing or securing the
work piece, or changing the work piece angle. Press
the safety, then the trigger switch. Move the saw
forward to contact the work piece. Clamp the work
piece on a rigid support, such as a bench or saw
horses. Mark the line of cut on the work piece. Be
sure that the cuto line is far enough on the work
piece to allow proper operation of the telescoping
guard. Place the front edge of the saw squarely on
work piece before starting the motor. Sight the
cutting line with the sighting notch indicator or
use the rip fence. Be certain that the blade is not
contacting the work piece. Press the safety, then the
trigger switch, allow the motor to come up to full
speed and move the saw forward to begin the cut.
Do not force the cut. Let the saw do the cutting at
the rate of speed permitted by the type of cut and
work piece. Increase feed pressure as the blade
cuts through the thicker cross-sections (to maintain
minimum “sparking”). Decrease the feed pressure as
the blade cuts through the thinner cross sections
(to maintain motor speed and avoid overloading
the machine). After completing the cut, release the
power switch and wait for the coasting blade to
stop completely before putting the saw down.
7. MAINTENANCE
7.1. KEEP TOOL CLEAN
Periodically blow out all air passages with dry
compressed air. All plastic parts should be cleaned
with a soft damp cloth. NEVER use solvents to
clean plastic parts. They could possibly dissolve or
otherwise damage the material. Wear safety glasses
while using compressed air.
7.2. WARNING
Make sure that the tool is turned o and not
connected to a power source before you perform
maintenance and/or examine the tool. For safety
reasons and in order to ensure proper functioning
of the device, repairs, maintenance and adjustment
of the tool must be performed by a certied service
center. Use only original spare parts.
ENGLISH
13

7.3. TRANSPORT
The contained lithium-ion batteries are subject to
the Dangerous Goods Legislation requirements.
The user can transport the batteries by road without
further requirements.
When being transported by third parties (e.g.:
air transport or forwarding agency), special
requirements on packaging and labelling must
be observed. For preparation of the item being
shipped, consulting an expert for hazardous
material is required.
Dispatch batteries only when the housing is
undamaged. Tape or mask o open contacts and
pack up the battery in such a manner that it cannot
move around in the packaging.
Please also observe possibly more detailed national
regulations.
7.4. DISPOSAL OF RECHARGEABLE
BATTERIES/BATTERIES
The machine, rechargeable batteries,
accessories and packaging should be
sorted for environmental-friendly
recycling.
Do not dispose of power tools and batteries/
rechargeable batteries into household waste!
Only for EC countries:
According to the European Guideline
2002/96/EC, power tools that are no
longer usable, and according to the
European Guideline 2006/66/EC, defective or
used battery packs/batteries, must be collected
separately and disposed of in an environmentally
correct manner.
Li-Ion:
Please observe the instructions in
section „7.3 Transport“.
Subject to change without notice.
8. QUOTATION
When returning a defective machine for repair with
cost estimate. We charge a handling fee of 50€, but
does not apply if a repair order or purchase of a new
machine is given.
9. SPARE PARTS
For current spare parts list with order numbers
please visit our website:
www.drycutter.com
10. WARRANTY
The warranty time (warranty according to the
commercial code) is 12 months from the day of sale
to the end consumer.
It covers and is limited to the free replacement
of the defective parts or the free repair of defects
that are demonstrably due to the use of imperfect
materials during production or due to assembly
errors.
Incorrect use or start-up and unauthorized instal-
lations or repairs not specied in the operating
instructions void the warranty. Parts that are subject
to wear are also excluded from the warranty. We
expressly reserve the right to make decisions on
the warranty application. The warranty is void if
the device is opened by a third party. Transport
damages, maintenance work as well as damage and
malfunctions due to insucient maintenance are
not covered by the warranty.
For warranty claims, the proof of purchase of the
device must be given by presenting the delivery
note, bill, or cash receipt.
As far as it is legal, we assume no liability for any
personal, material or consequential damages, in
particular if the device is used dierently than for
the purpose indicated in the operating instructions,
not installed or repaired according to the operating
instructions, or repairs were executed by a
layperson.
We reserve the right to perform repairs or
maintenance over and above the ones specied in
these operating instructions at the factory.
The quality and safety of the JEPSON POWER
circular cold saw depends on the exclusive use of
original JEPSON POWER saw blades or saw blades
with the same cutting width, blade diameter and
recommended cutting speed. The use of other saw
blades may damage the machines.
The original JEPSON POWER saw blade fulls all
requirements of the TÜV examination (several
inspection oces) and is therefore certied by these
inspection oces. In case of use of saw blades with
dimensions that dier from the original JEPSON
POWER saw blades, the manufacturer assumes no
liability.
ENGLISH
14

EN
DE
FR
NL
ES
PT
IT
The warranty excludes:
• Wear parts such as switches, anges, carbon
brushes, supportings and cutting tools (saw
blades, carbide inserts, drills and abrasive) as
well as electronic units.
• Other parts that are subject to wear through
use or natural wear and tear.
• Tool failure due to non-compliance with the
instruction manual, unconventional use,
abnormal atmospheric conditions, improper
operating conditions, overload, or lack of
service or maintenance.
• Tool failure due to replacement parts or
additional parts that are not original Jepson
Power parts.
• Machines to which changes or additions have
been made.
ENGLISH
15

16

EN
DE
FR
NL
ES
PT
IT
1. EGKONFORMITÄTSERKLÄRUNG 18
2. TECHNISCHE DATEN 19
3. BENUTZERHINWEISE 19
4. SICHERHEITSHINWEISE 20
4.1. DARSTELLUNG VON SICHERHEITSHINWEISEN 20
4.2. ALLGEMEINE SICHERHEITSHINWEISE 20
4.3. SPEZIFISCHE SICHERHEITSVORSCHRIFTEN 23
5. BESCHREIBUNG 25
5.1. ANGABEN ZUR VERWENDUNG 25
6. FUNKTIONSBESCHREIBUNG 25
6.1. AUSPACKEN 25
6.2. PACKUNGSINHALT 25
6.3. AKKU LADEN 26
6.4. AKKU EINSETZEN 26
6.5. AKKU ENTNEHMEN 26
6.6. ANBRINGUNG DES SÄGEBLATTS 26
6.7. ENTFERNUNG DES SÄGEBLATTS 26
6.8. EINSTELLUNG DER SCHNITTTIEFE 27
6.9. EINSTELLUNG DES NEIGUNGSWINKELS 27
6.10. VERWENDUNG DER VISIERKIMME 27
6.11. EIN UND AUSSCHALTEN DES GERÄTS 27
6.12. ENTFERNUNG VON METALLSPÄNEN 27
6.13. VERWENDUNG DES PARALLELANSCHLAGS 27
6.14. UNTERE EINZIEHBARE SÄGEBLATTSCHUTZVORRICHTUNG 28
6.15. VERWENDUNG DES GERÄTS 28
6.16. BEFESTIGUNG DES ARBEITSSTÜCKS 28
7. INSTANDHALTUNG UND KUNDENDIENST 28
7.1. GERÄT SAUBER HALTEN 28
7.2. REINIGUNG 29
7.3. SCHMIEREN 29
7.4. TRANSPORT 29
7.5. ENTSORGUNG AKKUS/BATTERIEN 29
8. KOSTENVORANSCHLAG 29
9. ERSATZTEILE 29
10. GARANTIE 29
17
DEUTSCH

1. EGKONFORMITÄTSERKLÄRUNG
(nach Anhang IIA der Maschinenrichtlinie)
Wir, Jepson Power GmbH, Ernst – Abbe – Straße 5, 52249 Eschweiler, Germany, erklären in alleiniger
Verantwortung , dass das Produkt :
Maschinenbezeichnung: Hand Dry Cutter HDC 8203E
Baujahr: Siehe Maschinenetikett
Seriennummer: Siehe Maschinenetikett
Auf das sich diese Erklärung bezieht, mit den folgenden EG-Richtlinien und harmonisierten Normen oder
anderen normativen Dokumenten übereinstimmt:
2006/42/EC Machinery Directive
2014/30/EU EMC Directive
2011/65/EU RoHS Directive
EN 62841-1 :2015
EN 62841-2-5:2014
EN 55011
EN 12100
Pierre Michiels, GF
Name, Position Eschweiler, 01.01.2023
CE-Zeichen zur Dokumentation der
Übereinstimmung mit den
grundlegenden Sicherheits- und
Gesundheitsanforderungen gemäß
Anhang I der Maschinenrichtlinie
Nur für EU Länder
Werfen Sie Elektrowerkzeuge nicht in
den Hausmüll!
Gemäß Europäischer Richtlinie
2002/96/EG über Elektro- und Elektronik- Altgeräte
und Umsetzung in nationales Recht müssen
verbrauchte Elektrowerkzeuge getrennt gesammelt
und einer umweltgerechten Wiederverwertung
zugeführt werden.
Zur Verringerung eines Verletzungs-
risikos lesen Sie die Betriebsanleitung.
Schützen Sie den Akku vor Hitze,
übermäßiger Sonneneinstrahlung,
Feuer, Frost, Wasser und Feuchtigkeit.
Akkupacks vor Nässe schützen!
Akkupacks vor Feuer schützen!
Es besteht Explosionsgefahr!
Cordless Allicance System (=CAS) ist ein
herstellübergreifendes Akku-System.
Weitere Informationen erhalten Sie
unter
www.cordless-alliance-system.com
18
DEUTSCH

EN
DE
FR
NL
ES
PT
IT
2. TECHNISCHE DATEN
Nennspannung 18V
Leerlaufdrehzahl 3.500 min-1
Sägeblattdurchmesser 203 mm | 8”
Neigungswinkel 0°~45°
Aufnahmedurchmesser 25,4 mm | 1“
Max. Schnitttiefe 90°: 67 mm | 2.63”
45°: 42 mm | 1.65”
Nettogewicht 5,4 kg | 12 lbs
Schalldruckpegel 87,3 dB
Schallleistungspegel 98,1 dB
Vibration - Hauptgri ah = 2,05 K = 0,07
Vibration - Hilfsgri ah = 2,39 K = 0,3
Angaben nach 2.2 des Anhangs 1 der V.G. Richtlinie über Vibrationen
3. BENUTZERHINWEISE
Hinweise für den Kunden
Die Betriebsanleitung enthält wichtige Hinweise,
um die Maschine sicher, sachgerecht und
wirtschaftlich zu betreiben. Ihre Beachtung hilft
Gefahren zu vermeiden, Reparaturkosten und
Ausfallzeiten zu vermindern und die Zuverlässigkeit
und Lebensdauer der Maschine zu erhöhen.
Die Betriebsanleitung ist von jeder Person zu lesen
und anzuwenden, die mit dem Elektrowerkzeug
arbeitet. Dies gilt insbesondere für das Kapitel
Sicherheitshinweise. Während des Arbeitseinsatzes
ist es hierfür zu spät. Bewahren Sie ein Exemplar
dieser Betriebsanleitung ständig zusammen
mit dem Elektrowerkzeug auf, so dass sie stets
gribereit ist!
Im Zweifelsfall ist immer der Hersteller
anzusprechen.
Neben der Betriebsanleitung sind die im
Verwenderland und an der Einsatzstelle geltenden
verbindlichen Reglungen zur Unfallverhütung zu
beachten. Daneben sind auch die anerkannten
fachtechnischen Regeln für sicherheits- und
fachgerechtes Arbeiten einzuhalten.
Haftung und Gewährleistung
Alle die in dieser Anleitung enthaltenen Informa-
tionen wurden zu unserem besten Wissen und
Gewissen erstellt.
Diese Anleitung wurde mit größter Sorgfalt erstellt.
Allerdings, wenn Sie unvollständigen Elemente oder
Fehler entdecken sollten, informieren Sie uns bitte
schriftlich. Ihre Verbesserungsvorschläge helfen
uns, eine benutzerfreundlichere Betriebsanleitung
zu erstellen.
Nachfolgende Bestellungen und Urheberrecht
Weitere Exemplare dieser Anleitung können von der
unten angegebenen Adresse bestellt werden. Wir
bitten um Ihr Verständnis, dass weitere Exemplare
gebührenpichtig sind.
Jepson Power GmbH
Ernst-Abbe-Straße 5
D-52249
Eschweiler
Phone: + 49 (0)2403 – 6455-0
Fax: +49 (0)2403 – 6455-15
Mail: [email protected]
Siehe Seite 2 - Abb. 1.
1. Hauptgri
2. Seitengri
3. Einrastknopf für Abdeckung
4. Sperrvorrichtung für Neigungswinkel
5. Unterteil
6. Einziehbare Sägeblattschutzvorrichtung
7. Visierkimme
8. Sperrvorrichtung für Sägeblatt
9. Sicherheitsschalter für Entriegelung
10. Feststellhebel für Schnittstärke
11. Akku-Raste
19
DEUTSCH
Alle Rechte sind ausdrücklich vorbehalten. Die
Vervielfältigung oder Übertragung an Dritte in
welcher Form auch immer ist ohne unsere vorherige
schriftliche Genehmigung nicht gestattet.
Abkürzungen
V Volt
A Ampere
Hz Hertz
W Watt
~ AC
/min Umdrehungen/Minute
N Newton
4. SICHERHEITSHINWEISE
Die Grundvoraussetzung für eine sichere
Handhabung und störungsfreien Betrieb dieses
elektrischen Werkzeuges ist die Kenntnis der
grundlegenden Sicherheitshinweise. Darüber
hinaus sind die Unfallverhütungsvorschriften,
die am Standort des Nutzers gelten, sowie die
anerkannten Regeln der Technik im Hinblick auf die
Sicherheit und korrekte Arbeitsweise einzuhalten.
Es ist nicht gestattet, das elektrische Werkzeug für
andere Zwecke als die vom Hersteller vorgesehenen
verwenden. Eine solche Verwendung könnte zu
unvorhersehbaren Risiken führen.
Lokale Arbeits-und Sicherheitsvorschriften und
Gesetze müssen immer befolgt werden. Das gleiche
gilt für Regelungen, die für die Umwelt gelten.
Sicherheitseinrichtungen dürfen nie entfernt oder
überbrückt werden.
Bei der Verwendung von Ölen, Fetten und anderen
chemischen Substanzen, müssen die Sicherhe-
itsvorschriften, die zu dem jeweiligen Produkt
gelten immer beachtet werden! Kontakt mit
Chemikalien sollte, so weit wie möglich vermieden
werden. Bevor es zulässig ist, mit diesen Stoen
zu arbeiten, ist die Gebrauchsanweisung auf der
Verpackung zu lesen und zu befolgen. Dies gilt für
alle Chemikalien, also auch für die Reinigung von
Geräten oder Werkstücken.
Alle Notizen und Zeichen zur Sicherheit und
möglichen Risiken müssen in vollständig lesbarem
Zustand gehalten werden
4.1. DARSTELLUNG VON SICHERHEITSHIN
WEISEN
In der Betriebsanleitung werden folgende Symbole
verwendet:
Warnung vor möglicher Verletzungs-
oder Lebensgefahr von Personen
Warnung vor möglichen Sach- und/
oder Umweltschäden
Warnung vor gefährlicher
elektrischer Spannung
Warnung vor heißer Oberäche
Das Nichtbeachten dieser Hinweise kann
schwere gesundheitsschädliche Auswirkungen
zur Folge haben, bis hin zu lebensgefährlichen
Verletzungen!
Dieses Symbol deutet auf wichtige
Sachverhalte hin!
Umweltgefährlich
4.2. ALLGEMEINE SICHERHEITSHINWEISE
Dieses Elektrowerkzeug entspricht
den grundlegenden EG Sicherhe-
its-und Gesundheitsvorschriften.
Dennoch können gefährliche
Situationen entstehen.
Alle Sicherheitseinrichtungen
müssen in einwandfreiem Zustand
gehalten werden.
Achten Sie immer auf sich
bewegende Teile. Diese können
durch ihre Bewegung oder durch
plötzlich einsetzende Bewegung
Verletzungen verursachen.
Benutzen Sie das Elektrowerkzeug
nur in technisch einwandfreiem
Zustand sowie bestimmungsgemäß,
sicherheits- und gefahrenbewusst
unter Beachtung der Betriebsanleitung! Lassen
20
DEUTSCH
Table of contents
Languages:
Other Jepson Saw manuals


