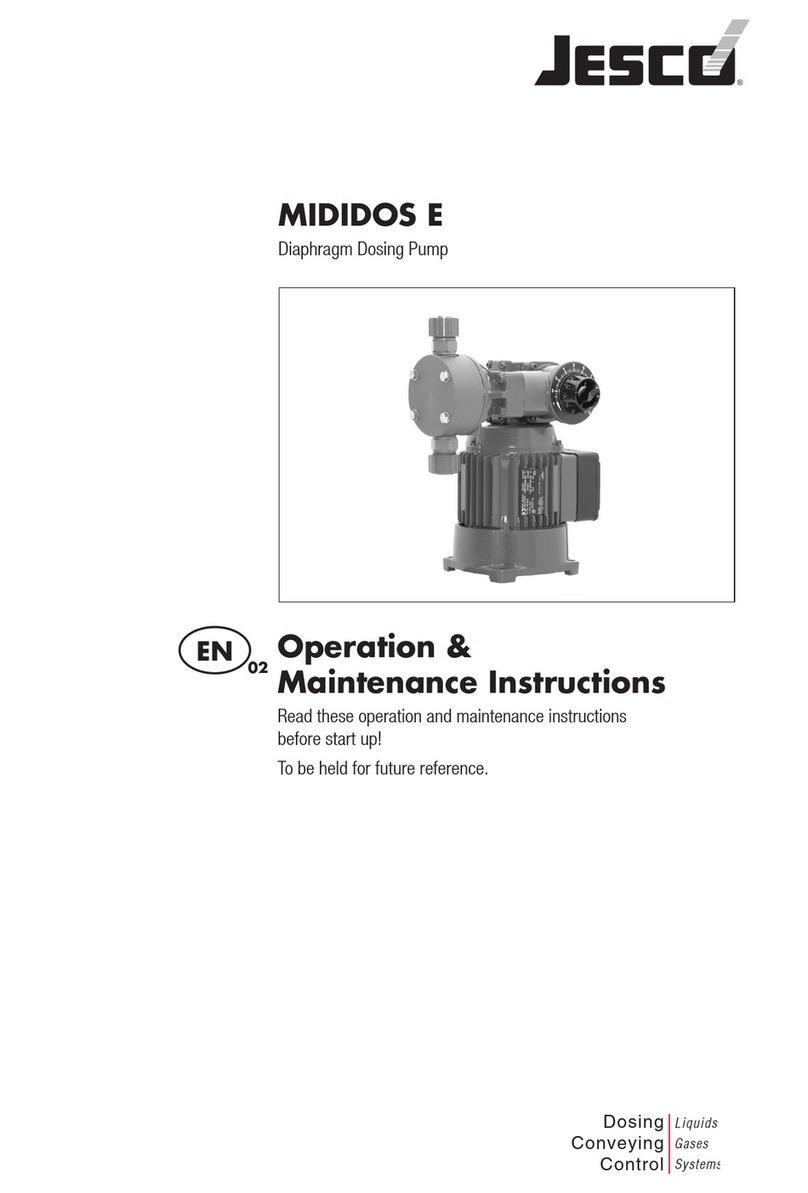
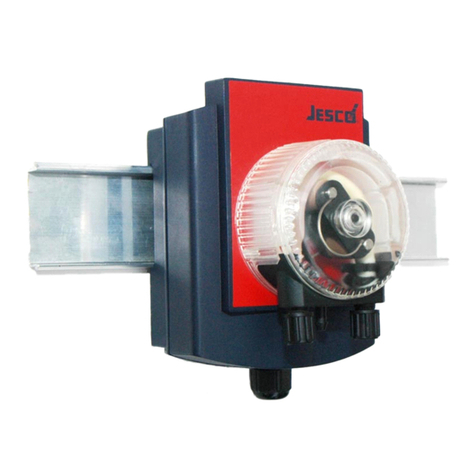
Jesco MIDIDOS E Instruction Manual

MIDIDOS E
Operation &
Maintenance Instructions
Read these operation and maintenance instructions
before start up!
To be held for future reference.
Dosing
Conveying
Control
Liquids
Gases
Systems

2

3
Content
1. Safety......................................................................................................................................................................................................4
1.1 General..................................................................................................................................................................................................4
1.2 Kennzeichnung von Hinweisen in der Betriebsanleitung.........................................................................................................................4
1.3 Qualification and training of personnel...................................................................................................................................................5
1.4 Important safety instructions..................................................................................................................................................................5
1.5 Hazards due to non-compliance with safety instructions........................................................................................................................5
1.6 Safe operation .......................................................................................................................................................................................6
1.7 Safety instructions for the owner/operator .............................................................................................................................................6
1.8 Safety instructions for inspection-, maintenance-, and installation work.................................................................................................6
1.9 Unauthorized modifications and production of spare parts .....................................................................................................................6
1.10 Impermissible modes of operation .......................................................................................................................................................6
1.11 Dosierung von Chemikalien..................................................................................................................................................................7
1.12 Scope of delivery .................................................................................................................................................................................8
2. General....................................................................................................................................................................................................9
3. Function...................................................................................................................................................................................................9
4. Technical data........................................................................................................................................................................................10
5. Mechanical handling capacity performance curves ................................................................................................................................10
6. Measurement drawing...........................................................................................................................................................................12
7. Installation.............................................................................................................................................................................................13
7.1 General information .............................................................................................................................................................................13
7.2 Installation location..............................................................................................................................................................................13
7.3 Drainage discharge..............................................................................................................................................................................14
7.4 Pressure sustaining and safety valves..................................................................................................................................................14
7.5 Injection nozzles ..................................................................................................................................................................................15
7.6 Electrical connection............................................................................................................................................................................15
7.7 Installation example............................................................................................................................................................................17
8. Stroke length setting..............................................................................................................................................................................17
9. Start up.................................................................................................................................................................................................18
10. Shutdown ............................................................................................................................................................................................19
11. Maintenance........................................................................................................................................................................................19
11.1 Lubricants .........................................................................................................................................................................................19
11.2 Maintenance of storage .....................................................................................................................................................................19
11.3 Replacing the diaphragm...................................................................................................................................................................20
11.4 Valves................................................................................................................................................................................................22
12. Spare parts list MIDIDOS E 24...72.......................................................................................................................................................26
12. Spare parts list MIDIDOS E 120............................................................................................................................................................28
13. Troubleshooting ...................................................................................................................................................................................30
14. Declaration of conformity.....................................................................................................................................................................32
15. Declaration of harmlessness................................................................................................................................................................33
16. Warranty..............................................................................................................................................................................................34

4
1. Safety
1.1 General
This Operation & Maintenance Manual contains basic information to be noted during
installation, operation and maintenance. It is therefore essential that the contractor read
the manual before installing and commissioning the pump/system as well as by the
relevant operating personnel/owner of the pump/system. It must remain accessible at
the dosing pump/system for reference at all times.
In addition to the general safety instructions under this main heading of Safety, the spe-
cial safety precautions outlined another section must also be observed.
1.2 Warning symbols used in this Operation & Maintenance Manual
This Operation & Maintenance Manual contains vital information, which may endanger
people, the environment and the dosing pump/system if disregarded. These statements
are identified by the following symbols:
DANGER!
Refers to an imminent danger.
Non-compliance can lead to death or serious injury.
WARNING!
Refers to a potentially hazardous situation. Non-compliance can lead to death or serious
injury.
CAUTION!
Refers to a potentially hazardous situation. Non-compliance can lead to minor injury or
property damage.
NOTICE!
or
INFORMATION!
Appear in conjunction with safety instructions, which may endanger the pump/system
and its operation if disregarded.
IMPORTANT!
Draws attention to supplementary information to make the work easier and ensure trou-
ble free operation.
Markings that are affixed directly to the pump, such as
• Cable markings
• Markings for process fluid connections
must be observed without fail and remain fully legible at all times.

5
1.3 Qualification and training of personnel
The personnel employed for installation, operation, inspection and maintenance work
must be qualified to do so. The areas of responsibility, competence and supervision of
the personnel must be precisely defined by the owner. Personnel who do not have the
required knowledge must be duly rained and instructed. If necessary, this training can
also be provided by the manufacturer/supplier on behalf of the dosing pump’s owner. In
addition, the owner of the system must ensure that the relevant personnel are fully fami-
liar with and have understood the contents of this Operation & Maintenance Manual.
1.4 Important safety instructions
When installing and using this electrical equipment, basic safety precautions should
always be followed, including the following:
READ AND FOLLOW ALL INSTRUCTIONS!
WARNING!
To reduce risk of injury, do not permit children to use this product unless they are closely
supervised at all times.
WARNING!
Risk of electric shock. Connect only to a grounding type receptacle protected by a
ground-fault circuit-interrupter (GFCI). Contact a qualified electrician if you cannot verify
that the receptacle is protected by a GFCI.
Do not bury the cord. Locate the cord to minimize abuse from lawn mowers, hedge
trimmers, and other equipment.
WARNING!
To reduce the risk of electric shock, replace damaged cord immediately.
WARNING!
To reduce the risk of electric shock, do not use an extension cord to connect the unit to
the electricity supply; provide a properly located outlet.
SAVE THESE INSTRUCTIONS!
1.5 Hazards due to non-compliance with safety instructions
Failure to comply with safety instructions may endanger not only people, but also the
environment and the dosing pump/system. Non-compliance with the safety instruc-
tions can lead to the loss of all entitlement to damages.
WARNING!
WARNING!
WARNING!
WARNING!

6
The following hazard in particular may arise:
• Danger to people due to electrical, mechanical and chemical effects.
• Failure of dosing pump/system functions.
• Failure of specified methods for maintenance and repair.
• Danger to the environment due to leakage of hazardous substances.
1.6 Safe operation
The safety instructions in this Operation & Maintenance Manual must be observed.
The owner is responsible for ensuring the compliance with local safety regulations.
1.7 Safety instructions for the owner/operator
• Leakages (e.g. due to ruptures in the lining) of hazardous substances (e.g. toxic or
abrasive) must be discharged in such a way as to exclude all danger to people and
the environment. Statutory regulations must be observed.
• Danger due to electric current must be excluded (for further details, refer to the
German VDE standards as well as local regulations or chapter 1.4).
1.8 Safety instructions for inspection-, maintenance-, and installation
work
The owner must ensure that all inspection, maintenance and installation work is under-
taken by authorized and duly qualified personnel who have also studied this Operation
& Maintenance Manual.
The dosing pump must always come to a complete stop before starting any work on the
pump. The procedure specified in this Operation & Maintenance Manual for shutting
down the Dosing/pump/system must be observed without fail.
Dosing pumps or systems in contact with potentially harmful media must be deconta-
minated.
All safety mechanisms and guards must be refitted and reactivated as the work is com-
pleted.
The instructions outlined in chapter 7.2 “Installation location” and 9. “Start up” must be
observed before starting the pump/system.
1.9 Unauthorized modifications and production of spare parts
The dosing pump may only be modified or converted in consultation with the manuf-
acturer. Genuine spare parts and accessories authorized by the manufacturer ensure
greater safety. The use of other parts can void the liability for the subsequent conse-
quences.
1.10 Impermissible modes of operation
The operational safety of the pump supplied can only be guaranteed when it is used in
conformity with its intended use as specified in our contracts, especially in our order
confirmation. The limit values specified in these documents must not be exceeded
under any circumstances.

7
1.11 Dosing of chemicals
CAUTION!
• When working on dosing systems, the accident prevention regulations applicable
on-site must be observed and the specified personal protective clothing is recom-
mended, depending on the hazard associated with the metered medium:
Googles Protective gloves Protective suit
• It is recommended that all people responsible for the installation and maintenance of
piping, hoses and accessories should wear this protective clothing.
• Before working in the dosing pump and plant, disconnect it from the power supply
and protect it from reconnection.
CAUTION!
• Any chemicals still present in the dosing head may spray out when the power supply
is reconnected. This may lead to caustic or other burns to the face and hands. The
dosing lines must always be reconnected before starting the pump up again.
• The chemical resistance of the pump’s materials of construction must be verified
before dosing with aggressive media!
• The dosing pump’s dosing head as well as connections and lines of the system may
be under pressure. Work carried out on the dosing system requires special safety
precautions and may be carried out only by instructed technical personnel.
CAUTION!
• Chemicals may spray out. This may lead to caustic or other burns. Always release
the pressure from the dosing pump system before starting work on the pump.
• Flush the pump with a harmless medium (mainly water) before working on the do-
sing head, valves and connections in order to avoid unintentional contact with the
dosing medium.
WARNING!
• Never look into the open end of a clogged line or valve.
Chemicals may emerge unexpectedly and cause caustic or other burns to hand and
face
• Before start up, all connections must be inspected for correct tightness and, if neces-
sary, must be further tightened using the appropriate tools.
CAUTION!
• If connections at the dosing head are loosened during operation for venting or other
reasons, the leaked chemicals must be removed professionally. This is the only way
CAUTION!
CAUTION!
CAUTION!
CAUTION!
CAUTION!

8
to avoid the danger of physical injury and corrosion at the dosing pump. Leaking
chemicals may also damage the diaphragm pump at its mounting points.
CAUTION!
• When changing the chemical medium, check whether the pump and the system’s
materials of construction are chemically resistant. If there is danger of a chemical
reaction between different media, a thorough cleaning is first mandatory.
IMPORTANT!
• After adjusting the stroke length, the locking screw must be retightened. Otherwise
the adjusting knob may change its position. Thus causing irregular flow rates.
CAUTION!
• The base area of the dosing pump must be kept clear to allow sufficient air circula-
tion to cool the motor down. If there is a danger of fluid collecting underneath the
base of the pump, the pump must be elevated.
DANGER!
• Fire hazard. Pressure surge: catapulting parts could kill you. MIDIDOS E must not be
used under any circumstances in an explosive environment.
1.12 Scope of delivery
IMPORTANT!
Please unpack the dosing pump and ordered accessories with great care in order not to
miss any small parts. Immediately compare the scope of delivery with the delivery note.
The cause of any discrepancies must be determined.
CAUTION!
CAUTION!
IMPORTANT!
DANGER!
IMPORTANT!

9
2. General
Dosing pumps are used to add chemicals in various processes. As leak free diaphragm
dosing pumps with a dosing range of between max. 2 l/h and 120 l/h the MIDIDOS E has
a broad field of application.
The MIDIDOS E is supplied as a simple dosing pump with the dosing head mounted on
the left hand side.
The motor is connected directly into a terminal box. The electrical power is supplied
through a three-phase motor. Operation with alternating voltage is likewise possible
with the use of an operating capacitor. To adapt the dosing performance the stroke
length can be set manually between 0 – 100%.
3. Function
The gearbox is based on a single level worm-wheel transmission. The gear parts as
well as the storage are greased for life. The dosing stroke functions through a cam that
the membrane moves over a spring-loaded tappet. The siphon is reached through a
spring-loaded position.
Legend
1 Retaining spring for the siphon
2 Stroke limiter eccentric cams
3 Eccentric drive cam
4 Impact plate
5 Diaphragm rod
x
x
x
a e d
b
c
drive eccentric continues to run free un-
til the plunger plate is reached again.

10
4. Technical data
MIDIDOS E 24 E 48 E 72 E 120
Flow rate [l/h] - max. pressure [bar] 24 - 10 48 - 10 72 - 6 114 - 4
max. pressure at 1~ mode [bar] 10 5 3 2
Hub frequency [1/min] 48 96 142 96
Hub volume [ml/Hub] 8.5 8.5 8.5 20.8
Diaphragm-Ø [mm] 64 64 64 90
Suction lift [mbar] 700 700 700 300
Double ball valve in pipe diameter DN6 DN6 DN6 DN10
max. environment temperature [°C] 45 (with PVC max. 40)
max. medium temperature [°C] 50 (wth PVC max. 35)
Motor specifications 3-Phase 400V / 50Hz - 440V/60Hz - 0,05kW
- 0,5A
Motor specifications 1 -Phase 230V/50Hz - 0,05kW - 0,85A
Weight of plastic model [kg] 7 7 7 8
5. Mechanical handling capacity performance curves
The performance curves of the handling capacity are at 20°C (68°F) for water. Media
(specific gravity and viscosity) and temperature change the handling capacity. Therefore
dosing pumps have to be litered out when used.
MIDIDOS E120
0
20
40
60
80
100
120
140
012345678910
Hubeinstellung
l/h
MIDIDOS E24
0
5
10
15
20
25
30
35
012345678910
Hubeinstellung
l/h
MIDIDOS E72
0
10
20
30
40
50
60
70
80
90
012345678910
Hubeinstellung
l/h
MIDIDOS E48
0
10
20
30
40
50
60
0 1 2 3 4 5 6 7 8 9 10
Hubeinstellung
l/h
10 bar
2 bar
10 bar
2 bar
6 bar
2 bar
4 bar
2 bar
erstellt von Krischker
Stroke adjustment

11
MIDIDOS E120
0
20
40
60
80
100
120
140
012345678910
Hubeinstellung
l/h
MIDIDOS E24
0
5
10
15
20
25
30
35
012345678910
Hubeinstellung
l/h
MIDIDOS E72
0
10
20
30
40
50
60
70
80
90
012345678910
Hubeinstellung
l/h
MIDIDOS E48
0
10
20
30
40
50
60
0 1 2 3 4 5 6 7 8 9 10
Hubeinstellung
l/h
10 bar
2 bar
10 bar
2 bar
6 bar
2 bar
4 bar
2 bar
erstellt von Krischker
Stroke adjustment
Stroke adjustment
Stroke adjustment

12
6. Measurement drawing
31
136
q
305~ (~359)
153~ (~252)
187~ (~297)
258~ (~284)
130~ (~145)
35211
100
q
9
O
47
175~
Dimensions for MIDIDIS E 120 in parenthesis.

13
7. Installation
7.1 General information
For the selection of a dosing pump when designing a system as well as for the installa-
tion and operation, local rules and regulations must be obeyed. This applies to the se-
lection of appropriate materials of construction for the pump, the handling of chemicals
and the electrical installation.
Likewise the technical data of the dosing pump (chapter 4) must be taken into conside-
ration. The system must be designed accordingly/properly (e.g. loss of pressure in the
piping, depending on nominal diameter and length).
The designer and the operator are responsible for ensuring that the whole system in-
cluding the dosing pump is constructed in such a way that neither plant equipment nor
buildings are damaged in the case of chemical leakage due to the failure of wear parts
(e.g. a rupture in the dosing membrane) or burst tubing. If the chemical system poses
great potential danger, the installation must be carried out in such a way that that no un-
reasonably high consequential damages occur, even if the dosing pump fails. Therefore
we recommend the installation of leakage probes and containment tanks.
The draining pipe of the dosing head must be visible in order for a diaphragm failure
to be detected. The flow from the drainage pipe must be routed downwards without
obstacles.
To increase the dosing accuracy and to ensure the functional reliability, we recommend
the use of additional accessories. These include, amongst others, backpressure valves,
relief valves, leakage probes and low level indicators, as shown in the installation ex-
amples.
Always use appropriate tools for the installation of plastic connecting parts. To avoid
damage, never apply excessive force.
IMPORTANT!
Plastic parts (especially parts made out of PVC) can be tightened and loosened with
greater ease if the thread is first lubricated with Vaseline or silicon grease.
NOTICE!
The compatibility of the lubricant with the dosing chemicals must be verified.
7.2 Installation location
The installation location of the dosing pump must be easily accessible for the operating
and service staff. When installing the dosing pump below the level of the process fluid,
care must be taken to ensure that chemical leakages due to a broken diaphragm cannot
cause any damage for example – collection pan, leakage sensor.
Further more it is possible to install the pump direct to the dosing supply tank.
The maximum environment temperature permissible for the dosing pump must be ob-
served (see technical specifications). Heat radiation from the apparatus and heat ex-
changes must be shielded from radiation heat, so that the dosing pump can sufficiently
emit it own heat. Direct sunlight must be avoided. When the dosing pump is installed in
the open, a canopy is provided as protection the effect of the weather.
The dosing pump is to be erected with the suction and pressure valves in an upright
IMPORTANT!
CAUTION!

14
position. To guarantee its stability, the pump must be screwed appropriately into the
ground.
The system’s piping must not put any force on the dosing pump’s connections or val-
ves.
To avoid backfiring dosing after the process end, an electrical and hydraulically locking
device is provided on the dosing pump.
7.3 Drainage discharge
NOTICE!
Released gases can destroy the dosing pump’s transmission!
The drainage as well as the leakages from the separate chamber must slope down-
wards, i.e. to go in a descent to the collection tank. Under no circumstances is the
drainage pipe to go direct through the lidded receptacle back to the medium; otherwise
the released gases can infiltrate the dosing pump’s transmission. The drainage pipe
must be directed only to a gas free collection tank (in a decline) or it has to be lead
on a decline to a collection funnel over which it then has to end with enough distance
in between. The leakages can then be directed back via the funnel through the tank
cover. Moreover possible leakages are detected with greater ease from the gap to the
collection funnel.
7.4 Pressure sustaining and safety valves
Pressure sustaining valves are accessories for optimizing the dosing process. They are
used:
• to increase the dosing accuracy in the presence of fluctuating back pressure
• with long dosing lines in order to prevent excess delivery, as the accelerated medium
continues moving on account of its own inertia even when the delivery stroke has
already ended.
• to prevent siphoning when the suction pressure is higher than the pressure system.
NOTICE!

15
Safety and pressure relief valves protect the dosing pump and the associated accessori-
es and lines from overloads.They prevent an impermissibly high increase of pressure on
the discharge side of the dosing pump that may be caused for example by the accidental
closing of valves whilst the pump is in operation or by a clogged injector.
The PENTABLOC is a combi-accessory that combines, amongst others, the function of
a pressure-sustaining valve as well as being a safety valve. Furthermore, the functions
such as anti-siphon, pressure-relief and flow indicator and monitor are also integrated.
7.5 Injection nozzles
Injection nozzles are used to mix the metered process fluid into a main stream and
simultaneously fulfill a non-return function. The injection nozzle is usually installed in
the main line from above. Installation from below is only recommended in the case of
media with a tendency to crystallize. Thus entrapped air is able to leave.
In the case of media with a tendency to contaminate the injector, it is advisable to use
an injector that can be dismantled for maintenance and shut off.
Injection fitting mounted from above
Injection fitting mounted from
below (for media with a ten-
dency to crystallize)
7.6 Electrical connection
• The electrical connection of the dosing pump must be made according to the local
rules and regulations and may only be carried out by technical experts.
• The type of cable and supply pipe’s cross section of the cable must be chosen in
accordance with the engine’s data.
• The connection of the cable to the engine terminal box must be carried out correctly.
We recommend a plug socket screw joint with strain relief.
• The required level of protection is guaranteed by the correct installation of the elec-
trical connector.
• To avoid incorrect dosing after the process ends an electrical and hydraulic locking
device is provided for the dosing pump.

16
Electrical connection data
(variants on request)
Pump sizes
MIDIDOS
voltage
[V]
output
[Watt]
electricity
[A]
E 24...120 400/230 50 0,50/0,87
50 Hz
440/254 80 0,46/0,80
60 Hz
400/230 80 0,42/0,73
60 Hz
230/1-Phase 50 0,85
50 Hz
Connection system for the driving motor
• supply of three-phase current
• alternating current supply with motor in the stonecutter circuit
• special connector-variant
Other electrical connectors are to be taken from the separately shown circuit dia-
grams.
W2 U2 V2
U1 V1 W1
L1 L2 L3 PE
W2 U2 V2
U1 V1 W1
L1 L2 L3 PE
Y-Schaltung -Schaltung
W2 U2 V2
U1 V1 W1
L1 N PE
W2 U2 V2
U1 V1 W1
L1 N PE
Rechtslauf Linkslauf
W2 U2 V2
U1 V1 W1
L1 L2 L3 PE
W2 U2 V2
U1 V1 W1
L1 L2 L3 PE
Y-Schaltung -Schaltung
W2 U2 V2
U1 V1 W1
L1 N PE
W2 U2 V2
U1 V1 W1
L1 N PE
Rechtslauf Linkslauf
Y-circuit ∆-circuit
clockwise counterclockwise

17
7.7 Installation example
Legend
1. MIDIDOS E
2. Electric agitator
3. Chemical tank
4. Pulsation dampener
5. Pressure relief valve (safety valve)
6. Diaphragm stop-valve
7. Injection nozzle
8. Stroke length setting
CAUTION!
The pump’s stroke length is to be moved only when the motor is running!
Set the stroke length as follows:
1. Loosen the mounted screw of the setting knob anti-clockwise (around to the left)
2. Set the stroke length to the desired value according to the capacity performance
curves (chapter 5)
3. Under the retention of the stroke length setting, tighten the mount screw again.
g f e
d
a
b
c
CAUTION!

18
9. Start up
NOTICE!
Personal protective equipment as specified by on-site regulations must be worn at all
times while working on the dosing pump!
Goggles Protective gloves Protective suit
1. Before starting up the dosing pump all the stages for “Installation” in chapter 7 have
to be carried out. The safety advice must be adhered to.
2. The dosing pump is connected externally to the installed control system.
3. The manual performance setting should be set at maximum stroke length for impro-
ved suction. During the initial suction it should run without contra-flow pressure. For
this purpose the installation of a relief valve on the pressure side of the dosing pump
is recommendable.
4. If a suction aid is installed this has to be filled up with chemical beforehand. In case
the dosing pump does not have suction, loosen the pressure valves and fill the do-
sing head with fluid when the pump is turned off. With safe media the dose medium
itself can be used, other a neutral medium that does not disturb the process. (In
many cases water is suitable).
WARNING!
Chemicals can spray out. This may lead to caustic or other burns. Ensure that the line
is not under pressure before disconnecting it.
Mount discharge valve, switch on the dosing pump and allow it to prime again.
5. If a venting facility is integrated in the dosing head or is available as a separate unit,
open it whilst the dosing pump is running until the liquid escapes, then close it. In
the case of effervescent media allow the process fluid to flow continuously (approx.
1 drop per 1...3 strokes)
6. If the ideal setting has been set, then the desired handling capacity is carried out at
the adjusting knob (see chapter 8). The first time it is filled use the capacity perfor-
mance curves (chapter 5). Depending on the installation and the chemicals used this
value may change and has to be verified under operation conditions.
7. The manufacturer of the dosing equipment is not responsible for damages due to
excessive or low flow rates resulting from faulty dosing pump settings or insufficient
and incorrect installation of peripheral accessories and fittings.
CAUTION!
WARNING!

19
10. Shutdown
Before starting any maintenance and before prolonged downtime, drain the chemical
from the pump and rinse it out with a neutral medium.
CAUTION!
Excess chemicals must be disposed of in accordance with local rules and regulations.
Note the applicable accident prevention regulations and wear personal protective clo-
thing.
Goggles Protective gloves Protective suit
CAUTION!
Next the dosing pump must be disconnected from the power supply and secured to
prevent unauthorized restarting.
CAUTION!
The pressure must be relieved before disconnecting the discharge line from the pump
discharge valve so that chemicals will not spray out.
It is advisable to loosen the discharge and suction check valves in order to drain the
dosing head.
11. Maintenance
Dosing pumps are produced according to the highest quality standards and have a
long service life. Nevertheless some parts are subject to wear and tear caused by its
running (e.g. diaphragm, valve seats, valve balls). To ensure a long operating life, visual
inspection is recommended regularly. Periodic maintenance protects the dosing pump
and system from unexpected downtime.
11.1 Lubricants
The diaphragm-dosing pump is designed to be maintenance friendly. The dosing pump’s
transmission is greased for life with a molybdenum-disulfide. Nonetheless the grease
has to be renewed after approx. 5000 hours of operation when under heavy operational
use such as under high environment temperatures and long running times. For this
purpose you can use for example: “Molykote BR 2 plus” or „OKS400“.
NOTICE!
The dosing pump motor is not to be greased with oil!
11.2 Maintenance of storage
The motor shaft storage are ball holdings caulked and greased for life. The other anti-
friction bearings in the transmission as well as the plain bearing of the diaphragm insert
are greased with the operational lubricant.
NOTICE!
CAUTION!
CAUTION!
CAUTION!

20
11.3 Replacing the diaphragm
CAUTION!
Chemicals may spray out this may lead to caustic or other burns. The dosing pump head
must always be depressurized and rinsed with water or another suitable medium before
starting any work on the dosing pump.
CAUTION!
Legend
1. Dosing head
2. Diaphragm
3. Supporting plate
(with the MIDIDOS E 24, 48
and 72)
4. Diaphragm chamber
6. Diaphragm insert
7. Motor
Changing the diaphragm
1. Remove the dosing head (1) with a sui-
table tool (Allen key SW 10 or. SW13 for
E120). picture 1
2. The dosing pump is set whilst the motor
is running at zero-capacity, whereby the
diaphragm (2) is secured into its stop
position.
3. Turn the pumps off.
4. Diaphragm (2), take its edge and turn
it anti-clockwise. So that the support
plate (3) behind the diaphragm is also
moved. Picture 2.
IMPORTANT!
Der Stützpilz cmuss vor Einbau einer neu-
en Membrane von Chemikalien gereinigt
werden, weil die Membrane sonst von der
Rückseite attackiert werden kann.
123
4
6
7
abcdfg
IMPORTANT!
123
4
6
7
Picture 1
123
4
6
7
Picture 2
This manual suits for next models
4
Table of contents
Other Jesco Water Pump manuals

Jesco
Jesco MAGDOS LT Instruction Manual

Jesco
Jesco Peristaltic Pump 2.8 l/h Instruction Manual

Jesco
Jesco MAGDOS LK User manual

Jesco
Jesco MAGDOS LB Guide

Jesco
Jesco SD 5 00 01/1 User manual

Jesco
Jesco FEDOS E 5 User manual

Jesco
Jesco Lutz PVC GF-2 User manual

Jesco
Jesco MAGDOS DE/DX User manual

Jesco
Jesco C7520 User manual

Jesco
Jesco EASYDOS Peristaltic V Manual
Popular Water Pump manuals by other brands

Ingersoll-Rand
Ingersoll-Rand MP PUMPS CHEMFLO 4 56C Operator's manual

Muncie
Muncie E Series installation instructions

Preiffer
Preiffer OKTA 5400 ATEX operating instructions

Aktobis AG
Aktobis AG WDH-KP40 manual

Gardena
Gardena WP 600 operating instructions

DuraMAC
DuraMAC 5030CVSPBUSS Installation & operation manual