Jetinno JL22 User manual

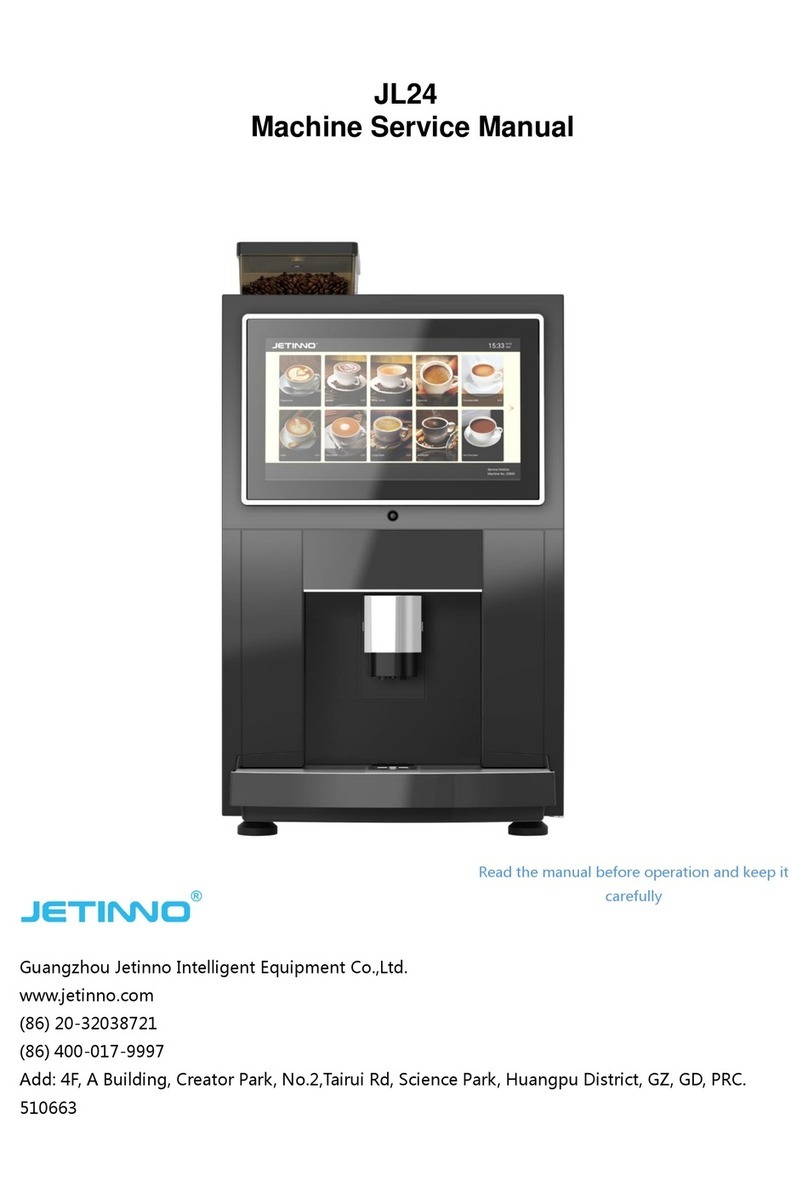
JL22
Machine Service Manual
Guangzhou Jetinno Intelligent Equipment Co.,Ltd.
www.jetinno.com
(86) 20-32038721
(86) 400-017-9997
Add: 4F, A Building, Creator Park, No.2,Tairui Rd, Science Park, Huangpu District, GZ, GD, PRC.
510663
Read the manual before operation and keep it carefully

1
1Preface..............................................................................................................................3
1.1 About this service manual......................................................................................................3
1.2 Important Safety Warnings....................................................................................................4
1.3 Spare parts ...............................................................................................................................5
1.4 Handling packaging materials...............................................................................................5
1.5 Machine scrap..........................................................................................................................5
2About machine ................................................................................................................6
2.1 Technical specification............................................................................................................6
2.2 Key parameters........................................................................................................................7
2.3 Machine view........................................................................................................................... 7
2.4 Product page............................................................................................................................8
3Shipping and Storing ......................................................................................................8
3.1 Shipping ...................................................................................................................................8
3.2 Storing and shipping environment .......................................................................................9
4Installation and commissioning .....................................................................................9
4.1 Placement of machine ..........................................................................................................10
4.2 Open machine door..............................................................................................................10
4.3 Connect to water source ...................................................................................................... 11
4.4 Power on.................................................................................................................................12
4.4.1 Connecting the machine power...................................................................................12
4.5 Power off ................................................................................................................................12
5First running...................................................................................................................13
5.1 Filling the canister .................................................................................................................13
6Adjustment and calibration..........................................................................................13
6.1 Grinder fineness adjustment method.................................................................................13
6.2 Grinder calibration ................................................................................................................14
6.3 Instant Canister Calibration..................................................................................................... 15
6.4 Recipe Management and Testing............................................................................................ 16
7Set vending mode and drink price...................................................................................16
7.1 Set vending mode....................................................................................................................16
7.2 Setting Drink Prices.................................................................................................................17
8Drinks making..................................................................................................................17
9Software Upgrade............................................................................................................18
10 Cleaning....................................................................................................................19
10.1 Cleaning and cleaning safety..................................................................................................19
10.2 Hygiene....................................................................................................................................20
10.3 Spoiled Food............................................................................................................................20
10.4 Basic Cleaning........................................................................................................................20
10.5 Cleaning Guidelines ................................................................................................................20
10.6 Daily Cleaning .........................................................................................................................23
10.6.1 Cleaning Hot Water System.............................................................................................23
10.6.2 Drink Spout Cleaning ....................................................................................................... 24
10.6.3 Drip Tray and Waste Bin Bucket Cleaning.......................................................................25

2
10.6.4 Mixer Cleaning .................................................................................................................25
10.7 Regular Maintenance .............................................................................................................. 25
10.7.1 Clean the Brewer..............................................................................................................25
10.8 Maintenance Guidelines.......................................................................................................... 28
10.8.1 Empty boiler .....................................................................................................................28
10.8.2 Empty air break................................................................................................................29
11 APP Installation.........................................................................................................29
12 Preventive Measures.................................................................................................31
12.1 Cleaner....................................................................................................................................31
12.1.1 Use ...................................................................................................................................31
12.1.2 Storage ............................................................................................................................32
12.1.3 Disposal............................................................................................................................32
12.2 Health Regulations..................................................................................................................32
12.2.1 Water ...............................................................................................................................32
12.2.2 Coffee...............................................................................................................................33
12.2.3 Instant powder ...............................................................................................................33
13 Safety and warranty ..................................................................................................34
14 Frequently asked questions ......................................................................................35
15 Certification ...............................................................................................................36

3
1Preface
Thank you for purchasing JL22 series products! Before using the machine, read the instruction
manual of this coffee machine carefully to ensure the normal operation of the machine.
In order to protect your rights and interests, unpack and inspect the goods, and check in detail
whether the machine is damaged or lacks accessories. In use, if you have any questions, please
contact us, we will do our best to provide services in the shortest time, our contact information is as
follows www.jetinno.com (86) 20-32038721 (86) 400-017-9997。
All parts of this machine, including hardware and software, are owned by Guangzhou Jetinno
Intelligent Equipment Co., Ltd. and cannot be copied, excerpted or translated without the
permission of the company. The product specifications and information mentioned in this user
manual are for reference only, and the content will be updated at any time without prior notice.
Electrical Safety: To avoid serious injury from possible electric shock, unplug the power plug from
the electrical outlet before moving or servicing the machine. If the power cord is damaged, it must
be replaced by a professional from the manufacturer, its repair department or after-sales service to
avoid danger.
Please notify Jetinno about factory settings in advance, such as: service phone number and
company website, company logo, recipe requirements and cup size and other important
information.
1.1 About this service manual
This manual is a guide for authorised technicians to safely transport, install, set up, maintain and
service the machine.
Refer to separate chapters for service, use and daily cleaning instructions.
Below is a description of the risk levels
description
symbol
risk of serious damage
Danger
risk of injury
Caution
Risk of damage to the machine
Attention
Risk of impaired machine function
Important
Advice
Note

4
Caution!
When transporting, installing, setting up and maintaining the machine, if the operation is not
carried out according to the instructions,
Jetinno
will not be responsible for any personal injury or
damage to the machine;
Any alterations and structural adjustments to the machine are strictly prohibited, and in these
cases
Jetinno
will not exclude non-cash claims.
Only products and formulas approved by
Jetinno
can be used in the machine,
Jetinno
will not be
responsible for any loss caused by this, and the risk lies with the operator;
Always follow the instructions in the technical manual and user manual; pictograms, symbols and
instruction stickers attached to the machine cannot be torn or removed;
The person setting up the machine needs to be a trained technician; no changes to product
specifications are allowed.
1.2 Important Safety Warnings
1) Read this manual carefully before use;
2) Use the correct voltage referring to the nameplate and make sure the power outlet is well
grounded;
3) Do not store or use the machine near heat or air sources;
4) The equipment must be disconnected from the power supply before cleaning or
maintenance;
5) Prevent the machine from being splashed with water;
6) Do not drag the cable when unplugging;
7) Do not put the machine and cables in water
8) If the water hardness is greater than 8°DH, use a filter;
9) When the machine is installed and arranged, do not tilt; do not let children beside the
installation process;
10) If the cable is damaged, contact our company as soon as possible to purchase new spare
parts to replace;
11) Protect the machine from weather (such as water, heat, etc.);
12) It is strictly forbidden to use the machine outdoors;
13) Maintenance, cleaning and restoration work should be done by professional service
personnel;
14) For your own safety and the longevity of the machine, please use original spare parts;
15) Equipotential sign: If there are other electrical equipments that require equipotential
connection, use appropriate copper conductors with a nominal cross-sectional area of 2.5
square to 10 square meters to reliably connect the equipotential terminal of the machine with
the equipotential terminals of other equipment.
16) Protective grounding.

5
1.3 Spare parts
1) Note that this machine, even with proper cleaning and maintenance, has parts that need to be
replaced due to wear and tear;
2) This mainly applies to mechanical parts and parts of the hot water system, such as hoses, seals,
etc;
3) Defects caused by wearing parts are not covered by warranty;
4) Defects and malfunctions must be resolved by factory-trained technical service personnel,
contact your professional retailer or
Jetinno
after-sales service center.
1.4 Handling packaging materials
Packaging materials include: cardboard, corrugated cardboard, treated wood, polystyrene
components and plastic film.
After installation, customers should contact their local public cleaning service to dispose of
packaging materials in a recyclable or environmentally friendly manner whenever possible.
1.5 Machine scrap
The scrapped machine cannot be returned to the original factory. The machine contains some harmful
materials to the environment, especially electronic parts, according to the national standards/regulations to
deal with!

6
2About machine
2.1 Technical specification
item specification
model
JL22
size
400(W)*667 (H)*550D)mm
weight
42kg
rated voltage/frequency
Domestic (220V/50Hz/foreign (110V/60Hz) to determine
the local power grid
rated power
3000W
rated current
16A
power supply wire length
>1.5m
Operation temperature/humidity
5℃-35℃/10%RH-90%RH
rated pressure
0.6MPa
communication port
USB;WIFI;4G
displaying screen
10.1displaying screen and touch screen
canister volume
3个/1.5L canister quantity can be adjust
coffee bean volume
1.5Kg
water waste bin volume
1.5L
coffee cake waste bin volume
50 cakes
boiler volume/ power
700CC\2700W
water outlet height
80mm-115mm
cup detection function
no
coffee bean detection function
yes
IP waterproof IP
IPX1

7
①
②
③
⑤
④
①
①
⑥
⑤
④
③
②
2.2 Key parameters
1) instant powder making time:30~40s 220ml;
2) Espresso≤45s 30ml) (brewing time 35s) the setting affect flavor and making time;
3) hot water outlet speed: 10ml/s;
4) machine starting time:<2 min;
5) payment method:WeChat/Alipay/banknote device/coin device/other MDB device;
6) Gcommunication interface:WIFI,4G(optional);
7) operation system:Android;
2.3 Machine view
①coffee bean container、②lock、③beverage outlet、④touch screen and displaying screen、⑤water
drip tray
①grinder、②brewer、③coffee cake waste bin、④canister、⑤mixer、⑥water drip tray cover
Frontal view
Inside view

8
①payment interface ②dust cover ③submersible pump power supply ④water intake ⑤power
switch ⑥power cable
2.4 Product page
3 Shipping and Storing
3.1 Shipping
This machine is packed in a cardboard box + plastic bag to prevent damage, moisture and dust.
Attention:
To avoid damage:
Transport the machine in a vertical position.
Double stacking is allowed if the outer box is intact.
Do not place objects larger than 5 kg on top of the machine.
Avoid tilting and dropping the machine during transportation.
Product name
Product icon
Time/date
Coffee machine(back)
Slide page
Company LOGO
Service hotline and
machine number
①
②
③
④
⑤
⑥
Product price
Coin refunds

9
3.2 Storing and shipping environment
Attention:
Danger of high temperature damage!
To prevent damage to the machine, please note that
Can only be used under +5°C to +35°C, low temperature icing can seriously damage the
machine
Ambient humidity range 10%RH - 90%RH
Store the machine in a dust-free and dry environment at a temperature of -10°C - 50°C
4Installation and commissioning
Attention:
Only professionally trained personnel should install the machine!
Confirm whether the machine is damaged before installation, some damage cases are rather
hidden!
If damage is found, contact the transport company to claim and notify our company for
after-sales service!
Prepare the transportation tools before installing the machine!
Note:
Before the installation to confirm the machine water connection, support external barrels and
direct drinking water way!
Support standard barrel water! If the machine is connected to a direct water source, confirm
that the water pressure should be between 0.5Bar-6Bar. Inside the machine, there is a small
water tank is used to remove the air in the water, so as not to affect the accuracy of the boiler
temperature control.
Observe the following steps for initial use.
Place machines at the place of operation, unpack the machine and open the door with the key.
Inspection of the machine interior.
Removal of the paper from the powder outlet of the grinder and from the canister.
Placing the antenna.
Placing the water bucket or connecting the machine to a direct water source.
Filling the canisters.
Connect the machine to power supply.
Making the necessary settings according to the customer's needs.

10
Note:
The machine is not suitable for outdoor installation, or placed in a strong light environment,
cannot be installed in the environment of air and water spray, need to be installed in 5°C to 35°C
dry room.
Ensure that the fan is effectively ventilated, the back of the machine is not less than 50cm from
the wall, and the side installation space is not less than 30cm; the machine must be placed
horizontally before positioning, and the tilt angle can not be more than 2 degrees.
Pay attention to the neatness of the installation environment and classify the packing materials!
4.1 Placement of machine
Use a forklift or flatbed to transport the machine to the designated location; unpack the coffee
machine and place it on a flat counter top.
Important:
Risk of malfunction!
Refer to the following recommendations when choosing a location. 5:
1. The machine is placed and operated in a dry, well-ventilated room.
2. Place it on a flat table.
3. Make sure there is enough space around the machine for repair, maintenance and cleaning.
4. The back of the machine can not be less than 50 cm from the wall, make sure the direct
drinking water pipe is not bent.
4.2 Open machine door
Open machine with keys and check the inside of the machine for any damage. Take out the machine
foot and install them on the bottom of the machine.
Lockhol
e
Take machine keys here
Standard foot

11
Note:
Only professionals can open the device!
Jetinno
is not responsible for any intentional damage or damage caused by ignoring these safety
instructions and notes.
4.3 Connect to water source
Important:
The quality of the water source affects human health!
The water source should meet the GB5479 sanitary standards for drinking water.
Pay attention to the sanitary condition of water pipes.
Clean the relevant parts.
The water source connected to the machine should be easy to operate.
Direct drinking water to tighten the joint to avoid leakage.
Note:
The pressure standard for direct drinking water is 0.5 to 6 Bar.
The hardness of the water must not exceed 8°DH, if yes then it is recommended to add a water
filter.
Take out the submersible pump from the
machine inside and put the submersible
pump into the bucket of water.
The other end of the submersible pump is
connected to the machine water inlet and the
submersible pump power connector.

12
4.4 Power on
warning:
Wrong voltage is a risk of damage to the machine!
Different countries have different voltages!
Make sure that your machine is suitable for the local electrical network connection.
The supply voltage and frequency can be found on the machine nameplate.
warning
Voltage variations are a risk of damage to the machine!
Do not connect the machine to a network that may be subject to voltage variations
The electrical outlet must be grounded.
The power switch is placed at a convenient power-off place to facilitate timely power-off when
abnormal.
4.4.1 Connecting the machine power
Plug the male end of the coffee maker's power cord into a power outlet;
Press the power switch on the back of the machine;
It takes about 2 minutes for the machine to start.
4.5 Power off
When the machine need to be turned off for a long time or need to be moved, the water tank and
boiler need to be emptied before the machine can be turned off. Otherwise there will be water
overflow inside causing damage to the machine;
Machine has fully automatic cleaning, emptying boiler, emptying water tank program, please refer
to chapter 9.6, 9.7.
Caution!
Risk of scalding.
When pulling pipes or joints, watch out for hot water spurting out to scald your body!

13
5First running
5.1 Filling the canister
Open machine door with keys
Open machine cover
Wear a mask and disposable edible gloves.
Open the top cover of the material box and add the powder corresponding to the material box.
Note:
When the machine is filled for the first time or after cleaning, it needs to be tested several times to ensure
that the canister outlet is filled.
The machine can only run properly if the powder is replenished in time.
6Adjustment and calibration
6.1 Grinder fineness adjustment method
To adjust the coarseness of the grind according to the
silkscreen diagram.
Before filling beans, firstly screw the knob clockwise to
the position of the disc fit (normal torque cannot be
screwed ), Second rotate the knob counterclockwise for
16 turns, as a benchmark coarseness position (general
espresso coarseness), final in the calibration process
according to the fineness of the powder and then
fine-tuning (clockwise direction is to adjust finer,
counterclockwise is to adjust thicker )
1. key unlock
3.open cover
2. open the door
4. place coffee hopper

14
6.2 Grinder calibration
The calibration software is for the physical characteristics of the instant canister powder, the
physical characteristics of the powder and the degree of roasting of the coffee beans. Before
calibration you need to prepare the electronic scale and cups.
Important:
No calibration will result in abnormal machine output!
Make sure that the canister outlet is filled before calibration, which can be achieved by the "Start
Test" function, as an insufficient outlet will lead to inaccurate calibration.
Note:
Because each part or powder has different physical characteristics, so every time you replace the
canister, motor or different manufacturers of coffee beans and powder, you need to recalibrate,
and the amount of powder in the canister should be greater than 1/3 of the volume of the
canister during calibration.
After the grinder adjustment is finished, you need to calibrate the amount of coffee powder.
Press and hold the top left corner of the screen, enter the password in the pop-up dialog box,
administrator password: jn9527 or maintenance password: 9527.
Enter the machine background "coffee machine" interface.
In the “Status”-“Canisters Management”-“Fill”, select “coffee bean”, click , in the pop-up dialog box
“Filling” enter the weight of the coffee beans poured into the coffee bean hopper, click “save”.
Find the coffee bean column in the “Status”-“Canisters Management”-“CAL.”, click on the calibration
icon ; in the pop-up dialog box "Output time" (range is 1-10 seconds, usually enter 2-3 seconds),
click "Start testing". Twice, discard the ground coffee powder!
Open the door of the machine, take an empty cup and put it on the electronic scale to clear it, then
place it on the grinder outlet and click "Start testing" again.
Weigh the coffee powder, enter the number of grams in the touch screen under "Discharge" and
"Save".
Put the empty cup on the electronic scale, then clear to zero and put it on the grinder outlet, then do the
"Start testing" again, weigh the powder dropped, compare the weight value with the value at the
"Discharge", if the deviation is within ±0.3 grams per second, it is considered Normal, if the deviation is
too large, recalibrate according to the above method until the value is OK.

15
6.3 Instant Canister Calibration
Canisters calibration is a program of measuring the dispensing speed of instant canisters with specific
powder. Before calibration, you need to prepare an electronic scale and cups and the calibration method is
same as grinder calibration above.
Important :
Lack of Calibration will cause a dispensing malfunction!
Before calibration, click [start test] to fill the canister outlet, a non-full outlet will lead to inaccurate
calibration.
Note :
Because every part or powder has different physical characteristics, so every time after replacing
canisters, motors or powder, you need to do calibration. Before calibration, make sure at least 1/3 of the
canister is full of powder
Use the key to open machine door. Long press the upper left corner of the screen, enter password in the
pop-up dialog box, administrator password: jn9527 or maintenance password: 9527. Enter the machine
background "coffee machine" interface.
Status Tab- Canisters Management - Fill, click , in the pop-up dialog box [Fill] enter the weight of milk
powder poured into the canister, click [Save].
Remove the mixer under the canister, prepare an empty cup and an electronic scale, and put the cup
on the electronic scale to clear the zero (tare). Place the cup under the canister outlet.
Status Tab- Canisters Management –CAL, find the milk powder, click the calibration icon ; enter
Discharging Time (1-10 seconds, usually 2-3 seconds) in the pop-up dialog box, click "Start Test", the
machine will automatically dispense powder, once dispensing is over, place the cup with powder inside
onto on the electronic scale to clear the zero and place the cup under the canister outlet, click "Start
Test" again, once dispensing is finished, use the electronic scale to weigh again; enter the value of
gram into the "Dispense" blank on touch screen, and then "Save".
Put an empty cup on the electronic scale, clear the zero and then place the cup under the canister
outlet, then do the "start test" again, weigh the powder dropped and compare the weight value with the
value at the "discharge" on machine screen, if the deviation is within ±0.3 grams per second, it is
considered normal. If the deviation is too large, recalibrate according to above method until the value is
OK.
Repeat above steps on the rest 2 canisters.

16
6.4 Recipe Management and Testing
Long press the upper left logo, enter password: jn9527 into the pop-up dialog box, click [recipe]. Select
corresponding product on left recipe list, then can adjust water volume, ingredient volume/weight, mixing
speed, delay time, after modifying, click [save], click [start cooking] to brew drinks.
On this Recipe Management page, you can add recipe, delete recipe, start cooking, save recipe, save
product, import recipe, export recipe, and edit recipes.
7 Set vending mode and drink price
7.1 Set vending mode
Free mode - No product price Payment mode - with product prices
1) Long press the upper left corner logo and enter the password: jn9527 in the pop-up dialog box;
Note :
The calibration method of sugar, cocoa is same as instant material. Every time using new canisters,
motors, different powder or new machines, re-calibration is needed. No need to do calibration when
refilling canisters with same powder.

17
2) Click the [Payment Configuration] button to set the payment mode in the pop-up dialog box.
3) When [Free] mode is enabled, no payment is needed.
4) When MDB cash, MDB swipe card switch are enabled, the machine would make products only after
customers pay successful
5) [Server List] Offline mode should be enabled in free mode. Offline mode should be disabled in payment
mode to ensure normal network.
7.2 Setting Drink Prices
The machine backend allows admin to set different prices for each drink. Enter the password to enter the
backstage, admin can then set the prices for each beverage, take the product off the shelves, modify its
name, replace its picture and set discount
Tap [Batch Price Adjustment], select all, deselect all, Click OK to adjust the price of all products; set the
price of a single product, click product price, then you can set its price individually; tap [Normal], then Hot,
Normal, Off the shelf are available to choose in the drop-down menu.
Drink management: add new drinks, batch delete, batch price adjustment, import drinks, export drinks, edit
and delete single drink function.
8 Drinks making
Select a drink under user interface.
Adjust the taste strength on the touch screen, there are three levels and click confirm; (this step can be
cancelled in the factory settings according to customer needs)
the machine makes drinks directly in free mode; several payment methods will appear in payment
mode (MDB cash, MDB swipe card, WeChat payment QR code, Alipay payment QR code)
Place a cup under drink spout, if the payment is successful, the machine would automatically start
making drinks.
A prompt shows up on the touch screen once the beverage is made.
Customers can set the language of the user interface according to their needs.

18 Service Manual JL22
9 Software Upgrade
Local upgrade: copy latest software (APK file) into a USB drive (8G or smaller).
Enter the background to open the machine gate, insert the U disk into USB port on the back of machine
door; click [More Setting] on backend menu; the following pop-up will appear, click [Local Upgrade APP] >
select the upgrade software in U disk, press [OK] to start upgrading the system.
Note: Do not power off machine when machine is in the middle of upgrading, the software will automatically
restart after a successful upgrade, please wait patiently. Refer to Chapter 11 for software installation and
upgrade instructions.
1、Product list page: all available drinks
2. Taste adjustment: coffee strength, can be
freely adjusted, click OK after adjustment
Payment page: WeChat Pay,Alipay ,MDB
cash, MDB swipe card adjustment
4、Product making page: After payment,
brewing animation.

19 Service Manual JL22
10 Cleaning
Thorough cleaning and maintenance is a basic requirement to maintain food hygiene. Only regular (twice a
week or more frequently depending on situations) maintenance, cleaning and servicing can keep machine
in good conditions to make tasty and clean drinks.
Jetinno thoroughly took all criteria into consideration, to reduce maintenance costs and improve operational
efficiency.
Attention:
Excessive high temperature of water will damage plastic parts!
When cleaning plastic parts in a dishwasher, Excessive high temperature of water can cause damage!
Cleaning water temperature must not exceed 65°! After cleaning and drying, parts can be disinfected in the
disinfection cabinet or ultraviolet disinfection!
10.1 Cleaning and cleaning safety
Read below safety instructions before rinsing and cleaning!
Danger!
Electric shock danger!
Before repairing, make sure first shut down the machine, then unplug it and repair it! If the power supply has a
malfunction, Do not try to fix it by yourself, please contact professional technical personnel.
Caution!
NON-Daily Cleaning and maintenance can only be done by trained personnel or manufacturer's technicians
who know what dangers may occur when operating the machine!
Caution!
Be aware of injuries caused by high temperature and high pressure of water!
Follow below order to clean and maintain a boiler or tubes
First shut down water supply.
Remove tubes before any maintenance operations.
Caution!
Burn danger!
There are extremely hot parts inside the machine.
Caution!
Finger-pinching danger!
ES brewer has moving parts, don't put your fingers or hands on moving parts before power off the machine.
Table of contents
Other Jetinno Coffee Maker manuals