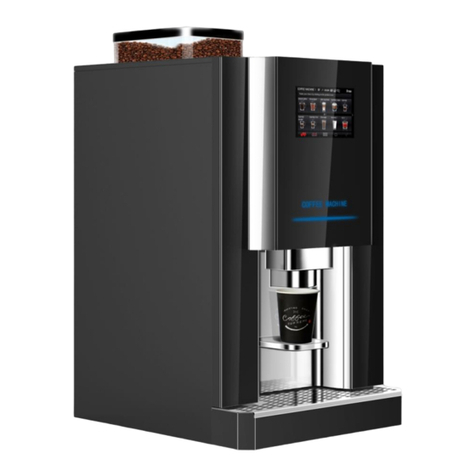
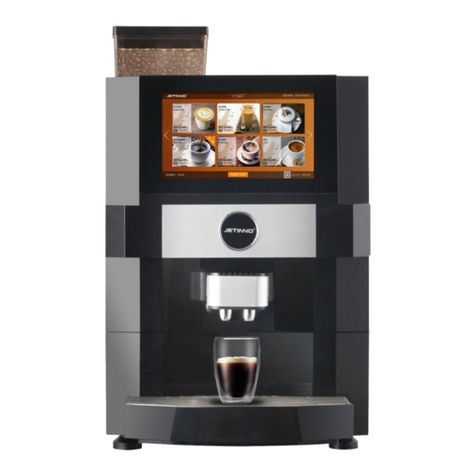
Jetinno JL18 User manual

-1/64 -
JL18 Machine Service Manual
Guangzhou Jetinno Intelligent Equipment Co.,Ltd.
www.jetinno.com
(86) 20-32038721
(86) 159-1570-5797
Add: 4F, A Building, Creator Park , No.2,Ruitai Rd, Science Park, Huangpu District, GZ, GD, PRC. 510663

-2/64 -
Contents
Foreword.................................................................................................................................................. 5
1.1 Thanks for using........................................................................................................................... 5
1.2 Identification and symbols............................................................................................................ 5
General Safety Tips................................................................................................................................. 6
2.1 Danger to users........................................................................................................................ 6
2.2 Harm to machine.......................................................................................................................... 9
Product description................................................................................................................................ 10
3.1 Intended use............................................................................................................................... 10
3.2 Technical data............................................................................................................................ 10
3.3 Place........................................................................................................................................... 12
3.3.1 Installation site................................................................................................................. 12
3.4 Power supply.............................................................................................................................. 12
3.4.1 Condition.......................................................................................................................... 12
3.4.2 Connecting data.............................................................................................................. 13
3.5 Water connector..................................................................................................................... 13
3.6 Water connector/drainage ......................................................................................................... 14
3.6.1 Condition.......................................................................................................................... 14
3.6.2 Connection values......................................................................................................... 14
3.7 Installation................................................................................................................................... 14
3.7.1 Unpack the machine..................................................................................................... 14
3.7.2 Automatic Debug Program............................................................................................. 14
3.8 Disassembly and disposal......................................................................................................... 14
Operation............................................................................................................................................... 15
4.1 Machine instruction.................................................................................................................. 15
4.1.1 Machine External Operating Components.................................................................. 15
4.2 Check before power on............................................................................................................. 15
4.3 Power on..................................................................................................................................... 16
4.3.1 Coffee machine............................................................................................................... 16
4.4 Sale page.................................................................................................................................... 16
4.4.1 Sale page......................................................................................................................... 16
4.4.2 concentration adjustment page...................................................................................... 17
4.4.3 Payment page................................................................................................................. 18
4.4.4 Product making page...................................................................................................... 18
4.4.5 Product finish page.......................................................................................................... 19

-3/64 -
4.4.6 Error page........................................................................................................................ 19
4.4.7 Background interface...................................................................................................... 20
4.4.8 Error.................................................................................................................................21
(Error):.................................................................................................................................. 21
4.4.9 Maintenance.................................................................................................................... 22
4.4.10 Filling.............................................................................................................................. 22
4.4.11 Background bottom icons function............................................................................... 22
4.4.12 Machine......................................................................................................................... 23
4.4.13 Canister and motor parameters................................................................................... 24
4.4.14 Grinder........................................................................................................................... 25
4.4.15 Mixer.............................................................................................................................. 26
4.4.16 Espresso brewer........................................................................................................... 27
4.4.17 Esboiler-1....................................................................................................................... 27
4.4.18 Auxiliary-1...................................................................................................................... 28
4.4.19 Recipe............................................................................................................................ 29
4.4.20 product recipe................................................................................................................ 30
4.4.21 Powder Adjustment....................................................................................................... 30
4.4.22 product test.................................................................................................................... 31
4.4.23 Product........................................................................................................................... 31
4.4.24 Set product prices......................................................................................................... 32
4.4.25 Show/Hide..................................................................................................................... 32
4.4.26 Product Show/Hide page.............................................................................................. 32
4.4.27 Edit name....................................................................................................................... 33
4.4.28 Program......................................................................................................................... 34
4.4.29 Rinsing........................................................................................................................... 34
4.4.30 Purification..................................................................................................................... 35
4.4.31 Empty boiler................................................................................................................... 35
4.4.32 Empty air-break............................................................................................................. 36
4.4.33 Setting............................................................................................................................ 36
4.4.34 Reboot........................................................................................................................... 45
4.4.35 About.............................................................................................................................. 46
4.5 Filling and connection.............................................................................................................. 46
4.5.1 Connect water................................................................................................................. 46
4.5.2 Coffee bean..................................................................................................................... 47
4.6 Empty.......................................................................................................................................... 48

-4/64 -
4.6.1 Residue bin................................................................................................................... 48
4.6.2Waste water tray............................................................................................................. 49
4.7 Transport condition..................................................................................................................... 49
4.8 Empty air break.......................................................................................................................... 49
4.9 Power off..................................................................................................................................... 49
4.9.1 End operation.................................................................................................................. 49
4.9.2 Long downtime (over1 week)........................................................................................ 50
5.1 Clean interval.............................................................................................................................. 50
4.10 Cleaning plan............................................................................................................................ 51
4.11 Cleaner................................................................................................................................... 52
4.12 Flush the interval.................................................................................................................... 52
4.13 Cleaning interval....................................................................................................................... 52
4.14 Dailymachine cleaning............................................................................................................ 53
4.14.1 Screen Guide Cleaning Procedure.............................................................................. 53
4.14.2 Brewer purification(put cleaning tablet in)............................................................... 53
4.14.3 Clean residue bin.......................................................................................................... 54
4.14.4 Clean waste water tray............................................................................................... 54
4.14.5 Clean Mixer ................................................................................................................... 55
4.14.6 Clean touch glass and window.................................................................................. 55
4.15 Weekly cleaning....................................................................................................................... 55
4.15.1 Clean coffee bean canister........................................................................................... 55
4.15.2 Clean Espresso brewer.............................................................................................. 56
4.15.3 Clean Fresh tea brewer................................................................................................ 58
Q&A........................................................................................................................................................ 62
Preventive measures............................................................................................................................ 63
6.1 Cleaner........................................................................................................................................ 63
6.1.1 Use................................................................................................................................... 63
6.1.2 Storage............................................................................................................................. 63
6.1.3 Disposal........................................................................................................................... 64
6.2 Health Regulations..................................................................................................................... 64
6.2.1Water................................................................................................................................ 64
6.2.2 Coffee............................................................................................................................... 64
6.2.3 Powders........................................................................................................................ 65
Safety and warranty.............................................................................................................................. 65

5
Foreword
1.1Thanksforusing
JL18 productinformation and usage are introduced to you in this service manual. Wewill notbe responsible for
the loss if the coffeemachine is not used comply with the relevant instructions. Butthe manual may not include
all intended uses! For more information, please contactour customer service
Equipment performance depends on proper maintenance and use.Please read the service manual carefully
before the firstcommissioning andkeep it available for you to read at anytime.
Have a good time!
1.2Identificationandsymbols
See also section of “General Safety Tips”
The followingsigns andsymbols are used in theinstructions to indicate hazards and
special matters
Directly risk of serious injury or death due to electric shock
Must comply with measures to prevent such hazards
Dangerous situations in general, which can cause serious injury
Must comply with measures to prevent such hazards
General dangerous conditions, may cause minor injuries.
Must comply with measures to prevent such hazards.
Situation that may cause damage to the machine.
Must comply with measures to prevent such hazards.
High temperature liquid. The risk of scalding. There is danger in the outlet position. Symbol
only used below
Must comply with measures to prevent such hazards

6
High temperature surface. Risk of scalding. Outlet position
Position (selection of accessories) creates such a hazard. Symbol only used below.
Must comply with measures to prevent such hazards.
Risk of crush. May cause bruising. Symbol only used below.
Must comply with measures to prevent such hazards.
Risk of poisoning. General dangerous circumstances may cause injury caused by poisoning,
Symbol only used below。
Must comply with measures to prevent such hazards.
General SafetyTips
2.1 Dangertousers
Incorrectuse of the coffeemachine can causeminor injuries
Be sure to follow
Please read the servicemanual carefully before using.
Only technical service personnel allowed to enter the maintenance area of the machine.
Not allowed to use the coffee machine if it is not working properly or damaged.
No changes to built-in safety devices, not allowed to disassembly and assembly of equipment
by non-professional technicians.
No touch with high temperature machine parts.

7
Children over the age of 8, as well as persons with physical, sensory or intellectual
impairments or lack of experience and awareness, must learn how to operate the equipment
safely and understand the risks before using the equipment under continuous supervision.
Children is not be allowed to fiddling with machines or perform cleaning and maintenance
operations. Only personnel who are familiar with the equipment and with relevant experience
are allowed to perform such operations, particularly with regard to safety and health.
Coffee machine is installed where it is convenient for care and maintenance.
Self- service and operation should be supervised by trained personnel, to ensure complying
with maintenance regulations and to resolve usage issues at all times.
Coffee beans canister only can fill with coffee bean, the instant canister only can fille with
finished beverage powder, manual addition only can add ground coffee beans (or tablets
when cleaning).
Risk of electricshock, incorrect use of electrical equipment causes electric shock
Be sure to follow:
Operations on electrical equipment can only be performed by electrical professional.
Machine must be connected to a circuit with fuse protection (it is recommended to lay a
connection through a leakage protector).
Comply with relevant low-voltage instructions and national or local safety regulations.
Connection must be grounded in accordance with regulations to prevent electrical shock.
Voltage must be consistent with the instructions on the equipment nameplate.
No contact to components with voltage.
Be sure to turn off the main switch before maintenance, and disconnect the equipment from
the power supply.
All connections to equipment must be disconnected from the power grid. The disconnected
connection must be readily visible at the operating location of the device, or be interrupted by
locking.
Power cables can only be replaced by professional.
If don’t comply with safety tips, negligence thatmay occur in normal use, cause harm to people and
the surrounding environment.
The machine around or in the embedded structure should keep the ventilation smooth, unobstructed
No flammable materials around the machine.
Drinks with additives or residues may cause allergies
Be sure to follow

8
In self-service mode, need indicate allergic additives through the tip on the coffee machine
Whenused byservice personnel, trained personnel inform the possible allergic additives.
Inhaled cleaner is at risk of poisoning
Be sure to follow:
Cleaner should be kept awayfrom children and unauthorized personnel
Don’t Inhaled cleaner.
Don’t mix cleaner with other chemicalsor acid substances.
Forbidden to add the cleaner to the cup.
Forbidden to add the cleaner to the drinking water tank(Internal/external)
Cleaning agents and descaling agents can only be used for specified purposes (refer to label)
Do not eat or drink when using cleaner.
Must ensuregood ventilation and exhaustwhen using cleaner
Wearprotective gloves when using cleaner.
Wear goggles when using cleaner.
Wash hands thoroughly after using cleaner.
\\ Before using cleaner, read the instructions on the package carefully. If you do not get a safety data
sheet, you can obtain it from the dealer (refer to cleaner package)
High temperature liquid. There is a risk of scalding under the outlets of drinks by hot water and
steam. Do not put your hand under the outlet when flowing or cleaning.
High temperature surface. Outlets,brewers and boilers are easy to scald.
Onlyallowed to touch pre-designed handles.
Onlyallowed to clean brewer aftercoffeemachine cools.
Danger of Squashing. Exposure to any moving component is at risk of Squashing.

9
Onlyallowed to touch pre-designed handles.
Do not put your hand into the cup holder, coffee bean canister, powder canister or brewer when
machine starting.
The blades in the grinderand under the coffee bean canister are very sharp.
2.2 Harm tomachine
Improper useof the coffee machine may cause damage or contamination.
Be sure to follow:
If the carbonate hardness in the watermore than 5°DKH, install scale filter, otherwise would cause
calcification and damage the coffeemachine.
For security considerations, please note that the main water valve (coffee machine with directly
water connector) should be closed after shutdown,also close the main switch orthe unplug power
cable.
Please comply with relevant low voltage instructions and/or national and local safety regulations and
regulations.
Don’t not power on if no water. Otherwise,the water heater will not work and the pump will keep
idling.
It is recommended that a ball valve be installed in the pipe to avoid seepage when the pipe breaks.
After a long downtime (e.g.corporate leave), the coffee machinemust be cleaned first,then can
re-booted and use.
Prevent coffee machine from bad weather (frost, moisture, etc).
Troubleshooting can only be operated by technical service personnel.
Use original machine parts formaintenance.
External visible damage or leakage please contact the service partner immediately for replacement
or repair.
Do not wash thismachinewith water or steam cleaner.
The machine shall notbe placed on a position which may be sprayed by water.
Improper useof the coffee machine may cause damage or contamination.
Be sure to follow
Coffee beans canister only can fill with coffee bean, theinstant canister can only be filled with
finished beverage powder, manual additiononlycan add ground coffee beans (or tablets when
cleaning).
Don’t use freeze-dried coffee, otherwise it will bind the brewers and the machine can not work
normally.

10
If the coffee machine and its accessories are transported at a temperature below10℃, the coffee
machine and its accessories must be placed under normal temperature for three hours before being
connected to the power supply and started. Failure to comply with this requirementmay resultin a
short circuit or damage to electrical components due to condensation.
Use newormachine-provided pipes (drinking water pipes / waste water pipes). Noold pipes.
Improper useof coffee machines maycause damage; It is strictly forbidden to climb to the machine.
Productdescription
3.1Intendeduse
The equipment is suitable for office, hotel, catering, shopping mall, station, gas station and so on. User can
operate it by self.
Children over the age of 8,as well as persons with physical, sensoryor intellectual impairments or lack of
experience and awareness,mustlearn how to operate the equipmentsafely and understand the resulting risks
before using the equipmentunder continuous supervision.
Children not be allowed tofiddling with machines.Children are not allowed to perform cleaning and maintenance
operations. Only personnelfamiliar with the equipment and with relevantexperience are allowed to perform such
operations, particularly with regard to safety and health.
In addition, please refer to the clause and conditions of Jetinno Intelligent equipment Co.,Ltd. Other or
beyond-limit uses are considered to uncompliant use. The manufacturer is not responsible for the losses
arising therefrom.
Incorrectoperation of the coffee machinemay cause damage, JL18 formula is recommended, other
formulationsneed to be verified beforeuse.
3.2Technical data
Definition Parameter
Model
JL18-ES3C-P \ JL18-BTC3C-P
Dimensions
713mm(H)*310(W)*550(D)(Exclude
castors)
Weight
40.5kg
Rated Voltage/Frequency
220V/50Hz or 110V/60Hz
Total Rated Power
2600W
Installation Power
2600W

11
Rated Pressure
0.5-6Bar
Fuse
15A
Operating temperature/humidity
5℃-35℃/10%RH-90%RH
Behind space
>50CM
Side space
>30CM
Communication interface
USB;WIFI;4G
Screen
14 inch display+touch module
Cup capacity \ size
Optional
Coffee bean canister capacity
5.0L
waste water bin capacity
>2L
Residue bin capacity
4L
Instant canister capacity
3.5L*1 和2.3L*1
Boiler capacity\Power
700CC\2500W
Coffee beans have no bean detection
function
Yes
IP Rating
IPX1
Installation and debugging
Machines should beinstalled in accordance with existing national or local electrical and hygiene
regulations. Include backflow protection measures
Weargloves and goggles when removing machine packaging because
sharp edges of packaging materials and cut nylon straps may cause injuries.
Pollution of intake pipes maycause harm to health, machine mustbe cleaned afterinstallation,
debugging and restart operation.
Follow the screen-guided cleaning procedure before first drink.
Refer to: Cleaning-Daily cleaning - screen-guided cleaning procedure.

12
3.3Place
3.3.1 Installation site
The following conditions are suitable for placing coffee machines. If these conditions are not
guaranteed, the machine may be damaged.
Be sure to follow
Don’t reverse, horizontal, vibration machine when transporting, gradient should not be more than 45°
Ensure vertical placement for at least 24 hours before installation.
Surfacemust be stable and flat, without distortion under the weight of the coffee machine.
The distance between the necessaryenergy connector and the position of the machine shall not
more than1 meter according to the Installation drawings.
4.1.2 Ambient conditions
Harm to machine. The following ambient conditions are suitable for placing coffee machines. If these
conditions are not guaranteed, the machine may be damaged.
Keep the ambient temper ℃-35℃.
Relative humidity: 10%RH-90%RH
Coffee machines are designed for indoor use only.Do not use outdoors to prevent bad weather
(rain, snow, frost).
3.4Powersupply
3.4.1 Condition
Electrical connections mustbe according with the relevant regulations of the country. The voltage at the
installation site must be consistent with the voltage remark on the nameplate.

13
Danger of electric shock! Directly hazardous situation, which may result in serious injury or death
due to electricshock.
Be sure to follow:
All power supply circuits must be shut down before touch or connectthe terminals.
Power leakage protection devices must be protected by a fuse according to ampere value indicating
on the nameplate.
Power socket to equipment must be disconnectedfrom the power grid.
Do not run themachine when power cable is damaged. Replace damaged power cable or socket by
professional technician immediately.
Suggest not to use extended power cable! If you need to useextended cables (minimum cross
section :1.5mm²), follow the power cablemanufacturer's data (instructions)and local regulations
Make sure that the power cable does nottrip the personnel. Do not drag the cableat the sharp or
corners, not clamp the cable or let it hang in the air. In addition, cables shall notbe placedon high
temperature items ,shall be oil-proof and protect from corrosive cleaners.
Don’t lift or pull the machine through the power cable. Do not pull the plug out of the socket by
pulling the power cable. Do not touch the power cable or plug with wet hands! Do not plug wet plugs
into sockets.
3.4.2 Power cable
Harm to client:
If the power cable is damaged or non-original, there is a risk ofelectric shock and fire! Use
original power cable.
Be sure to follow:
Purchase country-specific original power cables through service partners
Fixed-connected power cable shall be replaced bytechnician
3.4.2 Connecting data
Refer to nameplate on the machine.
3.5 Water connector
Water pump connect to the inlet of machine(G3 / 8 external thread).

14
3.6Waterconnector/drainage
3.6.1 Condition
Poor qualityraw materialsand watermay damage the machine. Be sure to comply with measures to
prevent such hazards. Be sure to follow:
Water must be clean and pollution-free, chlorine content less than50 mg per liter.
Don’t add reverse osmosis or other corrosive water to the coffeemachine.
Carbonate hardness shall not exceed 5–6°DKH (German carbonate hardness) or 8.9–10.7°FKH
(FKH (French carbonate hardness).
Minimum carbonate hardness :5°DKH or 8.9°FKH. PH value:Between 6.5-7
Use newormachine-provided pipes (drinking water pipes / waste water pipes).
Must connect watersources in accordance with existing countryregulations. If the machine is
connected to the newly installed water pipe, the water pipe and inlet pipe must bethoroughly flushed
to prevent stains from entering the machine.
The machine is directly connected to the external drinking watertank or waste water tank. The
corresponding level monitoringcan be carried out.
3.6.2 Connection values
Water pressure
0.05 - 0.6 MPa (0.5 - 6 bar)
Water inlet temperature
Minimum:
10°C
Maximum:
30°C
3.7Installation
3.7.1 Unpack the machine
Read the "place" and "power supply" chapters carefully before installation!
Pay attention to the accompanying installation instructions
Unpack the machine.
Check if the package contains accessories.
Remove attached accessories.
3.7.2 Automatic Debug Program
Machine run the debugging program automaticallywhen first use. Which will describe all installation
items. Technician can start debugging programs at any time.
3.8Disassemblyand disposal
Coffee machines must be discarded properly in according to local regulations
►Please contact the Service Cooperation Agency

15
A
B
E
C
D
Operation
High temperature liquid. There are hot drinks
Do not put your hand under the beverage outlet or in the machine during outflow.
High temperature steam. Risk of scalding in the area of steam nozzle outlet.
High temperature surface. The risk ofscalding. Such hazards arise from drink outlet and boiler
Forbidden to grasp the beverage outlet or touch thesurface of the boiler being heated.
Harm to machine. Wrong operation may damage the touch screen
It is forbidden to press the display screen with brute force, greater pressure or sharp objects.
4.1 Machineinstruction
4.1.1 Machine External Operating Components
[A] Coffee bean canister
[B] 14inch touch screen-Operation interface
[C] Drink outlet
[D] Instant canister
[E] Water drip tray
4.2Checkbeforepoweron
Check the condition before power on:
The main water valve has been opened or installed barreled water。
Waste water outlet set properly / Waste water tank placed properly。

16
Filled the coffee bean and instant powder。
Residue bin cleaned
Power cable connected
4.3 Poweron
4.3.1 Coffee machine
►Check the power connection of themachine
►Turn on the power switch
Start
Displaymain screen,start heating
Machinestandbyafter reaching desired temperature
For the first time, set the machine configuration and hardware calibration according the guidance
showed the display screen
4.4Salepage
4.4.1 Sale page
Displaythe current product and price, LOGO、the
button of pgup and pgdn,(click the arrowto pageup
and down), time display at the upper right corner
Buy product—click the product,enter the
concentration adjustment page

17
4.4.2 concentration adjustment page
concentration adjustment page
Coffee, sugar, milk concentration can be freely
adjusted,sliding concentration bar to the right for
increment,to the left for reduction
Click BACK to return to the sales page, click
CONFIRM to enter the payment interface。
Attention: Hot water products (product ID must be
816)concentration adjustment page added three-
stage temperature switches.
Hot water product page
Support low-grade, middle-grade, high-grade
temperature adjustment, each temperature and
temperature calibration settings refertobackground
operation instructions. Boot default low temperature,
can adjust.

18
4.4.3 Payment page
Payment page
Support mobile phone scanning QR code payment
(About payment types, please contact before the
shipment), but also support coin, banknote, credit
card and other MDB equipment payments. After
successful payment, enter the product making page
automatically
4.4.4 Product making page
Product making page
After paying successful,enter the product making
page automatically if no error,and the page will
close when the drink finish。
If the machine have error, such as no water during
production, this order will be cancelled.

19
4.4.5 Product finish page
Product finish page
Whenproductis finished, the product finish page will
be displayed, and after a few seconds, it will return to
sale page automatically
4.4.6 Error page
Error page
Machine error,Product sold out(lack water or
powder),No network,Door unclosed,any of
these four states ,the interface will enter error page,
and will report to server

20
4.4.7 Background interface
background main page
For JL18 series machine,use the key to open the
door ,it would enter the machine background. At
the same time, when the door opens, when the page
is in the product saleinterface, click on the top left of
the sale interface LOGO, you can enter the machine
background main interface.
Password form
Enter the corresponding permissions(password)
to operate the machine management background
Click lock icon, enter the specify password
(operator password:110, service
password:9527,Administrator password:2378.
Administrator can modify all permissions), click OK to
operate
Table of contents
Other Jetinno Coffee Maker manuals