Jetwave EXPLORER G2 User manual

HIGH PRESSURE WATER CLEANER
V2.0 - 2022
EXPLORER G2 MANUAL - HIGH PRESSURE CLEANER
Record Serial Number below and retain product serial number which is
located on nameplate.
UNIT SERIAL NO.
ENGINE SERIAL NO.
PURCHASE DATE
Hot Water Petrol or
Diesel Driven
WARNING!
Read this Operator’s Manual
carefully before using
this machine. Failure to
understand and follow the
contents of this manual may
result in electrical shock,
re and/or serious personal
injury.
READ CAREFULLY
OPTIONAL TROLLEY KIT
ENGLISH
VERSION
DIESEL MODEL SHOWN
1300 660 358

2
EXPLORER G2 MANUAL - HIGH PRESSURE CLEANER
The manufacture reserves the right to modify design features and technical facts without notice: due to our principals of continuous improvement.
Table of Contents 2
Safety Symbols 2
General Safety Rules 3
Work Area Safety 3
Personal Safety 3
Pressure Cleaner Use & Care 3
Service 3
High Pressure Cleaning Safety 4
Description, Specications And Standard Equipment 5
Description 5
Specications 5
Standard Equipment 5
Machine Assembly & Operation 6
Engine Oil 6
Pump/Gearbox Oil 6
Wheels 6
Pre-Operation Inspection 6
Machine and Work Area Set-Up 7
Water Supply 8
Hose Setup 8
Operating Instructions 8-10
Pressure Washer Operation 9
Machine Shut Down 9
Hose Reel Brakde Adjustment 10
Transportation and Storage 10
Maintenance Instructions 10
Cleaning 10
Engine 10
Battery 10
Pump Lubrication/Maintenance 10
Gearbox Lubrication 11
Preparing Pump for Cold Weather Storage 11
Machine Storage 11
Service And Repair 11
Disposal 11
Troubleshooting 12
Maintenance Log 13
*Original Instructions - English

3
EXPLORER G2 MANUAL - HIGH PRESSURE CLEANER
The manufacture reserves the right to modify design features and technical facts without notice: due to our principals of continuous improvement.
Safety Symbols
In this operator’s manual and on the product, safety symbols and signal words are used to communicate important safety
information. This section is provided to improve understanding of these signal words and symbols.
This is the safety alert symbol. It is used to alert you to potential personal injury hazards. Obey all safety
messages that follow this symbol to avoid possible injury or death.
indicates a hazardous situation which, if not avoided, will result in death or serious injury.
indicates a hazardous situation which, if not avoided, could result in death or serious injury.
indicates a hazardous situation which, if not avoided, could result in minor or moderate injury.
indicates information that relates to the protection NOTICE of property.
This symbol means read the operator’s manual carefully before using the equipment to reduce the risk of injury.
The operator’s manual contains important information on the safe and proper operation of the equipment.
This symbol means always wear safety glasses with side shields or goggles when handling or using this
equipment to reduce the risk of eye injury.
This symbol indicates the risk of high pressure water directed at body parts, causing skin puncture and injection
injuries.
This symbol indicates the risk of loud noises from the machine, causing irritation to your ears.
This symbol indicates the risk of breathing carbon monoxide and causing nausea, fainting or death.
This symbol indicates the risk of re and explosion from gasoline or other sources causing burns and other injury.
General Safety Rules
WARNING
Read and understand all instructions. Failure to
follow all instructions listed below may result in
electric shock, re, and/or serious injury.
SAVE THESE INSTRUCTIONS!
Work Area Safety
• Keep work area clean and well lit.
• Keep bystanders, children, and visitors away while
operating a pressure cleaner. Distractions can cause
you to lose control.
Personal Safety
• Stay alert, watch what you are doing and use common
sense when operating a pressure cleaner. Do not use
a pressure cleaner while you are tired or under the
inuence of drugs, alcohol, or medication. A moment
of inattention while operating pressure cleaners may
result in serious personal injury.
• Dress properly. Do not wear loose clothing or jewelry.
• Contain long hair. Keep your hair, clothing and gloves
away from moving parts. Loose clothes, jewelry, or
long hair can be caught in moving parts.
• Do not overreach. Keep proper footing and balance
at all times. This enables better control of the pressure
cleaner in unexpected situations.
• Use safety equipment. Always wear eye protection.
• Dust mask, non-skid safety shoes, hard hat, or hearing
protection must be used for appropriate conditions will
reduce personal injuries.
Pressure Cleaner Use and Care
• Do not force the pressure cleaner.
• Store idle pressure cleaners out of the reach of children
and other untrained persons. Pressure cleaners are
dangerous in the hands of untrained users.
• Maintain pressure cleaners with care.
• Check for misalignment or binding of moving parts,
breakage of parts and any other condition that may
affect the pressure cleaners operation. If damaged,
have the pressure cleaner serviced before using. Many
accidents are caused by poorly maintained pressure
cleaners.
Use only accessories that are recommended by the
manufacturer for your model and pressure & ow rated
accordingly.
Service
• Pressure cleaner service must be performed only by
qualied repair personnel. Service or maintenance
performed by unqualied personnel could result in a
risk of injury.
• When servicing a pressure cleaner, use only
genuine replacement parts. Follow instructions in
the Maintenance section of this manual. Use of
unauthorized parts or failure to follow Maintenance
Instructions may create a risk of electrical shock or
injury.
DANGER
WARNING
CAUTION
NOTICE

4
EXPLORER G2 MANUAL - HIGH PRESSURE CLEANER
The manufacture reserves the right to modify design features and technical facts without notice: due to our principals of continuous improvement.
High Pressure Cleaning Safety
WARNING
This section contains important safety information
that is specic to this pressure cleaner.
Read these precautions carefully before using
this drain Cleaning Machine to re duce the risk of
electrical shock or other serious injury.
SAVE ALL WARNINGS AND INSTRUCTIONS
FOR FUTURE REFERENCE!
Keep this manual with machine for use by the operator.
• Never operate the unit without a pressure control
mechanism Hoses can whip, causing striking injuries
and spray can penetrate skin and cause serious injury.
• High pressure water can inject under skin resulting in
serious injury including amputation. Do not direct spray
at people or animals.
• Do not operate unit above the rated working pressure
or 60°C (inlet water temperature). This increases the
risk of injury, including burns, and damage to the unit.
• One person must control the high pressure cleaning
process and water ow.
• Always use appropriate personal protective equipment
while handling and using high pressure cleaning
equipment. Appropriate personal protective equipment
(PPE) includes safety glasses and gloves, and may also
include equipment such as latex or rubber gloves, face
shields, goggles, protective clothing, respirators, head
protection, hearing protection and steel toed footwear.
• Practice good hygiene. Use hot soapy water to wash
hands and other body parts exposed to drain contents
after handling or using drain cleaning equipment.
• Do not eat or smoke while operating or handling high
pressure cleaning equipment. This will help prevent
contamination with toxic or infectious material.
• Do not spray toxic or ammable liquids. This will
reduce the risk of burns, re, explosion or other injury.
• Gasoline and its vapors are highly ammable and
explosive. See engine manual for precautions to
reduce the risk of burns, explosions and serious injury
while handling and using gasoline.
• Engines produce carbon monoxide, a colorless,
odorless poison gas. Breathing carbon monoxide can
cause nausea, fainting or death. Do not start and run
engine in an enclosed area, even if doors and windows
are open. Only operate outside.
• Never attempt to refuel the unit whilst engine is
running. Do not spill fuel on or near exhaust take extra
care in the refueling process as vapors or liquid can
combust due to heat.
• Hot surfaces can cause burns and re. Keep body
parts and ammable material away from hot surfaces.
• Read and understand this manual, the engine manual
and the warnings and instructions for all equipment
and material being used with this tool before operating.
Failure to follow all warnings and instructions may
result in property damage and/or serious injury.
• Follow all applicable workplace health and safety
regulations and guidelines concerning the use of this
equipment.
• Read and understand Australia/New Zealand standard
AS/NZS4233.1:13 High Pressure Water Jetting
Systems Part 1: Safe Operation & Maintenance.
If you have any question concerning this Jetwave®product:
– Contact your local Jetwave®distributor.
– Visit jetwave.com.au/nd-a-dealer to nd your local
Jetwave contact point.

5
EXPLORER G2 MANUAL - HIGH PRESSURE CLEANER
The manufacture reserves the right to modify design features and technical facts without notice: due to our principals of continuous improvement.
Figure.1A - Explorer G2 (Honda Petrol)
Figure.2 - Explorer G2D (Kohler Diesel)
Standard equipment
Jetwave Explorer™G2 High Pressure Cleaner comes with:
• High Pressure gun & back part lance
• Variable dual lance with high and low nozzles
• 15m of DWB 3/8” high pressure hose
• Engine Operator’s Manual (diesel or petrol)
• Operator’s Manual
• (Optional) Trolley Kit
• (Optional) Hose Reel
• (Optional) Water Bypass Tank
Description, Specications and
Standard equipment
Description
The Jetwave® Explorer™ G2 combustion engine powered
Hot Water High Pressure Cleaner machine is a portable
unit designed to use a combination of water pressure, heat
and ow to clean different surfaces from dirt, grease, oil &
grime. Water is pumped through the high pressure plunger
pump & boiler at increased pressure and ow allowing
water to be used at such high pressure to remove dirt
and grime from surfaces. The Explorer™G2 High Pressure
Cleaner is equipped with either a unleaded gasoline
powered HONDA™engine or a diesel powered KOHLER™
engine to drive the triplex pump via a reduction gearbox.
MODEL PUMP PRESSURE
(PSI/BAR)
FLOW RATE
(L/PM) ENGINE NOZZLE
SIZE
UNIT
WEIGHT
(KG)
MACHINE DIMENSIONS
SKID (mm)
Explorer G2 JW Triplex
Plunger 3650 / 250 13 HONDA iGX390
(Petrol) 04 280 1090(L)x700(W)x920H)
Explorer G2D JW Triplex
Plunger 3150 / 210 15 KOHLER KD15-440
(Diesel) 045 280 1090(L)x700(W)x920H)
Explorer G2D JW Triplex
Plunger 4060 / 280 13 KOHLER KD15-440
(Diesel) 035 280 1090(L)x700(W)x920H)
Figure.3 - Machine Serial Number
Figure.1B - Explorer G2D (Kohler Diesel) with optional trolley kit

6
EXPLORER G2 MANUAL - HIGH PRESSURE CLEANER
The manufacture reserves the right to modify design features and technical facts without notice: due to our principals of continuous improvement.
Figure.4B - Explorer G2 Water Filter
The machine serial number is located on the frame. The
rst letter & digits indicate the year and month of the
manufacture. (G = 2021 (Year), 4 = April (Month)).
NOTICE This machine is made high pressure water clean.
If properly used it should not damage a surfaces that is
in good condition and properly designed, constructed
and maintained. If the surface is in poor condition or not
properly designed, constructed or maintained, the water
cleaning process may not be effective or could cause
damage to the surface. The best way to determine the
condition of a surface before cleaning is through visual
inspection. Improper use of this pressure cleaner can
damage the unit and the surface. This machine may not
clear all substrate debris.
Machine Assembly
WARNING
To prevent serious injury during use and prevent
machine damage, follow these procedures for proper
assembly.
Engine Oil
NOTICE The unit is shipped with oil in the engine.
Operating the engine with low or no oil will result in engine
failure. See supplied engine operator’s manual for specic
information on checking oil, adding oil and oil selection.
Pump/Gearbox Oil
The unit is shipped with oil in the pump and gearbox.
Check oil level (ensure half way on sight-glasses) per
Maintenance section.
Wheels (Optional)
Typically the unit is boxed and shipped with wheels
assembled. Wheels, Axles & Locking Collar are found
within the box. To assemble the wheels, slide axles through
axle location hole, slide wheels on each side nd centerline
and proceed to install locking collar each side with 4mm
Allen key tool. (if applicable)
Pre-Operation Inspection
WARNING
Before each use, inspect your pressure cleaner and
correct any problems to reduce the risk of serious
injury from high pressure water and other causes and
prevent unit damage. Always wear appropriate safety
equipment, when inspecting your unit.
1. Make sure that the battery isolator (if applicable) and
engine switch is in the OFF position.
2. Clean any oil, grease or dirt from the equipment,
including the handles and controls. This aids inspection
and helps prevent the machine or control from slipping
from your grip.
3. Inspect the high pressure cleaner and accessories for
the following:
• Proper assembly and completeness.
• Broken, worn, missing, misaligned, binding or loose
parts.
• Presence and readability of the warning labels.
(See Figure 4A.)
• Any other condition which may prevent the safe
and normal operation.
If any problems are found, do not use the unit until the
problems are corrected.
Figure.4A - Explorer G2 Warning Labels
Clean water lter (Figure 4B). Unscrew the clear plastic
bowl cover anti-clockwise and remove and clean the mesh
lter (note: ensure the o-ring is set back into place before
screwing plastic bowl back on). Dirt and debris can restrict
the water ow to the pump and cause performance issues.

7
EXPLORER G2 MANUAL - HIGH PRESSURE CLEANER
The manufacture reserves the right to modify design features and technical facts without notice: due to our principals of continuous improvement.
4. Inspect the pressure cleaner nozzle orices for any
damage or blockage. Blockages can be cleaned with
a nozzle cleaning tool. Use care not to enlarge nozzle
orices while cleaning. Damaged nozzles or nozzles
with enlarged orices can decrease unit performance
and should be replaced.
5. Inspect the hoses, connectors and ttings for wear and
damage. If there are any kinks, cracks, breaks or wear
through the outer jacket of the hose or other damage,
do not use the hose. Damaged hoses can burst or
leak high pressure water and cause serious injury.
Replacement hoses and tting should be rated at or
higher than the unit pressure and temperature rating.
6. Inspect and maintain the engine per the engine
operator’s manual.
7. Check engine fuel level. If needed, add unleaded
gasoline for Explorer G2 Petrol Honda engine or add
diesel fuel for Explorer G2D Kohler diesel engine. See
engine operator’s manual for requirements. Use caution
when handling fuel. Work in a well ventilated area.
Never ll the tank while unit is running or hot, do not
overll tank and do not spill fuel. Make sure tank cap is
securely closed.
8. Check diesel red burner fuel tank level, if needed add
diesel. Use caution when handling fuel. Work in a well
ventilated area. Never ll the tank while unit is running
or hot, do not overll tank and do not spill fuel. Make
sure tank cap is securely closed. Ensure burner on/off
button is located in off position and thermostat dial is
set to 0° C / off position.
9. Check the oil level(s) in the pump and gear box through
the sight glass and add oil if needed (see Maintenance
Instructions section). Inspect Engine as directed in the
engine operator’s manual.
Machine and Work Area Set-up
Always wear safety glasses, gloves and other
appropriate protective equipment when setting up
your pressure cleaner. Rubber soled, non-slip shoes
can help prevent slipping on wet surfaces.
Engines and burners produce carbon monoxide, a
colorless, odorless poison gas. Breathing carbon
monoxide can cause nausea, fainting or death. Do
not start and run engine in an enclosed area, even if
doors and windows are open. Only operate outside.
Set-up the unit and work area according to these
procedures to reduce the risk of injury from high
pressure water, chemical burns, infections, carbon
monoxide and other causes, and prevent unit
damage.
1. Check work area for:
• Adequate lighting.
• Flammable liquids, vapors or dust that may ignite.
If present, do not work in area until sources have
been identied and corrected. The machine is not
explosion proof and can cause sparks.
• Clear, level, stable dry place for machine and
operator.
• If needed, remove the water from the work area.
Wood or other coverings may need to be put
down.
• Unit location that is in a well ventilated outdoor
area. Do not place the unit indoors, even with
doors and windows open. Unit can be located
remotely from the point of use.
• Suitable water supply. Clear path to transport the
unit to the set up location.
2. Inspect the surface to be cleaned, and make sure no
materials or elements are in the way of the unit.
3. Determine the correct equipment for the application.
4. Make sure all equipment has been properly inspected.
5. Evaluate the work area and determine if any barriers
are needed to keep bystanders away. Bystanders
can distract the operator. If working near trafc, erect
cones, signs or other barriers to alert drivers.
6. Take the unit to the well-ventilated outdoor work area
along the clear path. See Transportation Section.
Be aware of possible slip hazards. Wear appropriate
footwear to help prevent slips.
WARNING
Figure.5A - Diesel red burner fuel supply tank
Figure.5B - Burner on/off button and thermostat location

8
EXPLORER G2 MANUAL - HIGH PRESSURE CLEANER
The manufacture reserves the right to modify design features and technical facts without notice: due to our principals of continuous improvement.
Water Supply
Run a hose from the water source to the unit water inlet.
Use the largest diameter, shortest length hose possible. A
1/2” (13mm) I.D. Inlet hose is the minimum recommended
size. An appropriate backow prevention device should be
used to comply with all local codes and ordinances.
Dirt and debris in the water supply can cause excess pump
wear, clog the unit lter, nozzles and reduce performance.
Do not use water from ponds, lakes or other sources that
may be contaminated.
Fill the water tank prior to starting the unit (If Applicable).
The tank is equipped with a: (If Applicable)
• Low water level shut-off (If Applicable) to prevent
pump damage from insufcient water. This will shut
OFF the engine when the tank water level falls below a
predetermined level.
• Float valve to shut-off inlet water when the tank is full,
preventing water spillage through the tank vent.
By removing two screws, the top of the tank can be
removed for inspection or tank cleaning.
Warm water can be used for improved cleaning. Do not
use water hotter than 60°C. When using warm water, use
appropriate personal protective equipment to reduce the
risk of burns.
When using in cold weather, use precautions to prevent
water from freezing in the pump. This can damage the
pump.
Hose Set-Up
Use care when routing hoses. Routing hoses over rough
surfaces, sharp edges, crossing hoses, etc. can damage
the hose jacket. Keeping the unit hose on the reel(s) will
help to minimize hose damage.
Operating Instructions
CAUTION
Always wear eye protection to protect your eyes
against dirt and other foreign objects. Always wear
appropriate personal protective equipment for the
work environment.
Never operate the unit without the hose attached to
a spray gun. Hose can whip, causing striking injuries
and spray can penetrate skin and cause serious
injury.
High pressure uid can inject under skin resulting
in serious injury, including amputation. do not direct
spray at people or animals. do not operate unit above
pressure rating or 60°C (inlet water temperature).
This increases the risk of injury, including burns, and
damage to the unit. One person must control the unit
process and water ow.
Always use appropriate personal protective
equipment while handling and using high pressure
cleaning equipment. Appropriate personal protective
equipment always includes safety glasses and
gloves, and may also include equipment such as latex
or rubber gloves, face shields, goggles, protective
clothing, respirators, and steel toed footwear.
Follow operating instructions to reduce the risk of
injury from whipping hoses, high pressure liquid
injection, carbon monoxide and other causes.
1. Make sure that machine and work area is properly set
up and that the work area is free of bystanders and
other distractions. If the unit is located remotely from
the point of use, another person may be located at the
unit.
2. Attach the gun to the high pressure hose via coupling
system.
3. Attach the hose to the high pressure pump/valve/facia
outlet.
4. Turn the battery isolator switch ON (Figure 6) and
conrm the Emergency stop button is in the out
position (rotate button clockwise).
Figure.6 - Explorer G2 Battery Isolator

9
EXPLORER G2 MANUAL - HIGH PRESSURE CLEANER
The manufacture reserves the right to modify design features and technical facts without notice: due to our principals of continuous improvement.
5. Conrm that the water supply is attached and turned
on to low pressure pump/facia inlet. Never start the
engine without the water supply turned ON. This can
damage the pump.
6. With the wand pointed in a safe direction, squeeze the
wash wand trigger to reduce pressure and allow the
engine to be started. Following the starting instructions
supplied in the engine manual, start the engine. Apply
choke or decamp before starting (If Applicable). Allow
the engine to warm up. Set the throttle to the full open
position (If Applicable). Release the trigger soon after
the engine starts.
7. (iGX Engine Only): the Honda iG390 is an auto throttle
engine. Engine will automatically idle down the revs
when off the trigger on the gun and will automatically
rev up when you press trigger on the gun.
8. Hot water burner operation: Press burner button (will
illuminate orange). Adjust thermostat dial to desired
working temperature, please note that once the gun
trigger is pulled the burner system will incur a delay
in startup (this is a protection feature) wait approx. 1
(one) minute for burner system to engage and begin to
produce hot water from the nozzle.
9. Wash Wand Lock Out – the wash wand includes a lock
out on the back of the trigger. Flip the lock out down
to prevent the operation of the trigger when the wash
wand is not in use.
If the unit will not generate the rated pressure or is erratic
• Make sure the engine throttle is properly adjusted to
the full open position.
• Turn unloader valve clockwise to increase pressure. Do
not force.
• Inspect system for leaks. Use caution during inspection
to prevent injury. If leaks are found, shut unit OFF
before xing.
• Ensure the front part lance with nozzle is connected.
• Turn the unit OFF. Check the inlet hose and lter and
make sure that they clear of debris.
• Make sure there is adequate water ow to the unit.
• Turn the unit OFF. Remove the nozzle and clean the
orices with the nozzle cleaning tool.
• Ensure correct nozzle orice size is used and no signs
of excessive wear are evident.
• Activate trigger and run the unit to remove air or debris
from the system. Turn the unit OFF before removing or
attaching the lance/nozzle.
• Assume a proper operating position.
• Be sure you can control the ON/OFF action of a water
control valve. In case of emergency you must be able
to turn off water ow.
• Be sure that you have good balance and do not have
to overreach.
• You must be able to place one hand on the gun at all
times to control and support the lance.
This operating position will help to maintain control of the
gun and lance.
Pressure Washer Operator Speicifcs
1. When using as a pressure washer use both hands
to grip and direct the wash wand for greater control.
Never direct the wash wand at people. High pressure
uid can inject under skin resulting in serious injury.
Never direct wash wand at electrical equipment or
wiring to reduce the risk of electrical shock.
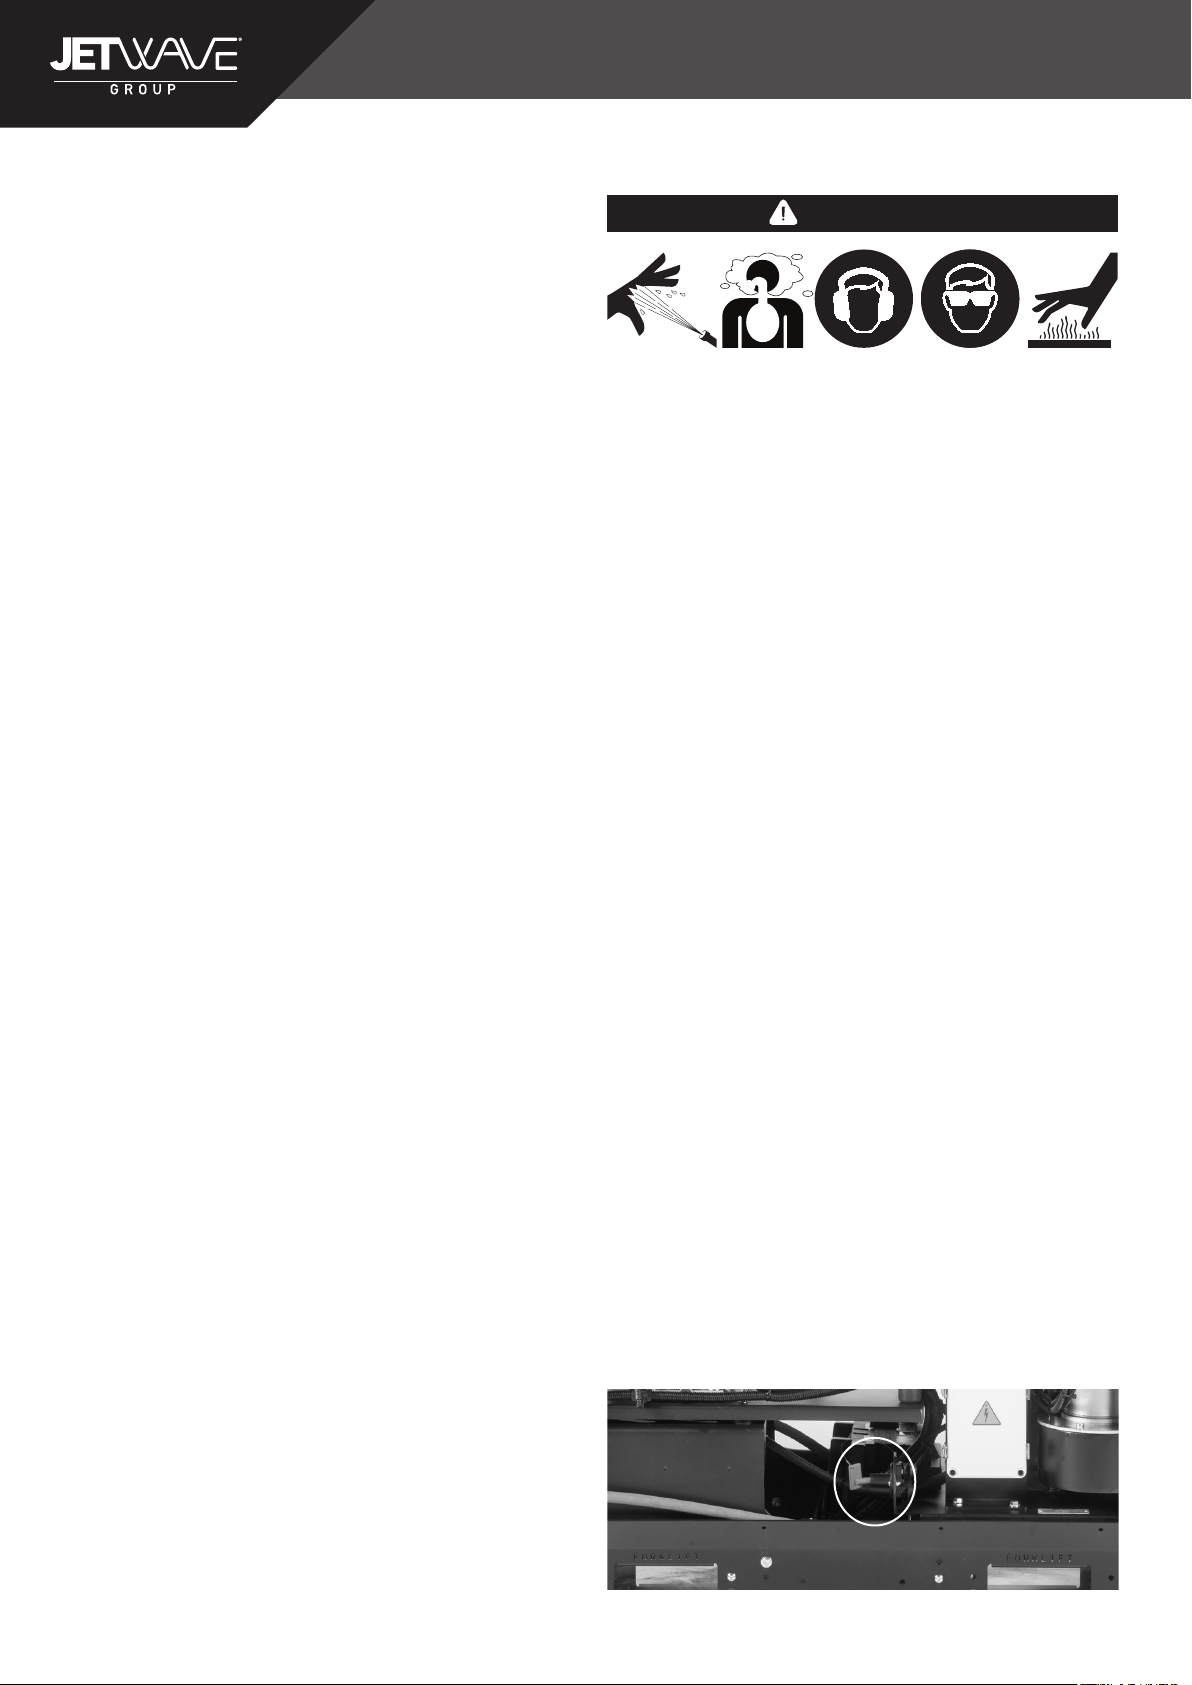
2. Caution when hot water is in operation hoses ttings
and lances become hot, take relevant measures to
prevent burns and any injuries e.g hose sleeves and
appropriate PPE.
3. Control the ow of water with the trigger. Use care
when using the pressure washer. Holding the nozzle
too close to a surface can damage it. Test a small,
inconspicuous area to conrm the settings work as
desired.
4. Do not allow the unit to run for extended periods of
time with the trigger OFF. When the trigger is OFF,
water recirculates and it causes the water to heat up
and heat the pump up, a safety relive valve is tted to
dump hot water if it gets too hot. (Bypass tank can
help bypass and cool the water.)
Machine Shut Down Procedure
1. When high pressure cleaning task is complete, release
high pressure trigger and return to the unit controls
with gun and spray lance.
2. Dial the thermostat to 0° C / off position. Proceed to
press burner button to off position.
3. Burner cool down procedure: Continue to spray gun
at ground to allow water through the system until front
part of metal lance can be touched safely, without risk
of burning the operator.
4. Idle down unit RPMs via throttle control (if applicable)
5. Proceed to power down the engine via kill switch or
key switch (if applicable). Refer to engine operator
manual.
6. Turn water supply OFF.
7. Release system back pressure by pressing the trigger
on the spray gun (if applicable).
8. Disconnect high and low pressure hoses and coil the
assembly for safety and proper storage.

10
EXPLORER G2 MANUAL - HIGH PRESSURE CLEANER
The manufacture reserves the right to modify design features and technical facts without notice: due to our principals of continuous improvement.
Transportation and Storage
1. Turn off the fuel valve (if applicable) and the battery
isolation switch.
2. Drain water from unit as needed.
3. Coil hoses and secure equipment appropriately. All
loose material must be removed. Transport remote reel
separate from unit.
4. Unit may equipped with equipped wheels to allow
transport over smooth level surfaces.
5. Unit weighs 280kg (approx.) Use appropriate
equipment and methods to load and transport.
Maintenance Instructions
WARNING
Before performing any maintenance, engine switch
battery isolation switch should be in OFF position and
spark plug wires should be disconnected to prevent
inadvertent operation. Open water control valve to
release any uid pressure in system.
Always wear safety glasses and gloves when
performing any maintenance to help protect against
drain chemicals and bacteria.
Cleaning
The hose should be cleaned as needed with hot, soapy
water and/or disinfectants. Do not allow water to enter the
engine or electrical system. Do not clean with pressure
washer. Wipe the unit down with a damp cloth.
Engine
Maintain the engine as directed in the engine
operator’s manual supplied with the unit.
Battery
To change battery (if applicable)
1. Unclip strap (if applicable) holding battery box top on,
remove top.
2. Disconnect ground (-) cable connection rst, followed
by positive (+) cable connection.
3. Remove battery.
4. Reverse procedure to install.
Replacement batteries should have the following
specications:
• BCI Group/Type: U1
• Size (L x W x H): 196 x 128 x 159 (mm)
• Voltage: 12
• Cold Cranking Amps (CCA): 350
• Reserve Capacity (RC): 45
• Terminal Type: Offset Lug Terminal (OLT)
• Assembly Type: C
• Max Charging Volt: 14.8
Pump Lubrication/Maintenance
Check the pump oil level prior to each use. Place the unit
on a level surface. Wipe any dirt and debris from the area
of the dipstick and sight-glass. Oil level should be at the
middle of the sight-glass (Figure 16). If needed, remove the
dipstick and add SAE 15W-40 Mineral non-detergent oil,
ll to half-way on the sight-glass. Do not overll, reinstall
dipstick.
PUMP OIL SIGHT GLASS
Figure.7 - Checking Pump and Gearbox Oil Level
PUMP OIL DIPSTICK
GEARBOX OIL DIPSTICK

11
EXPLORER G2 MANUAL - HIGH PRESSURE CLEANER
The manufacture reserves the right to modify design features and technical facts without notice: due to our principals of continuous improvement.
Change oil in pump after rst 50 hours of operation and
every 250 hours of operation after that. With the pump
warm from operation, remove plug on bottom of pump
and drain oil into suitable container. Replace plug. Fill to
approximately half-way on the sight-glass with SAE 15W-
40 Mineral non-detergent oil using the checking procedure.
Approximately 1000 ml of oil are required to change the
pump oil.
At 1000 hours of use (less in severe use conditions) the unit
should be taken to a Jetwave Independent Service Center
for pump seal and valve service.
Gearbox Lubrication
Check the gearbox oil level prior to each use. Place the unit
on a level surface. Wipe any dirt and debris from the area
of the dipstick and sight-glass (Figure 16). Oil level should
be at the middle of the sight-glass. If needed, remove the
dipstick and add SAE 85W-140 gear lubricant oil, ll to
half-way on the sight-glass. Do not overll, reinstall dipstick.
Change oil in gearbox every 500 hours of operation. With
the gearbox warm from operation, remove plug on bottom
of gearbox and drain oil into suitable container. Replace
plug. Fill to half-way on the sight-glass with SAE 85W-140
gear lubricant oil. Approximately 300 ml of oil are required
to change the gearbox oil.
Preparing Pump for Cold Weather Storage
If the unit will be stored under conditions where the
temperature is near or below 0°C, the unit must be properly
prepared. If water freezes in the pump, it can damage it.
After the tank is drained (if applicable), remove the hose
from the water inlet lter. Open all valves in the system and
use compressed air to force any water out of the system.
This can also be used to remove water from the hoses.
Machine Storage
Store the unit in a well ventilated area protected from the
weather elements. Keep the machine in a locked area
that is out of reach of children and people unfamiliar with
High Pressure Cleaners. This machine can cause serious
injury in the hands of untrained users. See Maintenance
section for information on cold weather storage. See
engine operator’s manual for specic information on engine
storage.
Service And Repair
WARNING
Improper service or repair can make machine unsafe
to operate.
The “Maintenance Instructions” will take care of most
of the service needs of this machine. Any problems not
addressed by this section should only be handled by an
authorized Jetwave service technician.
Unit should be taken to a Jetwave Independent Service
Center or returned to the factory.
For information on your nearest Jetwave Independent
Service Center or any service or repair questions:
• Contact your local Jetwave distributor.
• Visit jetwavegroup.com.au/nd-a-dealer/ to nd your
local Jetwave contact point.
• Contact Jetwave Technical Service Department at
Disposal
Parts of the unit contain valuable materials and can be
recycled. There are companies that specialize in recycling
that may be found locally. Dispose of the components in
compliance with all applicable regulations. Contact your
local waste management authority for more information.

12
EXPLORER G2 MANUAL - HIGH PRESSURE CLEANER
The manufacture reserves the right to modify design features and technical facts without notice: due to our principals of continuous improvement.
FAULT CAUSE SOLUTION
Pump runs normally
but pressure does not
achieve rated value.
Pump is sucking air.
Valves are worn or dirty.
Unloader valve packing worn.
Nozzle incorrect or worn.
Worn piston packing.
Dirty inlet lter.
Check that all hoses and ttings are airtight.
Check, clean or replace.
Check and replace.
Check and replace.
Check and replace.
Check and clean.
Fluctuating pressure. Valves dirty, worn or stuck.
Pump sucking air.
Worn piston packing.
Dirty lter.
Check, clean or replace.
Check that all hoses and ttings are airtight.
Check and replace.
Check and clean.
Presence of water in oil. High humidity in air.
Piston packing or oil seal worn.
Water entering through breather.
Check and change oil twice as often.
Check and replace.
Water dripping from
pump.
Piston packing worn.
Piston guide o-rings worn.
Check and replace.
Check and replace.
Dripping oil. Worn oil seals.
Oil coming out of breather.
Check and replace.
Pump oil level overfull.
Motor does not start
when switched on
Plug not well connected or unreliable
power supply.
Earth leakage overload.
Check plug, cable and switch.
Check earth leakage.
Will not product hot
water
Burner switch in ‘off’ position
Burner switch on but pump switch off
Inadequate fuel supply
Plugged fuel lter
Trigger gun not pulled on
Thermostat turned off
Turn burner switch on
Turn on pump switch
Fill tank with diesel
Replace fuel lter
Pull trigger gun (water ow must go through coil)
Turn thermostat dial to on position
No chemical ow Detergent valve closed
Low detergent level
Chemical screen dirty
Open detergent valve
Fill detergent container
Clean detergent screen
Burner not igniting No fuel
Burner switch turned off
Thermostat set too low
Clogged fuel lter
Defective pressure switch
Clogged burner nozzle
Fuel pump malfunction
Improper electrode setting
Fill fuel tank with proper fuel
Furn burner switch on
Reset thermostat
Replace fuel lter
Replace pressure switch
Replace burner nozzle
Replace fuel pump
Clean/reset to specications
Excessive burner smoke Improper fuel being used
Water contamination in fuel
Improper air band adjustment
Low fuel pressure
Air leaks in fuel lines
Scoot on coils/burner assembly
Misaligned electrodes
Dirty burner nozzle
Use diesel
Drain fuel and replace with new
Readjust air band/altitude
Adjust to specications
Check for air leaks or bubbles
Clean coil/burner assembly
Realign to specications
Clean or replace burner nozzle
Trouble Shooting

13
EXPLORER G2 MANUAL - HIGH PRESSURE CLEANER
The manufacture reserves the right to modify design features and technical facts without notice: due to our principals of continuous improvement.
Hour Meter
Reading Date Maintenance Performed Service Agent
Maintenance Log

14
EXPLORER G2 MANUAL - HIGH PRESSURE CLEANER
The manufacture reserves the right to modify design features and technical facts without notice: due to our principals of continuous improvement.
Notes

15
EXPLORER G2 MANUAL - HIGH PRESSURE CLEANER
The manufacture reserves the right to modify design features and technical facts without notice: due to our principals of continuous improvement.
Notes

jetwavegroup jetwave.group jetwavegroup jetwavegroup jetwave-group
Copyright © Jetwave Group Pty Ltd. All Rights Reserved. Subject to change without notice. The manufacture reserves the right to modify design features and
technical facts without notice: due to our principals of continuous improvement.
10 Smith Street, Thebarton 5031
Adelaide, South Australia, AU
+61 8 8371 3599
jetwave.com.au
1300 660 358
Table of contents
Other Jetwave Pressure Washer manuals