2.1 Safety Precautions
2.3 Tools and data
2.4 Symbolic Interpretation
2.2 Safety Requirement
2.Safety Instructions
The product must be installed and maintained by professionals in accordance with local standards and regulations, and strictly
follow the manual installation steps.
Before installation and maintenance, please ensure that the storage capacitor is fully discharged, that is, the power supply internal
battery input, photovoltaic input and AC grid are disconnected for at least 5 minutes to prevent electric shock or fire.
When the PV modules are exposed to light, a DC voltage is supplied to this inverter.
During operation, it is strictly forbidden to directly touch the output, input and other terminals to avoid the danger of electric shock.
Do not open the machine shell directly during operation, otherwise it will cause electric shock.
Keep the equipment away from flammable and explosive materials and heat sources.
It is forbidden to modify the equipment by yourself to avoid serious accidents.
·
·
·
·
·
·
·
All circuits connected to this power system with an external voltage of less than 51.2V must meet the SELV requirements defined in
the IEC60950 standard.
Iif operating within the power system cabinet, make sure the power system is not charged. Battery devices should also be switched
off.
Distribution cable wiring should be reasonable and has the protective measures to avoid touching these cables while operating
power equipment.
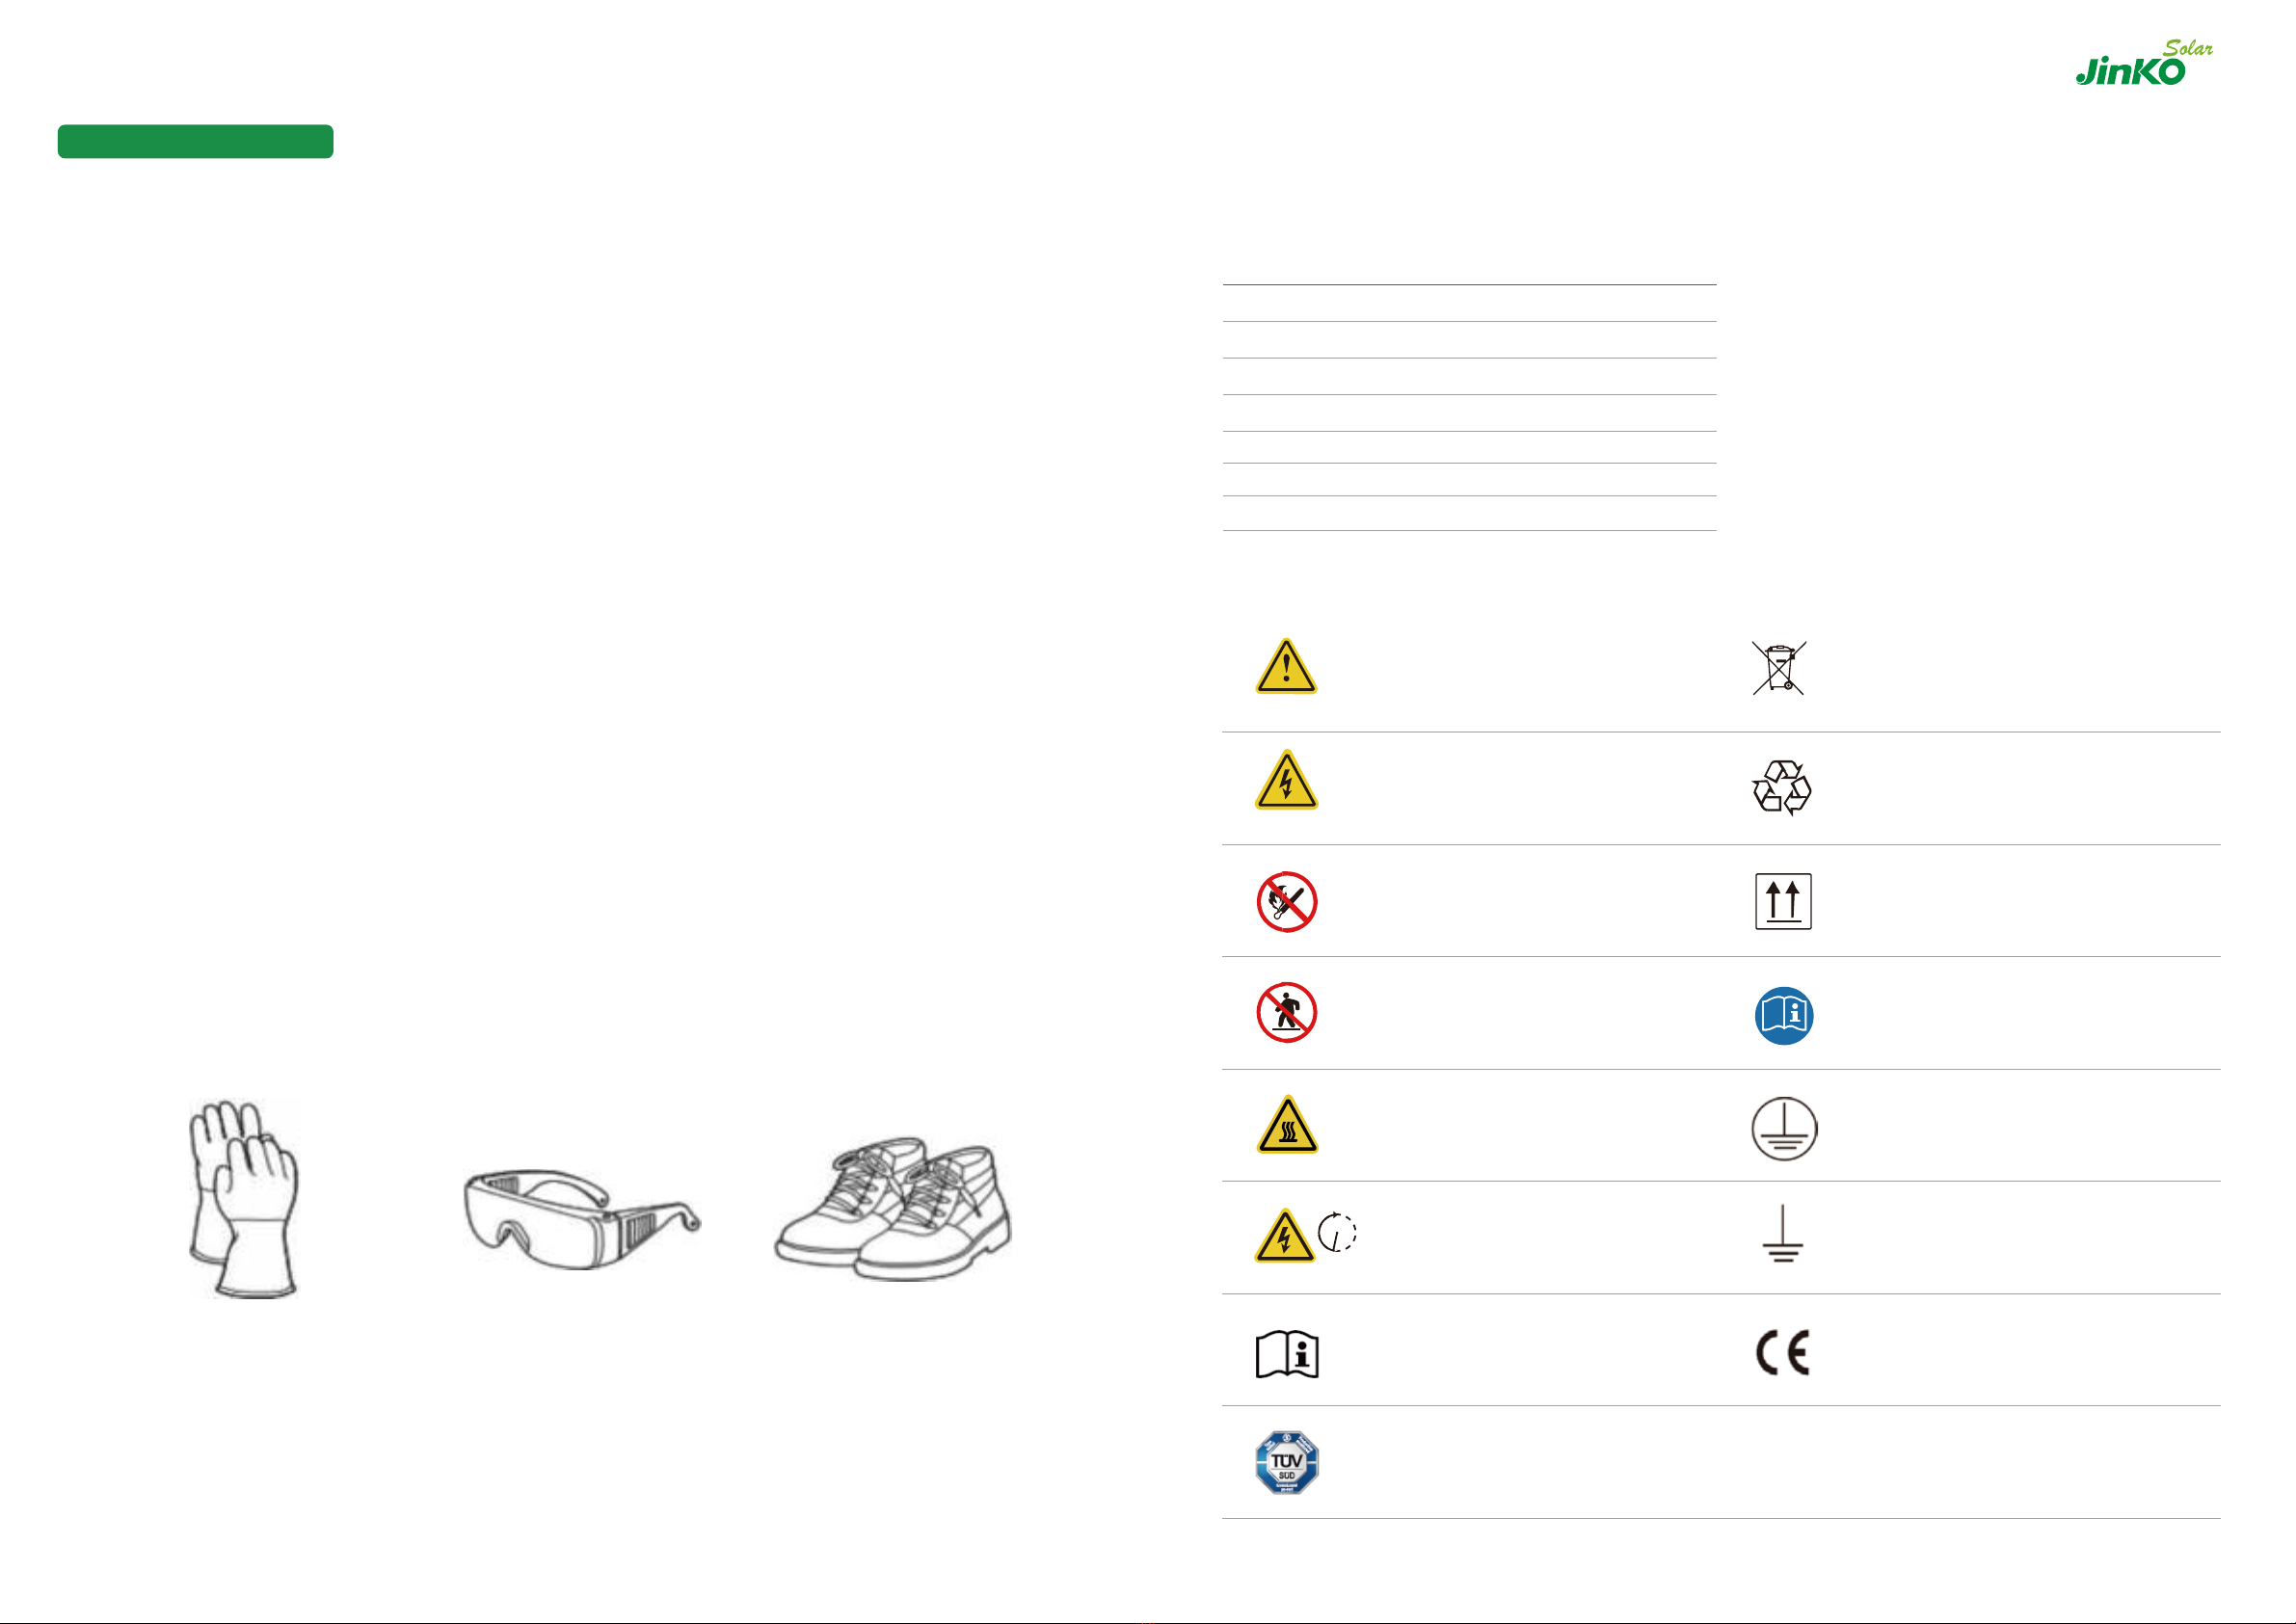
When installing the battery system, must wear the protective items below:
·
·
·
·
Please read the manual carefully and follow the safety precautions specified in this manual. The safety precautions mentioned in this
manual are only supplements to local safety regulations.
Tools and meters that may be used are shown in table 1-1.
Table 1-1Tool instrument
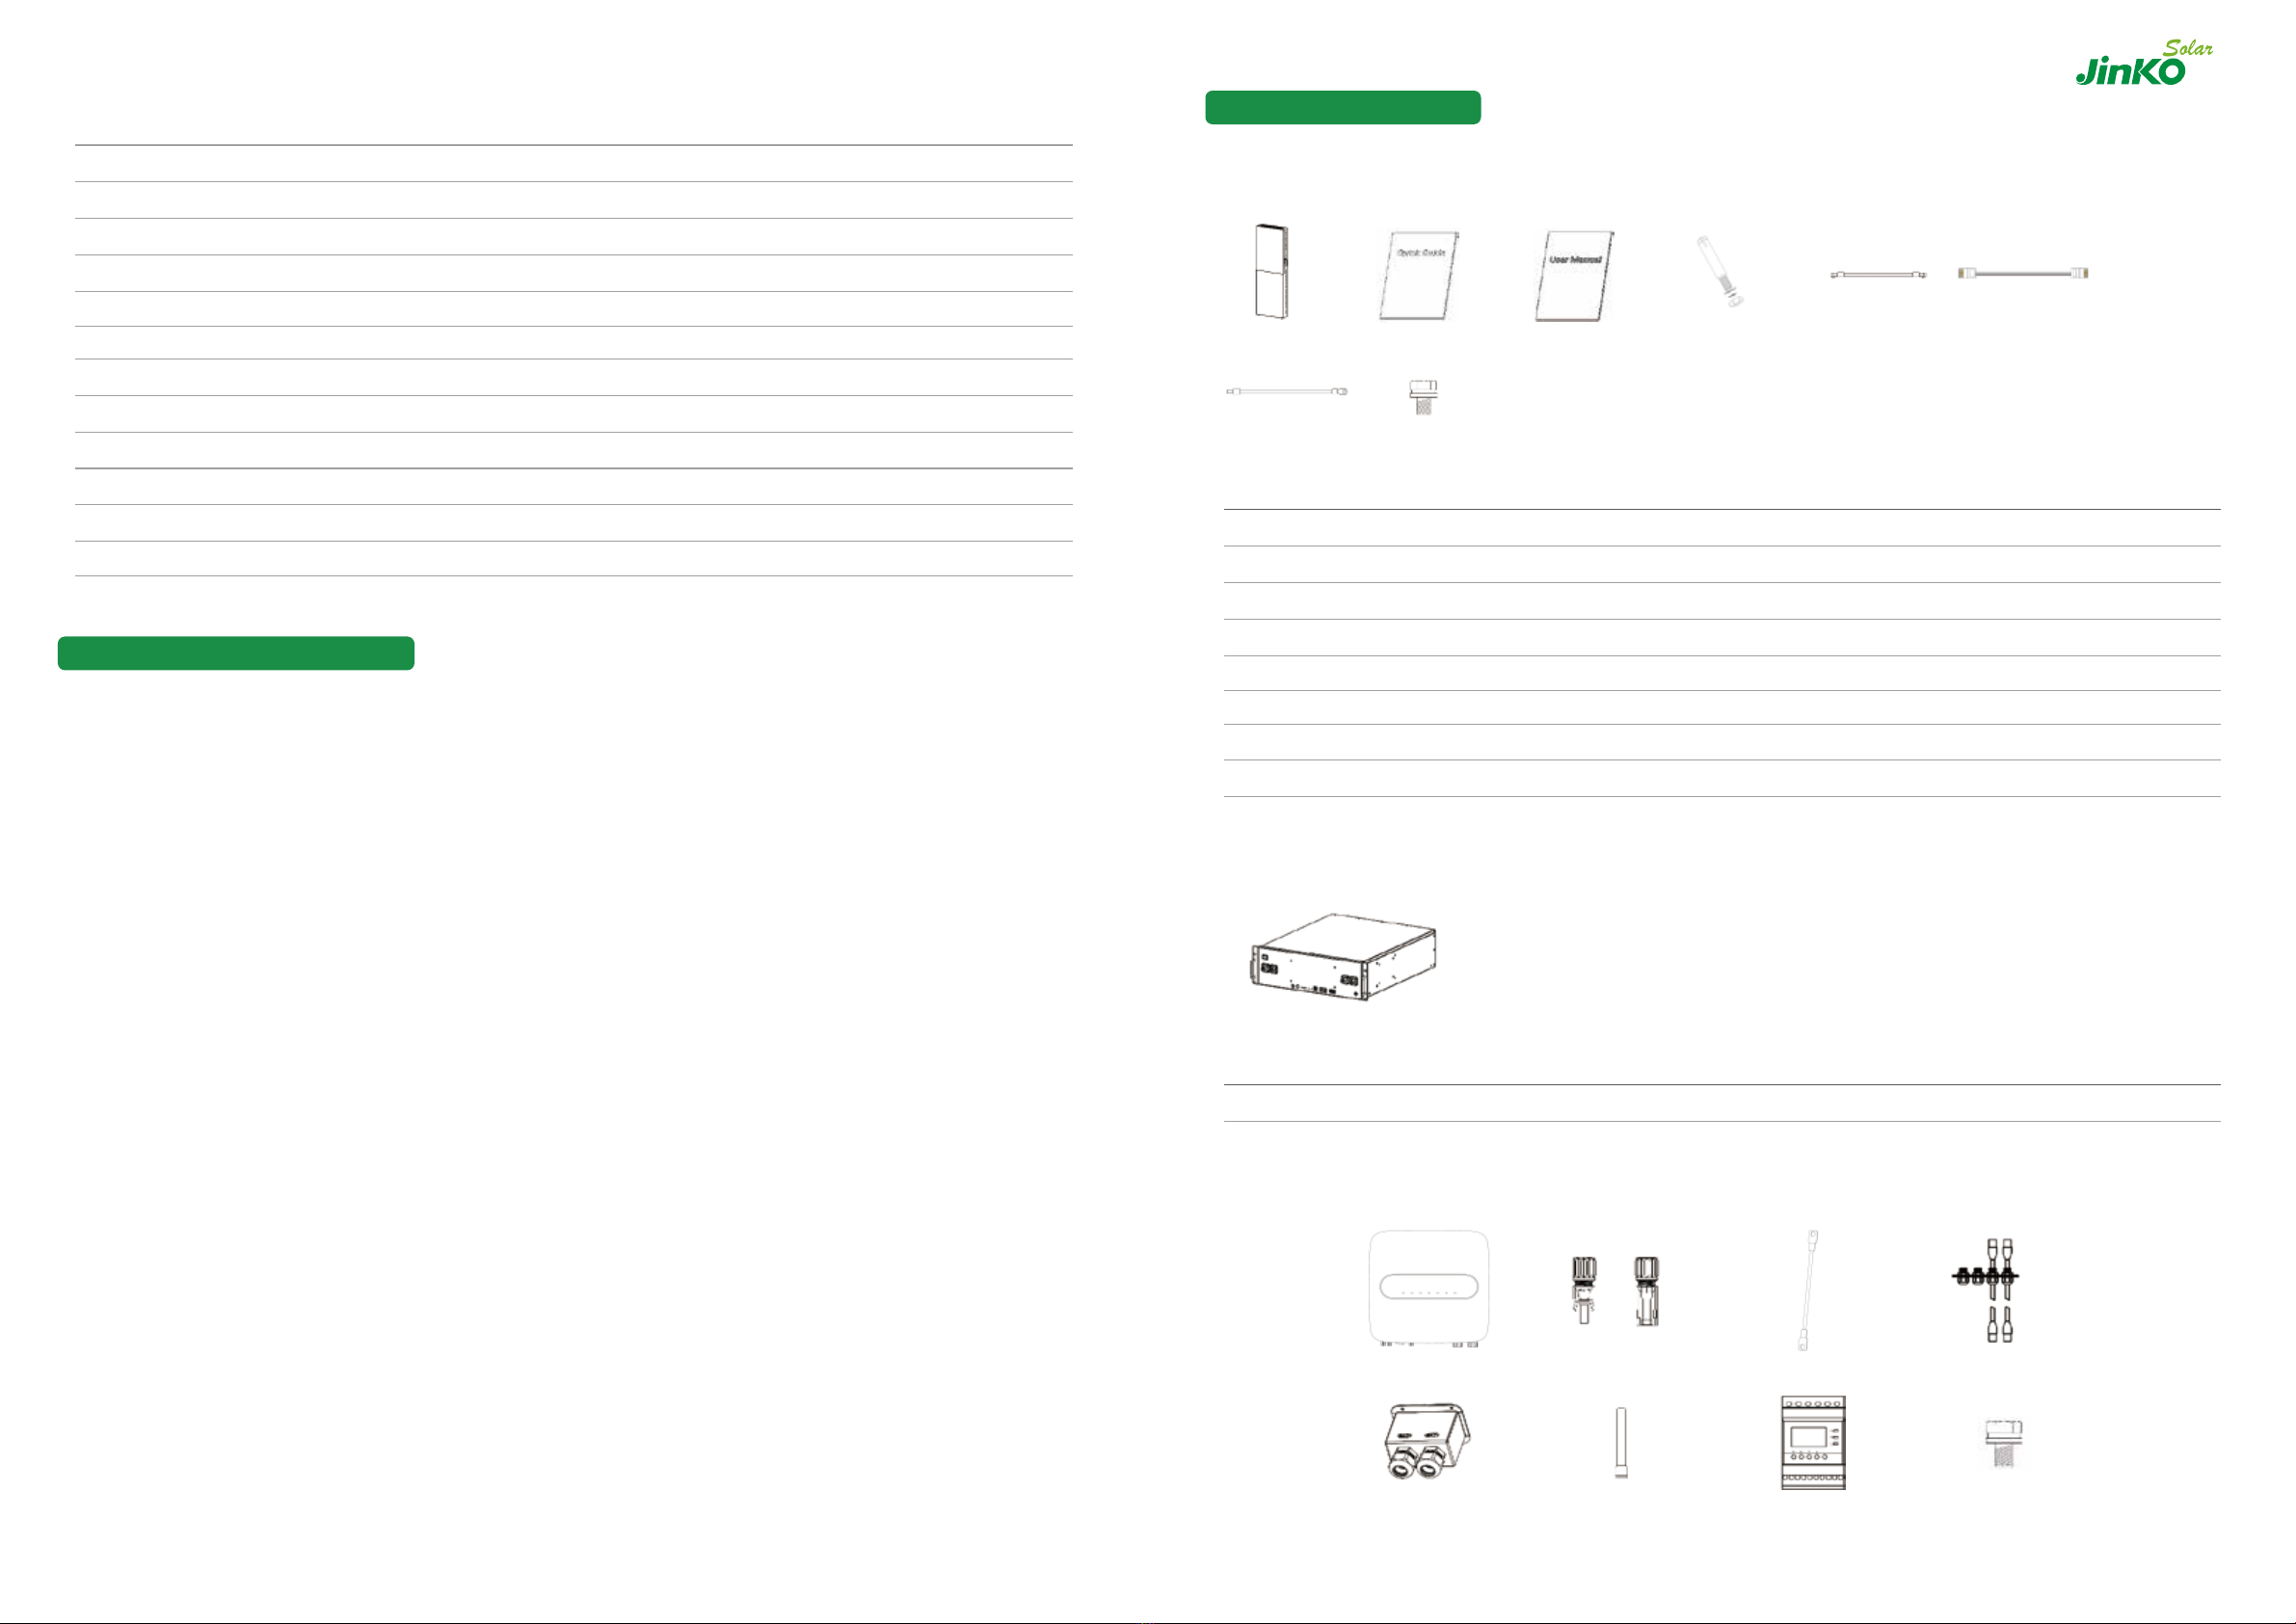
Attention. Operate not according to the
requirements, may result in personal injury.
Danger: Be careful of electric shock, high
voltage.
No smoking
No trampling
High temperature of equipment outlet, be
careful to touch.
This battery product passed the TUV certifica-
tion test.
Refer to operating instructions
After power off, wait for 5 minutes to
ensure full discharge of the machine.
Recyclable and reusable
Grounding
Protective grounding
Please read the manual carefully before use
This side up
The equipment can not be discarded with
other household garbage, must be sent to the
appropriate institution for recycling.
This battery product meets European directive
requirement
This system can only be installed by personnel who have been trained in the power supply system and have sufficient knowledge of the
power system.
Safety goggles Safety shoes
The isolation gloves
Name
Screwdriver(Slotted 、Phillips)
Torque wrench
Diagonal pliers
Pointed nose pliers
Pliers to hold the wire
Stripping pliers
Electric drill
Multimeter
Clamp current meter
Insulation tape
Temperature meter
Anti-static bracelet
Cable tie
Tape measure
5 m in
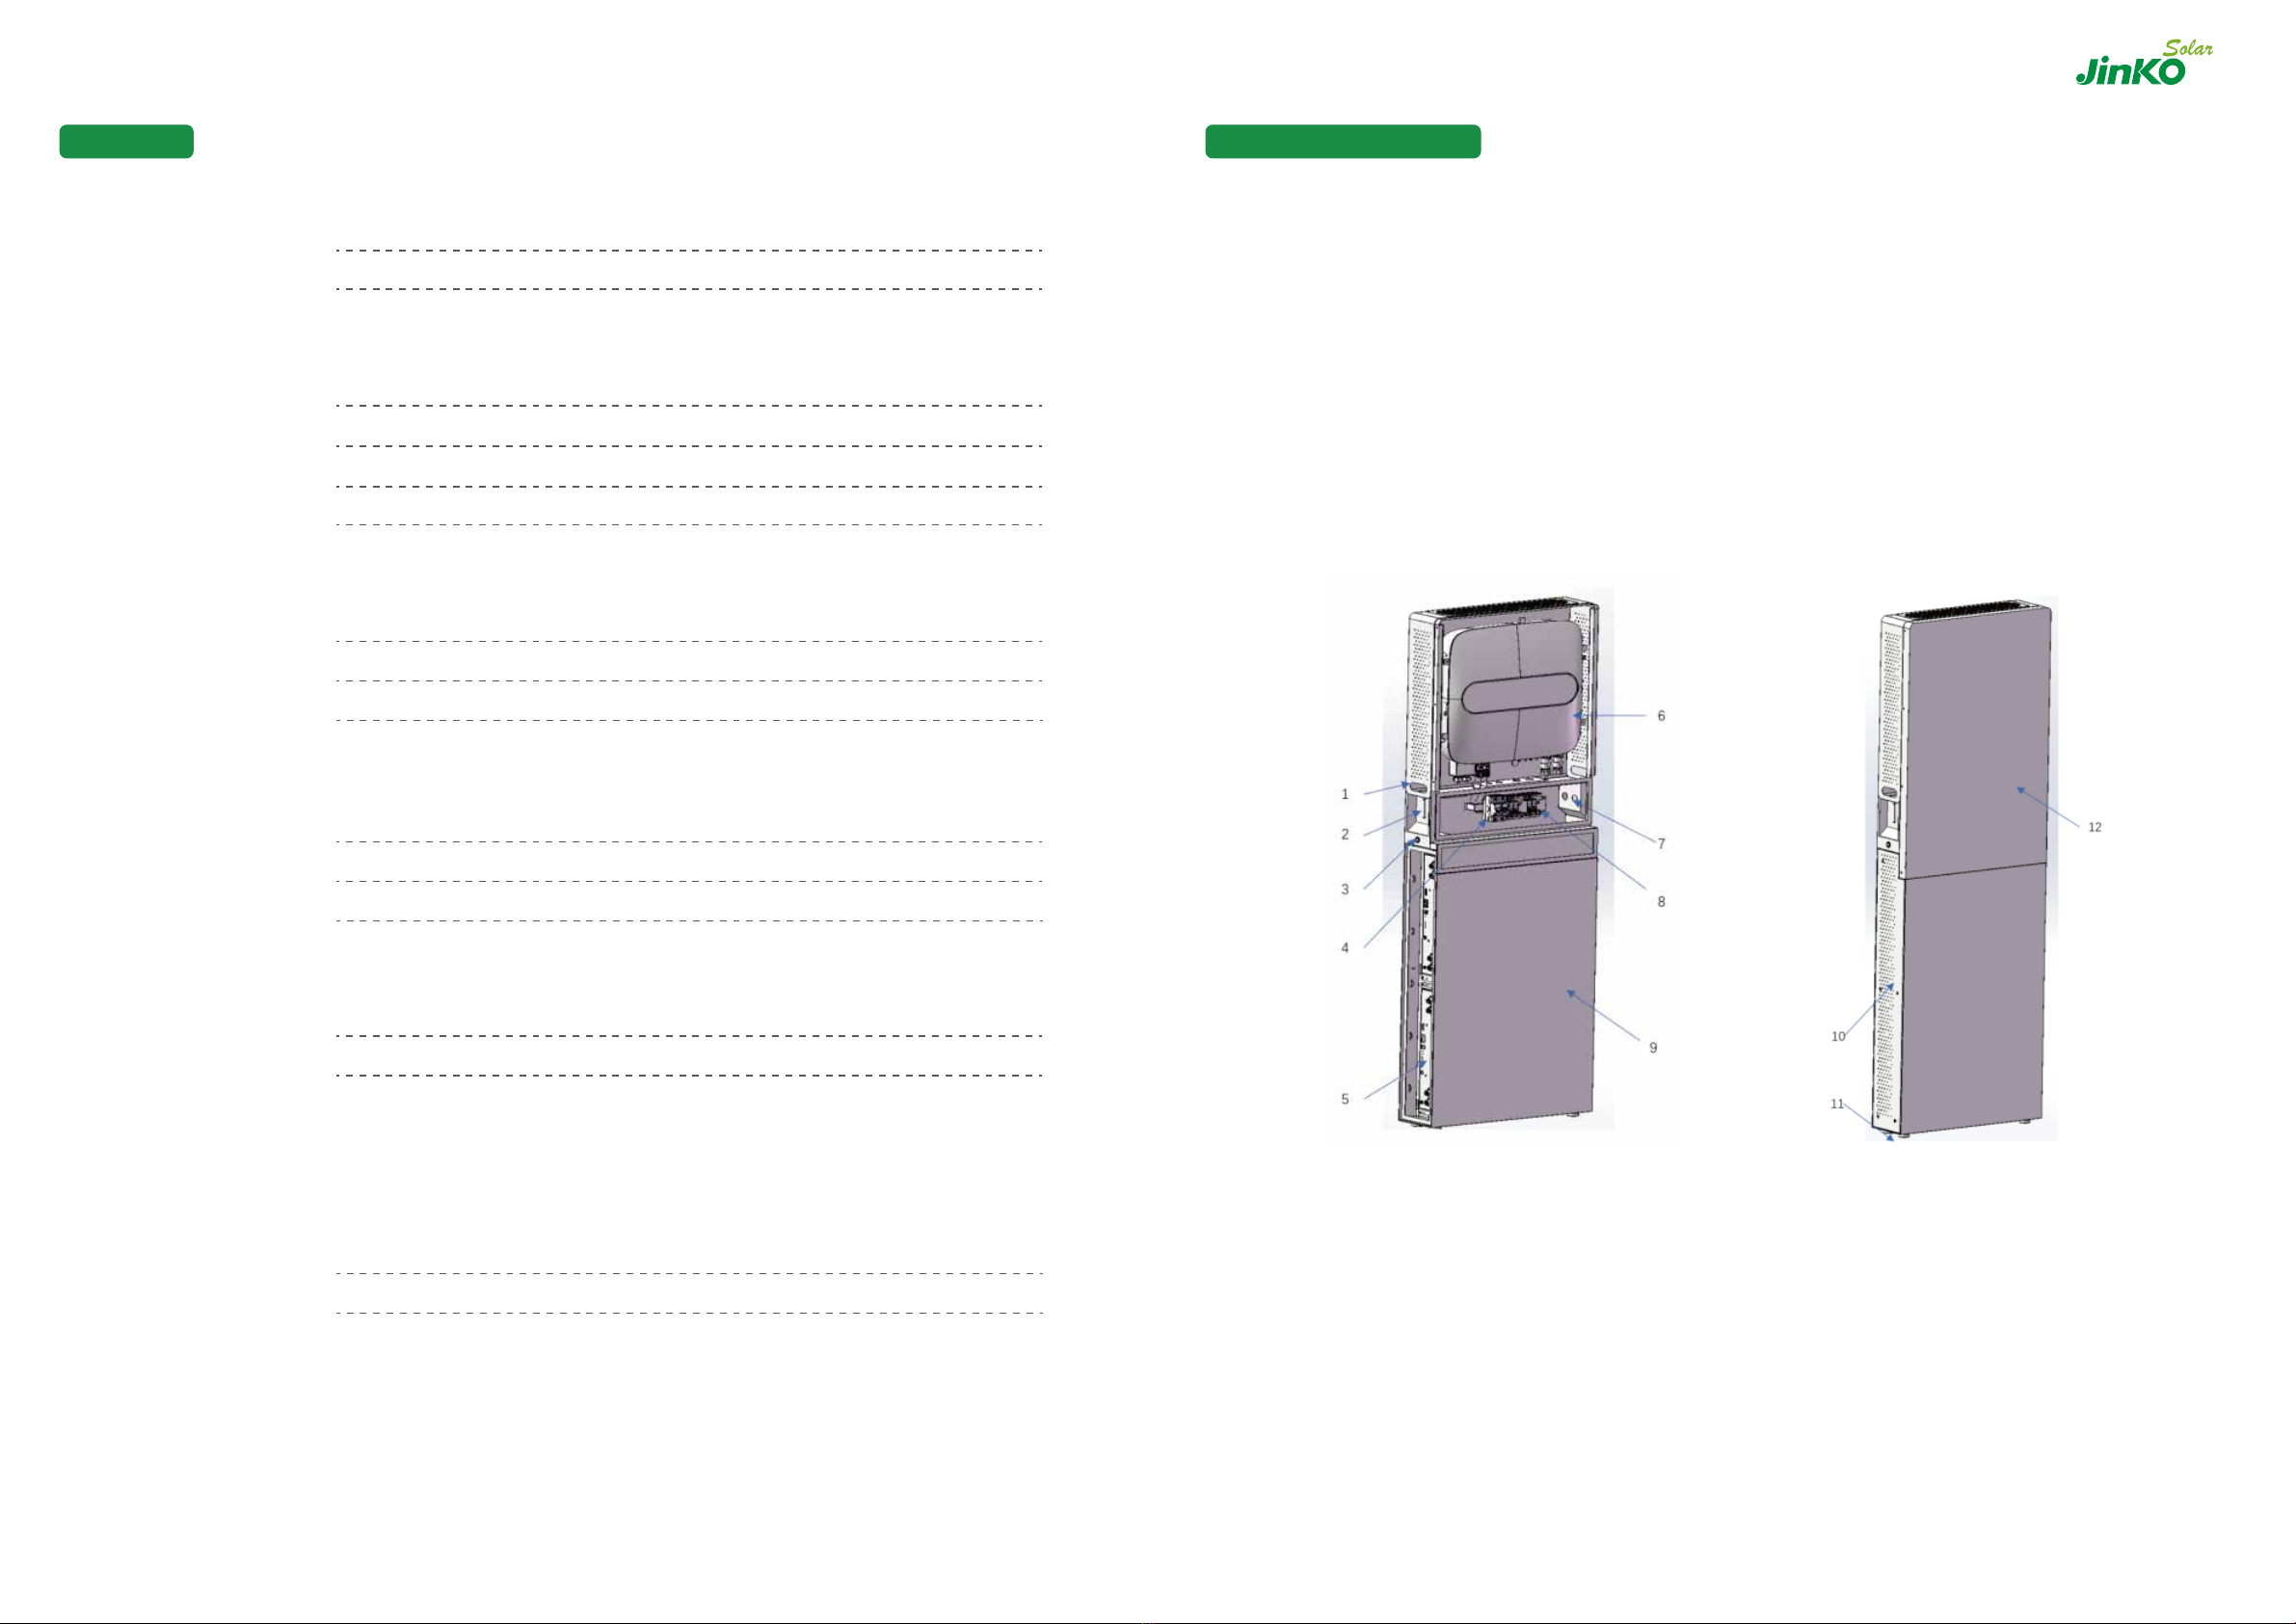
JKS10.2K-5HLVS User Manual