JLM Phazr User manual

Declare your energy independence.
Installation & Setup Guide
The following guide details the steps and procedures
to properly install and commission a JLM Phazr system.
If you require assistance during the installation
or commissioning of a Phazr system, please contact:
JLM Energy Customer Support at
(800) 475-3960

Installation & Setup Guide
Table of Contents
1.0 Phazr Installation
1.1 Roof Type and Mounting System Options
1.2 Mounting Phazr
2.0 Application (App) Installation
3.0 Phazr Hub and AmpliFi HD Router System Installation
4.0 Phazr Conguration
4.1 Linez Installation
5.0 Completing Installation
2017 ©JLM Energy Inc., All Rights Reserved.
1

Installation & Setup Guide
Info: Install the PV array stand-offs and rails as far apart as possible to locate
Phazr close to the exposed edge of the PV module. This allows access
to the ON/OFF button located on the bottom of each Phazr.
Info: The included DC jumper wires from the Phazr to the micro-inverter
are three feet (3’) long. Be sure that you do not mount the Phazrs and
micro-inverters or DC power optimizer too far apart.
WARNING: Ensure the DC jumper wires from the Phazr to the micro-inverter
or DC power optimizer are plugged into the correct terminals on Phazr
or damage to Phazr will occur and void the warranty. Take note of
the DC Input and DC output terminal locations on Phazr.
1.0 Phazr Installation
DC Out
DC In
PV Rail
DC Out
DC In
PV Rail
2

Installation & Setup Guide
Info: If utilizing the parts and materials listed in a specic mounting
system, all parts listed for the system MUST be used.
The following mounting systems have been tested and proven to work with Phazr. These options are
not specically required for use with Phazr and are listed only as examples. It is the responsibility of the
installer to provide mounting systems that provide the required clearances for Phazr.
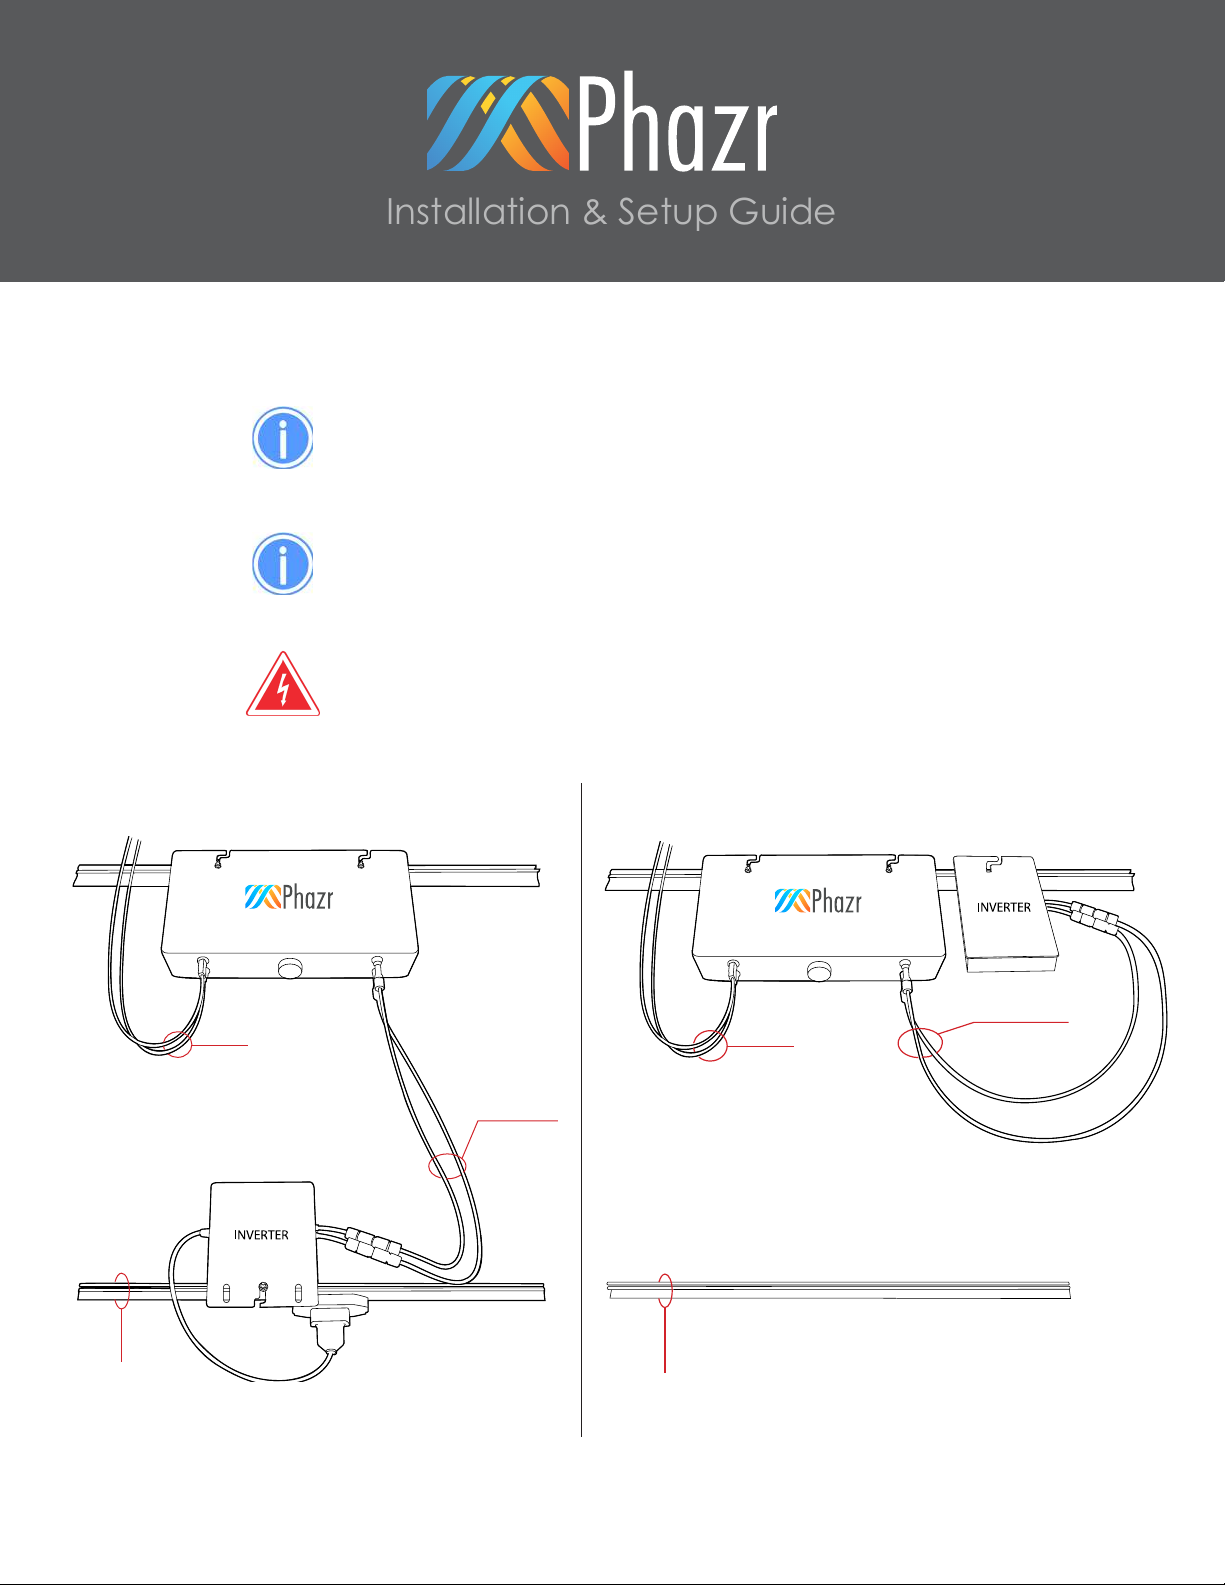
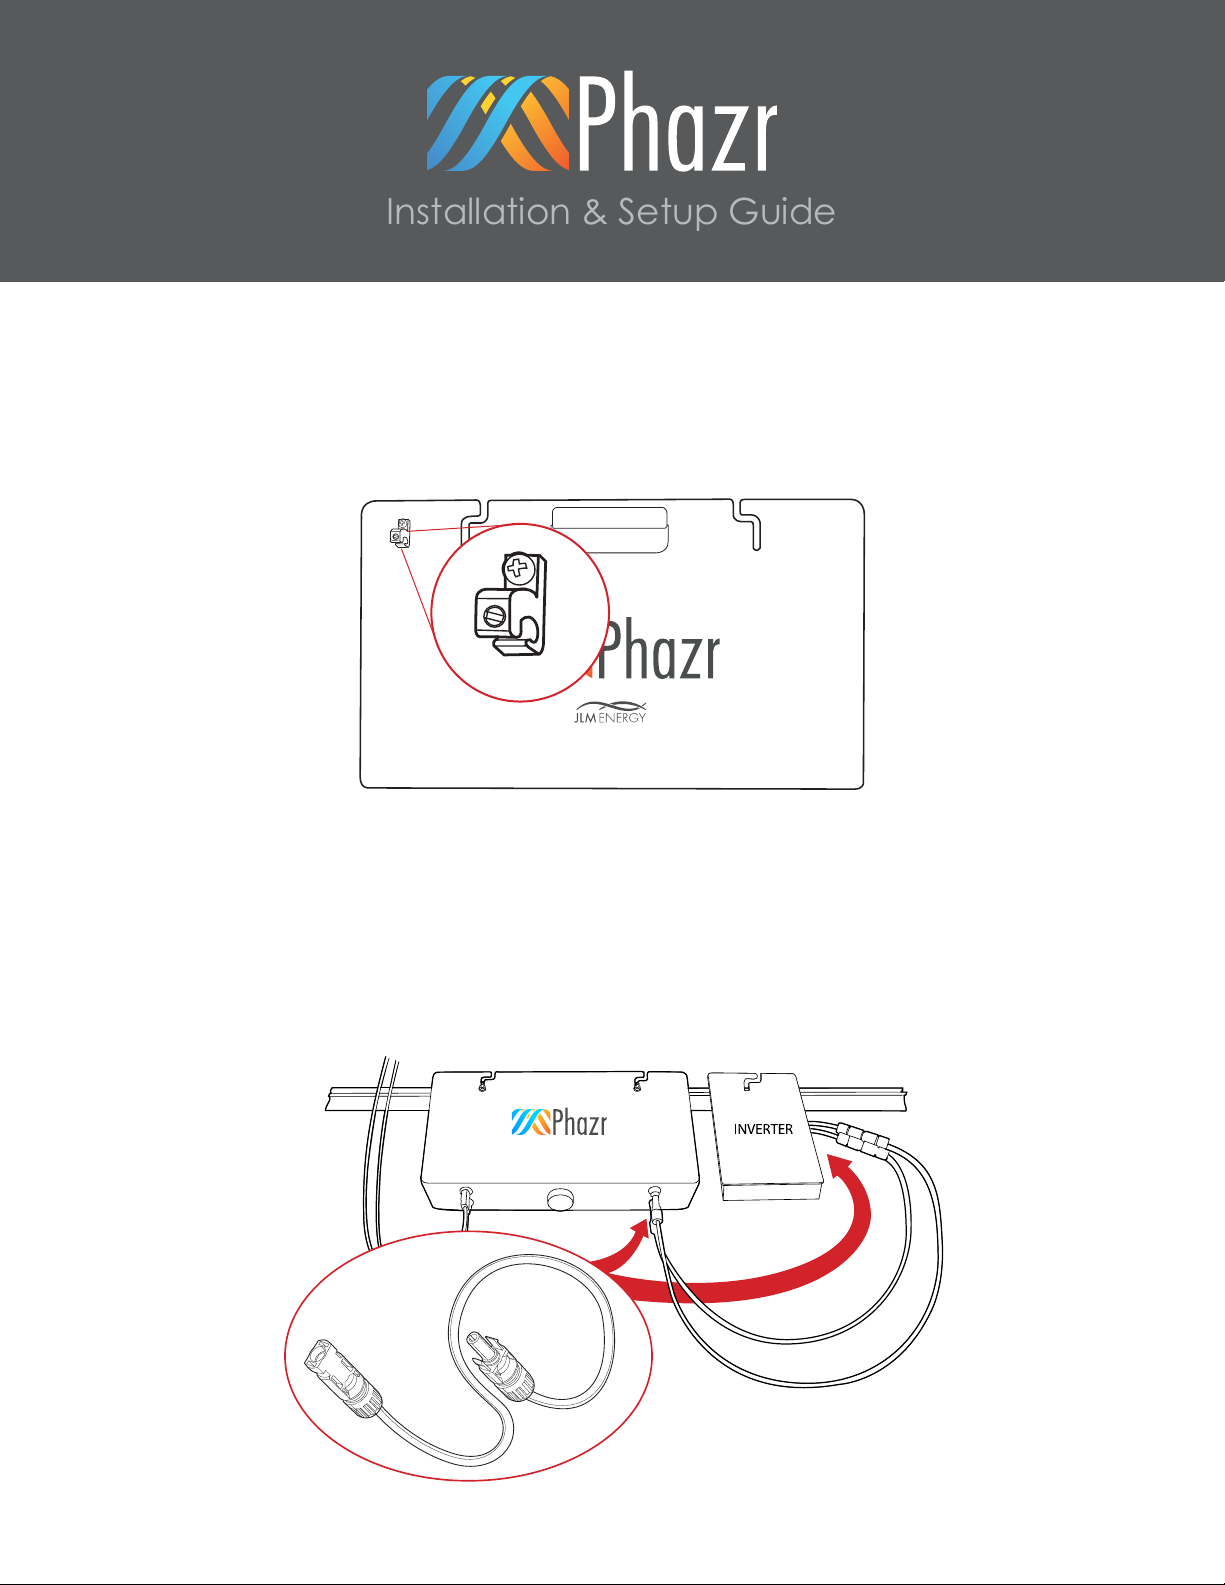
Info: The Phazr chassis is 3” tall.
Info: The minimum clearance between Phazr and the roof is 2”.
Info: The top of the racking must be a minimum of 5” above the
surface of the roof.
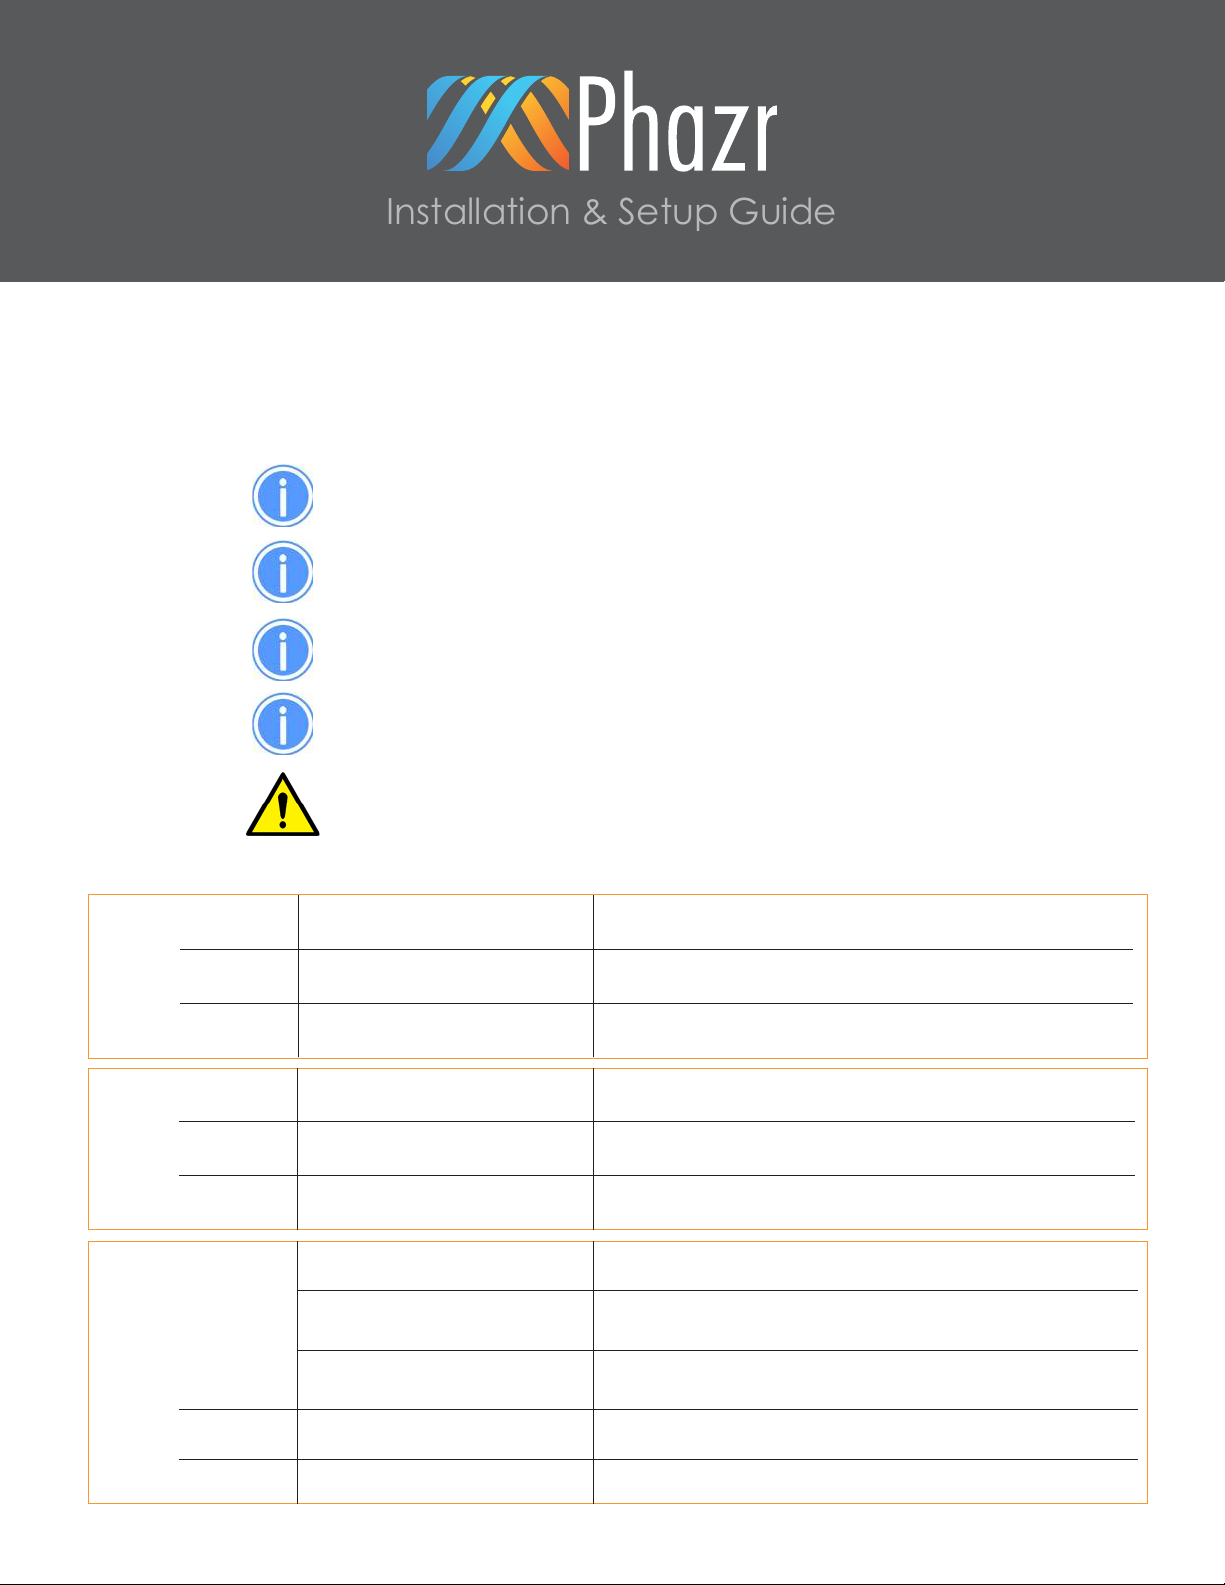
1.1 Roof Type & Mounting System Options
Caution: When using rails that utilize 5/16” mounting hardware, the
mounting slots of Phazr are designed for 1/4” hardware and must
be drilled out with a step bit if the 5/16” hardware is used.
Stand-off Quick Mount Q-Block or equivalent Recommend no more than 48” between stand-offs to avoid
excessive twisting of the racking.
Racking Iron Ridge XR1000 or equivalent Must be mounted as far up on the L-Bracket as possible for proper
Phazr clearance.
L-Bracket Iron Ridge FM-LFT-003 or equivalent
Stand-off Quick Mount #QMHSS or equivalent Recommend no more than 48” between stand-offs to avoid
excessive twisting of the racking.
Racking Iron Ridge XR1000 or equivalent Must be mounted as far up on the QMHSS slot as possible for proper
Phazr clearance.
L-Bracket Iron Ridge FM-LFT-003 or equivalent
Stand-off
Quick Mount PV Base Mount
#QMTR-BM or equivalent
Recommend no more than 48” between stand-offs to avoid
excessive twisting of the racking.
Quick Mount PV Tile Replacement
Kit #QMTR-S3.25 or equivalent
Quick Mount PV 4.5” Post
#QMC-SP4.5 (or taller) or equivalent Typical minimum order of 4.5” post is 12 with a 5-day lead time.
Racking Iron Ridge XR1000 or equivalent Must be mounted as far up on the L-Bracket as possible for proper
Phazr clearance.
L-Bracket Iron Ridge FM-LFT-003 or equivalent
Asphalt Shingle
System
Flat Tile
System
S-Tile & W-Tile
System
3
EXAMPLEEXAMPLEEXAMPLE

Installation & Setup Guide
1.2 Mounting Phazr
Info: Lay out and be aware of PV module frame locations to avoid
mounting Phazr in a location that will interfere with the PV modules.
Info: All micro-inverters or DC power optimizers should be mounted
and connected to their associated truck cable (AC connection)
prior to mounting Phazr for an easier installation process.
1. Mount each Phazr to the mounting rail using two 1/4” micro-inverter
mounting T-bolts (Iron Ridge #MI-BHW or similar).
• Push Phazr up against the rail as far as possible.
• Tighten the T-bolts to the manufacturer’s recommended torque specication.
WARNING: AC power to the micro-inverters or DC power optimizers SHOULD
NOT be turned on at this point of installation.
4

Installation & Setup Guide
2. Bond the Phazr chasis to the PV array grounding system using the factory-
installed grounding lug on the Phazr.
3. Unpackage the provided DC jumper cables and plug them into the Phazr
DC OUT terminals. Plug the other end of the cables into the micro-inverter
or DC power optimizer DC IN terminals.
DC Out DC IN
5

Installation & Setup Guide
4. Plug the PV module DC cables into the Phazr DC IN terminals and mount
the PV module to the rails.
DC IN
2.0 Application (App) Installation
1. Search for JLM Energy in Google Play (Android) or the App Store (Apple)
and you will find the Measurz Mobile App. Install the application on
your phone.
6

3.0 Phazr Hub and AmpliFi HD Router System Installation
Installation & Setup Guide
Note: Only JLM Energy Devices (Phazrs, Linez, Loadz) should be used
on this router to prevent communication issues to the equipment.
1. Install router and mesh points according to the AmpliFi instruction manual. Connect
the AmpliFi router into the homeowner’s modem if there is an extra LAN port. If not,
plug the ethernet cable into one of the available LAN ports on their home router.
1Install Phazr Hub by plugging the provided micro USB cord and
ethernet cable into the Ampli Router.
Info: Make sure to position the mesh points to connect
between the solar system where the Phazrs will
be installed, Linez unit at the main panel and the
router location to get the best signal strength.
Info: Installing one mesh point into the outlet where the
garage door opener is located (ceiling of the
garage) provides a good location for the Linez unit
if the Main Service Panel is close to the garage.
7

Installation & Setup Guide
•Connect your device to the PhazrConfig Network.
•Open the Measurz Mobile App and sign in with your certified installer credentials.
•Click Phazr from the dropdown menu.
•Verify you are connected to the PhazrConfig network and hit Next.
•Scan or type in the 8 digit barcode on the bottom of the Phazr Hub and hit Next.
•Click the select all button to select all Phazrs. Checkmarks will appear in all the configure and
Measurz boxes. Once all Phazrs are completed, hit Next and the process for configuring
Phazrs to the network and Measurz is finished.
4.0 Phazr Conguration
Info: The Ubiquiti AmpliFi WiFi router and mesh point system should
already be installed prior to Phazr commissioning.
Info: A WiFi enabled phone or tablet with Measurz Moble app is
required to commission a Phazr system
8

4.1 Linez Installation
•Install the Linez unit and configure according to the
installation / configuration of that product.
•Linez is preconfigured to the same AmpliFi router / Phazr hub
dedicated network. Once Linez is installed and powered on
it will automatically connect to Measurz.
5.0 Completing Installation
Call into JLM Customer Service Support at (800) 475-3960 to verify connectivity
to Measurz before leaving installation
3735 Placer Corporate Dr.
Rocklin, CA | 95765
(800) 475-3960
jlmei.com
2017 ©JLM Energy Inc., All Rights Reserved.
Installation & Setup Guide
9
Table of contents
Popular Inverter manuals by other brands

Sunforce
Sunforce 600 Watt MARINE WIND TURBINE user manual

Briggs & Stratton
Briggs & Stratton 10000 Watt Operator's manual

Victron energy
Victron energy MultiPlus 12 1600 70 230V manual

Siemens
Siemens micromaster 410 operating instructions

IO-Power Technology
IO-Power Technology IOP-DAPI-12243A-2 user manual

MeiKai ENERGY
MeiKai ENERGY N270 Installation and operation manual