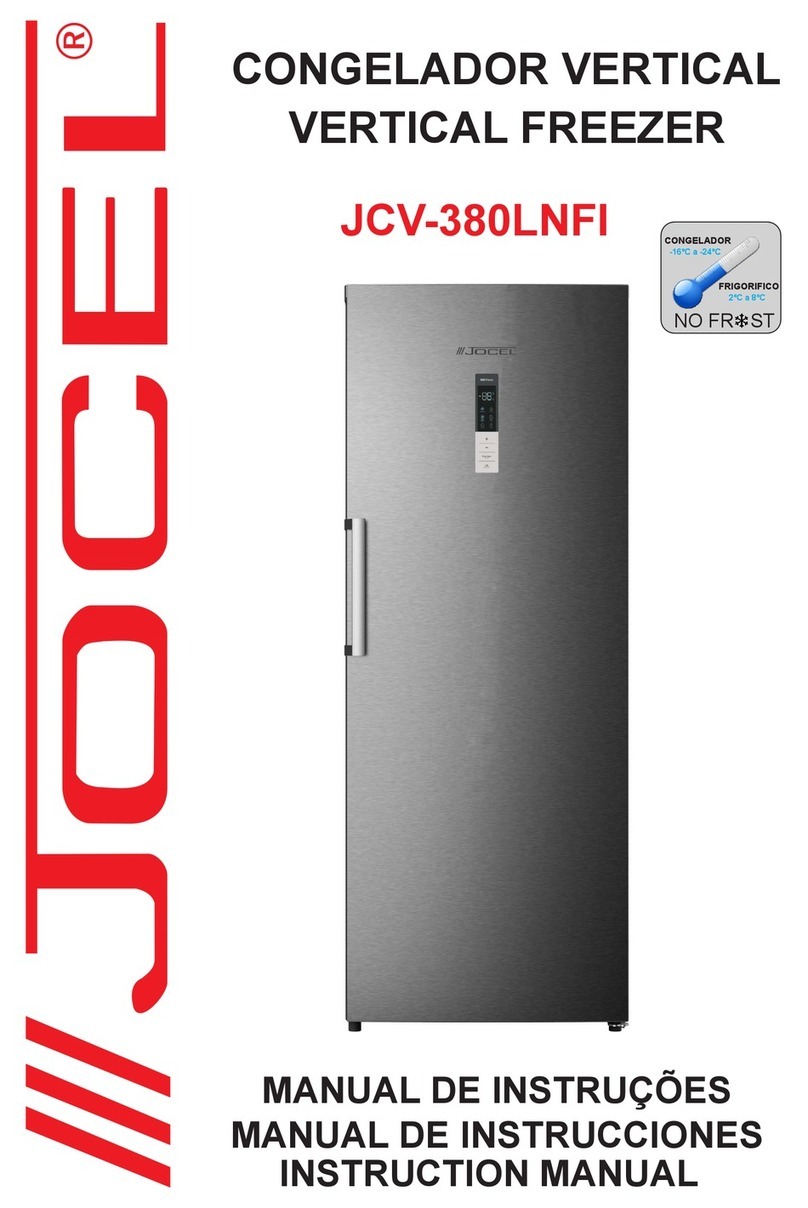
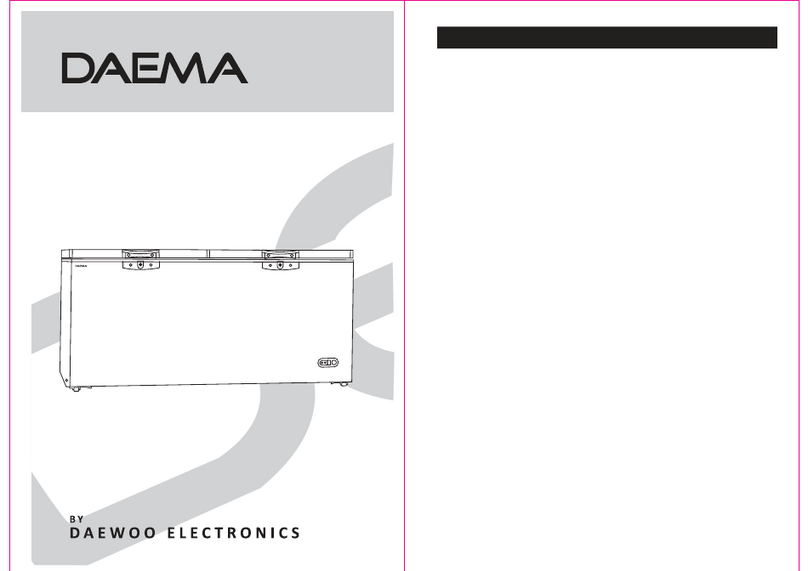
Jocel JCV-477L User manual

CONGELADOR VERTICAL / VERTICAL FREEZER
JCV-477L
MANUAL DE INSTRUÇÕES
INSTRUCTION MANUAL
MANUAL DE INSTRUCCIONES

INFORMAÇÃO DE SEGURANÇA
Leia e cumpra todas as regras de segurança e instruções de funcionamento antes da primeira
utilização deste produto.
INSTRUÇÕES DE LIGAÇÃO À TERRA
Este aparelho está equipado com um cabo que tem fio terra com uma ficha de ligação à terra. Esta ficha
elétrica deve ser ligada a uma tomada que esteja adequadamente instalada e com ligação à terra.
AVISO - A utilização incorreta da ficha de ligação à terra pode resultar em risco de choque elétrico.
Contacte um Eletricista Qualificado ou a Assistência Técnica, se as instruções de ligação à terra não
forem completamente compreendidas ou se existirem dúvidas de como o aparelho é corretamente ligado
à terra.
NÃO UTILIZAR COM UMA EXTENSÃO ELÉTRICA
Utilize uma tomada elétrica de 115V separadamente. Não ligue o seu frigorífico a extensões elétricas
ou em conjunto com outro equipamento na mesma tomada elétrica. Não entrance o cabo.
LEIA E CUMPRA TODAS AS INSTRUÇÕES DE SEGURANÇA
Por favor, certifique-se de que as peças do aparelho são substituídas por componentes iguais e de que
o serviço é efetuado pela Assistência Técnica, para minimizar o risco de uma possível ignição devido
a peças incorretas ou assistência inadequada.
Este aparelho tem de ser ligado à terra. Na ocorrência de um curto circuito, a ligação à terra reduz o
risco de choque elétrico, pois garante uma linha de fuga para a corrente elétrica.
REQUISITOS ELÉTRICOS
AVISO
CLASSIFICAÇÃO ELÉTRICA: a placa de identificação
de série indica a tensão e a frequência para as quais
este aparelho está concebido.
Devido a possíveis variações na linha de tensão (provocada por sobrecarga dos circuitos), é
aconselhável instalar um circuito dedicado a partir do quadro elétrico. Isto ajudará a eliminar qualquer
flutuação de corrente que pode causar problemas no motor.
-1-
PT

AVISO IMPORTANTE
Um congelador
vazio é uma atração muito perigosa para as crianças. Retire tanto as juntas como
a porta de aparelhos inutilizados, ou tome qualquer outra iniciativa que garanta a sua
inofensibilidade.
PERIGO: existe o perigo de as crianças ficarem presas no interior do aparelho. Antes de deitar
fora o seu congelador velho:
• Remova as portas.
• Deixe as prateleiras colocadas de modo que as crianças não consigam trepar tão facilmente
para dentro deste aparelho.
NÃO ESPERE! FAÇA ISTO AGORA!
•Este aparelho não se destina a ser utilizado por pessoas (incluindo crianças) cujas capacidades
sensoriais ou mentais possam ser diferentes ou reduzidas, ou com falta de experiência ou
conhecimento, a menos que recebam supervisão ou instruções para operar o aparelho pela pessoa
responsável pela sua segurança.
•As crianças devem ser vigiadas para assegurar que não brincam com o aparelho.
•Não utilize extensões elétricas ou adaptadores sem ligação à terra (dois pinos).
•Se o cabo de alimentação estiver danificado, tem de ser substituído pela Assistência Técnica um
Técnico Qualificado para evitar quaisquer potenciais perigos.
•AVISO Mantenha as aberturas de ventilação, na estrutura exterior do aparelho ou na estrutura
incorporada, livres de obstruções.
•AVISO - Não danifique o circuito do refrigerante.
•AVISO - Não utilize aparelhos elétricos dentro dos compartimentos de armazenamento de
alimentos do aparelho, a menos que sejam do tipo recomendado pelo fabricante.
•Este aparelho não foi concebido para instalação no exterior, incluindo a instalação em qualquer
local que não tenha temperatura controlada (incluindo garagens, alpendres, telheiros, etc.).
•Antes de ligar o aparelho à rede elétrica, deixe repousar durante 6 horas. Isto reduzirá a
possibilidade de problemas no sistema de refrigeração devido ao manuseamento durante o
transporte.
•O sistema de congelação está cheio com gás
refrigerante e substâncias isolantes que devem ser
tratadas e processadas separadamente. Contate a Assistência Técnica um Técnico Qualificado
ou as autoridades locais. Seja cuidadoso para não danificar a tubagem que deverá
estar na parte de trás do aparelho.
GUARDE ESTAS INSTRUÇÕES!
-2-

INSTRUÇÕES DE INSTALAÇÃO
LOCALIZAÇÃO
1. Escolha um local com um piso sólido e nivelado.
2. Deixe 13 cm de espaço entre as paredes laterais e a parte de trás do congelador e qualquer parede
adjacente.
3. Evite o contato direto de luz solar e de fontes calor. A luz solar direta pode danificar o aparelho. Fontes
de calor próximas irão causar um maior consumo de energia elétrica.
4. Evite locais húmidos. Demasiada humidade no ar formará gelo rapidamente no evaporador.
O aparelho tem 170,9cm de altura por 76,1cm de largura por 72,4cm de profundidade, por favor,
certifique-se de que deixa uma quantidade mínima de espaço entre o aparelho e todas as paredes
circundantes e orifícios de ventilação (consulte a secção de localização). Não cobrir quaisquer orifícios
de ventilação com qualquer tipo dematerial, pois o aparelho necessita de espaço suficiente para ventilar.
Colocar o aparelho numa base sólida e firme. Este aparelho têm 2 pés ajustáveis na parte frontal,
utilize-os para nivelar o aparelho.
NOTA: este aparelho destina-se APENAS PARA LIVRE INSTALAÇÃO, e não está concebido para
ser encastrado. Este aparelho está aprovado APENAS PARA UTILIZAÇÃO DOMÉSTICA e não se
destina para ser utilizado no exterior.
Nota: não utilize este aparelho onde a temperatura ambiente for inferior a 5°C.
CARACTERÍSTICAS
-3-
1. Interruptor de Luz
2. Painel de Controlo
3. Luz LED
4. Saída de Fluxo de Ar
5. Sensor de Temperatura
6. Prateleira do Congelador
7. Entrada de Fluxo de Ar
8. Frente da Prateleira
9. Prateleira da Porta
10. Pés ajustáveis: ajuste para nivelar o seu aparelho.

INSTALAÇÃO DA PEGA
O aparelho deve de ser desligado da corrente elétrica
antes de instalar a pega
1. O congelador é fornecido com a pega no seu interior.
2. Para instalar a pega, remova a embalagem e coloque a
pega sobre as hastes da pega na porta.
3. Assim que a pega estiver na sua posição nas hastes,
insira os pequenos parafusos sextavados no suporte da
pega e aparafuse-os com a chave sextava fornecida.
Aparafuse até que fiquem bem apertados, mas não em
demasia.
INSTRUÇÕES DE FUNCIONAMENTO
INSTRUÇÕES PARA INVERTER A ABERTURA DA PORTA
ATENÇÃO
Para evitar ferimentos e/ou danos materiais, recomendamos que alguém
o ajude durante o processo de inversão da abertura da porta.
-4-
Se achar necessário inverter a abertura da porta do congelador, por favor, siga as instruções abaixo.
Sugerimos que esvazie o aparelho e o coloque no solo apoiado na parte traseira antes de começar. Coloque uma toalha
ou cobertor no chão por baixo do aparelho para o proteger de possíveis riscos.
Depois de terminar a inversão de abertura da porta, certifique-se de que deixa o aparelho na posição vertical e vazio
durante pelo menos quatro horas antes de o ligar.
1. Remova um parafuso da cobertura da dobradiça superior (A) e depois retire a cobertura da dobradiça superior.
2. Remova quatro parafusos da dobradiça superior (B) e depois retire a dobradiça superior, o eixo da porta superior (C) e
o espaçador da dobradiça superior (D).
3. Retire a porta do aparelho e coloque-a de lado. Certifique-se de que não danifica os eixos inferiores da porta (F).
4. Remova as tampas que se encontram na parte inferior do aparelho (E).
5. Remova os quatros parafusos das dobradiças inferiores e depois troque as dobradiças inferiores (J). Certifique-se
de que a dobradiça em forma de C está no local oposto da pega.

ALARME DE PORTA ABERTA
Este aparelho vem equipado com um alarme de porta aberta que soará sempre que a porta ficar aberta
durante 3 minutos consecutivos ou mais. Soará um alarme audível de bips contínuos e o visor digital de
temperatura irá piscar. Para parar o alarme de porta aberta, certifique
-
se de que a porta foi corretamente
fechada. Assim que for fechada o alarme irá parar e o visor deixará de piscar.
-5-
6. Reinstale quatro parafusos em ambas as dobradiças inferiores (F).
7. Reinstale os eixos inferiores da porta (F e G).
8. Reinstale as tampas na parte inferior do aparelho (E).
9. Reinstale a porta e certifique-se de que o eixo inferior da porta (F) está colocado no orifício na dobradiça inferior
que está mais perto do exterior do aparelho.
10. Volte a colocar o espaçador da dobradiça (D), volte a colocar a dobradiça superior da porta (C), reinstale a
dobradiça superior com quatro parafusos (B). Certifique-se de que inverte a dobradiça superior para o seu lado
oposto, para que a dobradiça superior fique na posição correta.
11. Reinstale a cobertura da dobradiça superior (A) com um parafuso. Uma cobertura da dobradiça superior para o lado
oposto do aparelho pode ser encontrada na bolsa de acessórios no interior do aparelho.

INSTRUÇÕES DE FUNCIONAMENTO
SELEÇÃO DE TEMPERATURA
Escolher Entre ºC e ºF:
Para escolher entre °C e °F, pressione a tecla °C/°F, o indicador luminoso correspondenteirá iluminar-se.
CUIDADOS E MANUTENÇÃO
LIMPEZA DO APARELHO
•Desligue o aparelho da tomada e retire os alimentos e os acessórios do interior.
•Limpe o interior com água morna e bicarbonato de sódio. A solução deve ter 2 colheres (sopa) de
bicarbonato de sódio para um quarto de água.
•Limpe as gavetas e os acessórios interiores com uma solução de detergente suave.
•O exterior do aparelho deve ser limpo com detergente suave e água morna.
Atenção: se não desligar o aparelho da corrente elétrica podem ocorrer choques elétricos ou danos
físicos.
FALHA DE ENERGIA
A maior parte das falhas de energia são resolvidas em algumas horas e não devem afetar a
temperatura do seu congelador
se minimizar o número de vezes que abre a porta. Se a energia elétrica
for cortada durante um longo período de tempo, deve tomar as devidas precauções para proteger os
seus alimentos.
-6-
Definir a Temperatura:
A temperatura do compartimento do congelador é controlada ajustando / definindo o painel de controlo
do termóstato. (▲e ▼) para definir / ajustar a temperatura. Quando o símbolo da
temperatura estiver a piscar, pode definir a temperatura entre -14°C e -24°C, a definição de
temperatura recomendada é -18°C. A definição irá levar aproximadamente 5 segundos a ter efeito.
Após aproximadamente 5 segundos o símbolo de temperatura irá mostrar a temperatura atual. A
definição de temperatura predefinida é -18°C.
Definir Função de Congelação Rápida:
A função de Congelação Rápida permite que o aparelho funcione até alcançar -26°C ou até que o
compressor funcione ininterruptamente durante 24 horas, o que ocorrer primeiro. Pressionee mantenha
pressionada a tecla de Congelação Rápida durante 3 segundos para ativar o modo de Congelação
Rápida, o LED correspondente acende-se, o símbolo de temperatura mostrará -26 e piscará. Após
aproximadamente 5 segundos o símbolo de temperatura mostrará a temperatura atual. Para cancelar
a função de Congelação Rápida, pressione e mantenha pressionada a tecla de Congelação Rápida
durante 3 segundos para sair, a função de Congelação Rápida foi agora cancelada e o LED irá apagar-
se. Assim que a função de Congelação Rápida termine ou for cancelada, o aparelho voltará à última
temperatura definida.
Pressione as teclas

DESCONGELAÇÃO
Este aparelho está equipado com um sistema de refrigeração No Frost, que significa que nunca
terá de descongelar o compartimento do congelador.
CÓDIGOS DE ERRO
•E1: Falha do sensor do congelador.
•E2: Falha do sensor de descongelação do congelador.
•E3: Falha do sensor do congelador e do sensor de descongelação do congelador.
RESOLUÇÃO DE PROBLEMAS
PROBLEMA CAUSAS POSSÍVEIS SOLUÇÃO
ÃO
Não
funciona •O aparelho não tem alimentação
•O cabo de alimentação está desligado
•Está a ser usada a tensão errada
•Verifique a ligação do cabo de alimentação à fonte de
alimentação
•Ligue o aparelho
•Use a tensão adequada
Congelador
funciona
ininterrupta
mente
•A temperatura definida está demasiado baixa
•A porta não está fechada
•Foram introduzidos alimentos quentes
•Porta aberta demasiado tempo ou
demasiadas vezes
•Está perto de fontes de calor ou luz solar
direta
•Defina uma temperatura mais alta
•Feche a porta firmemente
•Certifique-se de
que os alimentos estão à temperatura
ambiente antes de os colocar no frigorífico.
•Minimize as aberturas de porta / tempo de abertura
•Não coloque o aparelho perto de fontes de calor ou
de luz solar direta
Temperatura
interna não
baixa o
suficiente
•O aparelho não tem alimentação
•O cabo de alimentação está desligado
•Controlo de temperatura definido demasiado
alto
•A porta não está fechada
•Foram introduzidos alimentos quentes
•Porta aberta demasiado tempo ou
demasiadas vezes
•Obstrução do fluxo de ar
•Está a ser usada a tensão errada
•Está perto de fontes de calor ou luz solar
direta
•Verifique a ligação do cabo de alimentação à fonte de
alimentação
•Ligue o aparelho
•Verifique a definição e altere conforme necessário
•Feche a porta firmemente
•Certifique-se de
que os alimentos estão à temperatura
ambiente.
•Minimize as aberturas de porta / tempo de abertura
•Deixe espaço para o ar circular à volta do aparelho
•Utilize a tensão adequada
•Não coloque o aparelho perto de fontes de calor ou
de luz solar direta
Temperatura
demasiado
baixa
•O controlo de temperatura definido está
demasiado baixo •Ajuste a temperatura
Ruído •Os componentes estão a expandir / o fluido
refrigerante está a circular •Isto é normal
-7-
•H: : Congelador com temperatura alta.
CONDIÇÕES GERAIS DE GARANTIA
1. A Garantia só é válida mediante apresentação da factura de compra do produto.
2. Esta GARANTIA limita-se exclusivamente à subsituição de peças ineficazes por defeito
de fabrico.
3. A eliminação das várias avarias do âmbito da garantia é feita por reparação ou substituição
de peças defeituosas, conforme critério dos nossos serviços técnicos. As peças
defeituosas são da nossa propriedade.
4. Não são abrangidos pela garantia danos causados por transporte, negligência ou
deficiente utilização, montagem ou instalações impróprias, bem como influências
exteriores como sejam: descargas atmosféricas ou eléctricas, inundações, humidades,
etc.
5. Perdem garantia, todos os aparelhos que não estejam a ser utilizados de acordo com as
instruções, ou ligadas a REDES DE ALIMENTAÇÃO, que não garantem uma tensão
constante de 220/240V.
6. A Garantia não abrange indemnizações por danos pessoais ou materiais causados directa
ou indirectamente, seja a que título for.
7. Esta garantia cessa no momento em que se constate terem sido efectuadas reparações,
alterações ou quaisquer intervenções por pessoa não autorizada pela JOCEL.
A GARANTIA CADUCA
1. Com a modificação ou desaparecimento da chapa de identificação do aparelho.
2. Excedido o prazo de 2 anos para a Linha Doméstica e 6 meses Linha Hotelaria, a Garantia
caduca e a Assistência será efectuada debitando as despesas inerentes à mão-de-obra,
consoante as tarifas vigentes.
ASSISTÊNCIA TÉCNICA
Para solicitar a assistência técnica, os nossos serviços estão disponiveis através dos
seguintes contactos:
Telef. 00 351 252 910351
Fax: 00 351 252 910367
E-mail: [email protected]
http://www.jocel.pt
-8-

SEDE:
Rua Alto do Curro, n.º 280
4770-569 S. COSME DO VALE
V.N. de FAMALICÃO
Telef: 252 910 350/2
Fax: 252 910 368/9
email: jocel@jocel.pt
http://www.jocel.pt DECLARAÇÃO DE CONFORMIDADE
Declaramos sobre nossa própria responsabilidade que o aparelho indicado abaixo:
Aparelho CONGELADOR VERTICAL
Marca JOCEL
Modelo JCV-477L
Está em conformidade com as seguintes diretivas europeias e normas de aplicação.
Baixa Tensão 2014/35/EU EN 60335-2-24:2010
EN 60335-1:2012+A11:2014
EN 62233:2008
Compatibilidade Electromagnética 2014/30/EU EN 55014-1:2006+A1:2009+A2:2011
EN 55014-2:2015
EN 61000-3-2:2014
EN 61000-3-3:2013
-9-

GROUNDING INSTRUCTIONS
This appliance is equipped with a cord having a grounding wire with a grounding plug. The plug must be plugged into an
outlet that is properly installed and grounded.
WARNING - Improper use of the grounding plug can result in a risk of electric shock. Consult a qualified electrician or
Technical Assitance if the grounding instructions are not completely understood, or if doubt exists as to whether the
appliance is properly grounded.
DO NOT USE AN EXTENSION CORD
Use an exclusive 115V wall outlet. Do not connect your freezer to extension cords or together with another appliance
in the same wall outlet. Do not splice the cord.
• Read and follow all safety rules and operating instructions before first use of this product.
Important Safety Information
-10-
EN

-11-
Important Safety Information
READ AND FOLLOW ALL SAFETY INSTRUCTIONS
This appliance must be grounded. In the event of an electrical short circuit, grounding reduces the risk of
electrical shock by providing an escape wire for the electrical current.
ELECTRICAL REQUIREMENTS WARNING
ELECTRICAL RATING: The serial rating plate indicates the
voltage and frequency the unit is designed for.
Due to possible variations in line voltage (caused by overloading of circuits), it is advisable to install a dedicated circuit
from the meter panel. This will help to eliminate current fluctuation which might cause motor trouble.
IMPORTANT WARNING
An empty freezer is a very dangerous attraction to children. Remove either the gasket
or door from unused appliances, or take some other action that will guarantee it harmless.
DANGER: Risk of child entrapment. Before you throw away your old freezer:
• Take off doors.
• Leave the shelves in place so that children may not easily climb in.
DON’T WAIT! DO IT NOW!
Please ensure that component parts shall be replaced with like components and that servicing shall be done by
factory authorized service personnel, so as to minimize the risk of possible ignition due to incorrect parts or
improper service.
SAVE THESE INSTRUCTIONS!
• This appliance is not intended for use by persons (including children) whose physical, sensory or mental capabilities
may be different or reduced, or who lack experience or knowledge, unless such persons receive supervision or train-
ing to operate the appliance by a person responsible for their safety.
• Children should be supervised to ensure that they do not play with the appliance.
• Do not use extension cords or ungrounded (two prongs) adapters.
• If the supply cord is damaged, it must be replaced by Technical Assistance or Qualified Technician.
• WARNING Keep ventilation openings, in the appliance enclosure or in the built-in structure, clear of obstruction.
• WARNING Do not damage the refrigerant circuit.
• WARNING Do not use electrical appliances inside the food storage compartments of the appliance, unless they are
of the type recommended by the manufacturer.
• This unit is not designed for outside installation, including installation anywhere that is not temperature controlled
(including garages, porches, carports, etc.).
• Before connecting the appliance to an electrical power supply, let it stand 6 hours. This will reduce the possibility of
malfunctions in the cooling system due to transport handling.
• The freezer system of the appliance is filled with refrigerant and insulating substances which should be separate-
ly treated and processed. Call the Technical Assistance our a Qualified Technician or the local authorities.
Be careful not to damage any tubes that may be on the rear wall of the appliance.

-12-
Installation Instructions
1. Select a place with a strong, level floor.
2. Allow 13 cm of space between the back of the freezer and any adjacent wall.
3. Avoid direct sunlight and heat. Direct sunlight could damage the unit. Heat sources nearby will cause higher electrici-
ty consumption.
4. Avoid moist places. Too much moisture in the air will cause frost to form very quickly on the evaporator.
This unit is 170,8cm high, 76,1cm wide and 72,4cm deep, please make sure that you leave the minimum amount of
space between the unit and all surrounding walls and vents (see location).
Do not cover any of the ventilation openings with any material as the unit needs adequate space to breathe.
LOCATION
Place the appliance firmly on a solid base. This appliances have 2 adjustable feet on the front side; use them to level the
appliance
.
NOTE: This appliance is intended for FREE-STANDING INSTALLATION ONLY, and is NOT intended to be built-in.
This appliance is approved for INDOOR USE ONLY and is NOT intended for outdoor operation.
Note: Do not operate this unit where the ambient room temperature is below 5°C.
1. Light Switch
2. Control Panel
3. LED Light
4. Airflow Outlet
5. Temperature Sensor
6. Freezer Shelf
7. Airflow Inlet
8. Shelf Front
9. Door Shelf
10. Adjustable Feet: Adjust to level your unit.
FEATURES

-13-
DOOR REVERSAL INSTRUCTIONS
CAUTION
To avoid personal injury to yourself and/or property, we recom-
mend someone assist you during the door reversal process.
Operating Instructions
The unit must be unplugged before installing the
handle
1. The freezer ships with the handle inside
2. To install the handle, remove packaging and posi-
tion the handle over the door handle posts
3. Once the handle is in position on the posts insert
the small hex screws into the handle bracket and
tighten them with the allen key provided. Turn
until snug but do not over tighten
HANDLE INSTALLATION
If you find it necessary to reverse the swing of the freezer door, please follow the directions below.
We suggest emptying the unit and placing it on its back before beginning. Place a towel or blanket on the floor underneath
the unit to protect it from possible scratches.
After completing the door reversal, ensure that you allow the unit to stand upright and empty for a minimum of four hours
before plugging in.
1. Remove one screw from top hinge cover (A) and then remove top hinge cover.
2. Remove four screws from top hinge (B) and then remove top hinge, top door spindle (C) and top hinge spacer (D).
3. Remove door from unit and set aside. Ensure that you do not damage the bottom door spindles (F).
4. Remove roller caps at bottom of unit (E).
5. Remove four screws each from both bottom hinges and then swap the bottom hinges (J). Ensure that the C-shaped
hinge is on the side of the unit opposite the handle.

-14-
This unit comes equipped with a door ajar alarm that will sound if the door is left open for 3 consecutive minutes or more.
An audible alarm will sound, beeping continuously and the digital temperature display will
fl
ash. To stop the door ajar
alarm ensure the door has been properly closed. Once closed the alarm will stop and the display will stop flashing.
DOOR ALARM
6. Reinstall four screws each in both bottom hinges (F).
7. Reinstall the bottom door spindles (F and G).
8. Reinstall the roller caps at the bottom of the unit (E).
9. Reinstall the door and ensure that the bottom door spindle (F) is placed in the hole in bottom hinge that is closest to
the outside of the unit.
10. Replace hinge spacer (D), replace top door spindle (C), reinstall top hinge with four screws (B). Ensure that you fli p
the top hinge to its opposite side so that the top door spindle is in the correct position.
11. Reinstall the top hinge cover (A) with one screw. A top hinge cover for the opposite side of the unit can be found in the
accessory bag inside the unit.

-15-
Operating Instructions
TEMPERATURE SELECTION
Switching Between °C and °F:
• To switch between °C and °F, press the °C/°F key, the corresponding indicator light will illuminate.
Care and Maintenance
• Unplug the unit and remove the food and interior accessories.
• Wash the inside with a warm water and baking soda solution. The solution should be about 2 tablespoons of baking
soda to a quart of water.
• Wash the baskets and interior accessories with a mild detergent solution.
• The outside of the unit should be cleaned with mild detergent and warm water.
Caution: Failure to unplug the appliance could result in electrical shock or personal injury.
CLEANING THE APPLIANCE
Most power failures are corrected within a few hours and should not affect the temperature of your freezer
you minimize the number of times the door is opened. If the power is going to be off for a longer period of time,
you need to take the proper steps to protect your food.
POWER FAILURE
• E1: Freezer sensor failure.
• E2: Freezer defrosting sensor failure.
• E3: Freezer sensor failure and freezer
defrosting sensor failure.
ERROR CODES
This unit is equipped with a “Frost Free” type cooling
system, which means you never have to defrost the
freezer compartment.
DEFROSTING
Setting Temperature:
• The temperature of the freezer compartment is controlled by adjusting / setting the thermostat control panel. Press
the arrow keys (▲and ▼) to set / adjust the temperature. When the temperature icon is flashing, you can set the
temperature between -14°C to -24°C, the recommended temperature setting is -18°C . The setting will take
approximately 5 seconds to take effect. After approximately 5 seconds the temperature icon will display the current
actual temperature. The default temperature setting is -18°C.
Setting Fast Freeze Function:
• The Fast Freeze function allows the unit to run until it reaches -26°C or until the compressor runs continuously
for 24 hours, whichever comes first. Press and hold the Fast Freeze key for 3 seconds to engage Fast Freeze mode,
the corresponding LED turns on, the temperature icon will display -26 and flash. After approximately 5 seconds the
temperature icon will display the current temperature. To cancel the Fast Freeze function, press and hold the Fast
Freeze key for 3 seconds to exit, the Fast Freeze function has now been cancelled, and the LED will turn off. Once
the Fast Freeze function ends or is cancelled, the unit will revert to the last set temperature.
• H: Freezer high temperature.

-16-
Troubleshooting
PROBLEM POSSIBLE CAUSE SOLUTION
Does not
work • No power to unit
• Power cord is unplugged
• Wrong voltage is being used
• Check connection of power cord to power source
• Plug in the unit
• Use proper voltage
Freezer
runs contin-
uously
• Temperature set too low (too cold)
• Door is not closed
• Hot food inserted
• Door opened too long or too often
• Close proximity to heat source or direct sunlight
• Set temperature higher (warmer)
• Close door securely
• Be sure food is at room temperature before inserting
• Minimize door openings/duration
• Do not place unit close to heat sources or direct sunlight
Internal tem-
perature not
cold enough
• No power to unit
• Power cord is unplugged
• Temperature control set too high (too warm)
• Door is not closed
• Hot food inserted
• Door opened too long or too often
• Air flow obstruction
• Wrong voltage is being used
• Close proximity to heat source or direct sunlight
• Check connection of power cord to power source
• Plug in unit
• Check setting and change as needed
• Close door securely
• Be sure that food is at room temperature
• Minimize door openings/duration
• Allow room for air to circulate around the unit
• Use proper voltage
• Do not place unit close to heat sources or direct sunlight
Temperature
too cold • Temperature control is set too cold • Adjust the temperature
Noises • Parts are expanding / refrigerant is circulating • This is normal

GENERAL WARRANTY TERMS
1. The warranty is valid only on presentation of invoice of purchase.
2. ThisWARRANTY is limited exclusively to parts substitution ineffective due to faulty manufacture,
made in our workshops.
3. The elimination of several faults of the scope of the guarantee is made for repair or replacement
of defective parts, according to the discretion of our technical services. Defective parts are our
property.
4. Are not covered under warranty damage caused by transportation, neglect or poor use, improper
assembly or installation, as well as external influences such as: lightning strikes or power,
flooding, humidity, etc..
5. Lose warranty, all appliances that are not being used according to the instructions, or connected
to FEEDING NETWORKS not guarantee a constant voltage of 220/240V.
6. The warranty does not cover damages for personal injury or damage caused directly or indirectly
in any capacity whatsoever.
7. This warranty terminates when it is found to have been undergoing repairs, alterations or
interventions by any person not authorized by Jocel.
THE WARRANTY EXPIRES
1. With the modification or disappearance of the nameplate of the appliance.
2. Exceeded the period of 2 years for home appliances and 06 months for industrial appliances,
warranty expires and assistance will be made by charging the costs of manpower, according to
current fees.
TECHNICAL ASSISTANCE
For technical assistance request, our services are available through the following contacts:
Telef. 00 351 252 910351
Fax: 00 351 252 910367
E-mail: [email protected]
-17-

HEADQUARTERS:
Rua Alto do Curro, n.º 280
4770-569 S. COSME DO VALE
V.N. de FAMALICÃO
Telef: 252 910 350/2
Fax: 252 910 368/9
email: jocel@jocel.pt
http://www.jocel.pt DECLARATION OF CONFORMITY
We declare on our own responsibility that the machine indicated below
Product
Brand JOCEL
Model
Complies with the following European directives and standards implementation:
Low Voltage 2014/35/EU EN 60335-2-24:2010
EN 60335-1:2012+A11:2014
EN 62233:2008
Electromagnetic Compatibility 2014/30/EU EN 55014-1:2006+A1:2009+A2:2011
EN 55014-2:2015
EN 61000-3-2:2014
EN 61000-3-3:2013
-18-
JCV-477L
VERTICAL FREEZER

INSTRUCCIONES DE CONEXIÓN A TIERRA
Este aparato viene con un cable de alimentación que tiene un conductor y pata del enchufe de tierra. Este cable debe
enchufarse en un tomacorriente debidamente instalado y con conexión a tierra.
ADVERTENCIA - El uso inadecuado del enchufe de conexión a tierra puede resultar en un riesgo de choque eléctrico.
Consulte con un electricista o persona de reparaciones competente si no comprende buen las instrucciones de conexión
a tierra o si existe alguna duda sobre si el aparato está conectado a tierra correctament.
NO USE CABLES DE EXTENSIÓN
Use una toma de corriente exclusiva de 115V. No conecte su congelador a cables de extensión o junto a otro aparato en
la misma toma de corriente. No empalme el cable.
• Lea y observe todas las reglas de seguridad y las instrucciones de operación antes de usar este producto
por la primera vez.
Importantes Instrucciones de Seguridad
-19-
ES
Table of contents
Languages:
Other Jocel Freezer manuals

Jocel
Jocel JCH-150 User manual

Jocel
Jocel JCH-100 User manual

Jocel
Jocel JCH-400 User manual

Jocel
Jocel JCH-287 User manual

Jocel
Jocel JCH-488 User manual

Jocel
Jocel JCV-32 User manual

Jocel
Jocel JCV-32 User manual

Jocel
Jocel JCHTV-208 User manual

Jocel
Jocel JCH-150 User manual

Jocel
Jocel JCH-100 User manual

Jocel
Jocel JCV63 User manual

Jocel
Jocel JCHTV-109 User manual

Jocel
Jocel JCH-255 User manual

Jocel
Jocel JCH-300 User manual

Jocel
Jocel JAV103-140LEN User manual

Jocel
Jocel XHC-22 User manual

Jocel
Jocel JCHTV-100 User manual

Jocel
Jocel JCH-98 User manual

Jocel
Jocel JCHTV-265 User manual

Jocel
Jocel JCV-80 User manual