Johnson Plastics Plus SSPGMB User manual

Sept-22
16oz Laserable Pint Glass- For use on the Flux Beamo
Desktop Laser Cutter & Engraver
16OZ LASERABLE PINT GLASS – Flux Beamo Laser Cutter & Engraver / HOBBY Laser
Engraving/Cutting
SSPGMB | SSPGWH | SSPGBL | SSPGBU | SSPGOR | SSPGPK | SSPGRD | SSPGSE
GENERAL LASER ENGRAVING PROCESS
Recommended Equipment & Accessories
•Flux Beamo Desktop Laser Cutter & Engraver with rotary attachment, or HOBBY CO2 Laser Engraver
•Hobby Laser cutter & engraver with rotary attachment if available
•Clean Towel
•Isopropyl Alcohol
•Kitchen Degreaser Cleaner

Sept-22
Recommended Settings- Flux Beamo Laser Engraving with Rotary Attachment
30W laser
Laser Power
25-30%
Laser Speed
205 mm/s
Resolution (DPI/PPI)
500 (High)
Recommended Settings- HOBBY Laser Engraving
30-40W lasers
Laser Power
25-30%
Laser Speed
65-75%
Resolution (DPI/PPI)
500-600
Flux Beamo Laser Engraving Instructions
•For best results, it is highly recommended to use the optional Rotary Extension for Flux Beamo
available for the Flux Beamo laser.
oBEFORE INSTALLING THE ROTARY EXTENSION, first use the laser’s flat bed and cutting table
insert to cut out the elevation spacer disk for the 16oz Laserable Pint Glass.
Use the Elevation Spacer Disk template file to cut out the elevation spacer disk. The template
is able to be downloaded from the 16oz Laserable Pint Glass product page under the Tech
Docs/Downloads tab on JPPlus.com
It is recommended to use 1/8” thick acrylic or similar material for the elevation spacer disk.

Sept-22
•After cutting out the elevation spacer disk for the 16oz Laserable Pint Glass, the rotary extension may
be installed.
oFor instructions on installing the Rotary Extension for Flux Beamo, see the Tech Docs/Downloads
tab of the Rotary Extension for Flux Beamo product page, found on JPPlus.com.
Using the Rotary Extension for Flux Beamo
•After the rotary extension is installed, turn the laser power on.
•Place the Rotary Extension disk onto the bottom of the pint glass. Make sure the disk fits snug against
the glass, but do not force the disk onto the pint glass to avoid damage to the powder coating.
•Place the pint glass with attached elevation spacer onto the rollers of the rotary attachment.

Sept-22
•Use the roller adjustment knob on the rotary attachment to adjust the spacing of the rollers, so that
the bottom edge of the mouth of the pint glass is approximately 0.34”-0.36” above the floor of the
rotary attachment.
oTip:Stacking 3 pieces of 1/8” thick material together and placing under the mouth of the pint
glass can be used as an approximate gauge for setting the optimal roller position.

Sept-22
•Move the laser head over to the pint glass and position in directly above the highest point of the side
of the pint glass.
•Rotate the clear acrylic focus tool to the downward position and loosen the laser focus set screw to
adjust the focus of the laser head to the highest point on the pint glass side.

Sept-22
•Move the laser head to the right to ensure that the side of the pint glass is still in focus towards the
bottom of the glass.
•When finished, tighten the set screw to lock the focus position. Rotate the acrylic focus tool back to
the upward position.
•Once the focus is set to the highest point on the side of the pint glass, use the camera mode in the
Beam Studio software to create a photo rendering of the laser bed. This will populate an image of
where pint glass on the Beam Studio layout.
•Using the photo rendering, center the artwork over top of the pint glass. Adjust size and other
settings as necessary.
oCAUTION: Make sure the bottom of the artwork is at least 1.5” away from the bottom of the pint
glass to prevent the laser head from hitting the elevation spacer disk during the engraving
process.
•When finished, send the engraving to the laser in the Beam Studio software using the recommended
starting settings.
•If cleanup is needed, wipe the surface with a clean cotton cloth lightly misted with isopropyl alcohol
or a kitchen degreaser cleaner.

Sept-22
General HOBBY Laser Engraving Instructions/Flux Beamo Engraving Instructions WITHOUT the
rotary attachment
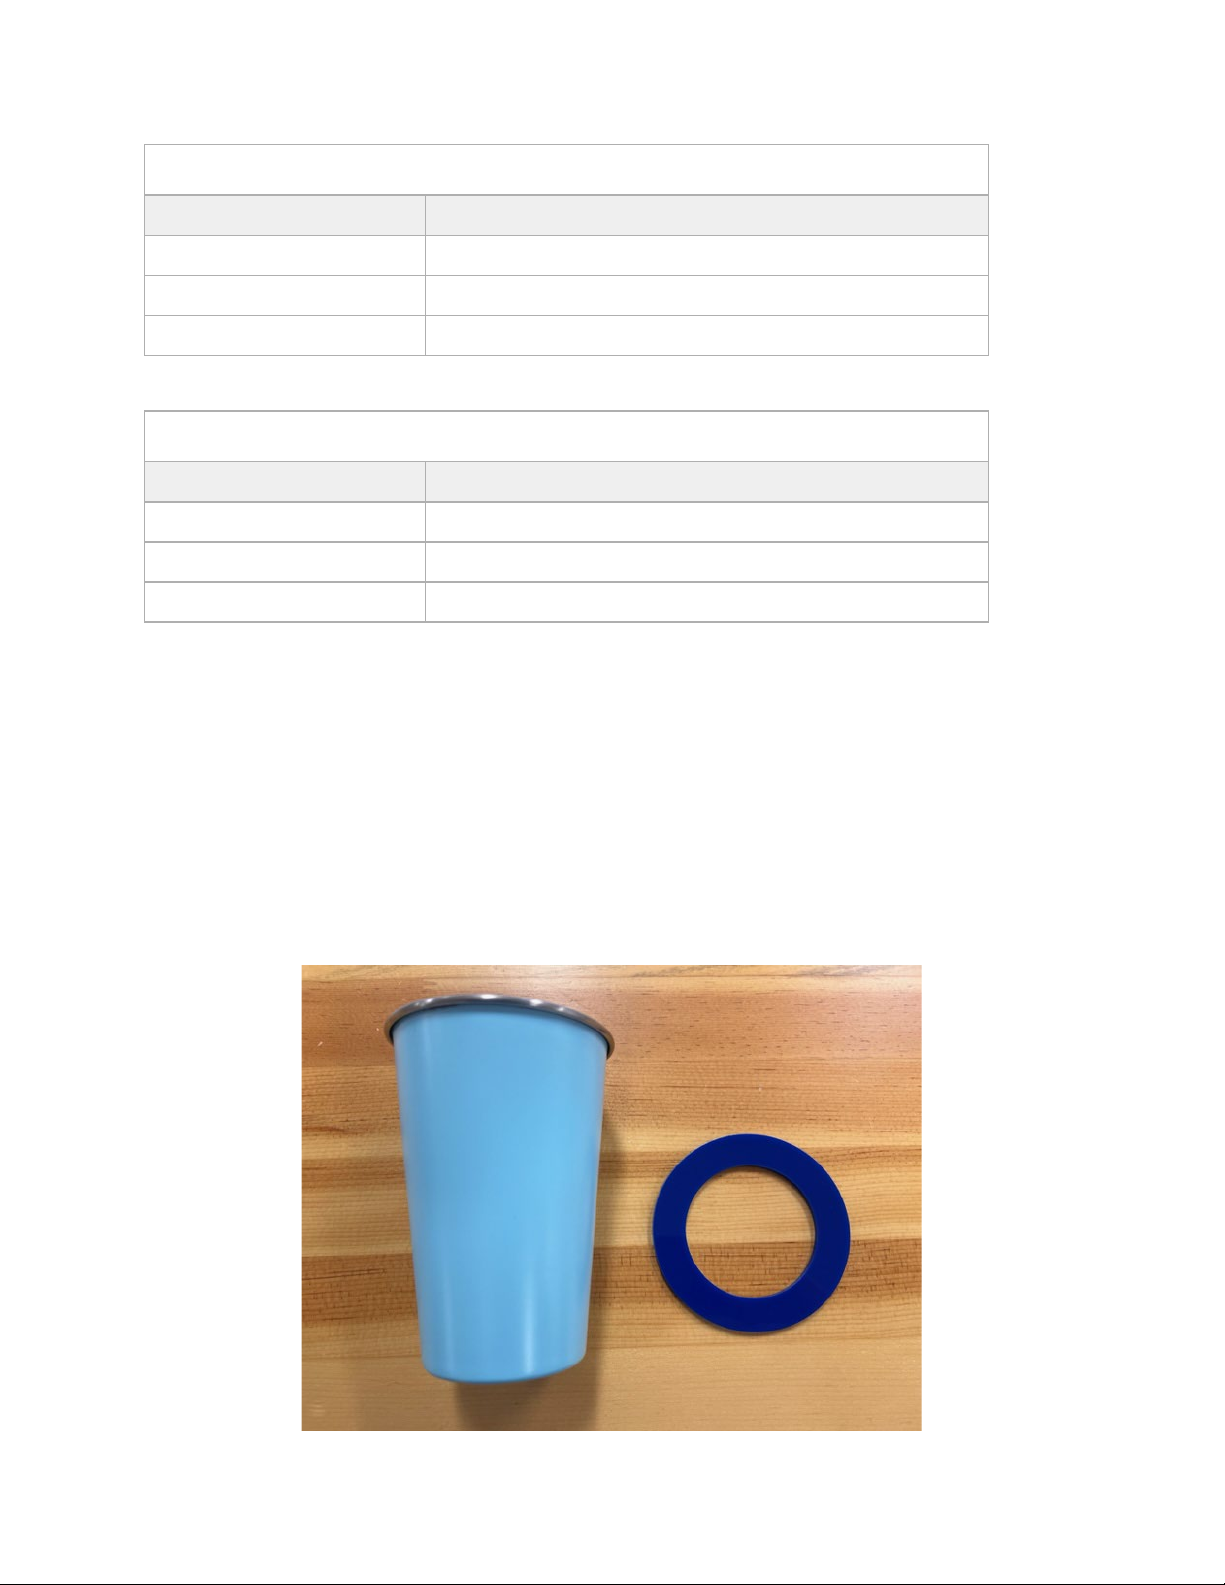
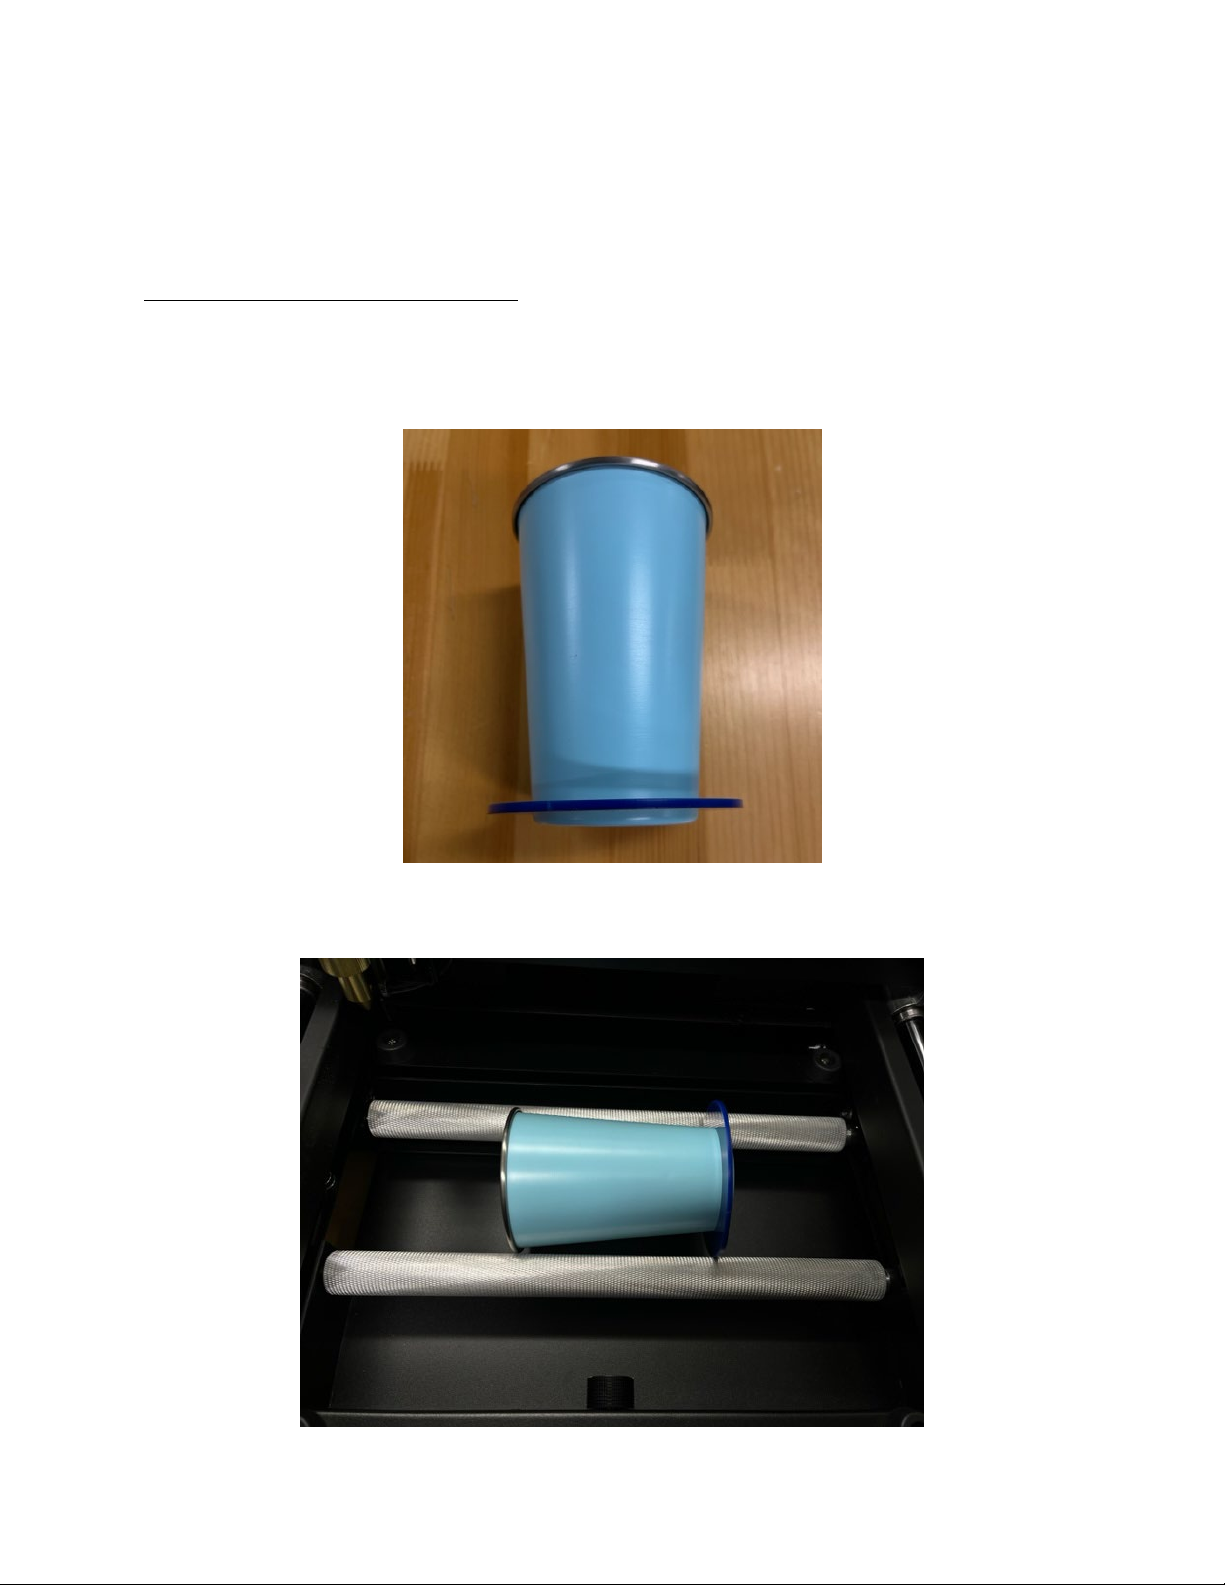
•Place the pint glass onto the laser bed and align to the zero point on the laser bed.
oFor best results, utilize a jig to help hold the pint glass level and in place during engraving.
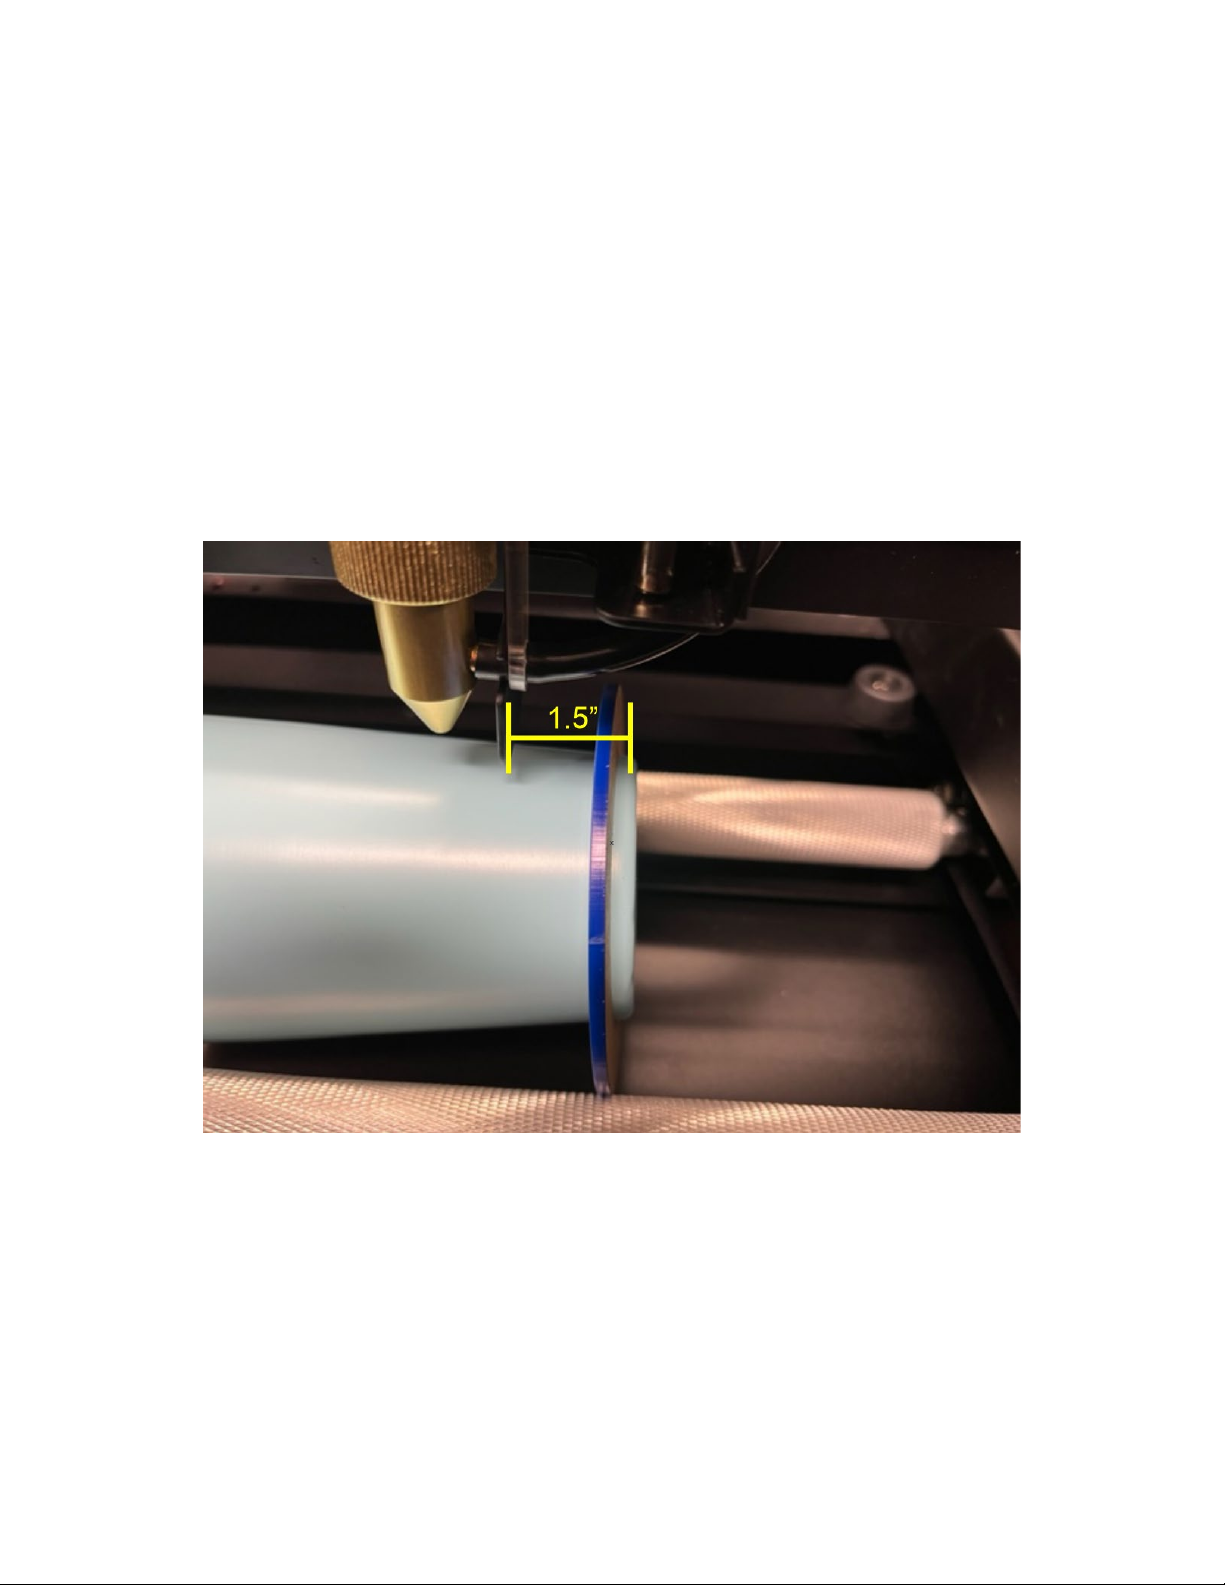
oFlux Beamo: Position the pint glass on the laser bed. Elevate the bottom of the glass so that the
side of the pint glass is parallel with the laser head.
Removing the cutting grid insert may be necessary for secure positioning of the pint glass.
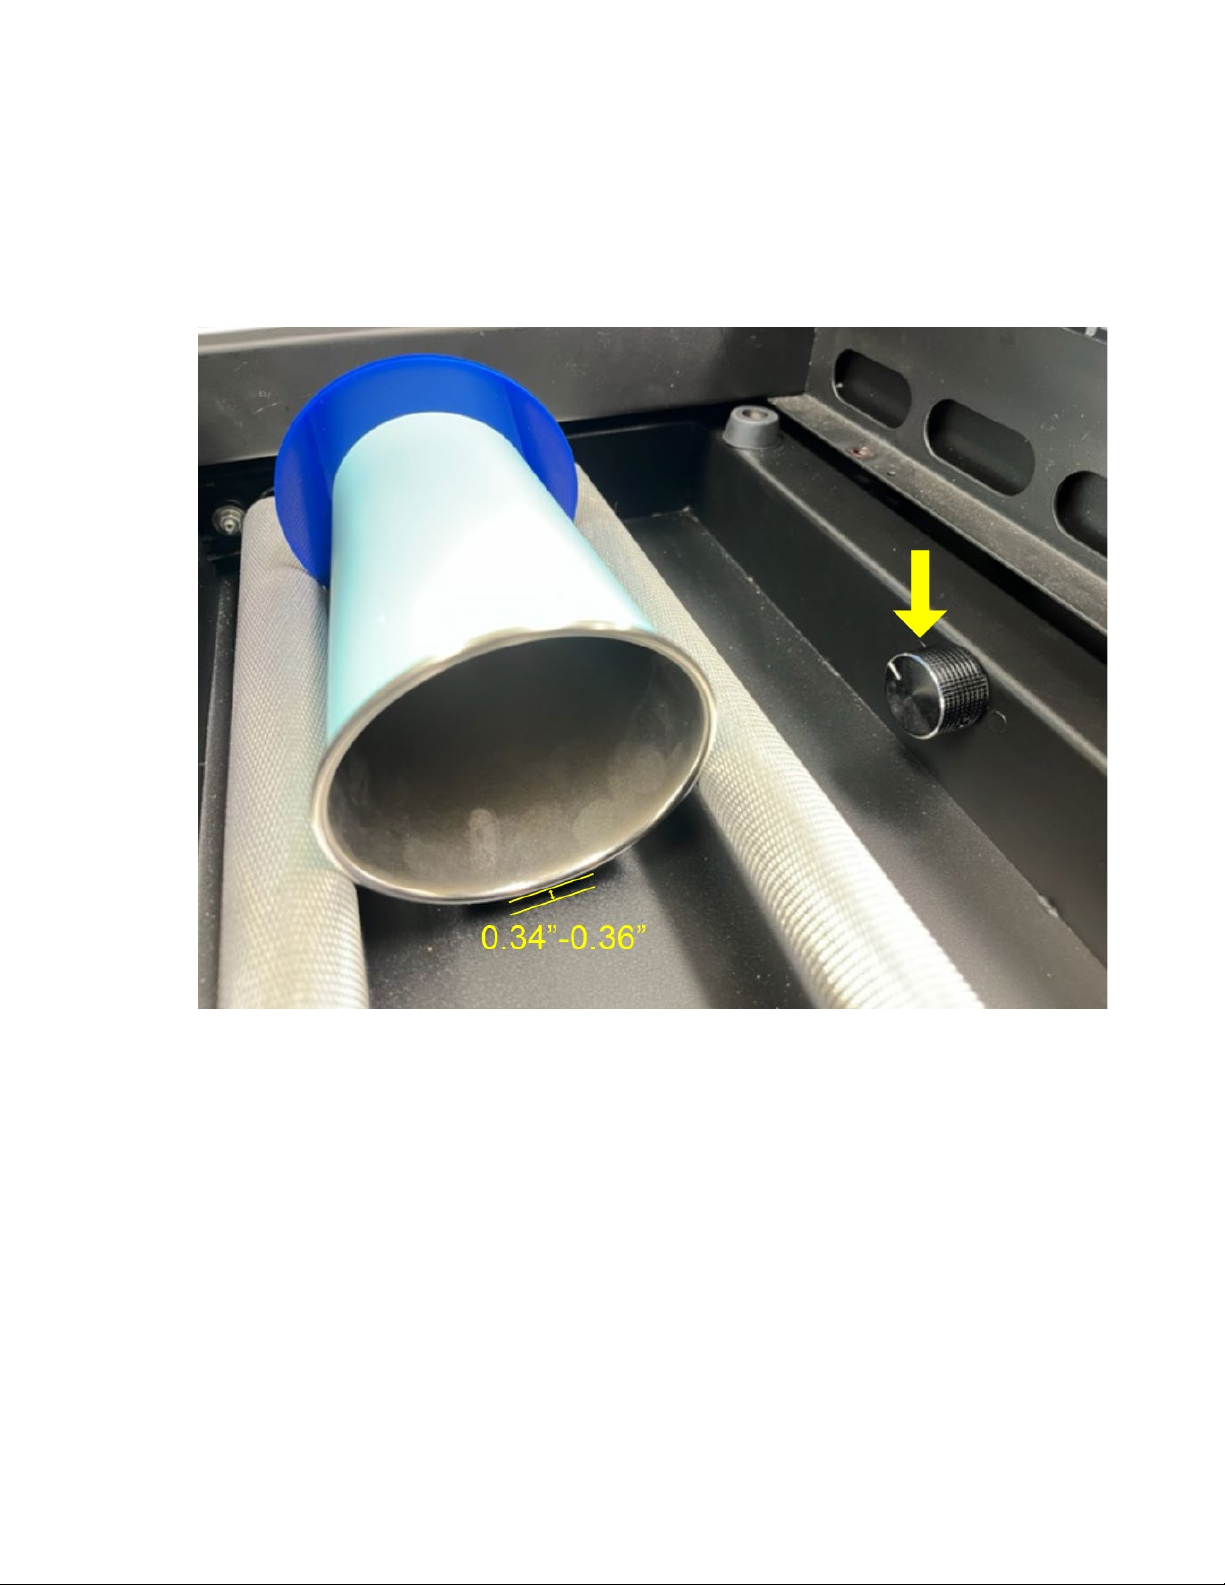
•Adjust the laser focus to the surface of the pint glass.
oWith the pint glass on its side, focus the laser just off of the highest point of the pint glass side
(usually approx. ¼” to the left or right of the highest point of the side of the pint glass).
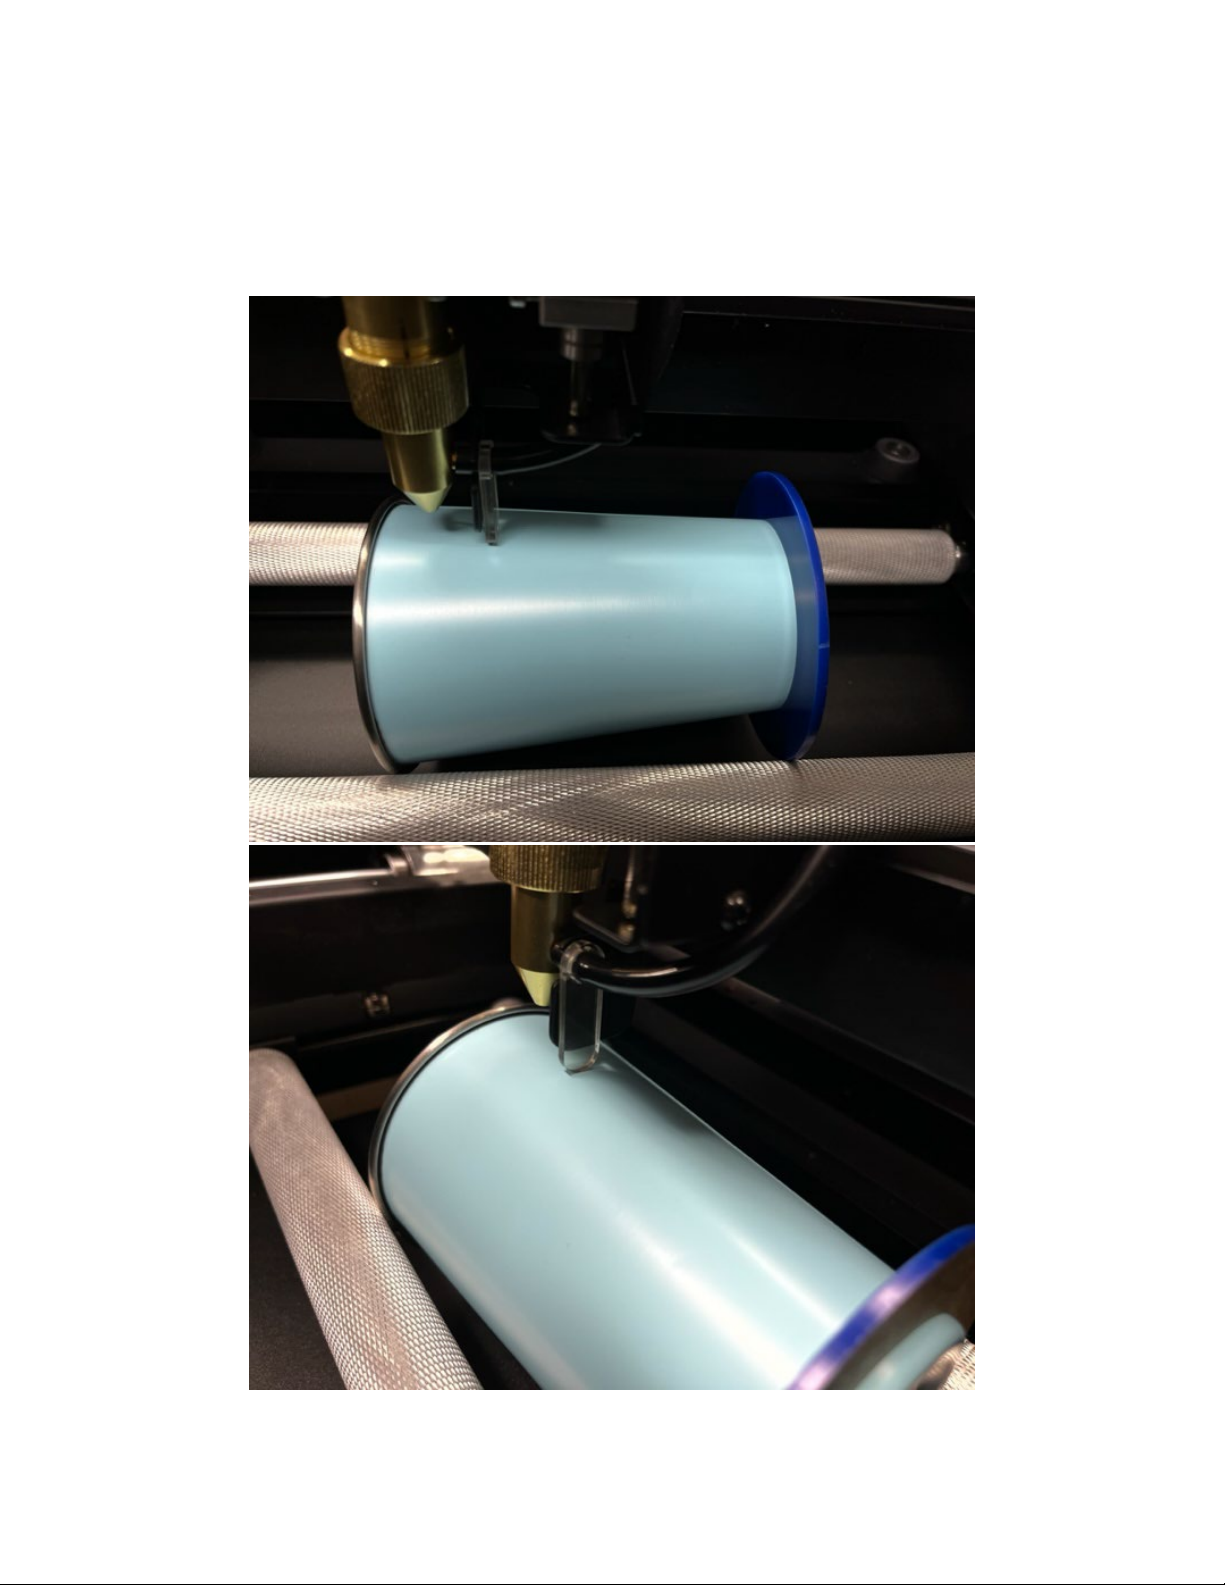
•Once the artwork is positioned, engrave using the suggested starting settings.
oFlux Beamo: Use suggested starting settings listed in the Flux Beamo chart above.
oSettings may need adjusted depending on the laser tube wattage.
oLaser focus may need to be slightly offset from the highest point of the curvature of the
drinkware in order to accommodate more engraving width on the pint glass when the pint glass
is engraved stationary (not using a rotary attachment).
•When finished, remove the pint glass from the laser bed.
•If cleanup is needed, wipe the engraved areas with a clean cotton cloth lightly misted with isopropyl
alcohol or a kitchen degreaser cleaner.
Tips and Tricks
•To help with artwork placement, utilize the product template for this item, found on the
item's product page on jpplus.com/..
Troubleshooting
•The engraved area is charring/melting.
oLaser power setting and/or resolution may need to be decreased.
oLaser speed setting may need to be increased.
•The engraved area is very light/the color coating is not engraving away completely.
oLaser power setting and/or resolution may need to be increased.
oLaser speed setting may need to be decreased.
oThe laser focus may need to be adjusted.
oThe laser focus may need to be set to just off of the highest point of the side curvature of the pint
glass to accommodate more engraving area on the side of the glass.
oThe laser beam alignment may need to be adjusted.
oThe laser tube may be degrading and need to be replaced.

Sept-22
Templates and Images
•Visit jpplus.com to find the product page for this item. The product template may be found under the
Tech Docs and Downloads area of the page.
To order more of this product, see similar products and much more, please visit jpplus.com.
For additional product support and troubleshooting, please contact JPPlus Advanced Support Team:
•Phone: 419-500-4877
•Email: ast@jpplus.com
•Schedule an appointment: https://jpplusadvancedsupport.setmore.com/
This manual suits for next models
7
Table of contents