JOJO WINGS SONIC User manual

JOJO WINGS – SONIC
1
A Letter from the President
Dear Customer,
We’d like to thank you for your purchase of your new JOJOWING´S SONIC canopy. We’re
confident you’ll be pleased with it in every way.
We urge you and your rigger to carefully inspect your new canopy to completely familiarize
yourself with its features and the quality workmanship. Should you find anything that does not
seem right to you or your rigger, please contact us immediately.
Again, thank you for choosing JOJOWINGS canopy. With proper care it should last many
years and hundreds of jumps.
Yours sincerely, with a team of staff and test parachutists,
František Salava
director

JOJO WINGS – SONIC
2
Table of content
1. A letter from the director
2. Table of content .................................................................................................................... 2
3. Basic information, warning ............................................................................................... 3
4. ABOUT THIS MANUAL .................................................................................................... 4
5. READ BEFORE ASSEMBLY AND USE .......................................................................... 4
6. TECHNICAL DESCRIPTION – SONIC CANOPY ....................................................... 5
SPECIFICATION ......................................................................................................................... 5
TECHNICAL-TACTICAL PARAMETERS ....................................................................................... 5
OPERATIONAL CONDITIONS ..................................................................................................... 5
RELIABILITY ASSURING PARAMETERS ...................................................................................... 6
TOTAL LIFE .............................................................................................................................. 6
7. PICKING THE RIGHT CANOPY ................................................................................. 8
8. A NOTE ABOUT SLOPE SOARING ............................................................................... 8
9. ASSEMBLY .......................................................................................................................... 9
10. PERIODIC INSPECTION PROCEDURE ..................................................................... 9
11. PRE-PACKING INSTRUCTIONS ................................................................................ 11
INTRODUCTION ....................................................................................................................... 11
BEFORE YOU BEGIN ................................................................................................................ 11
A WORD ABOUT HELP ............................................................................................................. 11
RED THE MANUAL FIRST ......................................................................................................... 11
PACKING CANOPY MADE OF ZERO POROZITY FABRIC ............................................................ 12
NOTE ...................................................................................................................................... 12
INSPECTION ............................................................................................................................ 12
12. PACKING PROCEDURE ............................................................................................... 14
BREAK SETTING PROCEDURE .................................................................................................. 14
CHRÁNIČE KARABINEK .......................................................................................................... 15
SLIDER PREPARATION ............................................................................................................. 15
FOLDING THE CANOPY ....................................................................................................... 16-26
13. CLEANING YOUR CANOPY ....................................................................................... 27
STANDARD MATERIALS .......................................................................................................... 27
ZERO POROSITY ..................................................................................................................... 27
15. STORAGE ........................................................................................................................ 27

JOJO WINGS – SONIC
3
CANOPY SONIC
OWNER´S MANUAL
JOJO WINGS
Chvalínská 2109
413 01 Roudnice n.L.
Česká republika
Read this manual completely before assembling, packing or using your
Jojowings canopy.
JOJOWINGS welcomes suggestions of ways to improve this publication. If you feel parts are
incorrect or hard to understand, please let us know in writing.
This manual is not a promotional material. It comes only along with the SONIC canopy.
The manual or any part of it cannot be used, sold or distributed with any other product than the
JOJOWINGS SONIC canopy for which it is approved.

JOJO WINGS – SONIC
4
WARNING!
Each time you use this parachute you risk serious bodily injury or death.
You can substantially reduce this risk by:
1) assuring that every component of the parachute system has been assembled and packed in
strict compliance with the manufacturer’s instructions
2) by obtaining proper instruction in the use of this canopy and the rest of your equipment
3) and by operating each component of the system in strict compliance with the owner’s
manual and safe parachuting practices.
However, parachute systems sometimes fail to operate properly - even when properly
assembled, packed and operated - so you risk serious injury or death each time you use the
system.
About This Manual
It is beyond the scope of this manual to teach you how to deploy, fly, land or maintain
parachute.
The Czech Aeroclub publishes recommended procedures on learning to jump and using
skydiving equipment. We urge you to learn and follow these procedures. We also recommend
you obtain instruction from a competent rated instructor before using this parachute for the first
time.
Other countries have similar organizations for instruction. If you are not in the Czech republic
get instruction from a competent instructor that is rated by your country’s organization.
Jumping this parachute without first receiving thorough and personal instruction increases the
serious injury or death.
Sport parachuting technology and procedures continue to advance rapidly. Although
reasonable care has been made in the preparation of this manual, Jojowings cautions that it may
contain information that may be incorrect or behind the current state-of-the-art parachute use.
For these reasons, we urge you to work closely with qualified experts - riggers and instructors - to
help you inspect, assemble, pack, use and maintain this parachute.
We also welcome your comments, good or bad, about our products.

JOJO WINGS – SONIC
5
Read Before Assembly or Use
Since parachutes are manufactured and inspected by people, there is always a possibly this
parachute contains defects as a result of human error. Therefore, the entire parachute system -
main and reserve canopies, harness, container, and other components - must be thoroughly
inspected before their first use and before each subsequent use.
Parachutes get weaker through time for a number of reasons. They receive wear during
packing, deployment and landing. Exposure to many agents, including sunlight, heat and
household chemicals, significantly weakens parachutes. The damage may or may not be obvious.
To help minimize the risk of parachute failure and possible serious injury or death, the entire
parachute system should be thoroughly inspected at least every 120 days or 50 jumps, whichever
comes first. It should be immediately inspected if at any time it is exposed to a degrading
element, unusually hard opening, or any time damage may be suspected.
Remember that some chemicals will continue to degrade the parachute long after initial
exposure. Regular and thorough inspections are necessary to insure the structural integrity,
reliability, and flight characteristics of the system are maintained.
Always know the entire life history of every part of your parachute system. That way you’ll
know no part has been exposed to an element that may seriously weaken or damage it.

JOJO WINGS – SONIC
6
Technical description of SONIC CANOPY
1. Specification
The aim of this Technical description is to provide users with only basic parameters, parts and
guidelines for the use of the SONIC canopy.
The SONIC parachute is designed for sports jump training.
The Sonic canopies are normal clasified canopies. The Sonic 220 canopy can be used as a
student canopy.
2. Technical and tactical parameters
Basic parameters
size SONIC
108 120 135 150 170 190 220 S
surface 108 ft2 120 ft2 135 ft2 150 ft2 170 ft2 170 ft2 220 ft2
Number of chambers
18/9 18/9 18/9 18/9 18/9 18/9 18/9
Exit weight
- kg
STUDENT ---- ---- ---- ---- ---- ---- 60 -105
ADVANCED
50 - 65 50 - 77 50 - 87 55 - 96 60 - 107 60 - 118 60 -120
EXPERT 50 – 95 50 – 95 50 - 105 55 - 120 60 - 125 60 - 130 60 - 130
The main canopy functional parameters
The parachute secure proper functioning at:
• flight speed from 0 to 240 KM per hour in altitude between 900 and 4000 meters
• free fall jumps with minumum lasting at least 3 seconds
• jumps with manual release
Operational conditions
• Parachute can be packed ready for jumps for 120 days in maximum
• Its proper function is secure at temperature between from 30 to 80 °C at the relative humudity
corresponding with these temperatures.

JOJO WINGS – SONIC
7
Reliability assuring parameters
Warranty period
a) Lasts 24 months on conditions that repairs and replacements of used parts are carried out,
storage conditions and maintained and regular inspections connected with the airing of
the system are performed.
b) The warranty period begins with the shipment date of the system to the maximum of 24
months from the manufacture date.
c) During warranty period the manufacturer will not accept claims in the cases as follows:
• Damage of parachute system parts caused by thair catching on gear ( by jump,
manipulation on the ground, packing)
• Violation of conditions of packing, storage an maintenance of the parachute system
• Missing parachute logbook or its improper records
• Failure to follow the instructions of this techincal description
• Any unskilled handling with the system
Total Life
The total life of the parachute is not determined, however technical condition of each
system or its part is important. Therefore it is required to keep the following conditions:
a) Replace damaged parts in time and without any delay. Each and every repair must be
recorded in the parachute logbook.
b) Repair the system and its parts in time and without any delay, always according to this
technical manual. Each and every repair must be recorded in the parachute logbook.
c) After the elapse of 5 years of use carry out overall technical inspections (validity is for
2 years in maximum, result is to be recorded in the parachute logbook) till the end of its
total service life (technical life).
The evaluation of the technical condition of the system (technical inspection) is
performed directly by the manufacturer or by an authorized senior parachute technician.

JOJO WINGS – SONIC
8
Picking The Right Canopy
It is important for your safety and enjoyment that you match your canopy with your ability and
weight. Jojowings canopies are built in several models that span a wide range of canopy surface
area. Any canopy’s descent rate and forward speed increases as the weight it is carrying - the so-
called suspended weight - increases. The canopy also becomes more responsive as forward speed
increases. It also reacts more radically when it is stalled or tuned.
Because of these aerodynamic facts, it is unsafe to put too much weight under any particular
canopy. Safe and comfortable landings will be difficult to obtain, even for experienced jumpers
under ideal conditions. Less experienced jumpers will have even a harder time and be at greater
risk.
Determining the wing loading of the parachute you intent to jump or buy is a good guide to
matching your weight to a particular canopy.
Wing loading is easily calculated by dividing the total suspended weight in pounds by the surface
area of the canopy in square feet. Total suspended weight is the weight of the jumper plus all his
clothing and gear- including the main parachute itself.
The surface area of Jojowings canopies is printed on the data panel, on the center cell rib, or
on the center cell top surface near the tail. (Be sure to actually check the data panel - canopies of
different sizes may look the same.) A typical ready-to-jump sport piggyback (rig and both
canopies) weighs 20 to 30 lb. Add this, plus the weight of your jumpsuit, clothing and accessories
to your bodyweight to get the total suspended weight. For example, a jumper who weighs 165 lb.
with his jumpsuit on and who jumps a packed rig that weighs 25 lb. Would have a suspended
weight of 190 lb.
Here’s an example of how to calculate wing loading of a 210 sq. ft. canopy and the jumper
used in the example above: 190 lb./210 sq.ft ‘ 0.9 lb./sq.ft.
Calculate the wing loading now for the canopy you intend to jump.
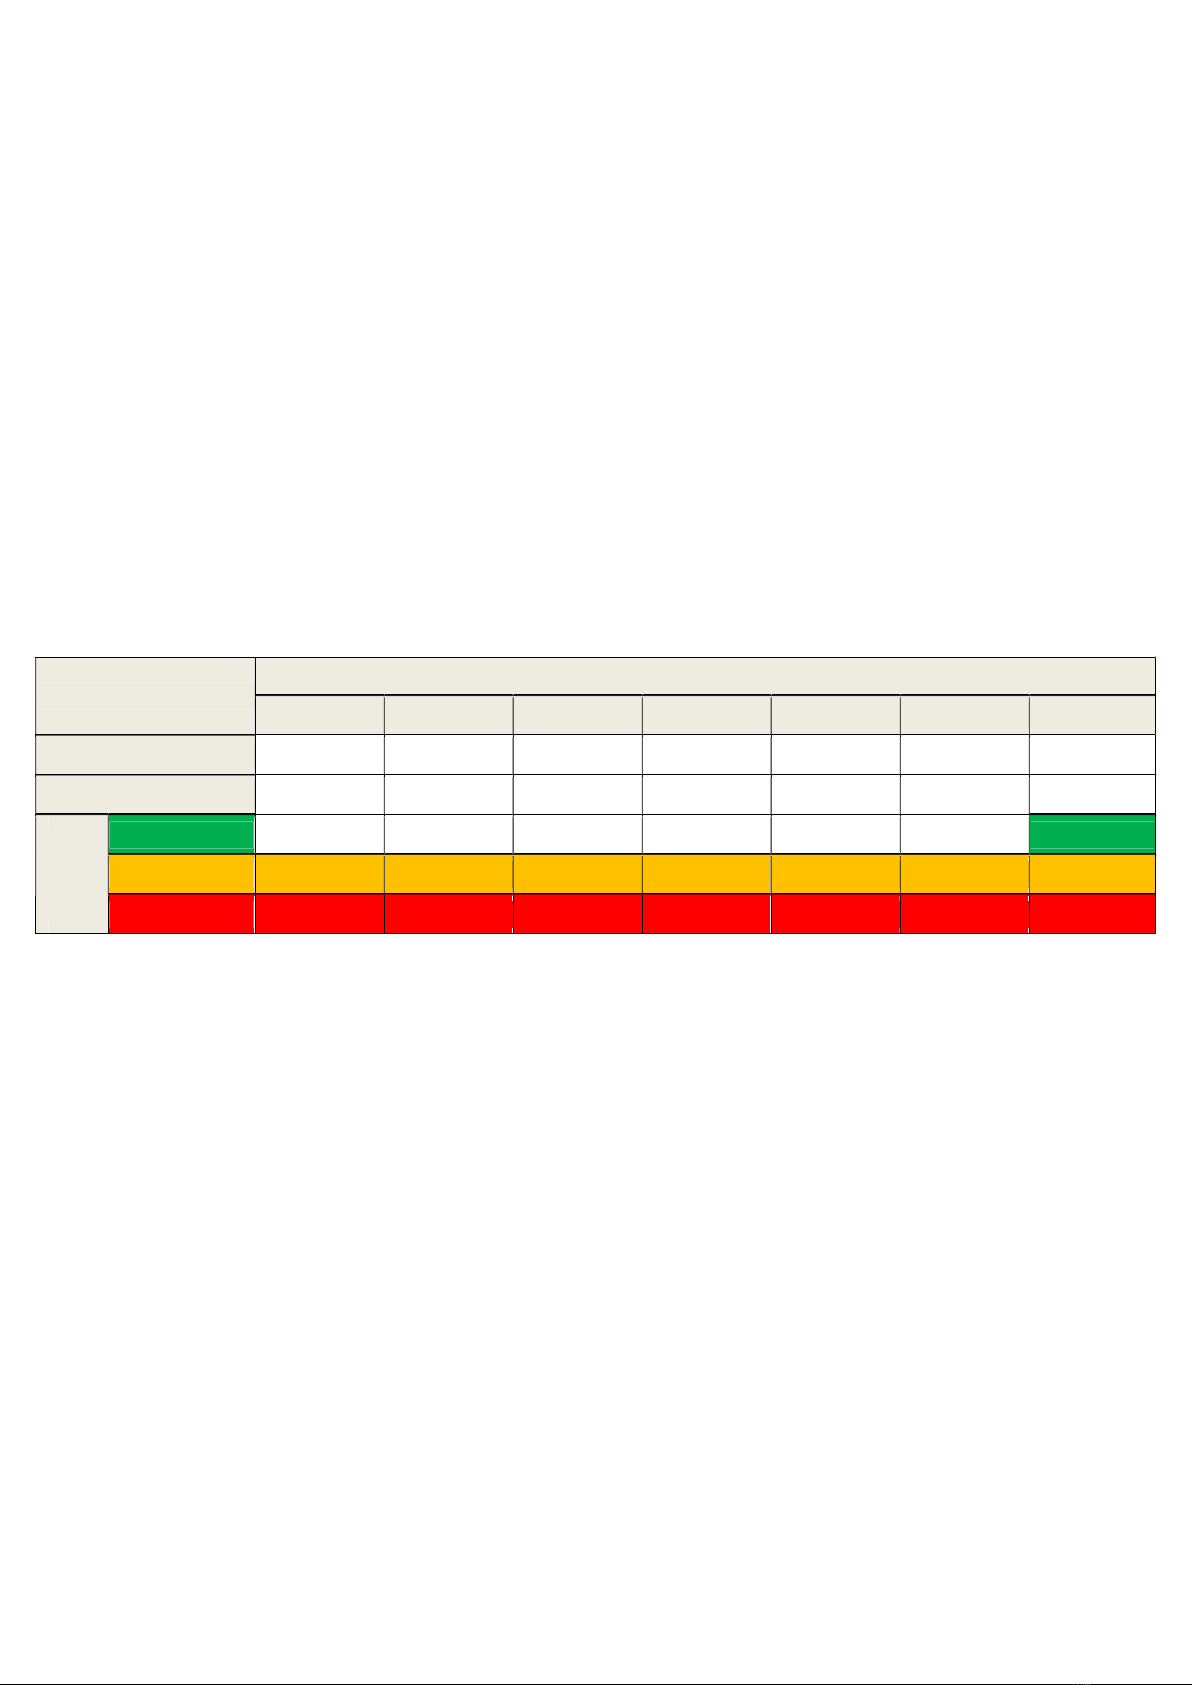
If this figure is below 0.7 and 1.0 it will turn fast and go fast. It will require skill to land well in
many weather conditions or at high altitudes. Be sure your skill level is up to the demands of this
situation. If the wing loading is greater than 1.0 lb./sq.ft. you are exposing your self to a
dangerous situation. Turn rates, forward speed and rate of descent will all be very high. Control
range may be short with stalls happening very abruptly with little warning. Normal landing
techniques may not work. Extra speed on approach to landing may be required to get enough
flare to stop your rate of descent. Therefore, a front riser approach to hook turn may be required,
either of which are very dangerous.
Jojowings does not recommend that anyone jump a canopy that will result in the wing loading
exceeding 1.0 lb./sq.ft.
It also is useful to compare the wing loading of a canopy you intent to jump with the wing
loading values of parachutes you’ve been jumping. If the different is great, you should expect the
new canopy to perform very differently than the ones you’ve jumped before.

JOJO WINGS – SONIC
9
A Note About Slope Soaring
Parachutes were frequently used for slope soaring or paragliding in the past. While this is an
acceptable use, it can be very dangerous. The following guidelines will reduce the danger:
1) Obtain competent instructor before atempting any slope soaring. Many countries have
organization that certify instructors.
2) Know the site. Never be the first one to launch at a site. Talk to several people who have
used the site before under similar weather conditions. Make sure the site is free of
turbulence. Turbulence may collapse your canopy and you may fall all the way to the
ground, causing severe injury or death.
3) Know the limitations of your canopy. Glide ratios, minimum sink rate, launch speed, flight
speed, tolerance to turbulence and recovery characteristics are just some of the things
you need to know. These all vary according to wing loading, jumper weight, and canopy
type. You must be very familiar with this canopy before attempting any paragliding.
Canopies designed specifically for paragliding may perform much better than this
canopy. Therefore, do not judge the suitability of a site based on the performance of a
paraglider.
4) Make sure that you can make the landing area before you launch. Check the flight path or
obstacles. Don’t launch if there are any dangerous obstacles along your flight path.
5) Inspect your parachute frequently and thoroughly. In skydiving the jumper structurally tests
his parachute every time he deploys it. If there is any structural deficiency the opening
shock will normally cause failure at an altitude where he can safely deploy his reserve. A
slope soaring pilot is not so fortunate. Turbulence can collapse a canopy and the
subsequent opening shock can be hard enough to cause a failure. This could happen at an
altitude that is too low for the reserve to work.
6) We recommend you use a reserve designed specifically for paragliding. Because
paragliding reserves are frequently required to work at very low altitudes, a skydiving
reserve is not adequate.

JOJO WINGS – SONIC
10
Assembly
Your canopy should be assembled by a properly certified rigger. Before you begin, be sure the
risers, toggles, bridle, deployment bag, pilot chute, harness, container and
other items are compatible with your SONIC canopy and each other.
Some toggles, for example will not work properly on certain type of risers.
Assemble your system in accordance with the owner´s manual for your rig.
The instructions below are for attaching toggles that have a grommet in the center to canopies
with Vectran lines. If another type of toggle is used consult the container manufacturer for
proper installation.
Two common problems that may happen if the toggles are installed improperly are
a) the toggle knot getting caught on the guide ring and,
b) the knot slipping
Be sure that your installation is safe. The container manufacturers instructions may not be
compatible with this canopy.
Periodic Inspection Procedure
(Performed at assembly and after every 50 jumps or 120 days, whichever comes first.)
As mentioned above, your Sonic canopy must be inspected thoroughly before it is jumped the
first time and periodically thereafter. This procedure is more thorough than the inspection which
should be completed each time the parachute is packed.
You or your rigger should inspect your parachute system in a clean, well-lighted area that will
allow you to spread the main canopy out.

JOJO WINGS – SONIC
11
Here is one recommended procedure for inspecting your SONIC main canopy. Consult the
owners manual for your rig and other components for instructions on inspecting them.
It’s best to inspect your canopy in a careful, systematic way. We recommend starting at the top
of the canopy and working down to the risers. You should leave the canopy attached to the rig.
1. Bridle attachment. Check to be sure the bridle is correctly attached to the canopy.
Check the integrity of the canopy fabric and reinforcement tapes in the area where
the bridle ring is attached.
2. Top surface. Spread the canopy out on its bottom surface and inspect the top surface.
Look for rips, stains , or failed seams. Check the fabric strength by grabbing a
handful of fabric in each hand and trying to tear the canopy with a moderate tug.
3. Bottom surface. Turn the canopy over and spread it out to inspect the bottom
surface. Check for rips, stains, and failed seams. Check the fabric strength (see #2
above). Check the line attachment points.
4. Inspect each rib from the leading edge to the tail by looking inside each cell. Pay
extra attention to line and bridle attachment points.
5. Lay the canopy out neatly on one side, stacking each rib on top of the others. Check
that all lines in each line group are the same length and that the trim differential
between each line group is correct for this canopy. Check the condition of the
stabilizers and slider stops.
6. Suspension lines. Check the full length of each line for amage and wear. Look for
fraying at all cascades (the Yshaped junction of two lines) and where each line
attaches to the connector link or soft-links.
7. Slider. Be sure the fabric isn´t torn, that the grommets are undamaged and have no
sharp edges, and that they are securely attached to the slider.
8. Risers. Be sure the barrels of the connector links are tightened and the slider stops are
properly positioned (slinks). Or if it is done using soft-links, whether this assembly is
done properly.
The toggles must be installed to the main steering lines. The rigger must check the correct
assempbly of the togglers and correct function of the whole system including guide rings
on the risers.

JOJO WINGS – SONIC
12
9. The rest of the assembly. Follow the instructions in the rig manufacturer´s owner´s
manual to inspect the rest of your parachute system.
10.Write the check into the logbook.
Pre-Packing Instructions
Introduction
Today’s ram-air canopies are very reliable parachutes. If a ram-air has straight lines - that is, if
it is assembled correctly and untangled after the last time it was jumped – it will usually inflate
even if folded in ways that are quite unusual.
In other words, it is difficult to pack a ram-air main canopy so it won’t open.
We’re not saying other packing methods won’t work with your Sonic canopy. But the method
shown here will probably help your canopy open more consistently.
Before You Begin
Where you pack your SONIC canopy is important.
Since sunlight irreversibly damages nylon parachutes, an indoor or shady area is best. Packing
in the sunlight is unavoidable at most places, so try to reduce your canopy’s exposure to direct
sunlight as much as possible.
Packing on concrete and asphalt should also be avoided because they will wear the fabric,
lines and fittings that are used to build your parachute system. A dry lawn or a packing table are
the best.
Packing behind a building or van will make packing easier because it blocks the wind.
Czech Aeroclub regulations require that a main parachute be packed by either a certified rigger or
the person who will jump it. Other countries may have similar regulations.

JOJO WINGS – SONIC
13
A Word About Help
When you’re learning to pack, never hesitate to ask a rigger or your instructor to help. They
will show you tips that will make the process faster and easier. Be sure they refer to this manual,
however, as they might not know our packing method.
Read The Manual First
Read these packing instructions completely before you begin. Doing so will give you a better
idea of what you’re doing, and it will help you go a little faster.
Packing Canopies Made of Zero Porozity Fabric
Canopies made from ZP can be packed just like any other similar canopy.
There are many different pack jobs currently being used. We recommend the pro-pack detailed in
the owner´s manual.
This pack method consistently results in soft, on-heading openings, with minimum risk of
canopy damage. Others may not work as well. If you try a different pack method, you do so at
your own risk. If you use a slide or book pack, start at the tail and work forward to squeeze the air
out.
Packing a canopy made of ZP is a new skill that must be learned. At first, it will be more
difficult to pack than canopies made out of conventional materials. However, with practice it will
become just as easy. You can make the pack job considerably easier by getting a bag that is
lightly larger than your main container. It is easier to squeeze a small amount of the air out after
the canopy is in the bag. (Consult the container manufacturer about this.)
The key to making the job easy is to pack fast and accurately. Each fold or roll must be done
quickly and correctly the first time. This will only come with practice. Packing does not hurt the
canopy, so please practice until you are good at getting a neatly folded canopy into the bag before
you start jumping the canopy.
The fabric has a memory and always tries to open back up. Once you start, you must continue
until the canopy is in the bag and the first locking stows are secure. You can´t waste time at any
point in the packing procedure because this gives the canopy time to move around, form a big
mess, and you will have to start over again.
After the folding and organizing portion that is done while standing is complete, you should
roll the tail as tightly and as far as possible. Be careful not to let the tail unroll while squeezing
the air out. If you kneel on the canopy facing the pilot chute attachment just above the warning
label you will be in a better position to control this. Slowly lay down on the canopy while still
containing it with your hands. The only place for the air to leak out is the stitch holes, so go
slowly. If you go too fast, the air will blow the pack job apart.

JOJO WINGS – SONIC
14
Note
Sonics are designed for a slow-to-medium speed opening when packed as described in the
manual - with each side of the nose rolled four complete turns towards the center. Do not tuck the
nose into the center cells. The new airfoil design causes the center cells to form a pocket that can
hold the rolls there during opening. Additionally, tucking the end cells into the center cells will
result in unreliable opening times, with some very long snivels. Repeat: Do not do this.
Inspection - (Performed before each packing)
You must inspect your parachute system each time you pack it. The inspection takes only a
few moments and will help prevent the malfunctions and other problems. The inspection is best
done when the rig and canopy are stretched out on the ground prior to packing. (The procedure
outlined below is different than the thorough inspection that must be performed periodically and
when the parachute is first assembled or if damage is suspected. The thorough procedure was
presented earlier.)
If you discover any worn or improperly rigged components, bring them to the attention of a
certificated rigger before jumping the system again.
During your inspection of the entire system, pay special attention to the items listed below.
Any damaged or worn parts must be repaired or replaced before jumping the system again.
Start with the harness and container and work up to the canopy and pilot chute. Although the
owner´s manual that came with the rig contains specific inspection procedures, be sure to check
the items listed below.
Reserve. It must be sealed and in date. The ripcord pin(s) must be seated properly and not
bent. The cable must move freely in its housing. The ripcord handle must be properly stowed in
its pocket. If the rig is equipped with an automatic ripcord release, it must be installed and
calibrated correctly.
Harness. Inspect the entire harness for broken stitches and excessive wear.
Main Container. The locking loop (or cones) must not be worn, as a problem with the
locking device can result in a premature opening, or a locked container.

JOJO WINGS – SONIC
15
Risers. Check the riser releases carefully. They must be installed and assembled properly.
Be sure the release cables are inserted correctly in the white loops.
Check the steering lines and toggles. Look for damage, loose knots and slipping toggles. (Serious
injuries could result if an incorrectly attached toggle detaches from the steering line during the
landing flare – don´t let it happen to you.)
Check the connector links or soft links. The threaded barrels must be securely tightened and not
cracked.
Slider. Be sure the slider isn´t twisted, and that its grommets are free of nicks or burrs that can
damage the suspension and steering lines.
Suspension and Steering Lines. Inspect these lines for wear. Be sure they are continuous (not
tangled). Each must go straight from its link to the canopy without wrapping around other lines.
The risers must not be twisted, either.
A tip: Pick up your canopy neatly after each landing, and lay it down neatly when you reach the
packing area. Doing this will make your packing go faster because the lines will most likely stay
continuous (or not passed through each other, as can happen if you walk through some lines after
landing).
If you find any incorrectly routed or twisted lines, it is usually better to leave the risers attached
to the harness while you correct the problem (unless the risers were attached incorrectly to begin
with). Disconnecting the risers usually makes it more difficult to straighten things.
Canopy. Be sure the canopy is not on backwards. Inspect it for tears, especially where the
lines and pilot chute bridle attaches. (You should periodically look inside the center cell to
inspect this junction.)
Deployment Bag, Bridle and Pilot Chute. The owner´smanual for these items is the best
source of inspection information. Tears or failing seams in the main pilot chute are especially
hazardous. So is a worn bridle or one that is too short.
After packing your canopy a few times, you´ll be able to combine the above inspection
procedures with the packing procedures – you´ll inspect it as you pack it.

JOJO WINGS – SONIC
16
Packing Procedures
Stretch your parachute system out on the ground with the rig laying with the containers facing up.
(If someone were wearing your rig at this point, he would be lying face down with
his head towards your canopy.) Pull the lines straight before setting the rig down.
Brake Setting Procedures
The lenght of the break lines is set by the manufacturer.
Pull the break line through the slider, then the guide loop and finally the loop.
Loop the loop through the loop on the break line as shown.
After the parachute assembly has been checked, store the brakes as instructed by the harness
manufacturer.
Set the break lines as shown.
Slider Bumpers
Check slider bumper position.It must protect slider grommets from link damage. When using the
soft-link system, the spider bumpers are not installed.

JOJO WINGS – SONIC
17
Slider preparation
The slider is designed to slow the speed of the canopy opening and thereby reduce the dynamic
impact.
The slider is made of polyamide fabric. It has the shape of a rectangle in the corners of which the
rings are inserted - the grommets. Through the grommets both the suspension and break lines
pass. The slider is provided with guides of recessed (collapsing) lines.
Before packing, the recessed lines have to be fully extended, the end pieces must be pushed into
the mouth of the recessed lines. Failure to do so may result in extremely hard opening, damage or
failure of the parachute, or serious injury to the parachutist.

JOJO WINGS – SONIC
18
Folding the Canopy- „Pro-pack“
1) Crouch next to the risers and face your
canopy. Slip the fingers of your left hand between
each left-hand riser and between the left-hand
steering line and the risers. Do the same with your
right hand. The idea is to have each line group
and each steering line occupying a slot between
two fingers. Stand between the right and left-hand
riser groups and grasp the lines as shown.
Be sure there are no twists in the risers. Start moving up
the lines, allowing them to slide between your
fingers. Push the slider ahead until you reach the
bottom of the canopy.
2) At this point, it´s possible to determine if your canopy and lines aren´t straight. If there are
twists in the lines as shown, this means your rig did a loop through your risers at some
point. To fix this, drop the lines, stretch the canopy and lines out again, and straighten the
entanglement out. Get help from a rigger if you have any questions. Do a linecheck again
to make sure you have done it correctly.
Obr.1
Obr.2

JOJO WINGS – SONIC
19
3) If the lines look something like this, then a
steering line or riser group passed around
everything
else.
A steering line that passes around everything
else will result in a malfunction that will almost
surely require a breakaway.
If you don´t know how to fix this, get qualified
assistance.
4) When you reach your canopy, pull
both hands apart as far as the slider will
allow. Shake the canopy a couple of
times to settle everything.
If the canopy is clear there will be four
distinct line groups going all the way to
the stabilizers with no lines crossing
each other and no twisted
lines.
Obr.3
Obr.4

JOJO WINGS – SONIC
20
5) The nose openings should be facing the rig
and the tail should be farthest
from the rig. If the reverse is true, double
check to be sure the rig is container-side
up (the back pad is on the ground). If the rig is
positioned correctly and the
canopy is not oriented as described above, then
the canopy
was attached to the harness backwards!
6) Now step to one step outside the lines and
transfer the lines to one
hand so that the left and right sides of the
canopy hang at the same height. It
isn’t necessary to keep the line groups
separated by the fingers of your hand
because you’ve already determined the lines
and canopy are straight. Your
canopy should look like the above illustration.
All lines should be kept taut and the nose
should still be facing the rig.
The slider should be against the slider stops on
the stabilizers.
Obr.5
Obr.6
Table of contents
Popular Tent manuals by other brands

RioOutdoors
RioOutdoors 6S-QH manual

SunnCamp
SunnCamp Breton 300 Deluxe Assembly instructions

COMPANION
COMPANION Rhino Compact 320 Swag instruction manual

UTILIS
UTILIS TMS 18 Assembly instructions

Coleman
Coleman Instant shelter Setup instructions

Magellan Outdoors
Magellan Outdoors Mag Mission 8P instruction manual

PahaQue Wilderness
PahaQue Wilderness T@DA Setup instructions

Harbor Freight Tools
Harbor Freight Tools BIG TOP 92942 Set up and operating instructions

THE THEORY WORKS
THE THEORY WORKS Quadratic operating instructions

Sunjoy
Sunjoy D-GZ849PST-A Assembly instructions

Bohemian Travel Gear
Bohemian Travel Gear WMT-130976 Setup Instruction

Baytex
Baytex ALISPAN Assembly instructions