Jomurema JR128-R01-RTR User manual


INDEX
1
INDEX
1. About this Model .......................................................... 2
2. Content of your Box ..................................................... 3-4
3. Safety Precautions .................................................... 5-6
4. About Lithium Polymere (Lipo) Batteries ............... 7-8
5. Quick Start .................................................................. 9-11
6. Function & Adjustment................................................. 12-15
7. Setup Changes ........................................................... 16-19
8. Fix Scale-Bodies from other Brands ........................... 20-23
9. Assembling Manual .................................................... 24-31
10. Trouble Shooting ........................................................ 32-33
11. Take Notes ................................................................. 34
JR128-R01 - RTR

ABOUT THIS MODEL (1.) 2
JR128-R01 - RTR
1. About this Model
Thank you for purchasing this 1/28th scale JR128-R01 2WD indoor Racer
Ready Set.
JR128-R01 series models are ultra small high performance 2WD indoor racing
cars with a lot of very advanced opportunities for fine tuning and car setup, which
you might find very surprising in a car of this very small size.
9 built-in ball bearings, an adjustable ball differential with 64dp fine pitch and a
1S / 3.7V Lipo battery + charger make you really ready to race out of the box.
The cars are already equipped with a 12mm micro servo for steering, a small
2.4 GHz receiver and an ESC (Electronic Speed Controller) running with
1S / 3.7V Lipo batteries, providing 5.5V current for receiver and steering.
Various other commercially available steering servos, micro receivers and micro
car ESCs for brushed or brushless motors from other brands can be built in and
used in this car. (Attention: Do not use motors with less than 40 turns (40T)
togehter with this ESC, to avoid damage of the ESC!)
Ask your dealer for our brushless motor and ESC - system and for our 2S Lipo batteries,
if you need 8.4V power supply for your preferred electronics.
The chassis offers the following features:
Caster-angle at front suspension adjustable in three positions: 1.1°, 2.7°, 4.4°.
Camber-angle at front suspension left and right adjustable: from 0° to -2.5°.
Toe-in / Toe-out adjustable at: 0°, +1°, +2°, -1°, -2°.
Droop limits at front suspension free adjustable.
Adjustable springs at front suspension.
Ground clearance front and rear adjustable on 4 levels in steps of 0.7mm.
Longitudinal damper with spring and droop-spring fully adjustable.
Cross-dampers with springs for tweak adjustment.
Rear scale body holder adjustable in height with included washers. Second
rear scale body holder for wider scale bodies included.
Front scale body holder set adjustable to most scale bodies from other brands
for wide front and 98mm or 102mm wheelbase.

CONTENT OF YOUR BOX (2.)
3
JR128-R01 - RTR
2. Content of your Box:
The box of your new JR128-R01 indoor racer contains the following items:
Please check the contents of your box on completeness:
Fully assembled Ready to Run JR128-R01 RC Car:
High Resistance Plastic Chassis
Jomurema Design GT01 Body
Adjustable Front Suspension
Adjustable Rear Suspension
9x Ball Bearings
Ball Differential (V-Groove PN)
Brushed Standard Motor / 130 Class
FS-GT2 / 2.4GHz digital proportional Receiver
12mm Steering-Servo;
1S / 3.7V programmable brushed ESC
Lithium Polymer (Lipo) Battery:
1S / 3.7V / 840mAh / 25C Lipo Battery Manuals and Decal:
Manual for JR128-R01 indoor Racer
Manual for FS-GT2 / 2.4 GHz
digital proportional Radio
Control System
Color Decal for Car Body
Miscellaneous Parts and Tools (8 Bags):
Cross-Screwdriver; Hex-Wrench-1.5mm;
+3 different plastic Tools
Front Body-Holder-Adjustment-Set for
many other Car Bodies
Miscellaneous adjustment Parts
and Washers
Steering- Servo-, Rear Body-Holder
and Adjustment Parts
Other Pinions and replacement Gear
for Change of Car-Speed
Steel- and Replacement Parts and
Springs for Change of Setup
O-Rings for Replacement
Screws for Replacement
Charger for Lipo Battery:
1S / 3.7V / Lipo Charger
Approx. 1A charging Current

CONTENT OF YOUR BOX (2.) 4
JR128-R01 - RTR
FS-GT2 / 2.4 GHz digital proportional
Radio Transmitter:
Channels: 2channels; Model type: car / boat
RF power: less than 20dbm; Modulation: GFSK
Code type: digital; Sensitivity: 1024
Low voltage warning: yes (less than 9V)
DSC port: yes (3.5mm); Charger port: yes
Power: 12vdc (1.5AA*8); Weight: 328g
ANT length: 26mm;
Size: 159*99*315mm; Color: black
Certificate: CE, FCC;
Something missing or damaged out of your Box?
If you find some items missing or visibly damaged out of your new original box,
please contact your dealer. Please describe your problem as clear as possible
and add some photos of broken parts for easy and fast clarification.
If your new car does not function properly at your first trial, after having followed
all informations and assistances from the manuals, please contact your dealer
as well and try to describe the defect as precisely as possible.
In any case your dealer will try his best to help you with your problem as fast as
he can and will arrange replacement of broken, defective or missing parts.
Still some questions? Or missing of some informations?
For all kinds of further information regarding technics, adjustment, spare parts and
option parts, please check on our website: www.jomurema.com.
All manuals for all our products will be kept available for download on this website.
If you have some open questions which this manual, your dealer or your fellow
racers could not answer, please refer to us directly by using the contact form on
our website for further clarification.
8x AA-Batteries for TX not included!

SAFETY PRECAUTIONS (3.)
5
JR128-R01 - RTR
3. Safety Precautions:
We recommend first time builders to seek advice from people
with building experience in order to assemble the model correctly
and to reach highest possible driving performance.
For assembling of this kit choose a place out of reach of children.
Before starting operating this model, take enough safety
precautions. You are responsible for assembly and safe operation
of this model.
Even after completing the assembly of this model, keep always
its instruction manuals at hand for quick reference.
It is recommended to take out liability insurance.
This radio controlled model is not a toy!
This model is suitable for people of 14 years and older.
Please read carefully before assembling and operating your model.
WARNING! This symbol indicates where caution is very
important to avoid injury to yourself and others.
PROHIBITED! This symbol points out actions which you
should not do to avoid possible damage and accidents.
The power supply for the product you have purchased is a
rechargable Lipo (Lithium Polymere) battery. The power supply
of the Radio Transmitter (Tx) for this product can be rechargable
AA / Ni-MH batteries, or non rechargebale AA / Alkaline batteries
or others. All defect or old batteries which you use with this
product must be recycled or disposed of properly according to
laws, regulations and standards in your country.

SAFETY PRECAUTIONS (3.) 6
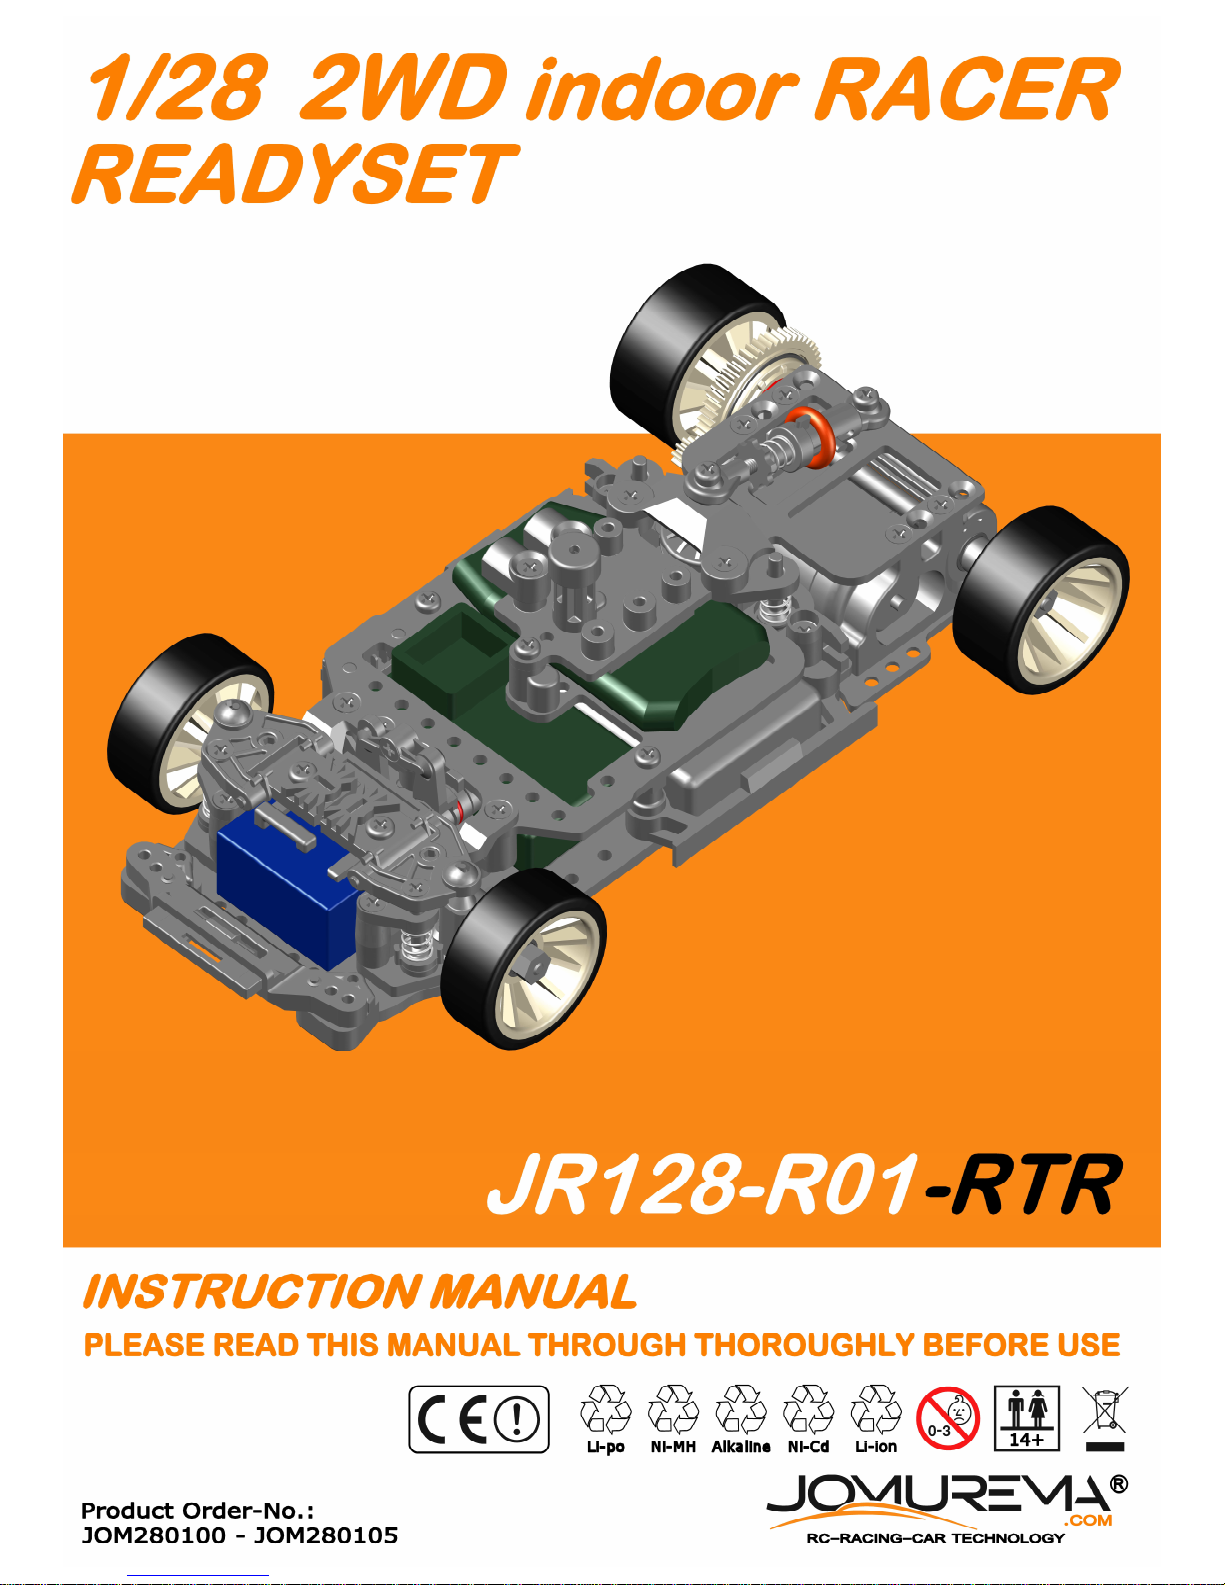
JR128-R01 - RTR
Because this product includes small,
edgy and sharp parts, store, assemble
and operate the product only in areas
out of reach of children.
NEVER operate the car without car
body properly attached. Body protects
suspension parts from damage in
case of impact.
Do NOT operate or store this model
in areas with high temperature or high
humidity nor under direct sunlight.
Cutters, wire cutter and screwdrivers
as well as sizzers and any other kind
of tools need careful handling in order
to avoid injury.
The protruding front end of the
antenna of your pistol transmitter may
be dangerous. Do NOT swing or aim it
towards faces.
Even when the power switch of your
JR128 racer is turned off there is still
a small current flowing. To avoid deep
discharging of your Lipo battery with
possible leakage, damage or fire always turn OFF
the power switch on the car and then unplug and
remove the Lipo battery from the car immediately
after running!
Always turn OFF the power switch of
your car before removing the body.
Do NOT touch moving gears.
This can cause injury.
Do NOT operate this model car on
public roads, in crowded places or
near children. Neither operate the car
when there are pets or any other
animals around.
This can cause accidents with injuries.
After and during operation the motor
and battery will be hot. Do NOT touch
them before they have had sufficient
time to cool down.
Do NOT operate your car in wet, dusty
or sandy conditions, or on soft / thick
carpets. Such surfaces or conditions
can damage its operating parts.
Do not use thinner, alcohol or water
to clean your cars body.
Best is to wipe it down with a soft,
clean cloth, or a dry, soft brush.
NEVER use thinner, alcohol or water
to clean your cars chassis. This will
cause damage to electronic and
operating parts. Simply use a soft and
dry brush to remove all the dirt and dust.
For reasons of product liability do NOT
use any other parts not made by
JOMUREMA in this model.
To avoid causing irreparable damage
do NOT attempt any modifications.
When starting running you car always
switch ON first the Transmitter (TX)
and afterwards switch ON the car!
When finishing your running session always
switch OFF first the car and afterwards switch
OFF the Transmitter (TX)!
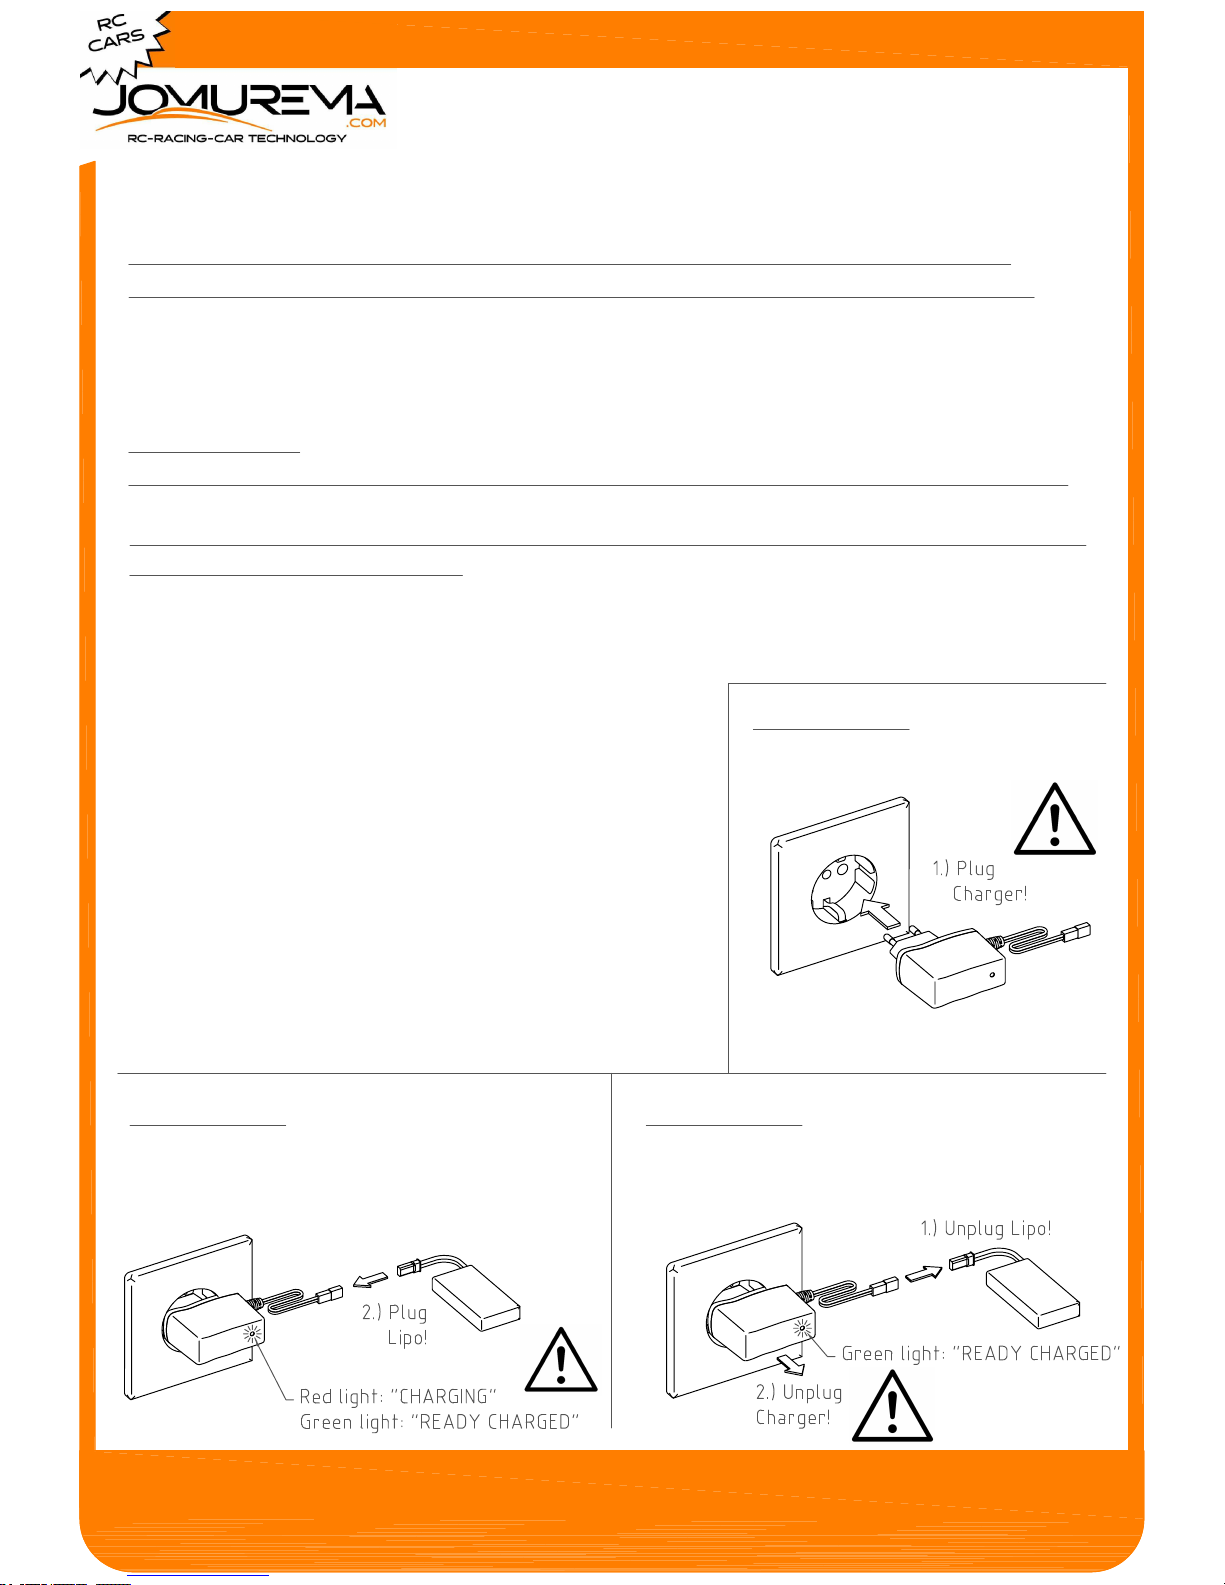
Always unplug and remove the Lipo battery
immediately from the car after running!
NEVER change polarity of the battery-
plugs. This may lead to damage of
electronics or damage, leakage or
fire of the battery.

ABOUT LIPO BATTERIES (4.)
7
JR128-R01 - RTR
4. About Lipo batteries:
4.1: General Instructions and Tips about LiPo Batteries:
Always use a charger made to charge LiPo packs
Double check that the settings for the lithium polymer charger are correct for the pack
being charged. This includes the cell count, as well as the current settings. In general,
most lithium polymer batteries should be charged to no more than 4.2 volts per cell or
depleted to less than 3.0 volts per cell.
Ensure that charging leads are connected correctly. Reverse charging can lead to
cell damage or fire or explosion.
Always charge LiPo batteries on surfaces that won't catch fire such as cement,
steel, ceramic or stone. Wooden tables and carpeted floors are not recommended
charging surfaces.
Do not charge batteries near flammable products or liquids.
Never charge a LiPo battery while inside your model or other electronic devices.
If it catches fire it can lead to total destruction of the item it is being charged in.
LiPo batteries should be charged within a temperature range of 0°C to 50°C.
Batteries charged outside this temperature range may experience leakage,
heat generation or cell damage.
Never leave a charging lithium polymer battery pack unattended.
Do not charge inside an automobile, especially while driving.
Do not store batteries inside an automobile.
If unsure of the charge rating, never charge a lithium polymer battery pack at a rate
over 1C (1 x the battery packs rated capacity).
Never charge a LiPo pack that has ballooned or swelled due to over / under charging
or from a crash.
Never charge a lithium polymer battery pack that has been punctured or damaged
in a crash.
Never, under any circumstances let the positive and negative battery leads
touch each other. It can lead to cell ballooning, cell damage or fire or an explosion.
Have a fire extinguisher near the charging area or a large bucket of dry sand.
Do not try to extinguish with water.
If you notice your LiPo battery pack is swelling, stop the charging process immediately,
put the battery in a safe container and observe it for 15 minutes.
Always charge your Lipo battery packs in a Lipo charging safe bag.

ABOUT LIPO BATTERIES (4.) 8
JR128-R01 - RTR
4.2: LiPo Battery Handling & Storage:
Keep LiPo battery packs WELL out of reach of children.
Do not put battery packs in pockets or bags where they can short circuit.
Do not store or transport batteries where they can come into contact with sharp
or metallic objects.
Do not store your LiPo pack in extreme temperatures below 0°C or above 50°C.
Always store your LiPo pack in a safe and non flammable container away from
flammable objects. A LiPo Sack or metal / ceramic storage container is best.
Always store your LiPo's partially charged. They will maintain their performance levels
over time and there's no need to cycle them unless stored for periods longer than
3-6 months. When storing batteries for such extended periods, store at a
half charged state.
Do not immerse the battery in water or allow the battery to get wet.
Do not dispose of in fire or heat.
When mailing or shipping LiPo batteries, always ship them at a 30% charged state
for safety reasons.
To dispose of a LiPo battery, strictly follow your municipal battery disposal guidelines.
Finally, always follow the safety instructions and charging guidelines for lithium polymer
battery packs. These are there for not only the longevity of the battery pack,
but also for your safety.

QUICK START (5.)
9
JR128-R01 - RTR
5. Quick Start:
STEP 5.1:
Charging of the 1S / 3.7V / 25C / 840 mAh Lipo Battery, included in this set:
ATTENTION: Read page 7 & 8 of this manual (about Lipo batteries) well before starting
your first charging procedure.
Before running your model for the first time, charge your 1S Lipo Battery with the included
charger from this box. For any further charging cycles follow the same charging instruction.
Plug the charger always first to the socket (STEP 1.1)
and afterwards plug the Lipo Battery to
the charger (STEP 1.2). Red light on the charger
shows you, that your Lipo battery is charging.
When the red light on your charger changes into green
your battery is fully charged and should be unplugged
immediately from the charger after the full green light
has appeared.
After having unplugged the Lipo battery from the
charger, unplug charger from the socket.
Carefully unpack all items from your box and check for completeness,
comparing the content with the listing from page 3 and 4 of this manual.
Please follow precisely the step by step description here below for starting running
and having fun with your new model car:
STEP 5.1.1: Plug Charger
always first to the socket:
STEP 5.1.2: After plugging Charger to
the socket, plug Lipo Battery to the Charger.
(RED LIGHT on charger: "CHARGING";
GREEN LIGHT: "READY CHARGED"):
STEP 5.1.3: After light on charger has
changed to green unplug the Lipo battery
immediately from the charger. Then unplugg
charger from the socket:

QUICK START (5.) 10
JR128-R01 - RTR
STEP 5.2:
Check the car for easy running wheels, rear shaft and ball differential:
STEP 5.2.1: Remove the body from
the car:
1.)
1.)
2.)
3.)
2.)
STEP 5.2.3: Check rear wheels for easy
opposite side rotation of differential:
If opposite side rotation of rear
wheels is going too hard, slightly
loosen the differential.
If differential slips while accelerating
the car, slightly tighten the differential.
STEP 5.2.2: Check all 4 wheels for small
axial play and free easy rotation movement:
STEP 5.2.4: Adjust smoothness of
differential:

QUICK START (5.)
11
JR128-R01 - RTR
STEP 5.3: Put 8x AA batteries into
your FS-GT2 Radio Transmitter (TX):
STEP 5.4: Put the fully charged
Lipo Battery into the car:
STEP 5.5: Plug the Lipo cable to
the ESC connector cable: Always
check "ON - OFF" switch to be in
"OFF" position before plugging.
STEP 5.6: Fix body on the car:
STEP 5.7: Switch on your
FS-GT2 Radio Transmitter (TX):
STEP 5.8: Switch on the car:
You will hear a double sound from the
ESC and see a red light on the "RX"
through the front window of the car!
1.)
3.)
2.)
2.)
3.)
1.)
2.)
1.) 2.)
8x AA-Batteries for
TX not included!

FUNCTION & ADJUSTMENT (6.) 12
JR128-R01 - RTR
6.1: BASIC FUNCTIONS OF THE CAR:
STEP 6.1.1: Check STEERING LEFT / RIGHT
function of the car as shown:
6. Function & Adjustment:
With the switched on Radio Transmitter and the switched on Car from
Step 5.7 & 5.8 from the previous chapter "Quick Start", check all functions of
your Car before driving for the first time:
Please follow precisely all steps of this function check, and if necessary do some adjustments
as described in this chapter:
STEP 6.1.2: Check THROTTLE FORWARD /
BACKWARD function of the car as shown:
If LEFT / RIGHT function
is set in wrong way, switch
STeering REVerse switch
to opposite position:
If FORWARD / BACKWARD function
is set in wrong way, switch THrottle
REVerse switch to opposite position:

6.2: FINE TRIMMING OF CAR FUNCTIONS:
FUNCTION & ADJUSTMENT (6.)
13
JR128-R01 - RTR
STEP 6.2.1: Fine Trimming of STEERING:
In NEUTRAL POSITION of the
STEERING WHEEL the car has to
run precisely STRAIGHT!

FUNCTION & ADJUSTMENT (6.) 14
JR128-R01 - RTR
STEP 6.2.2: Fine Trimming of THROTTLE:
In NEUTRAL POSITION of the
THROTTLE TRIGGER the car has to
stand still without any movement!

FUNCTION & ADJUSTMENT (6.)
15
JR128-R01 - RTR
At RIGHT and LEFT MAXIMUM POSITION of the STEERING WHEEL
adjust MAXIMUM STEERING ANGLE of WHEELS: without loud noise of
steering servo in the car at the maximum endpoints:
STEP 6.2.3: Adjustment of Maximum Steering Angle
LEFT / RIGHT (STeering Dual Rate: ST.D/R):

4.4°
2.7°
1.1°
SETUP CHANGES (7.) 16
JR128-R01 - RTR
7. Setup Changes:
7.1: Adjustment of Caster Angle at front suspension:
2 Clips front:
Angle: 4.4°
1 Clip front
1 Clip rear:
Angle: 2.7°
2 Clips rear:
Angle: 1.1°
Use different
positions of
these clips
to adjust
3 different
caster angles!
-2.5°
0°
7.2: Adjustment of Camber Angle at front suspension: 0° to -2.5°:
1.) unlock
-2.5°
0°
3.) lock2.) adjust
LOCK
ADJUST


Table of contents